Portland, OR
adriaan mol
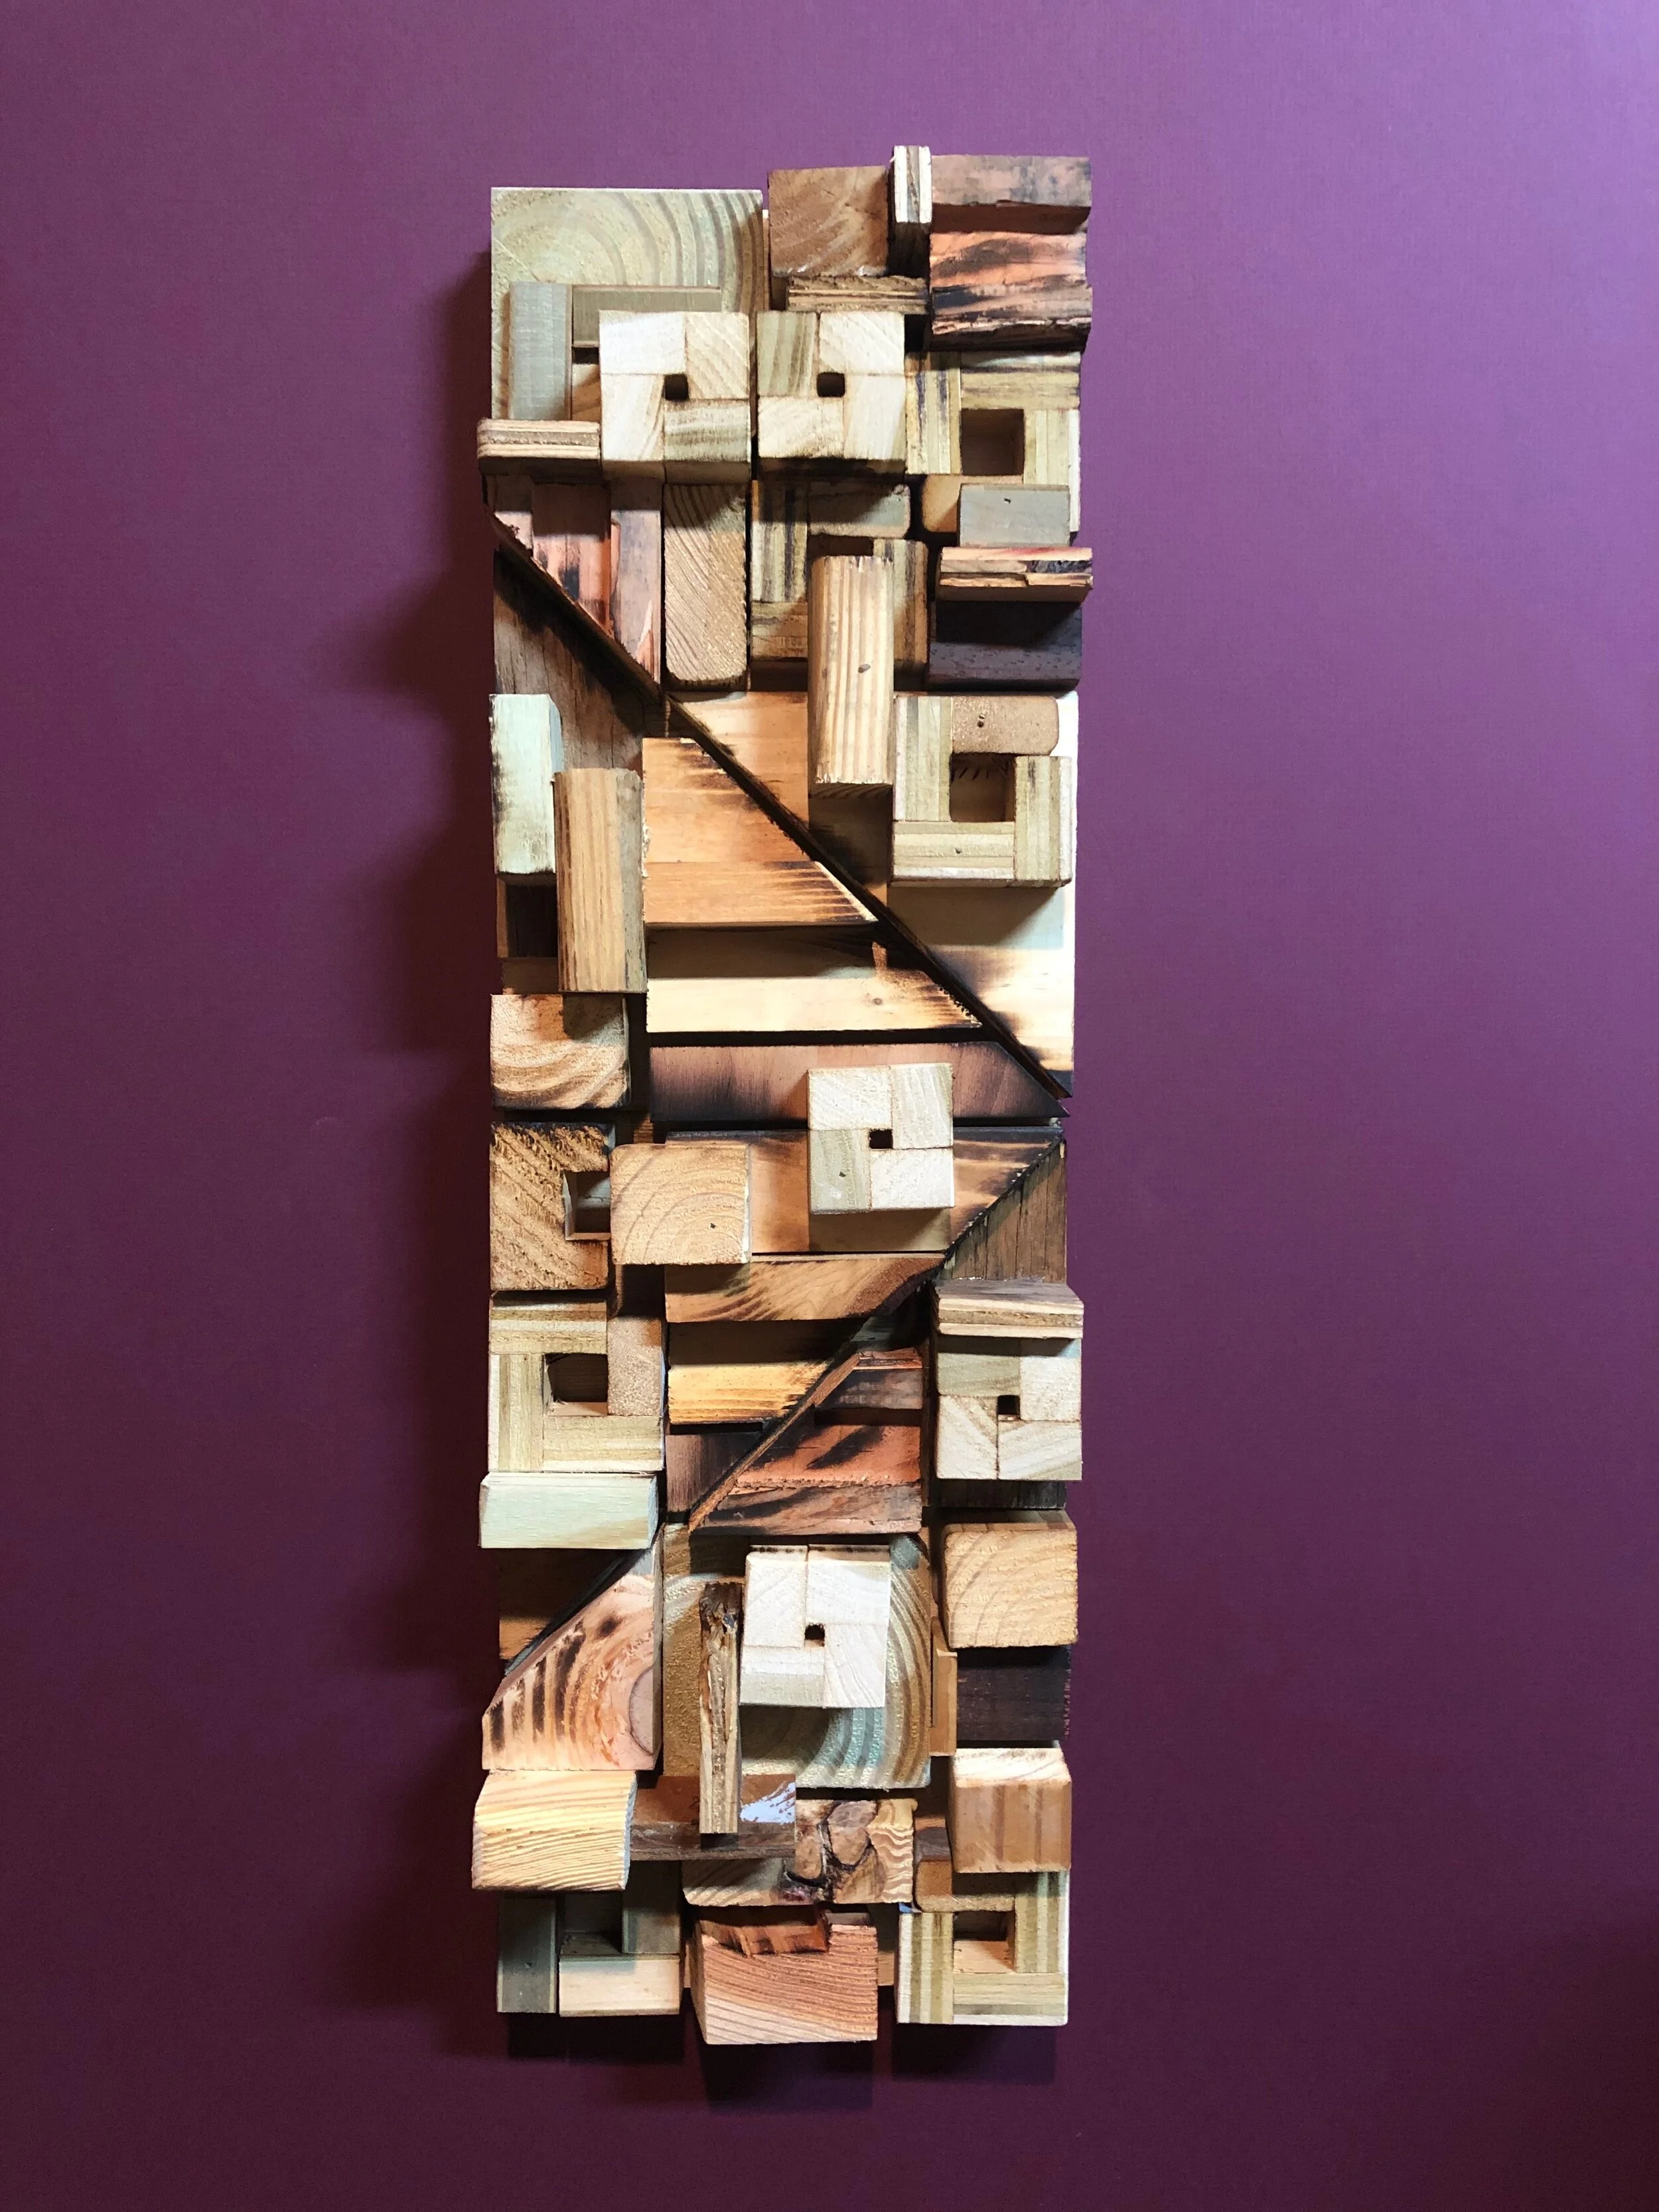
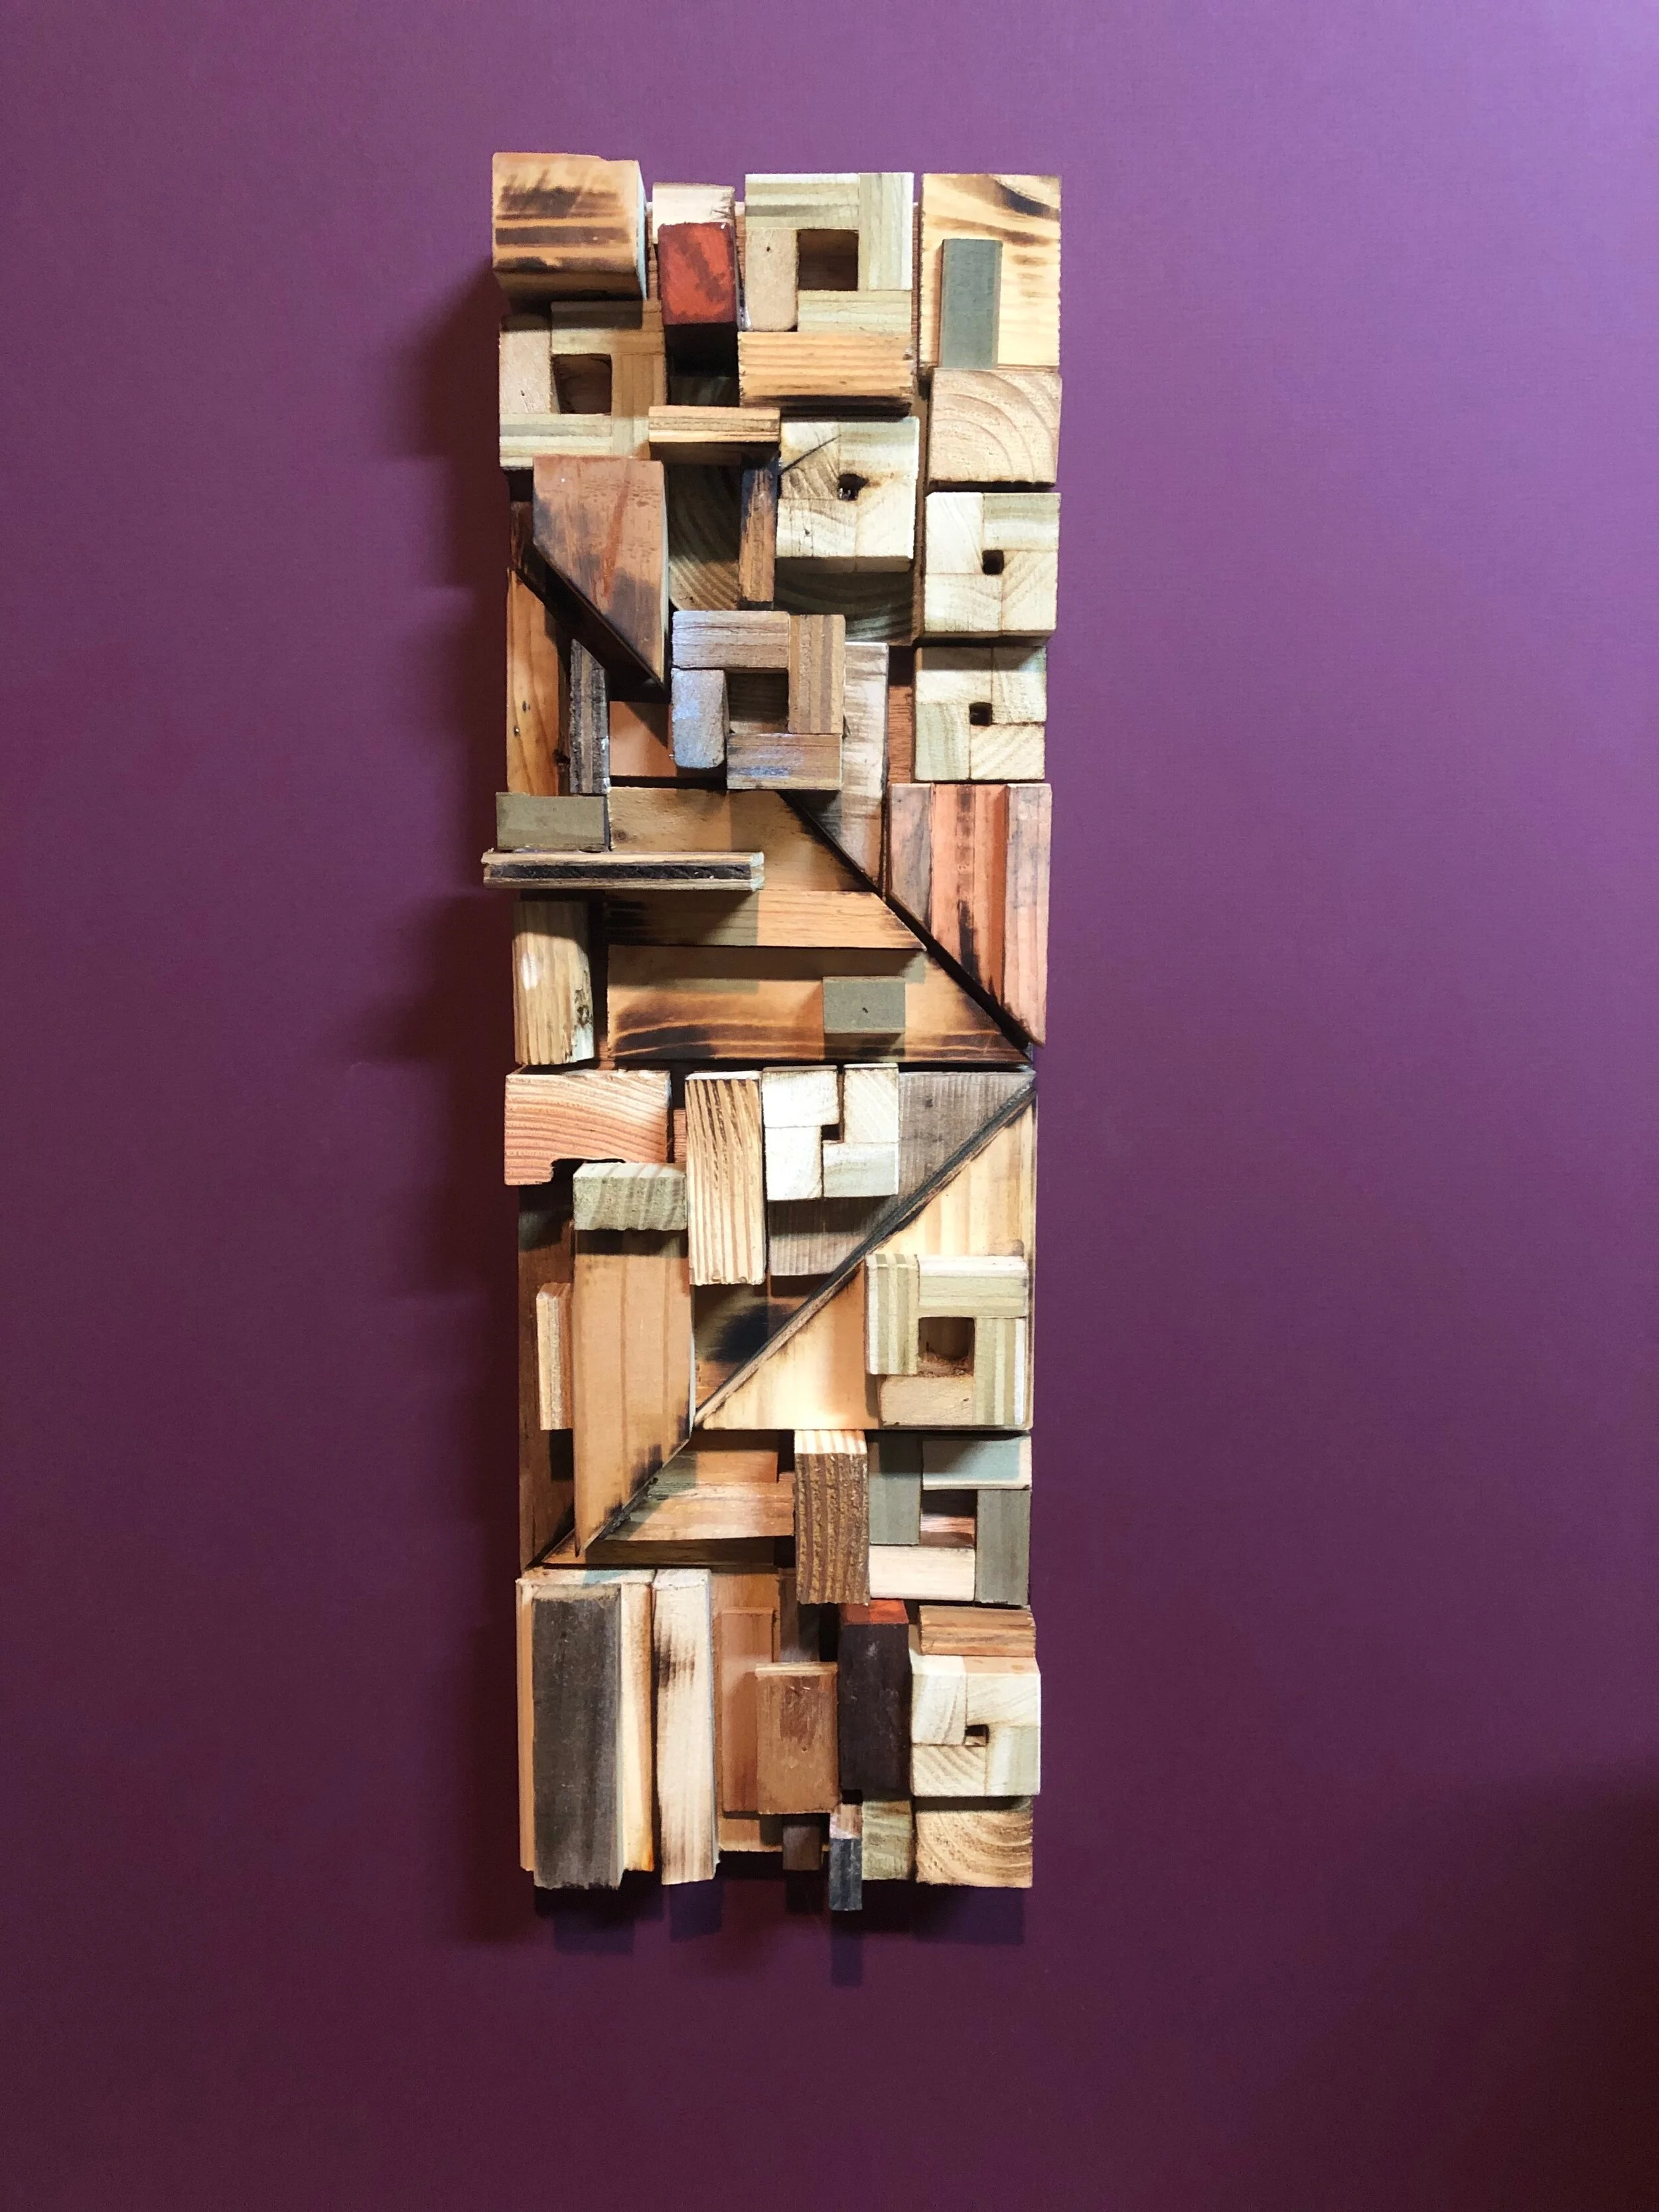
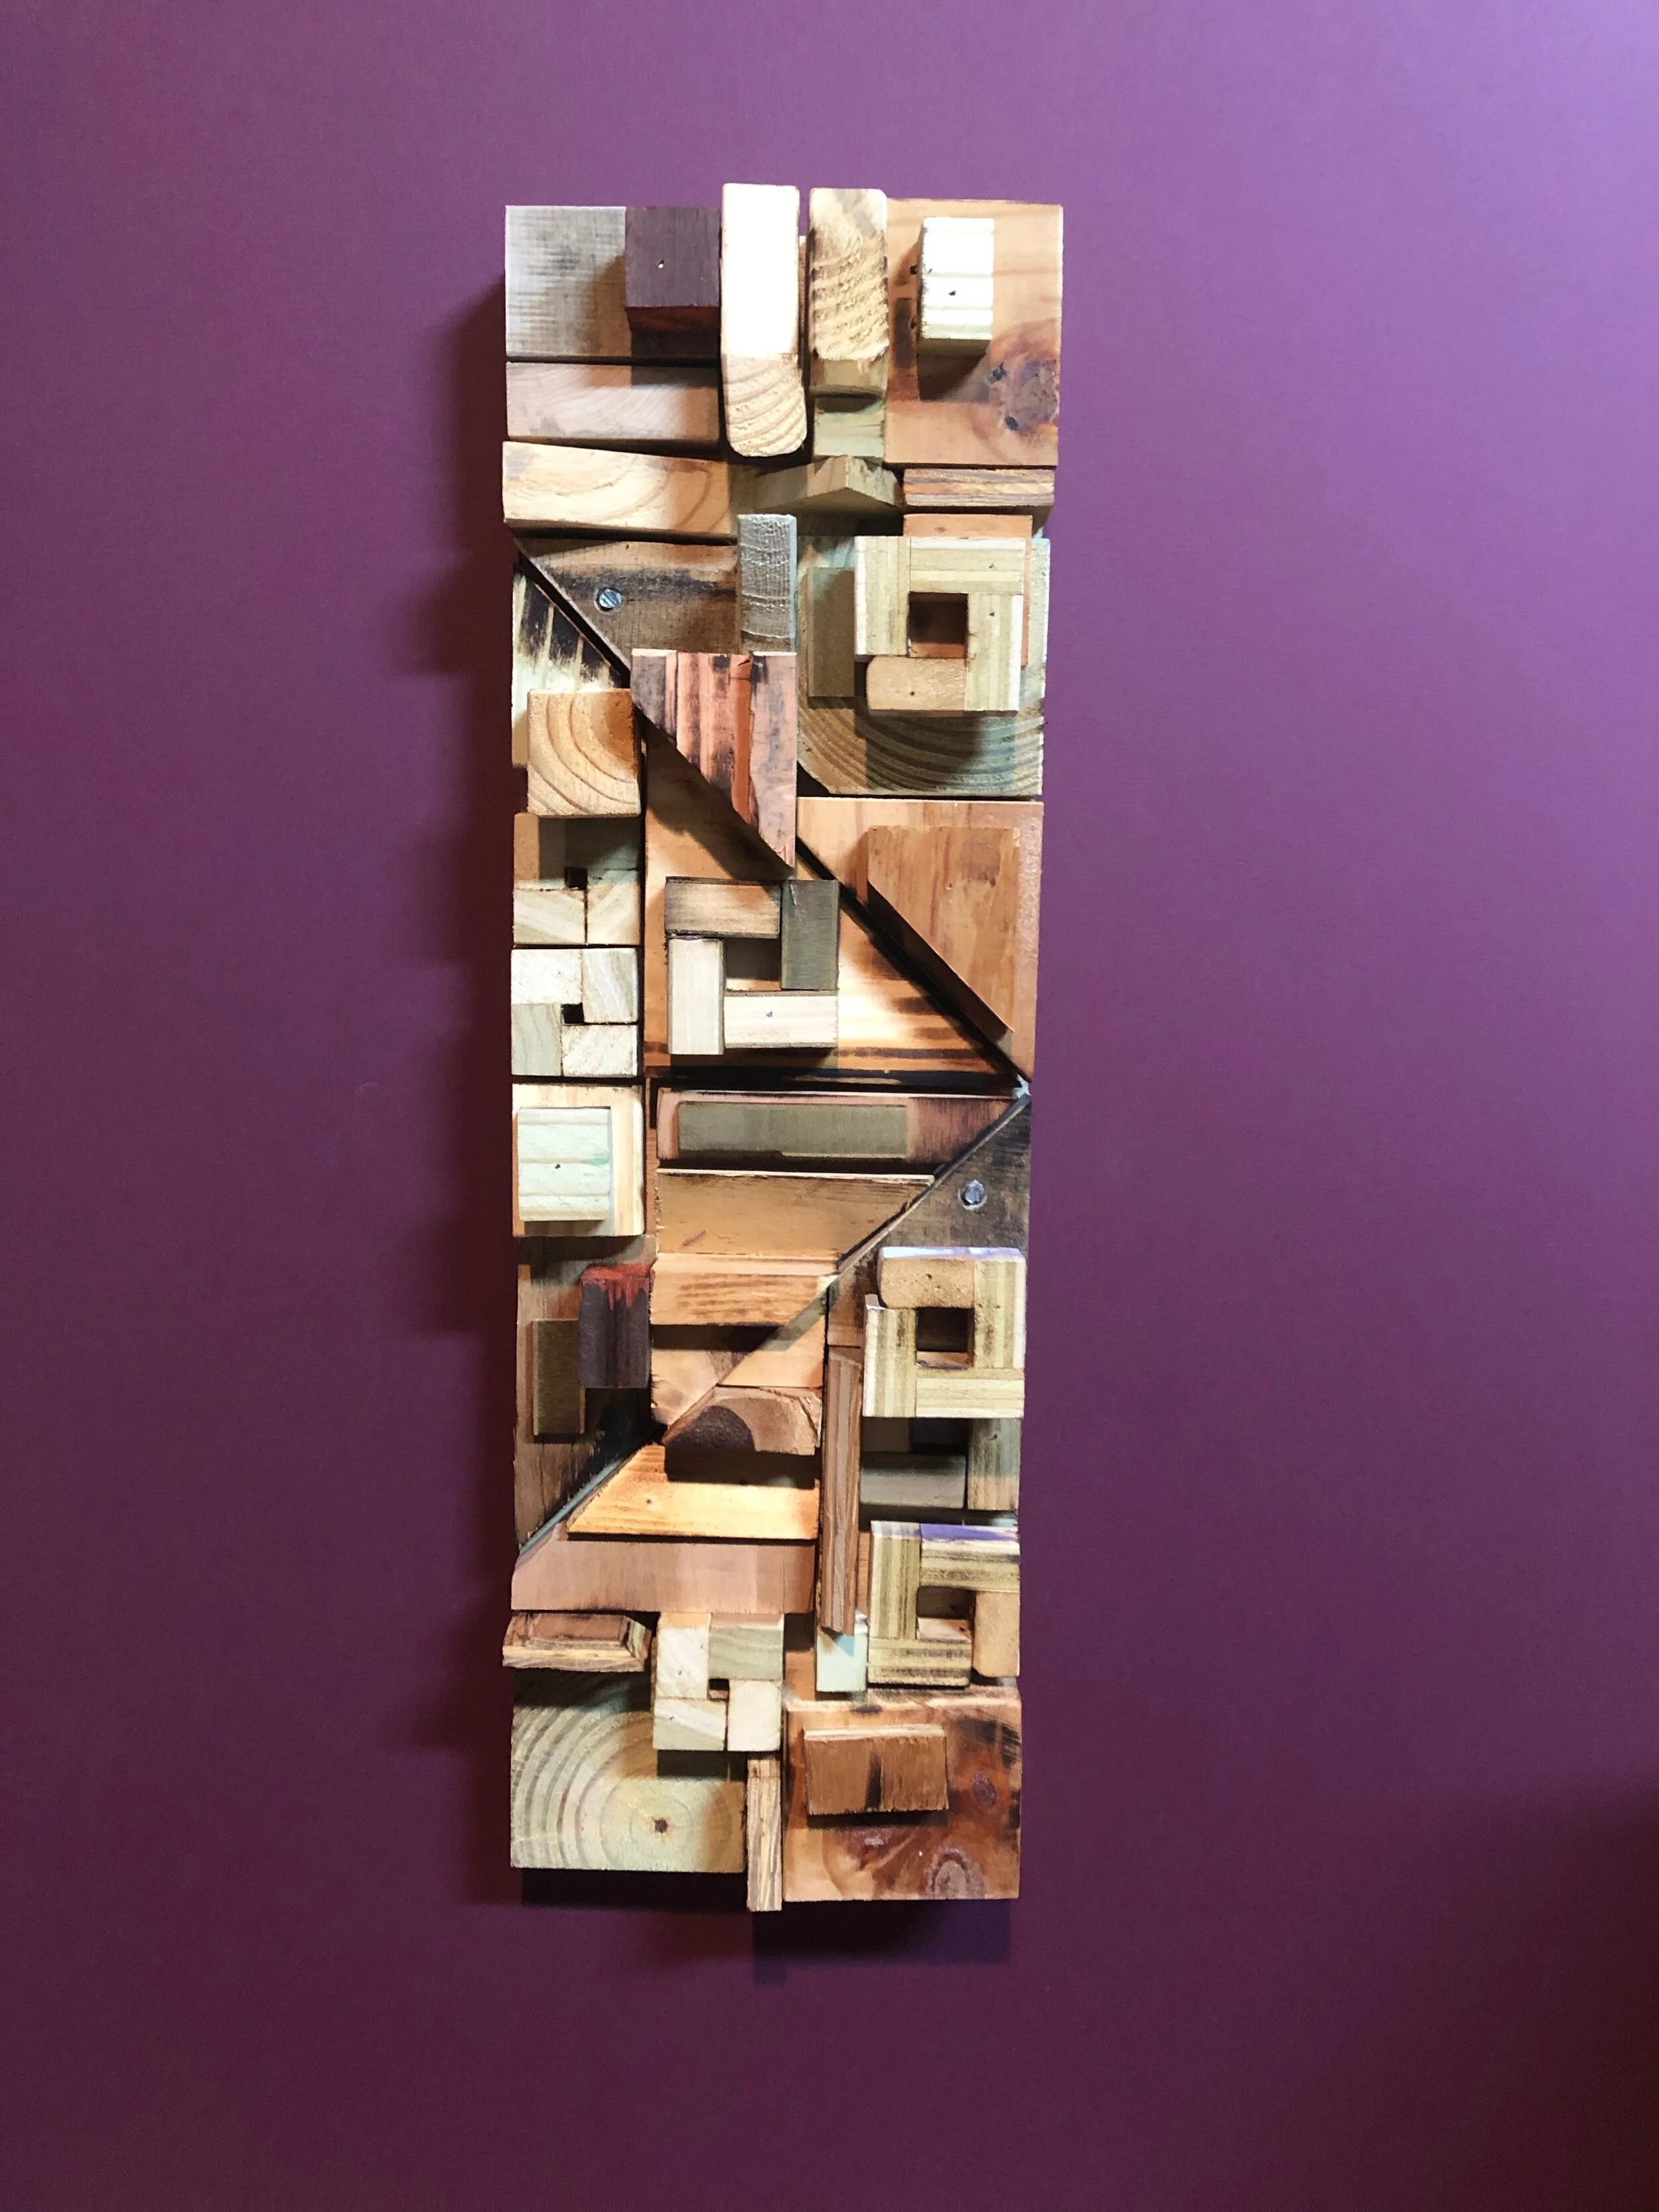
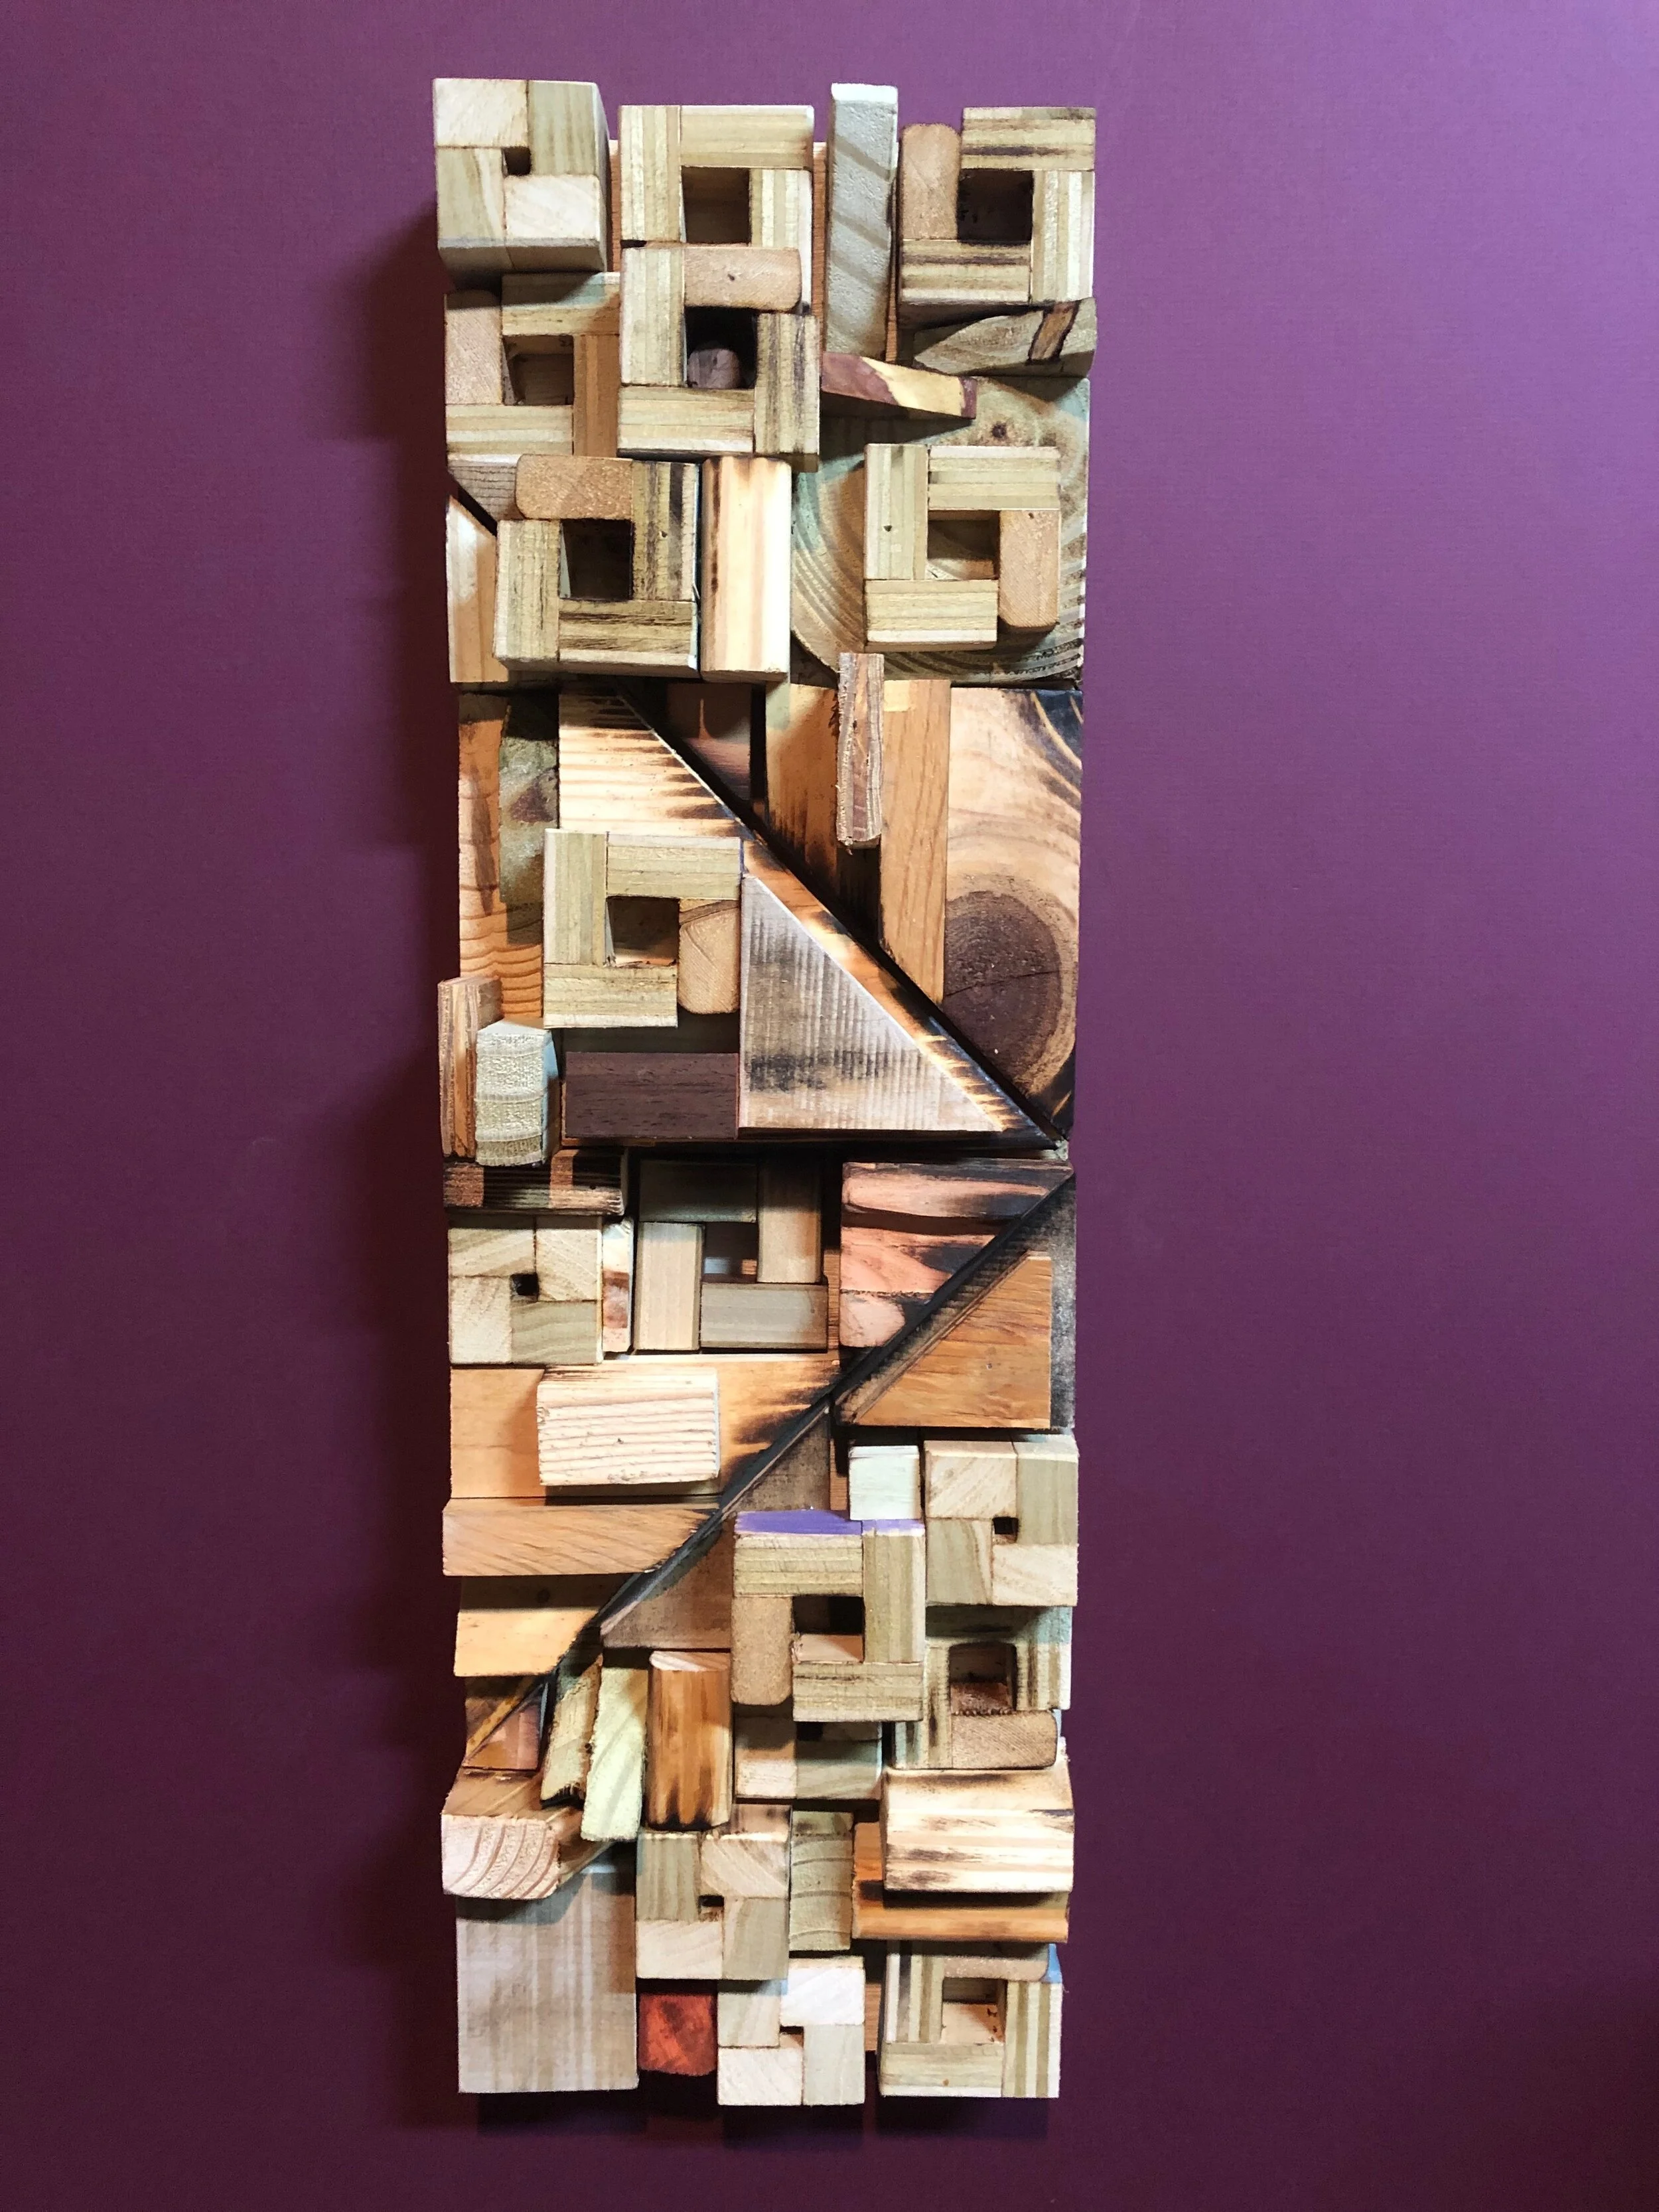
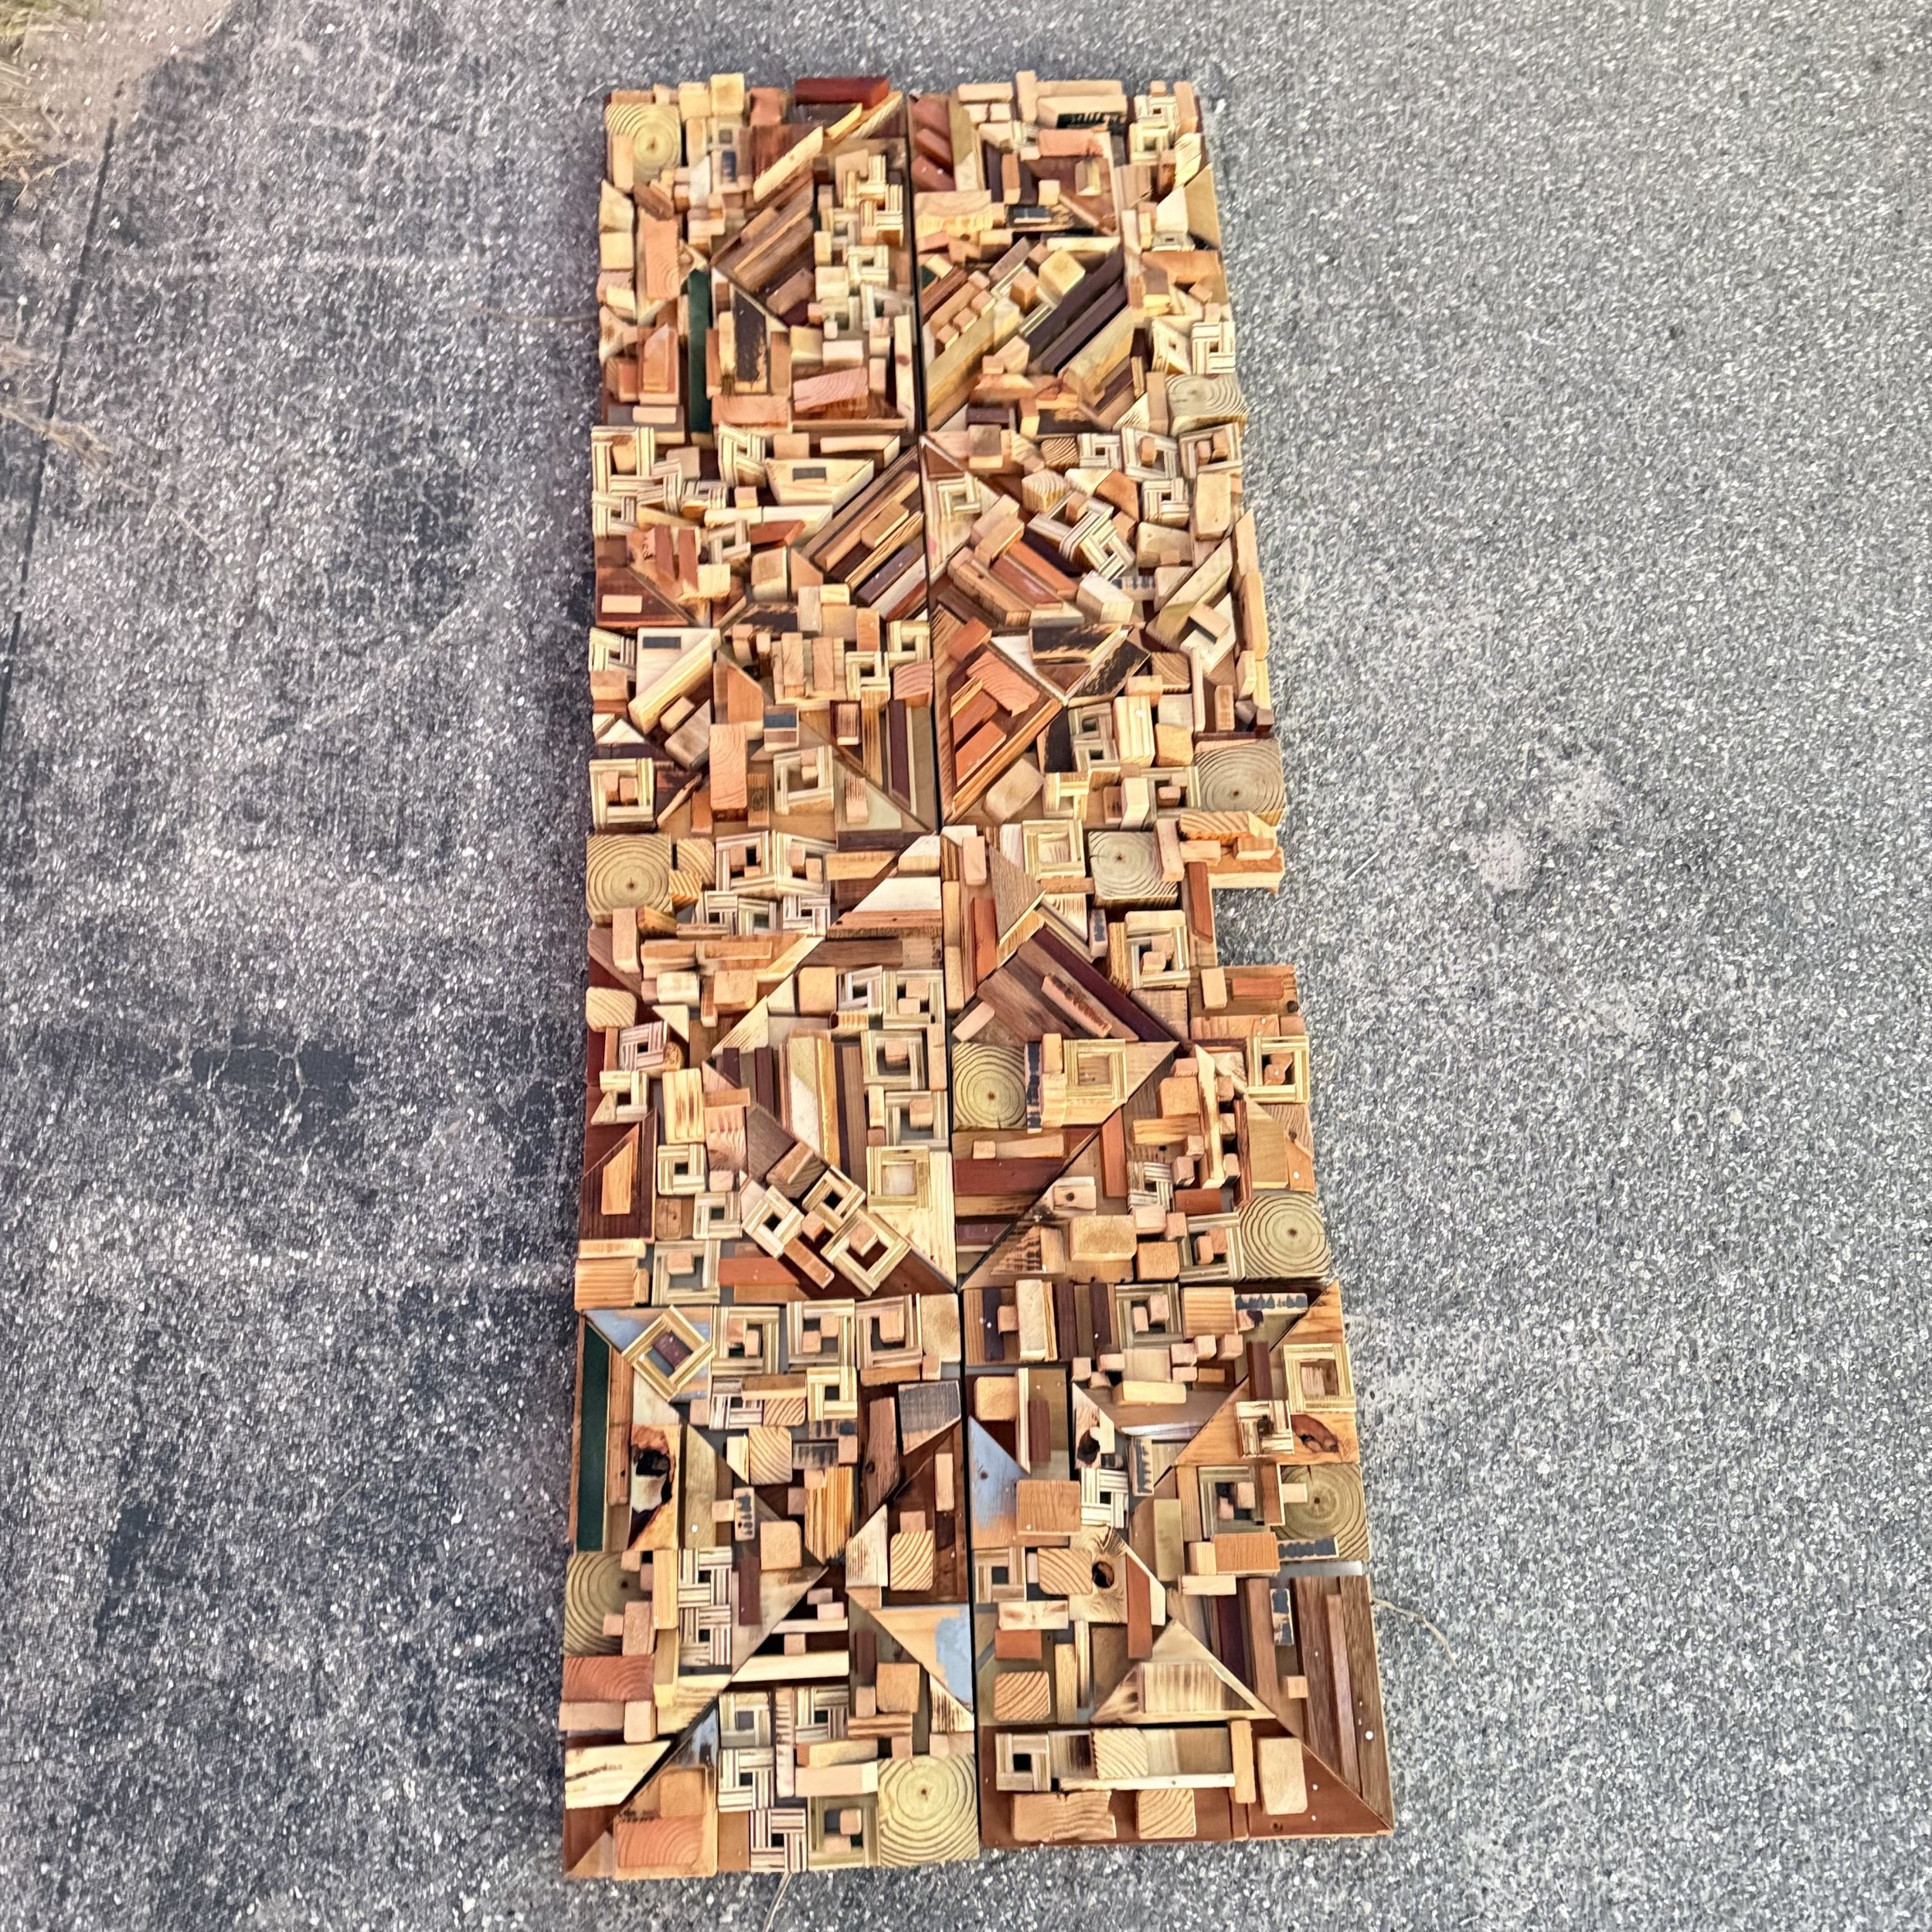
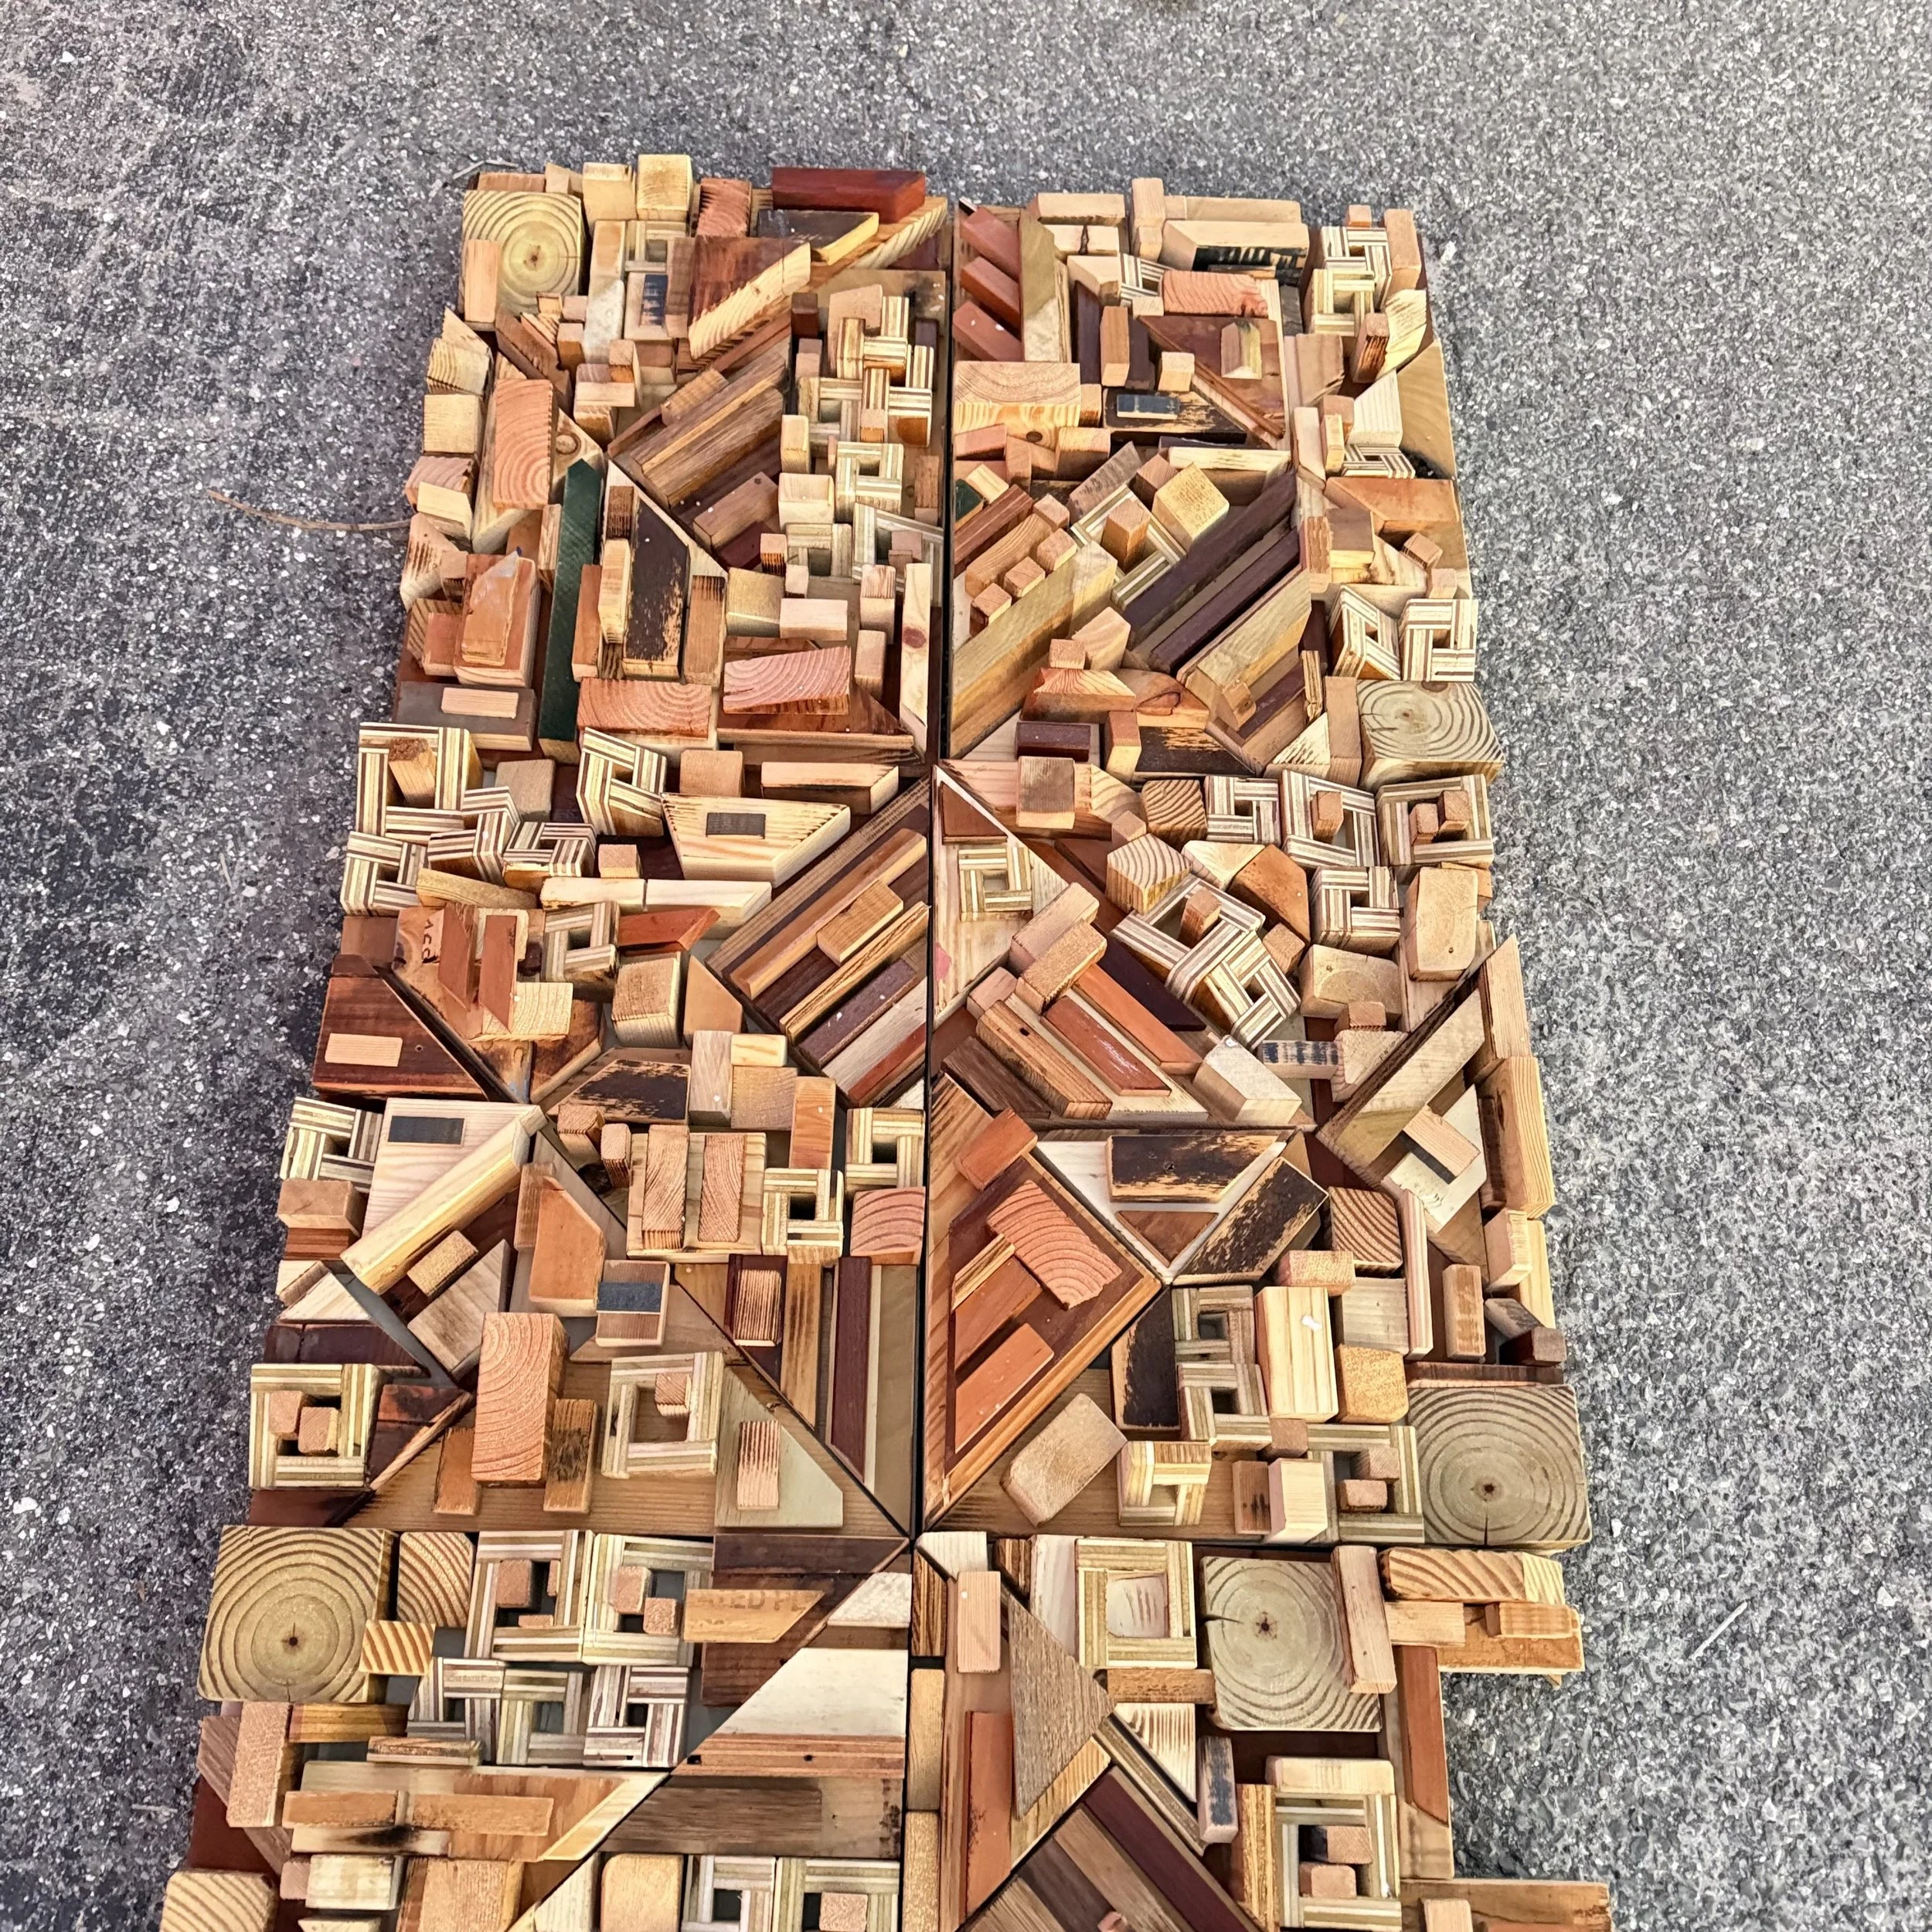
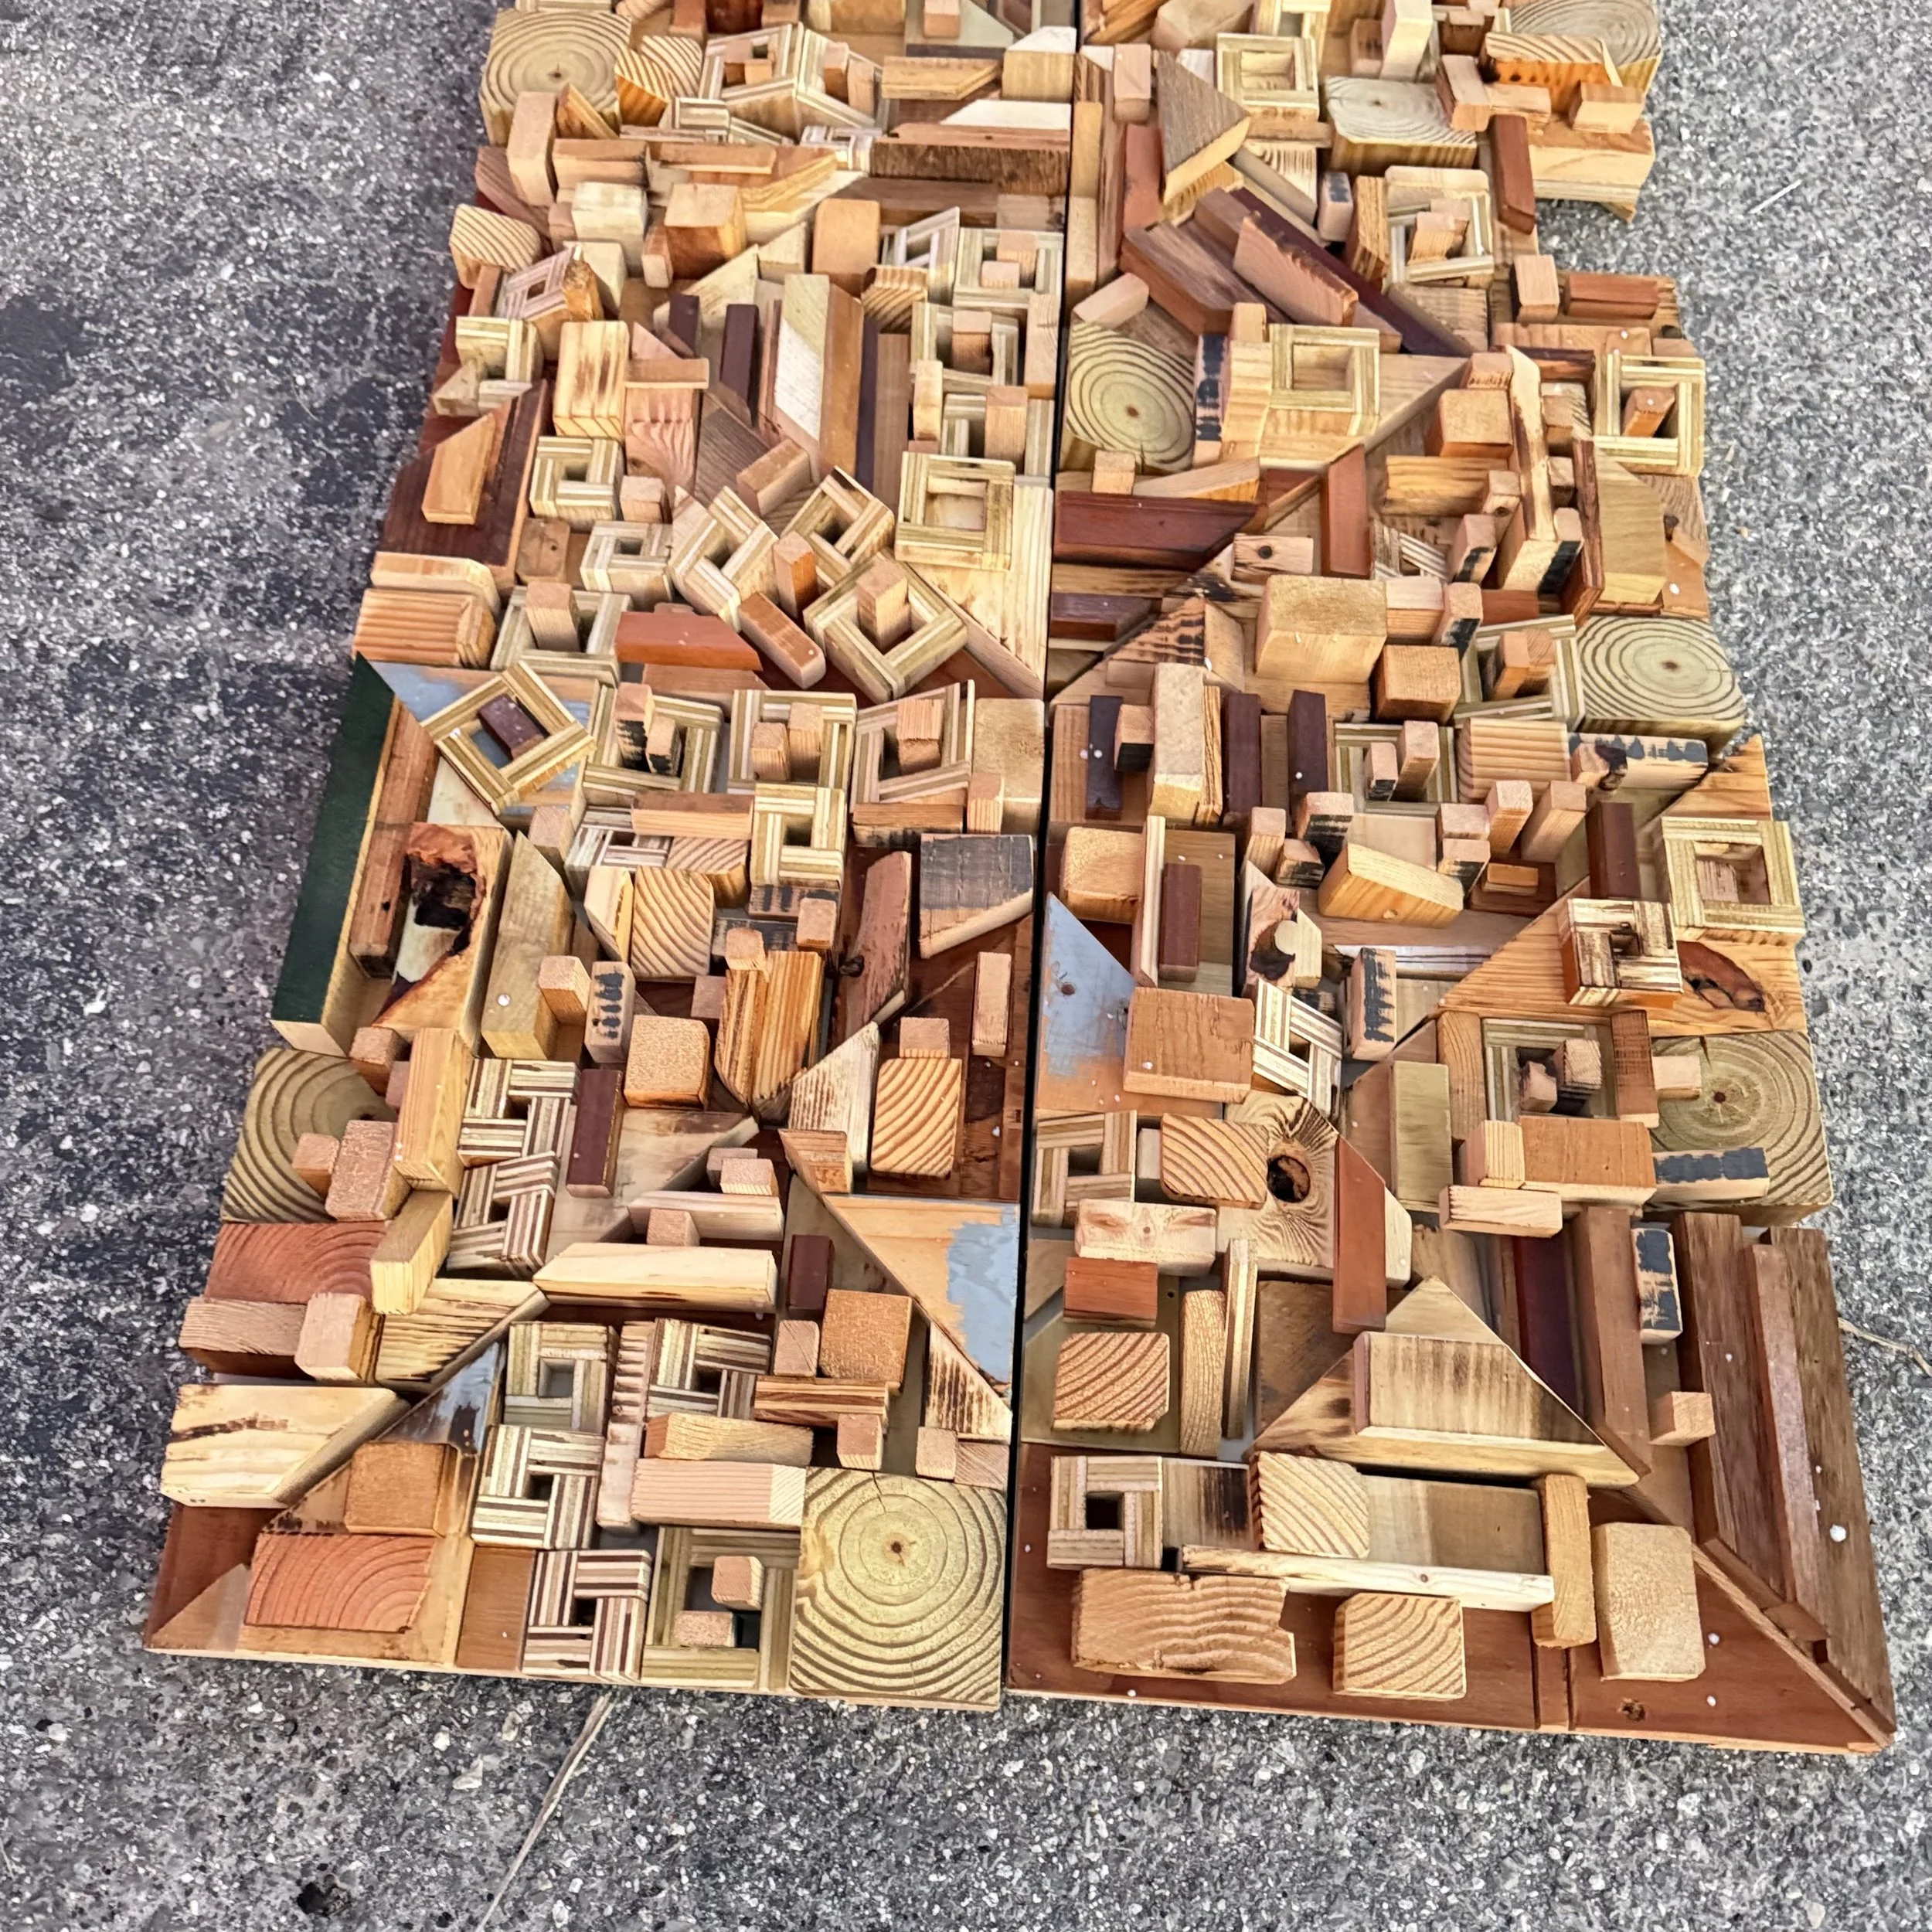
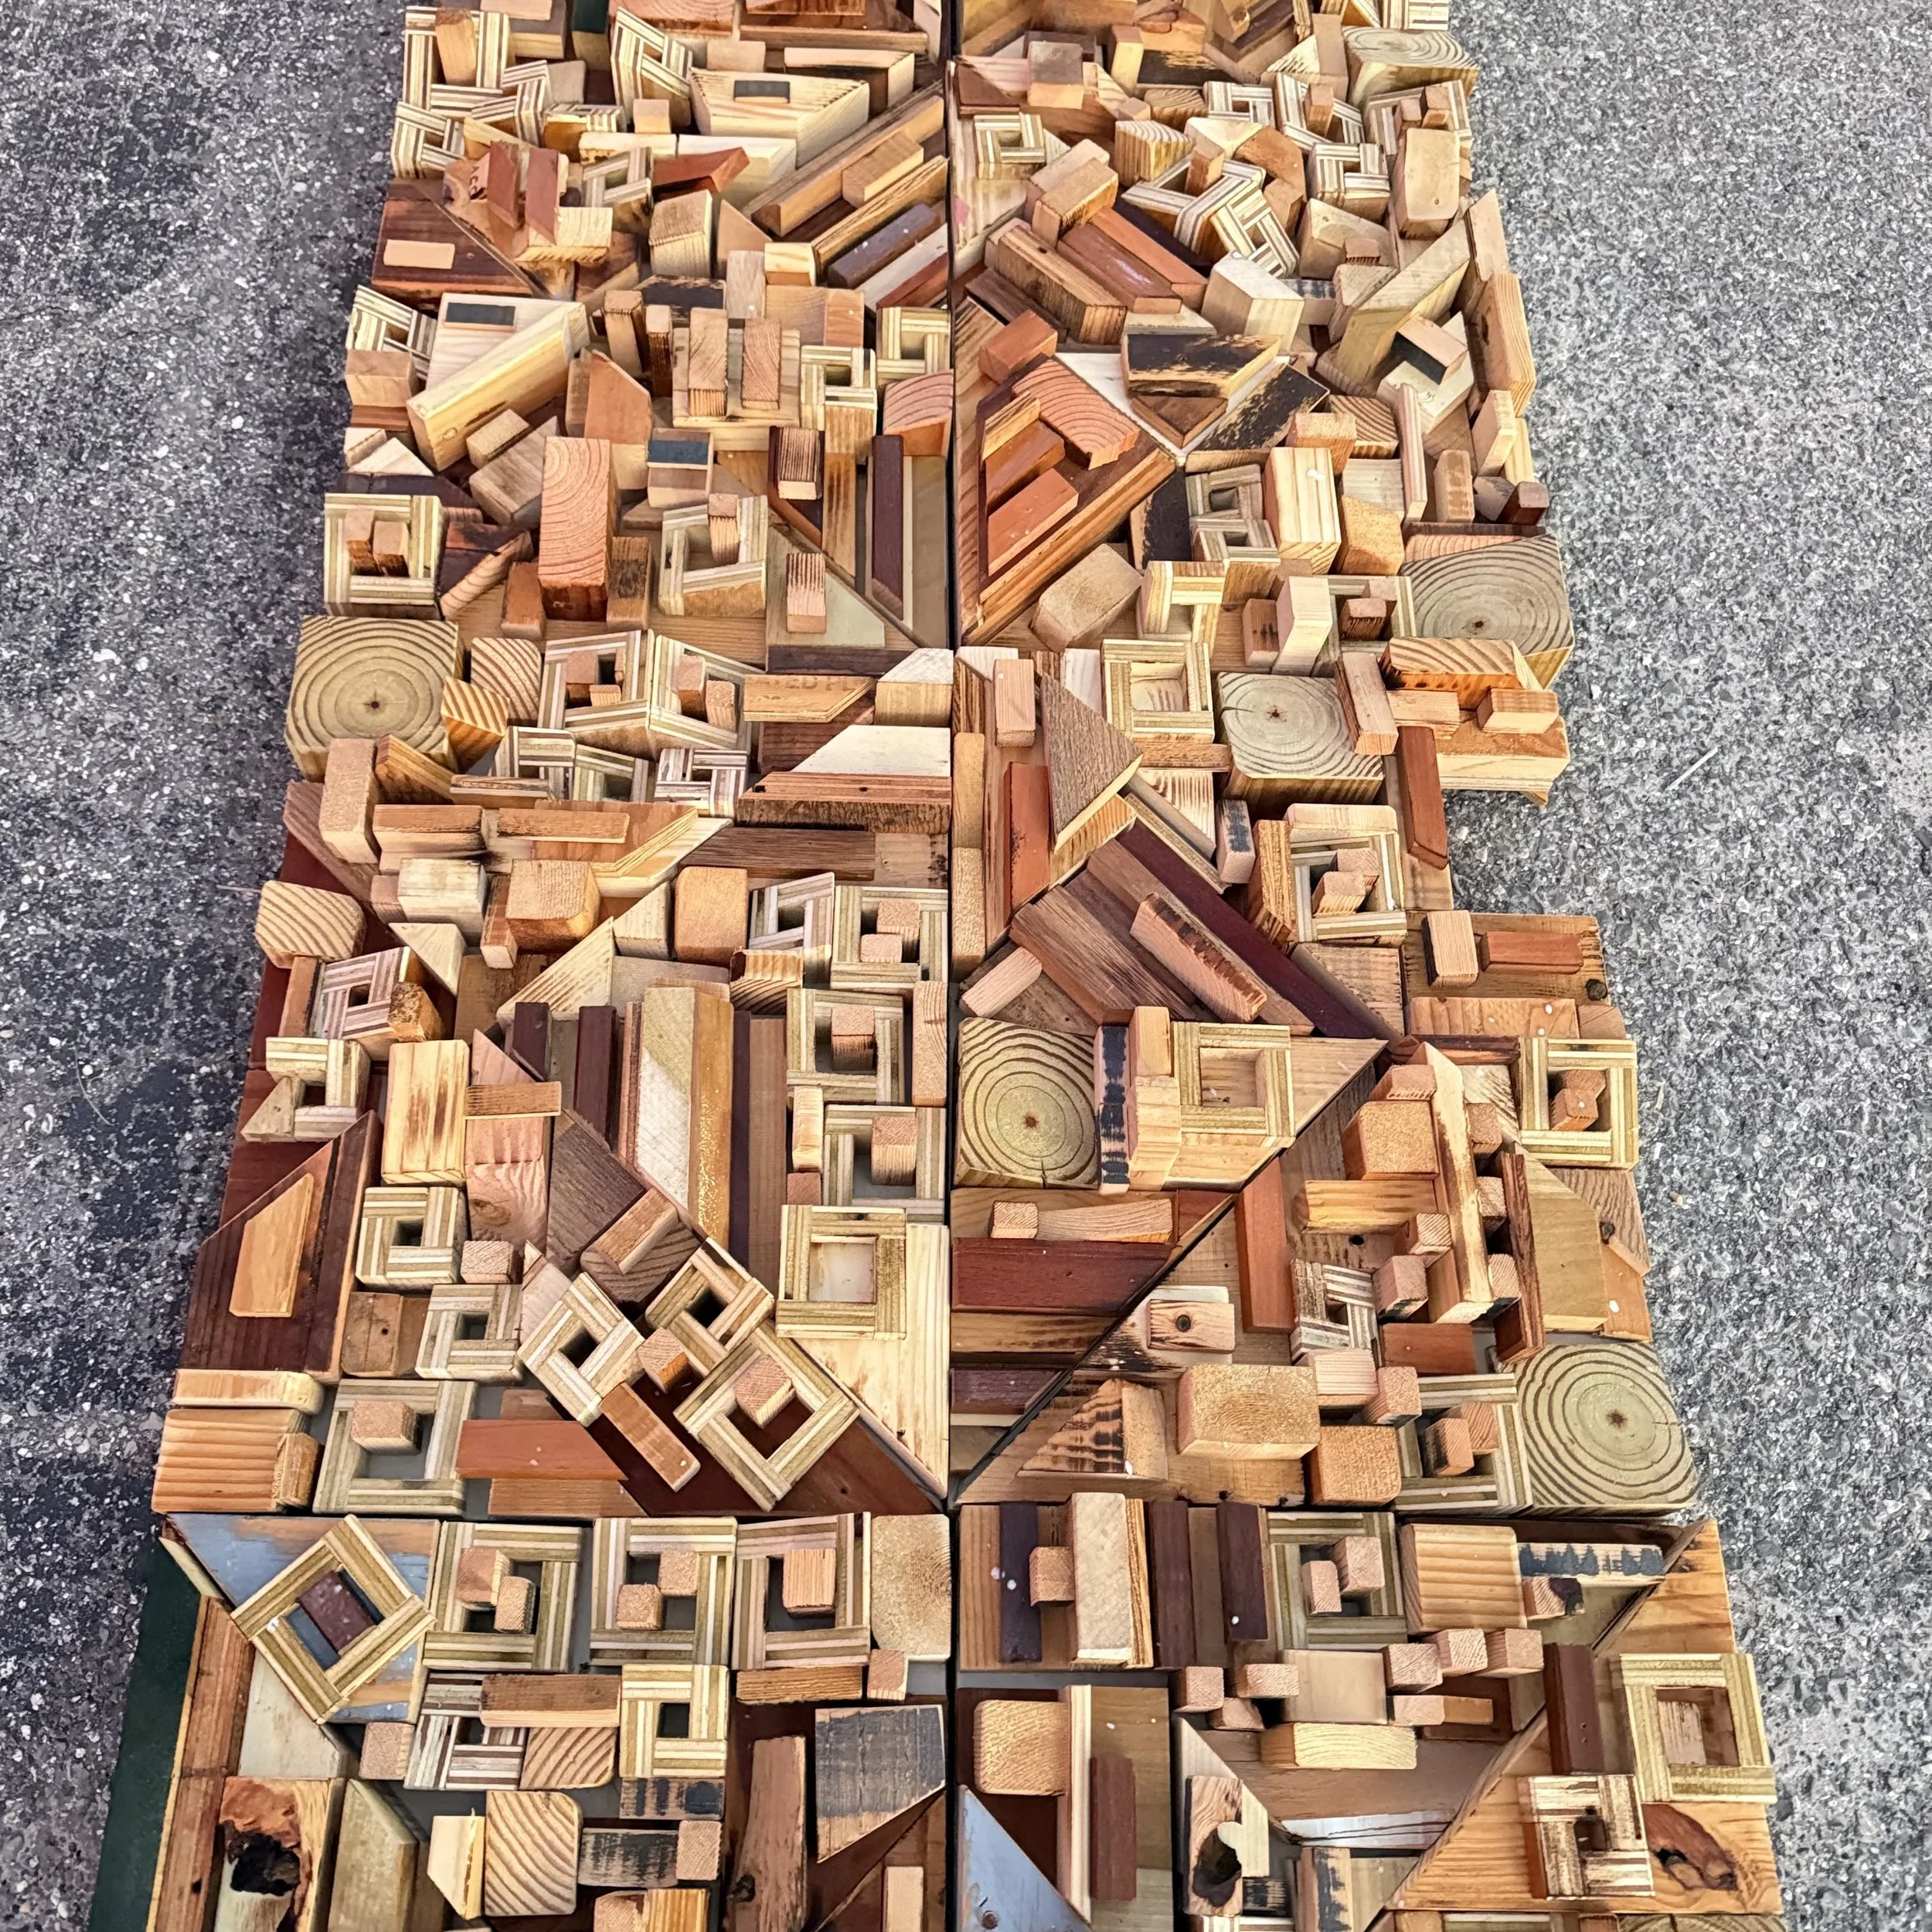
Project Title: Unpainted Nebraska Control Room Wall
Size: 3’ x 6’ (18 square feet)
Status: Complete
Ship Date: 7-31-20
7-14-20: Greetings! Thank you or stopping by your project will be underway soon. Stand by for updates.
7-25-20: Good news! The prep work is finally done, as well as a few other projects. The focus is one your project now. There will be something so see soon. Shooting for completion by Wed if all goes well. Cheers!
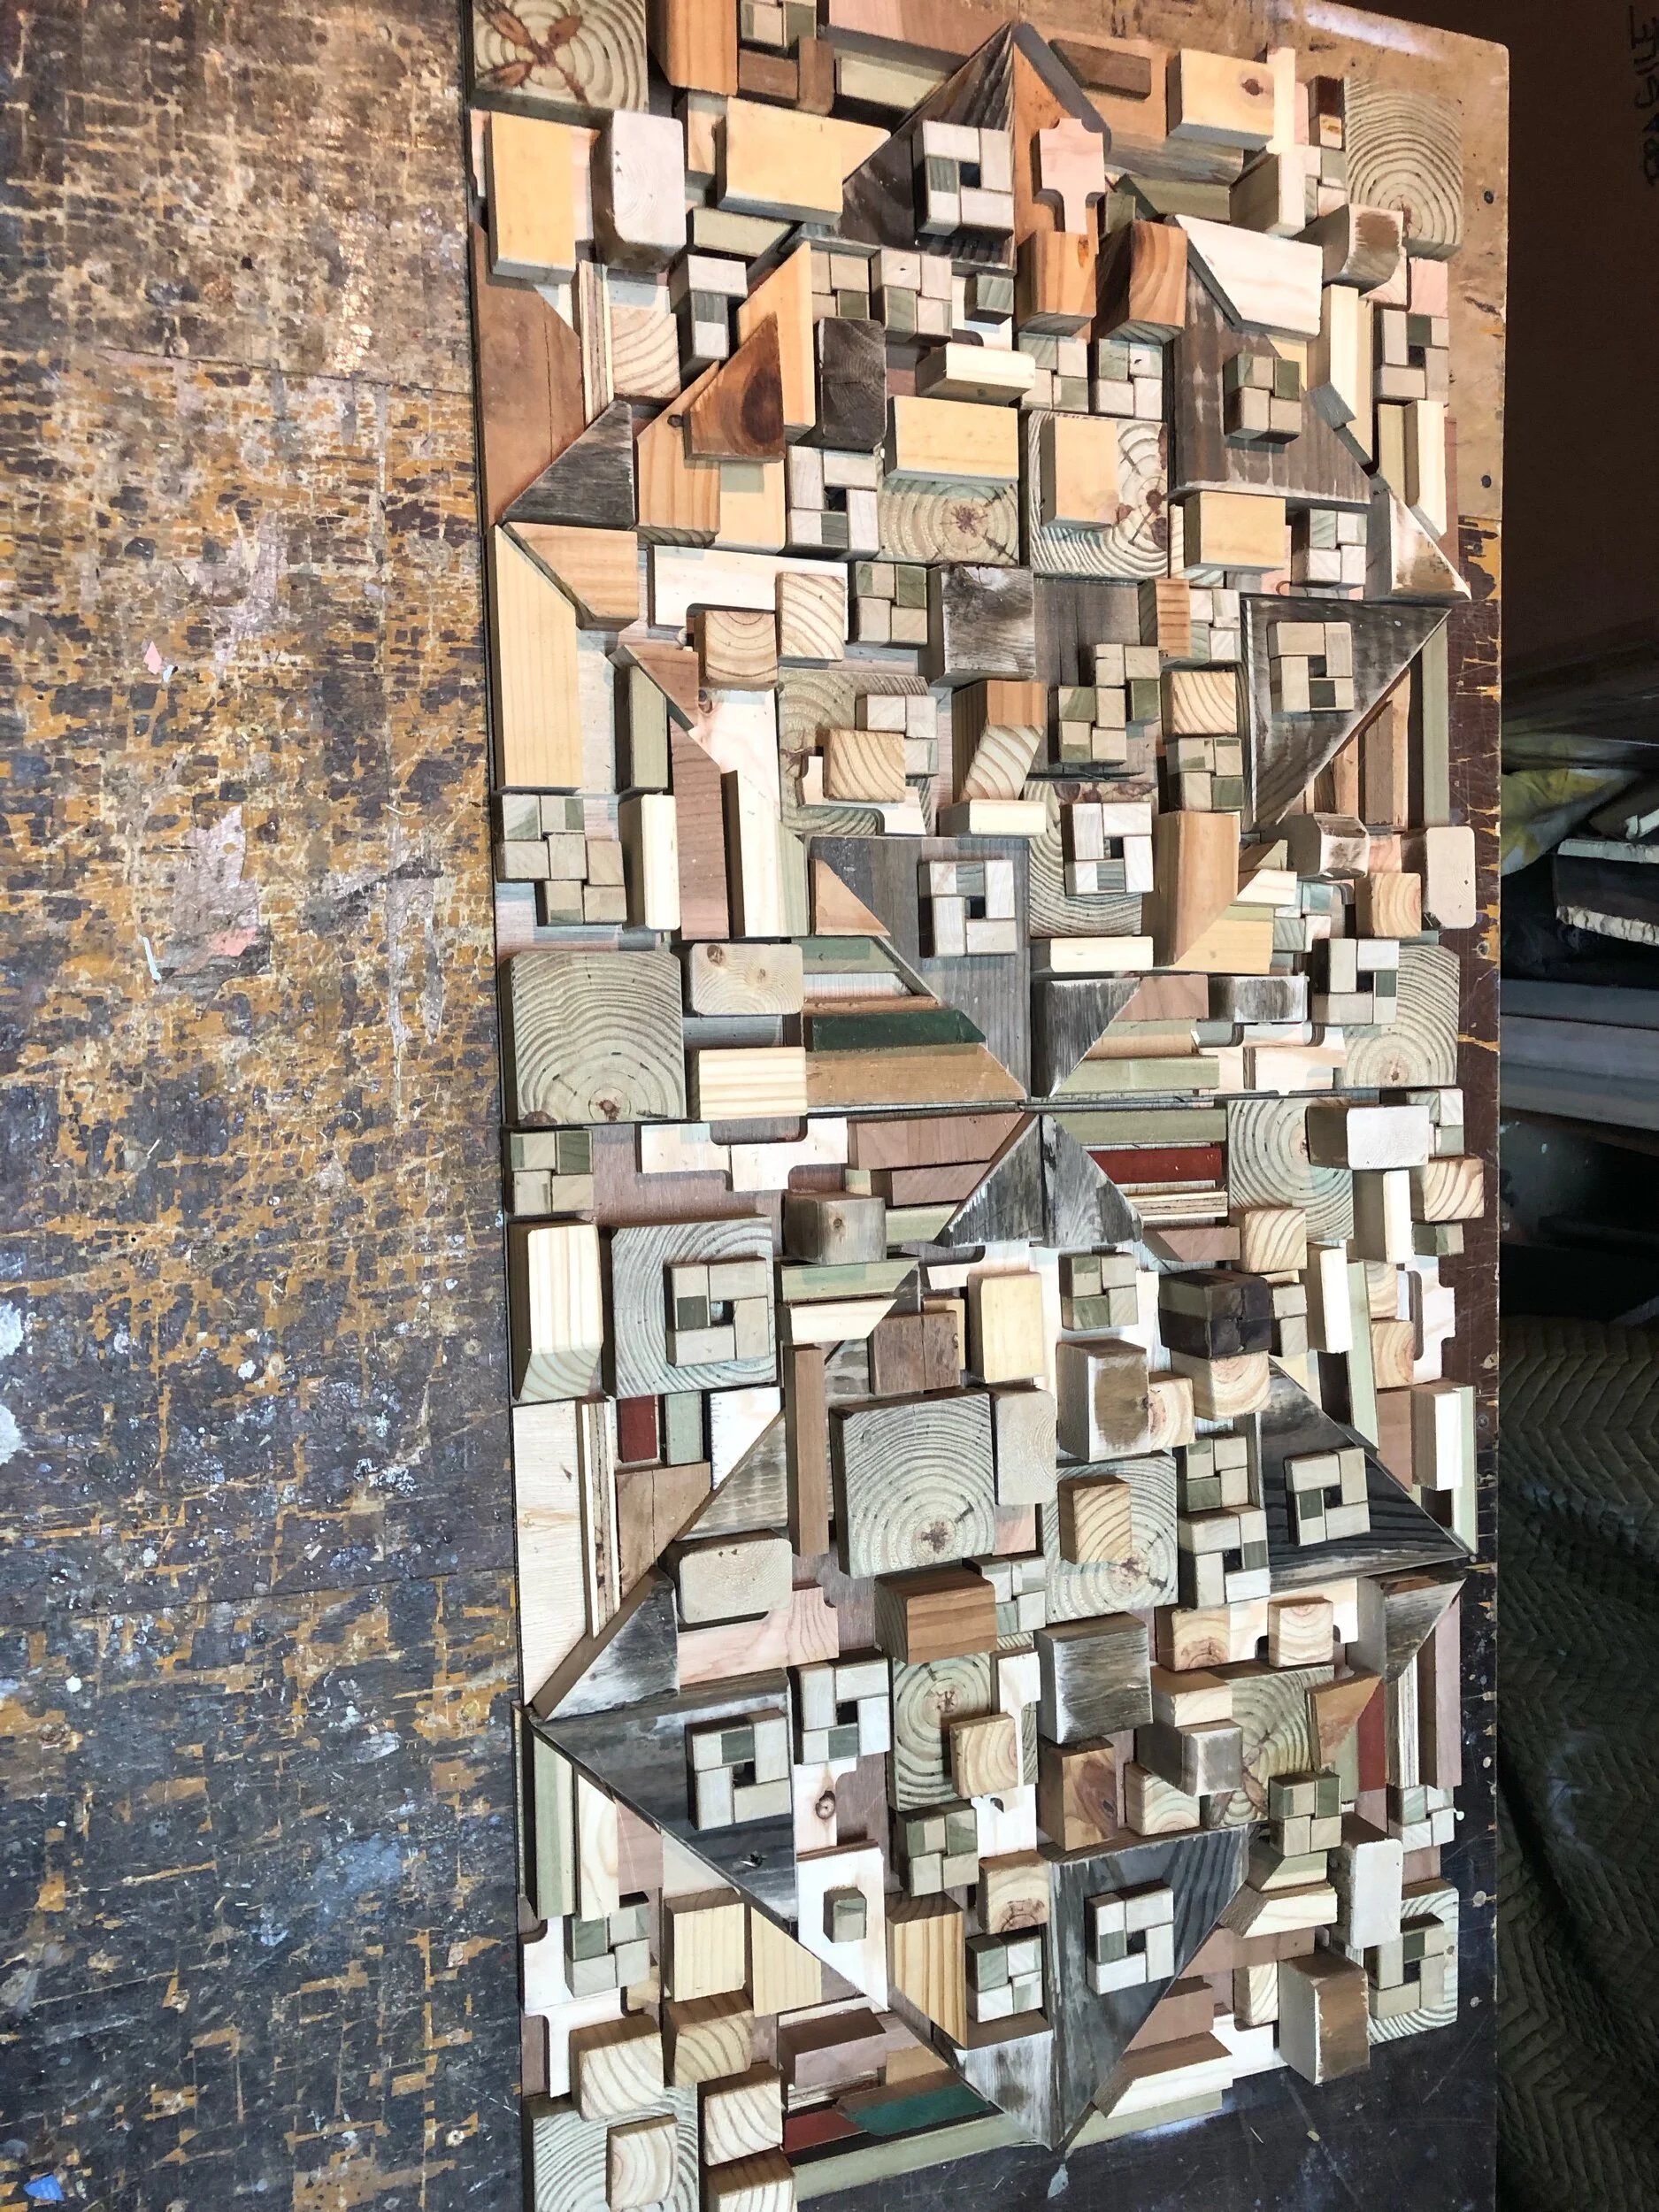
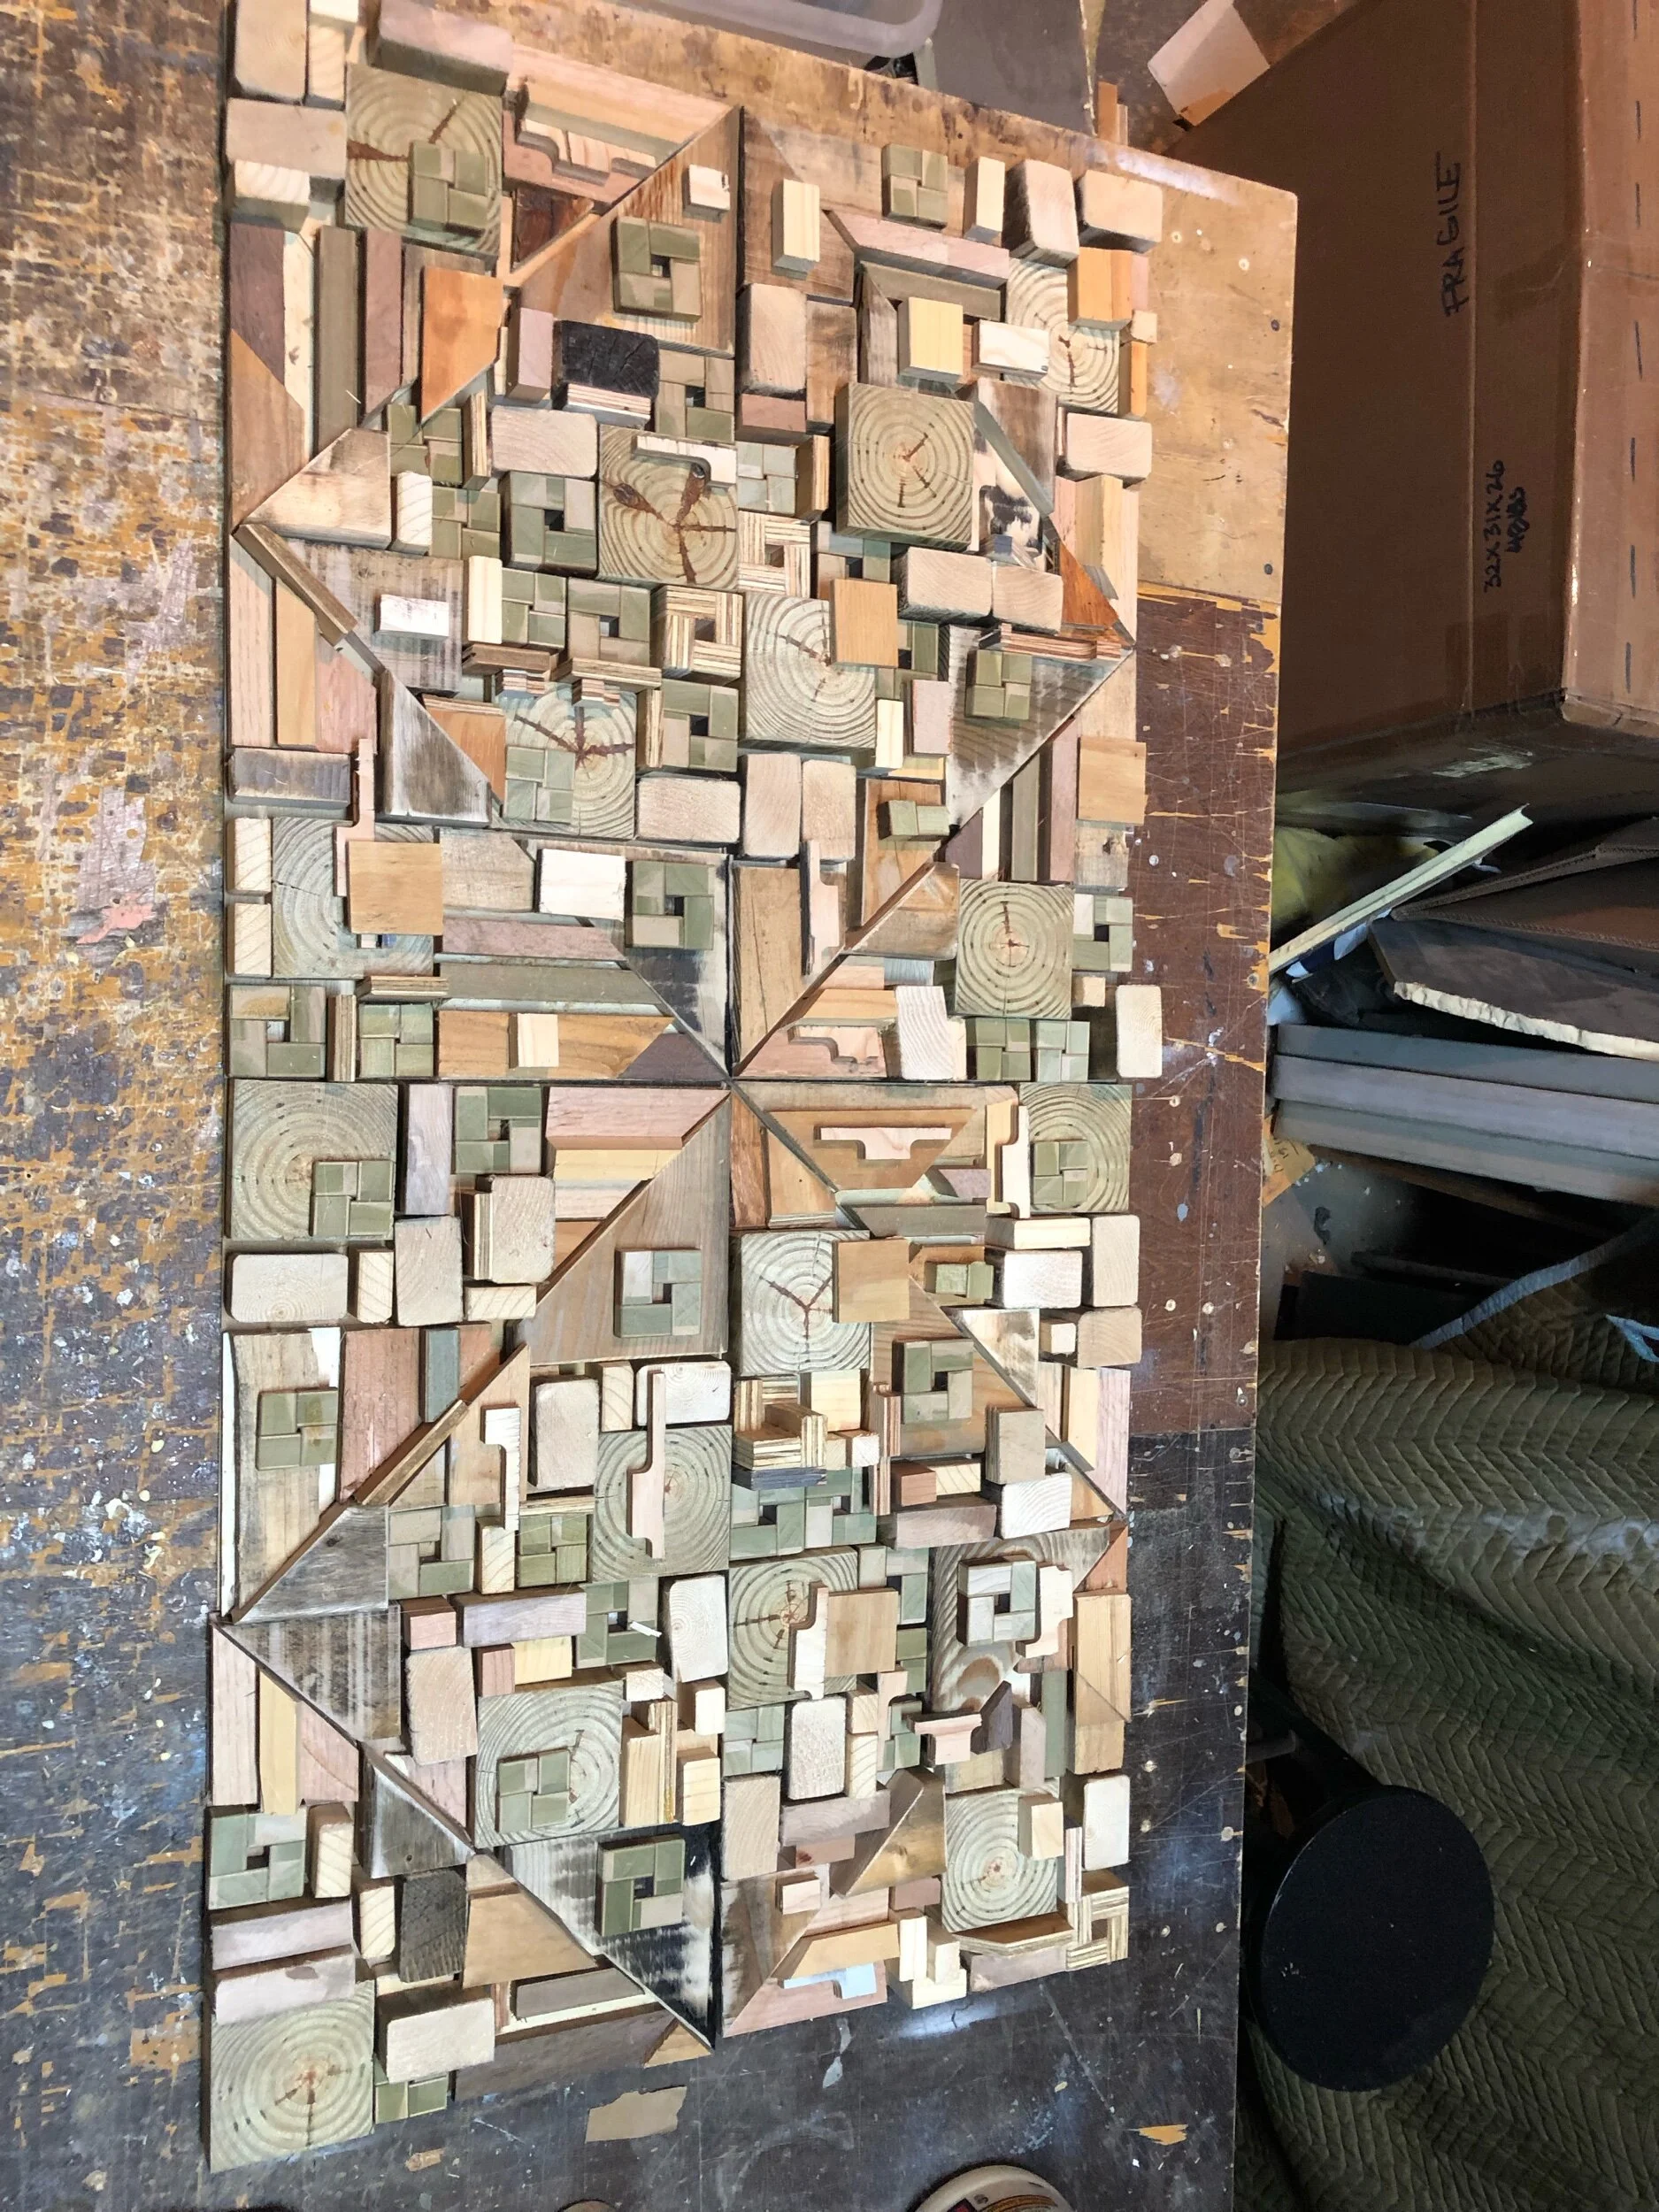
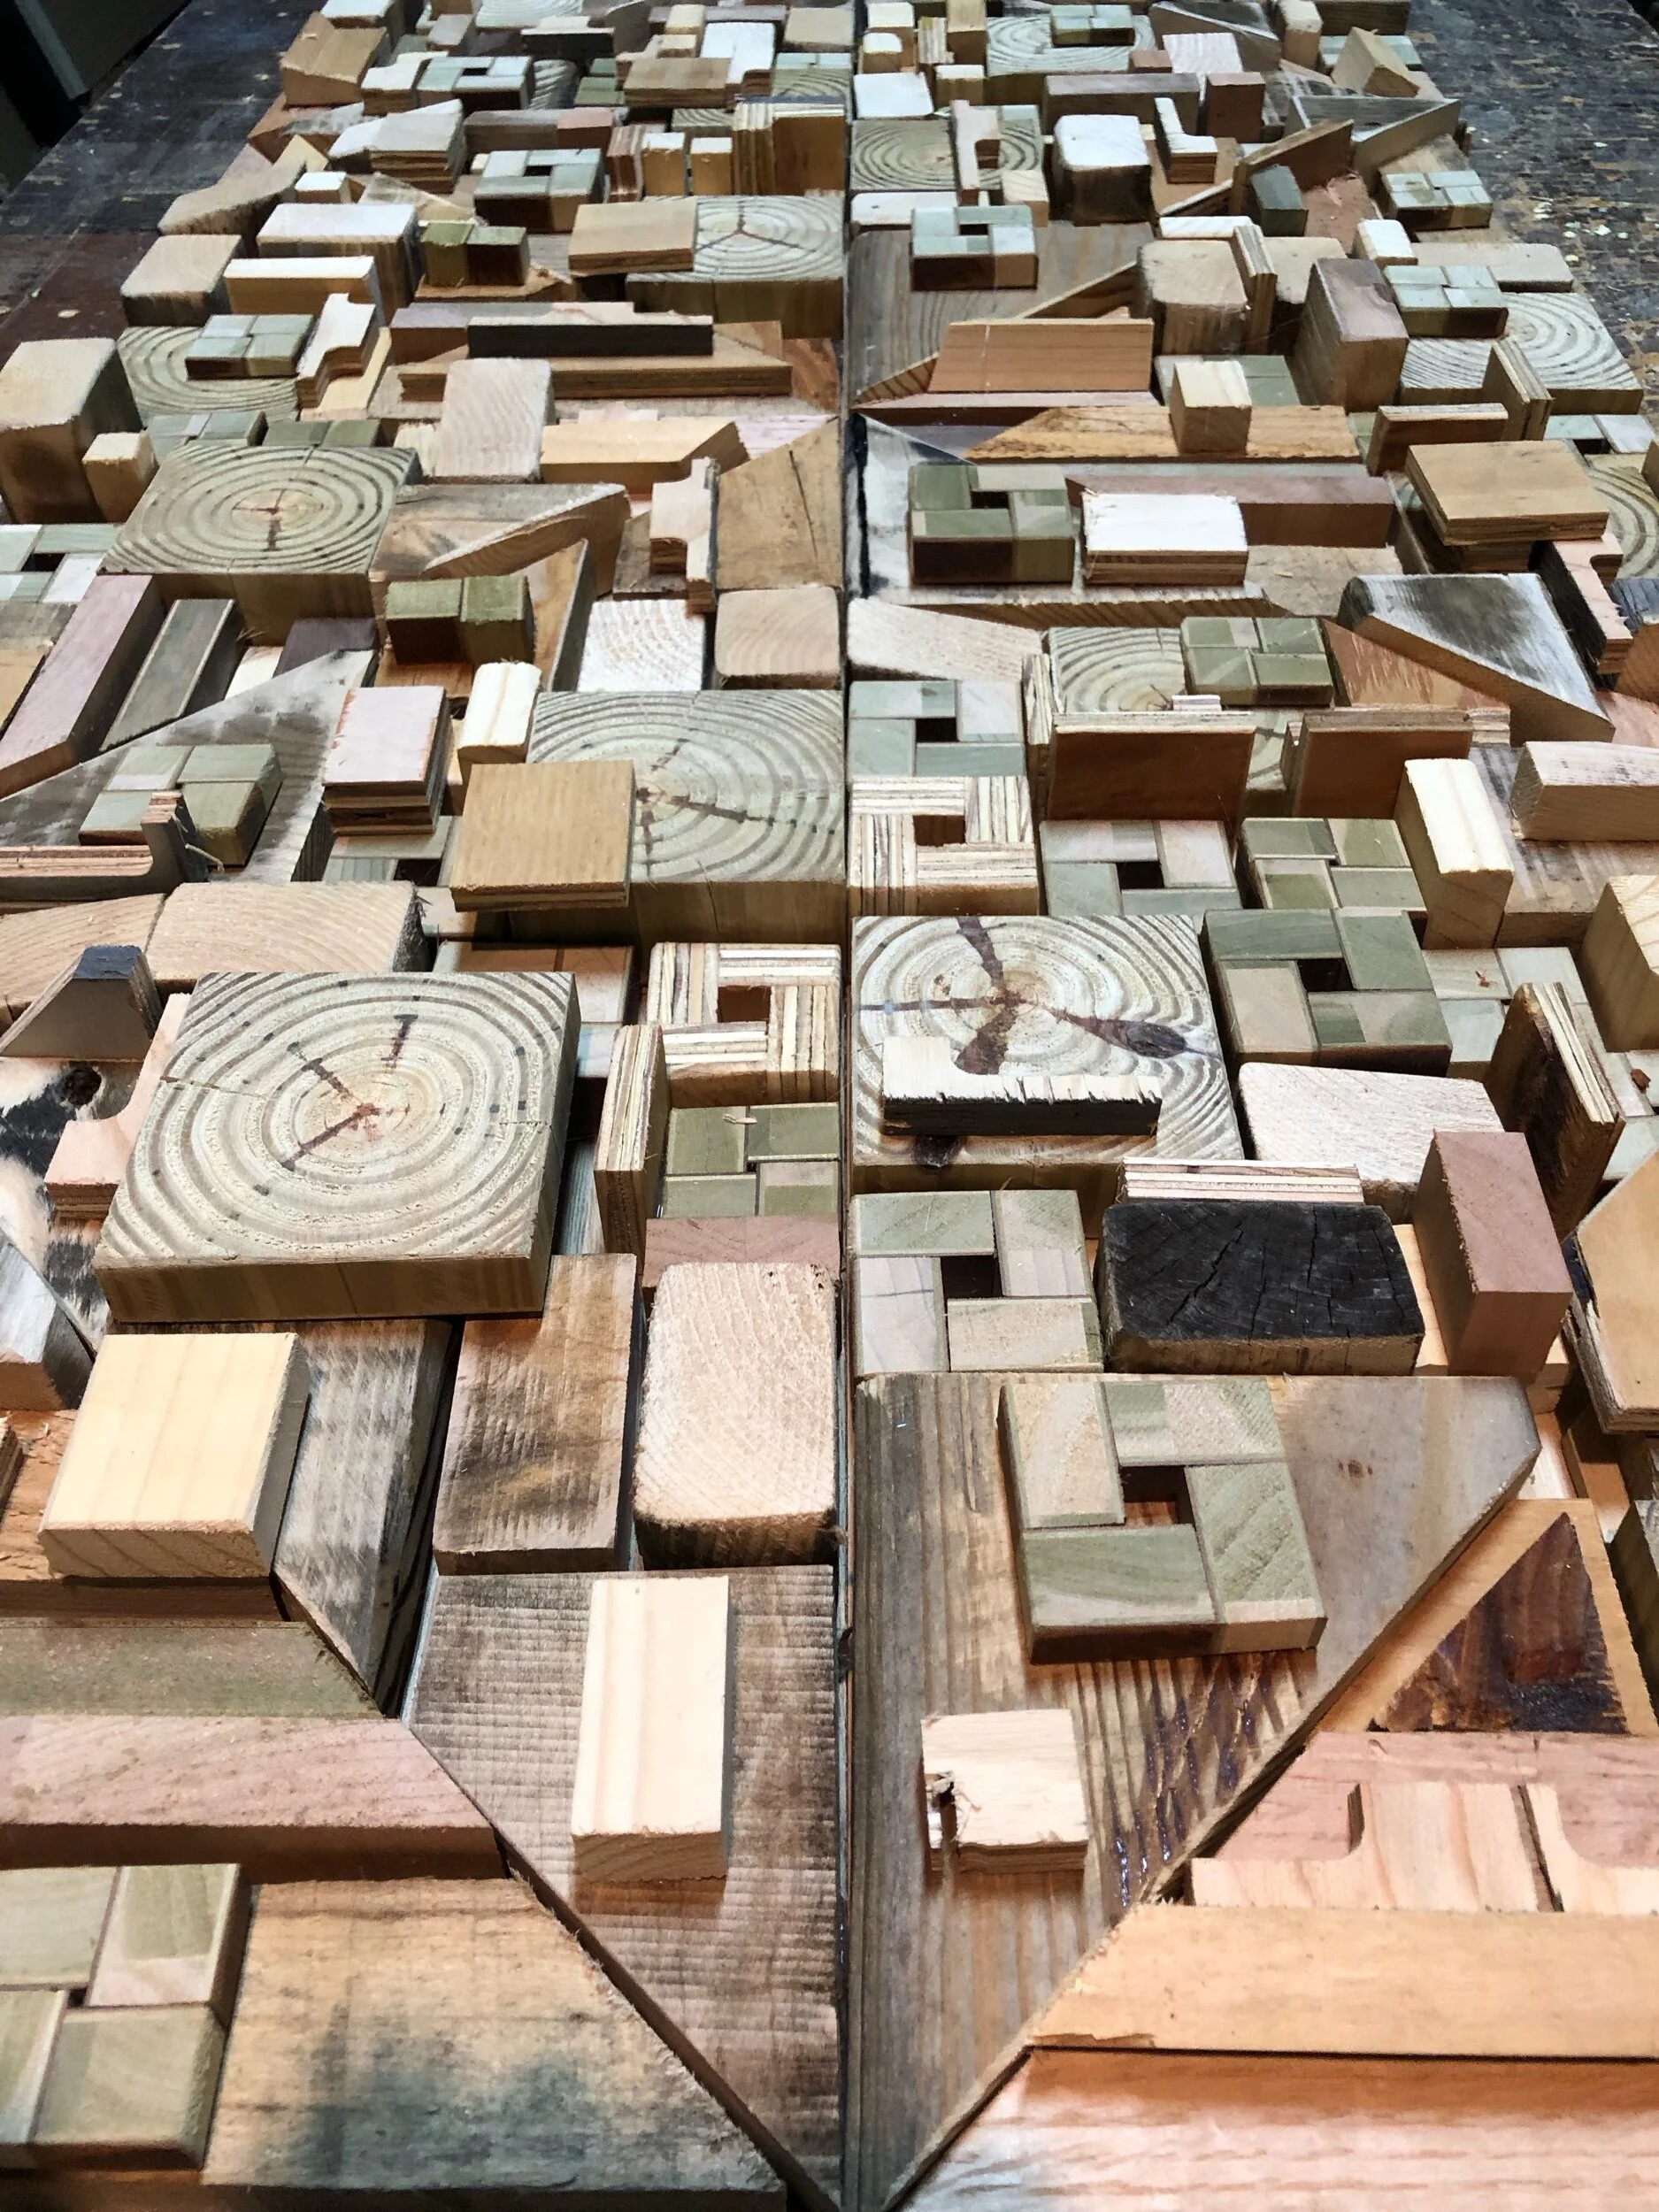
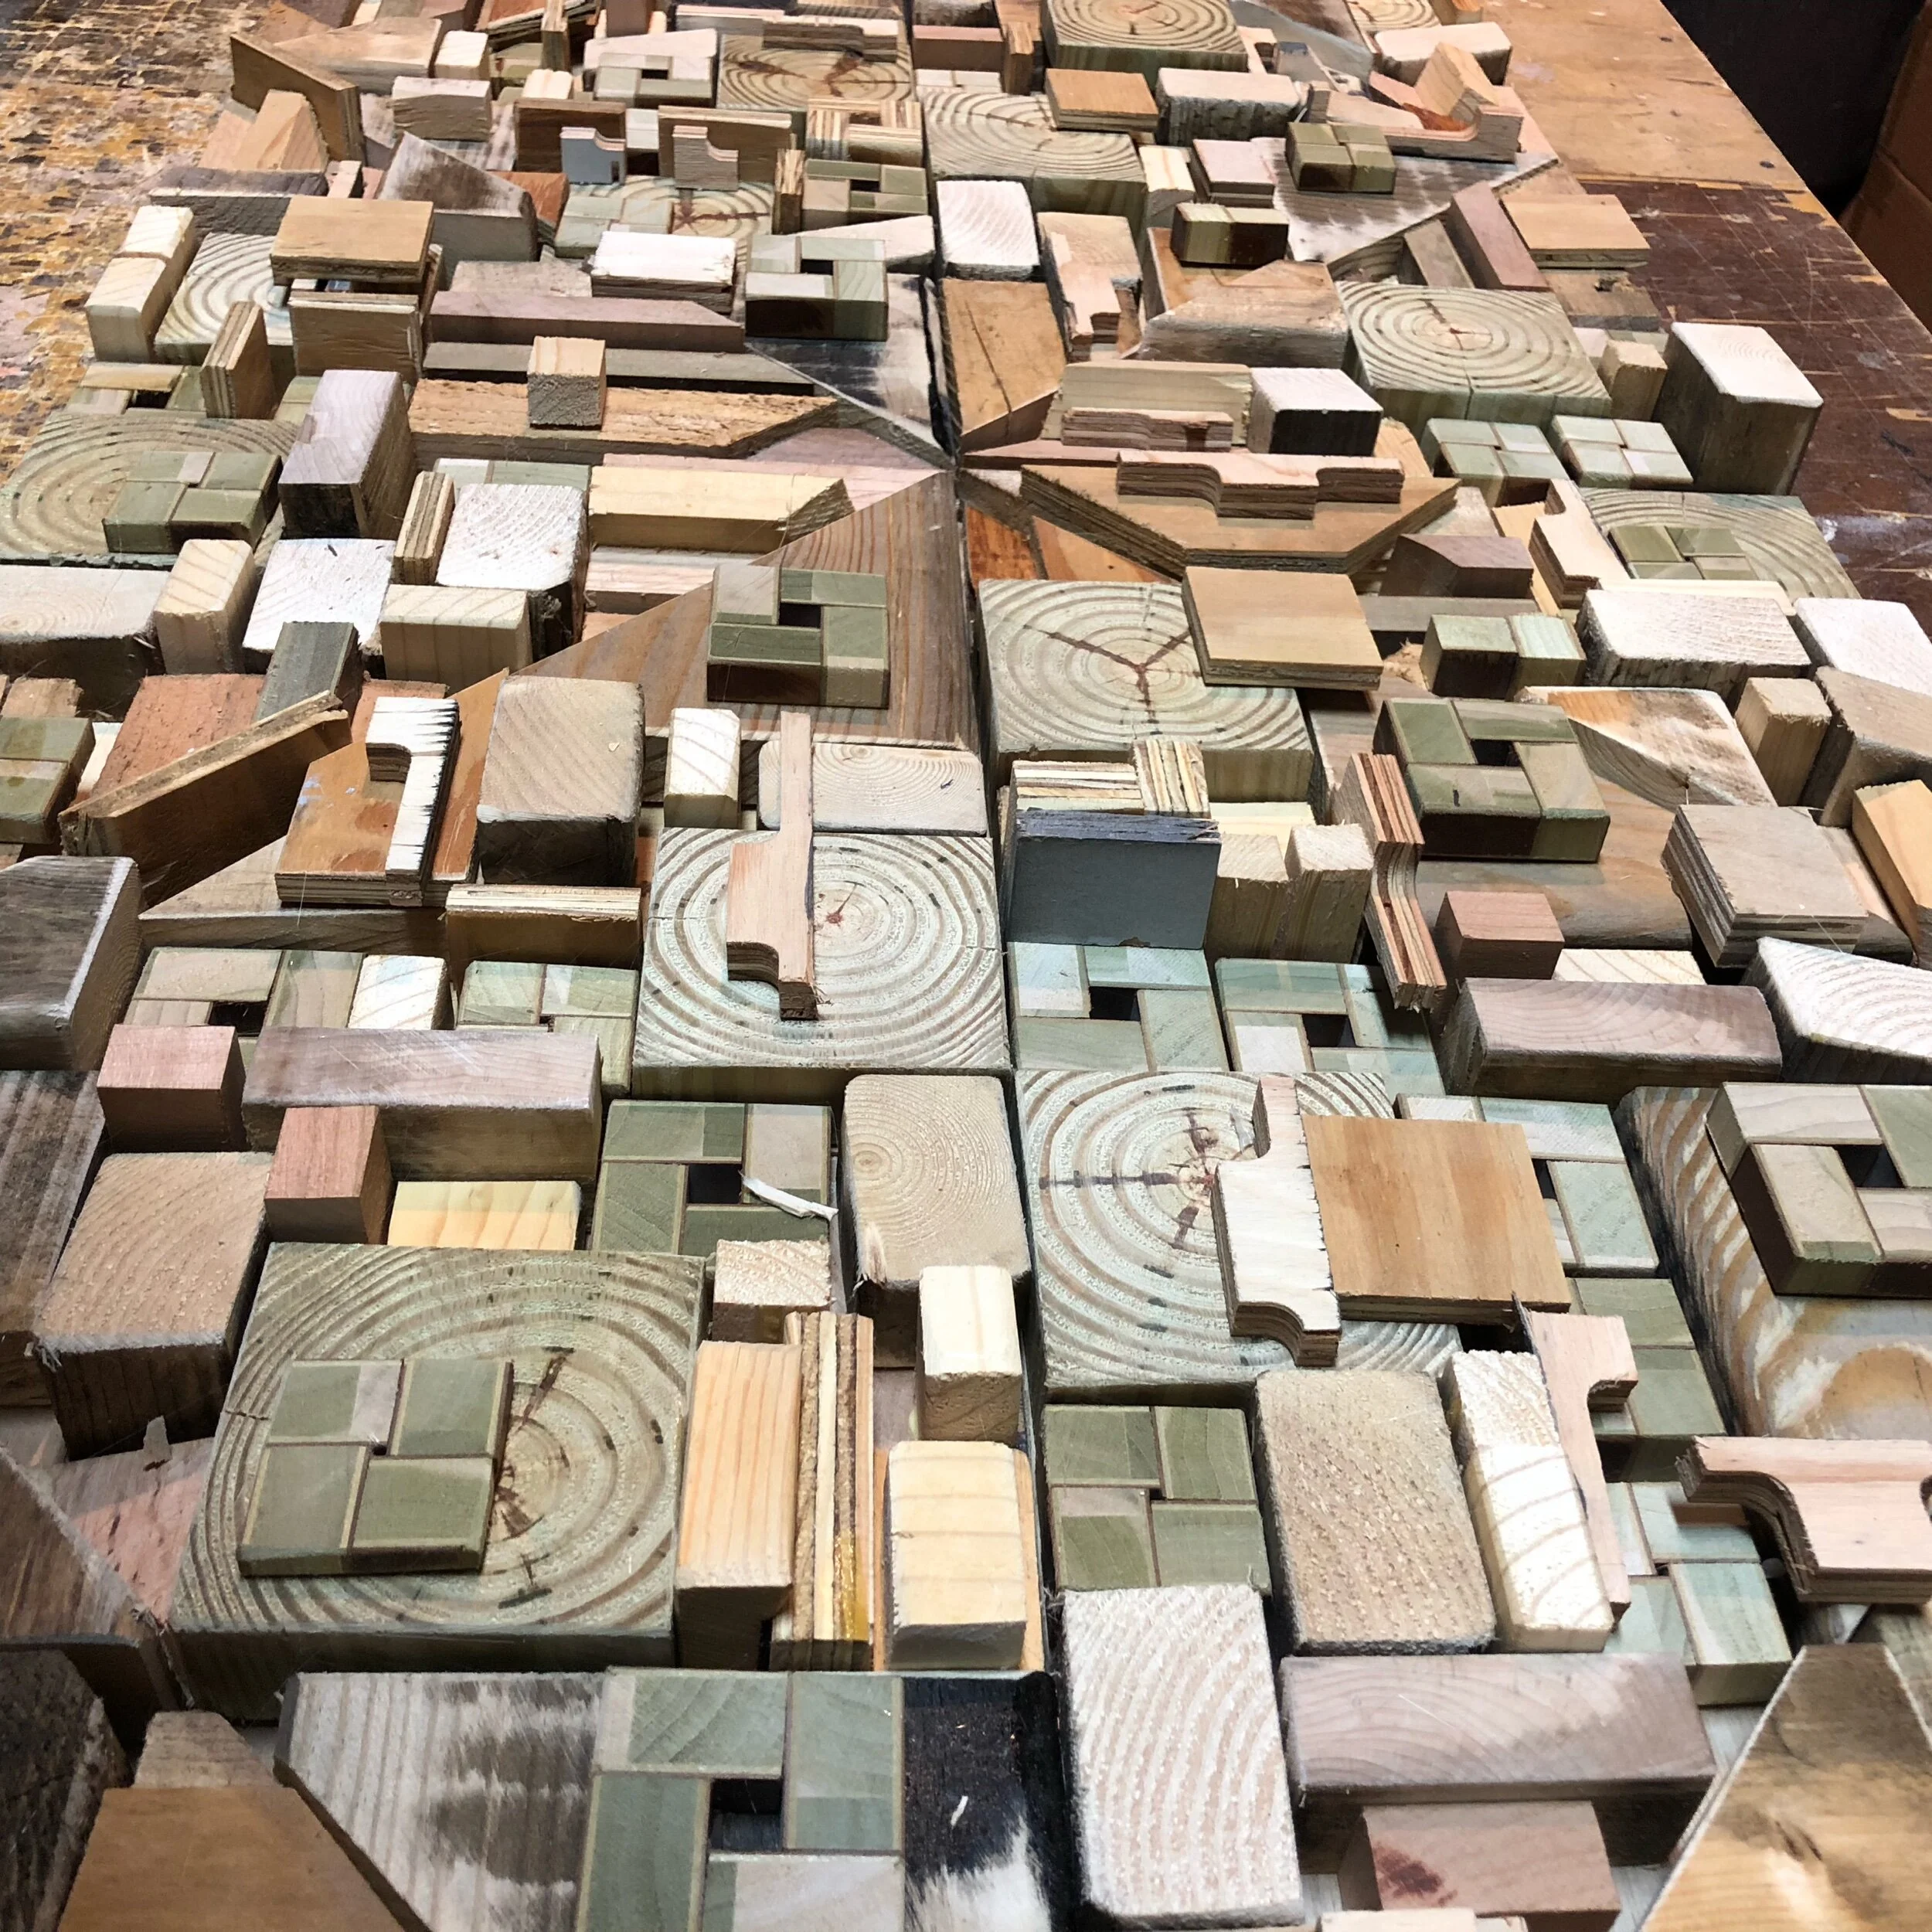
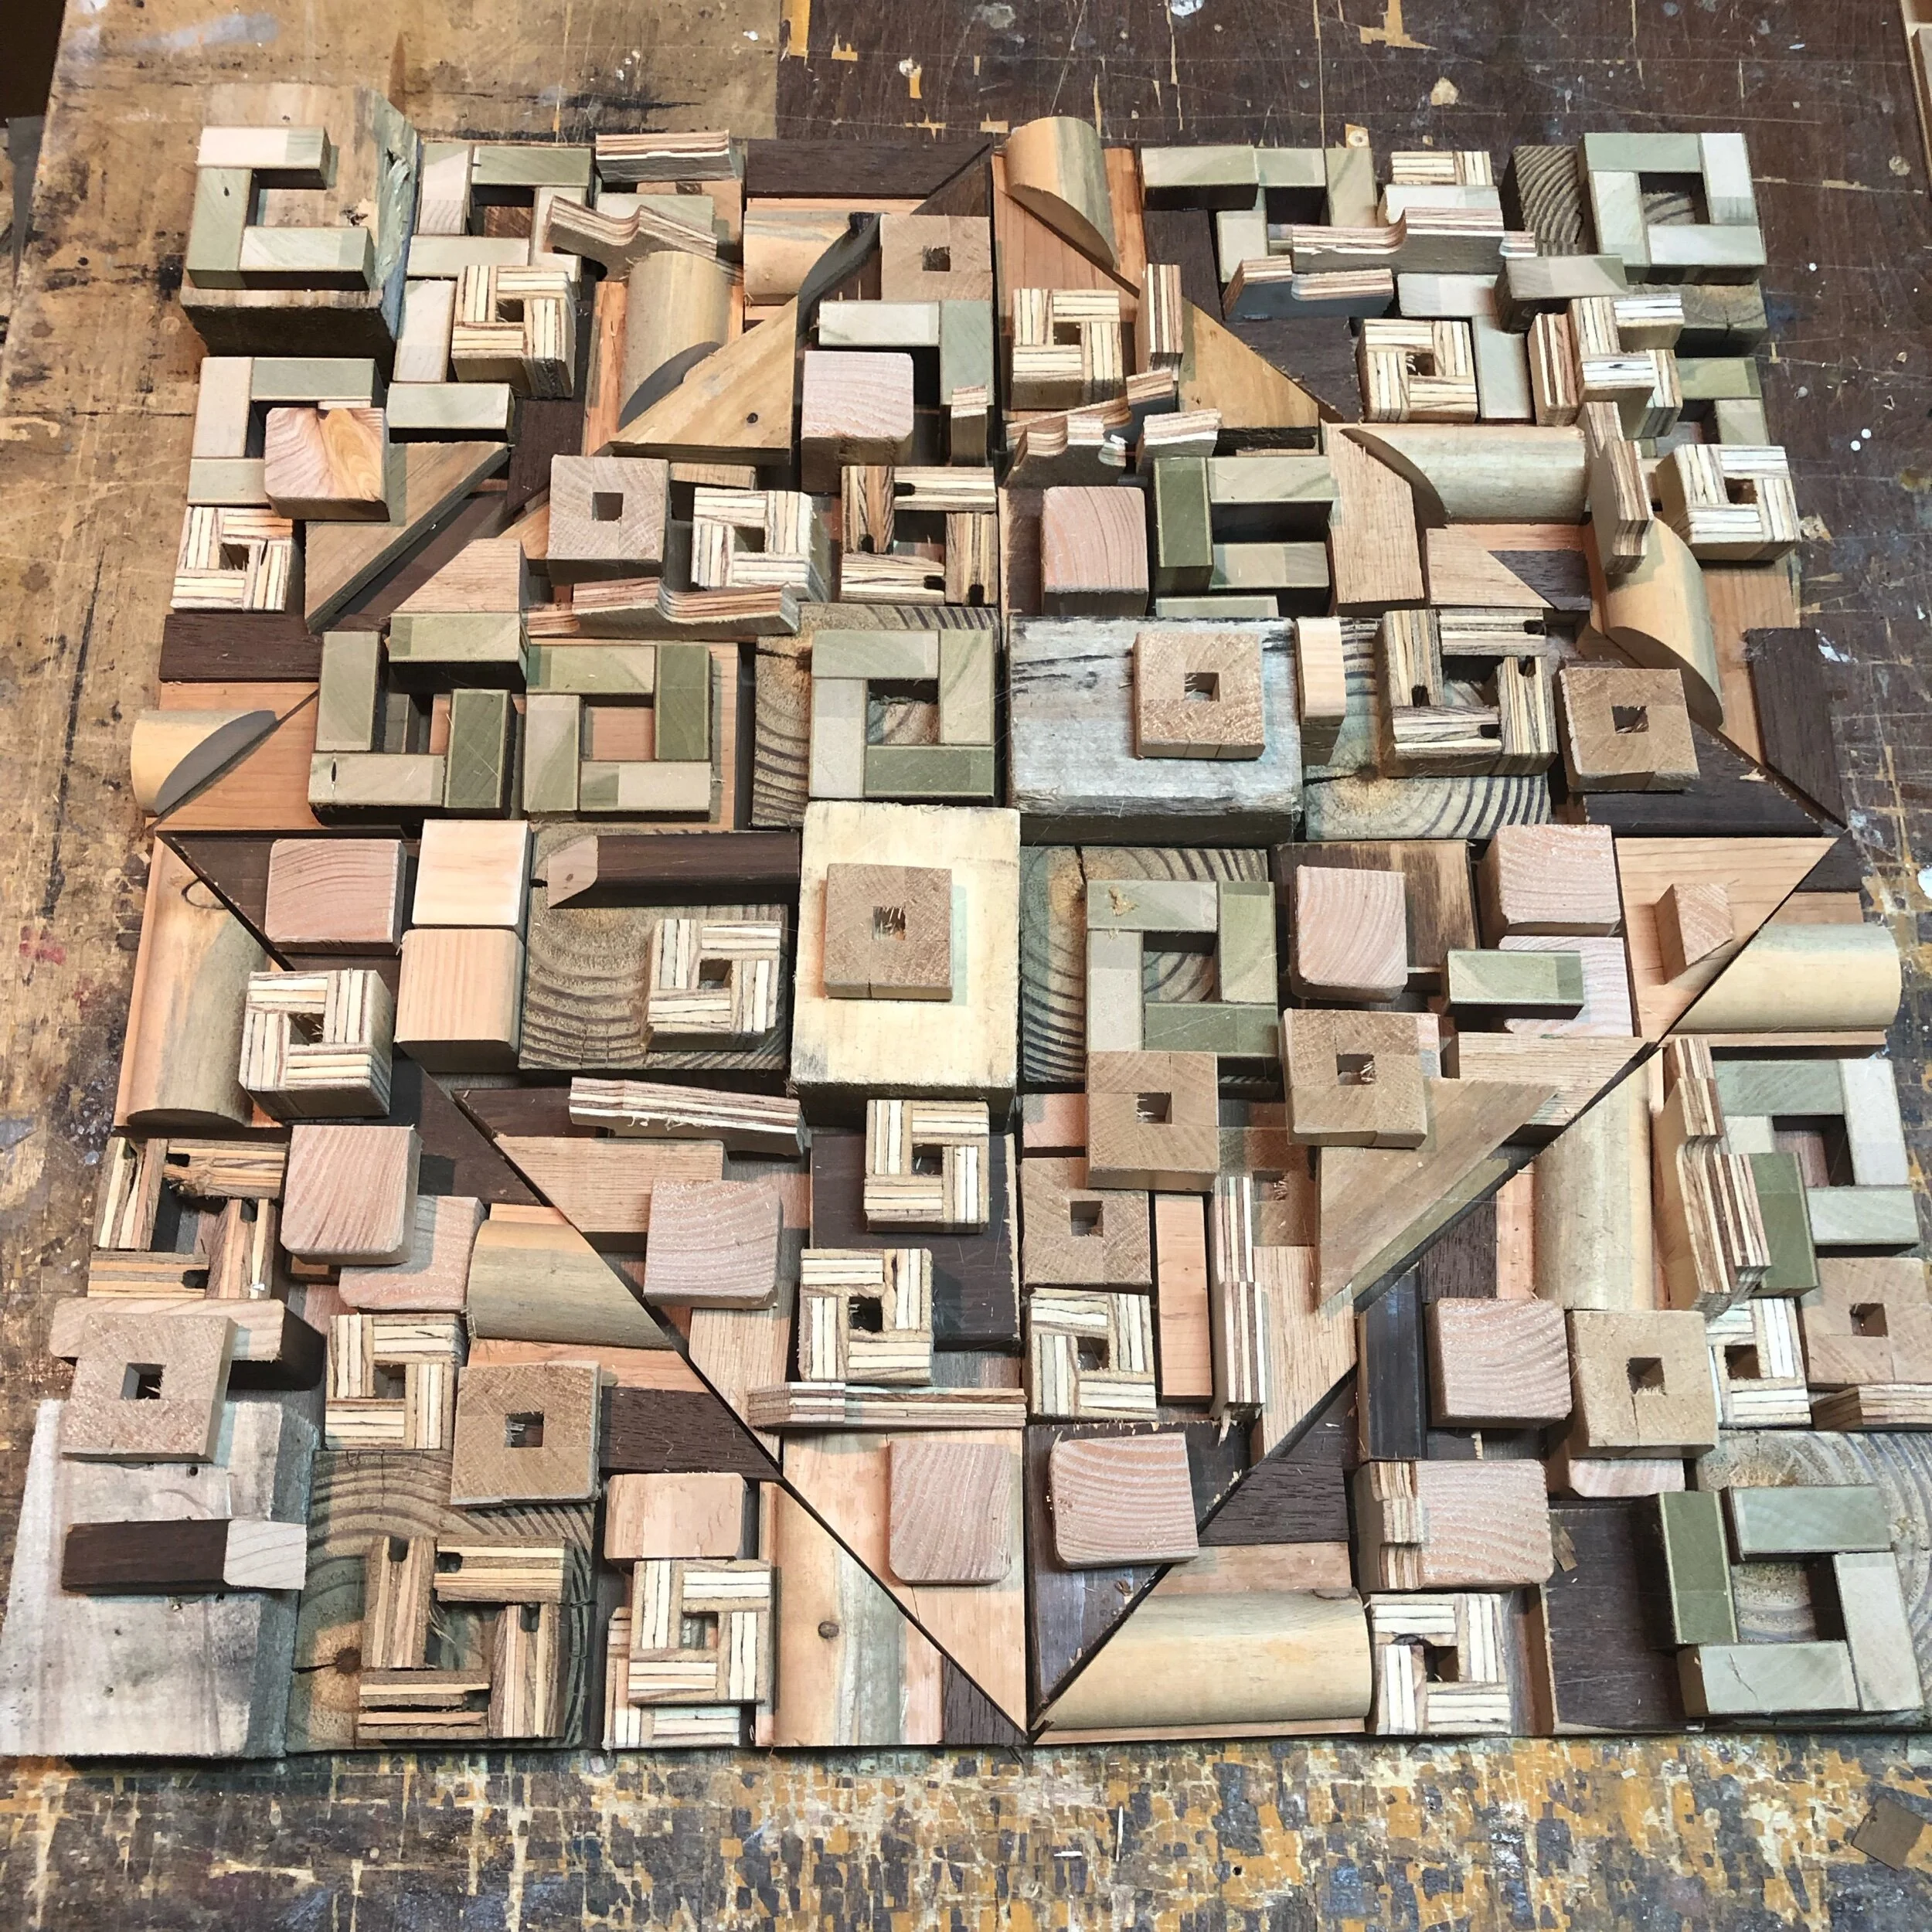
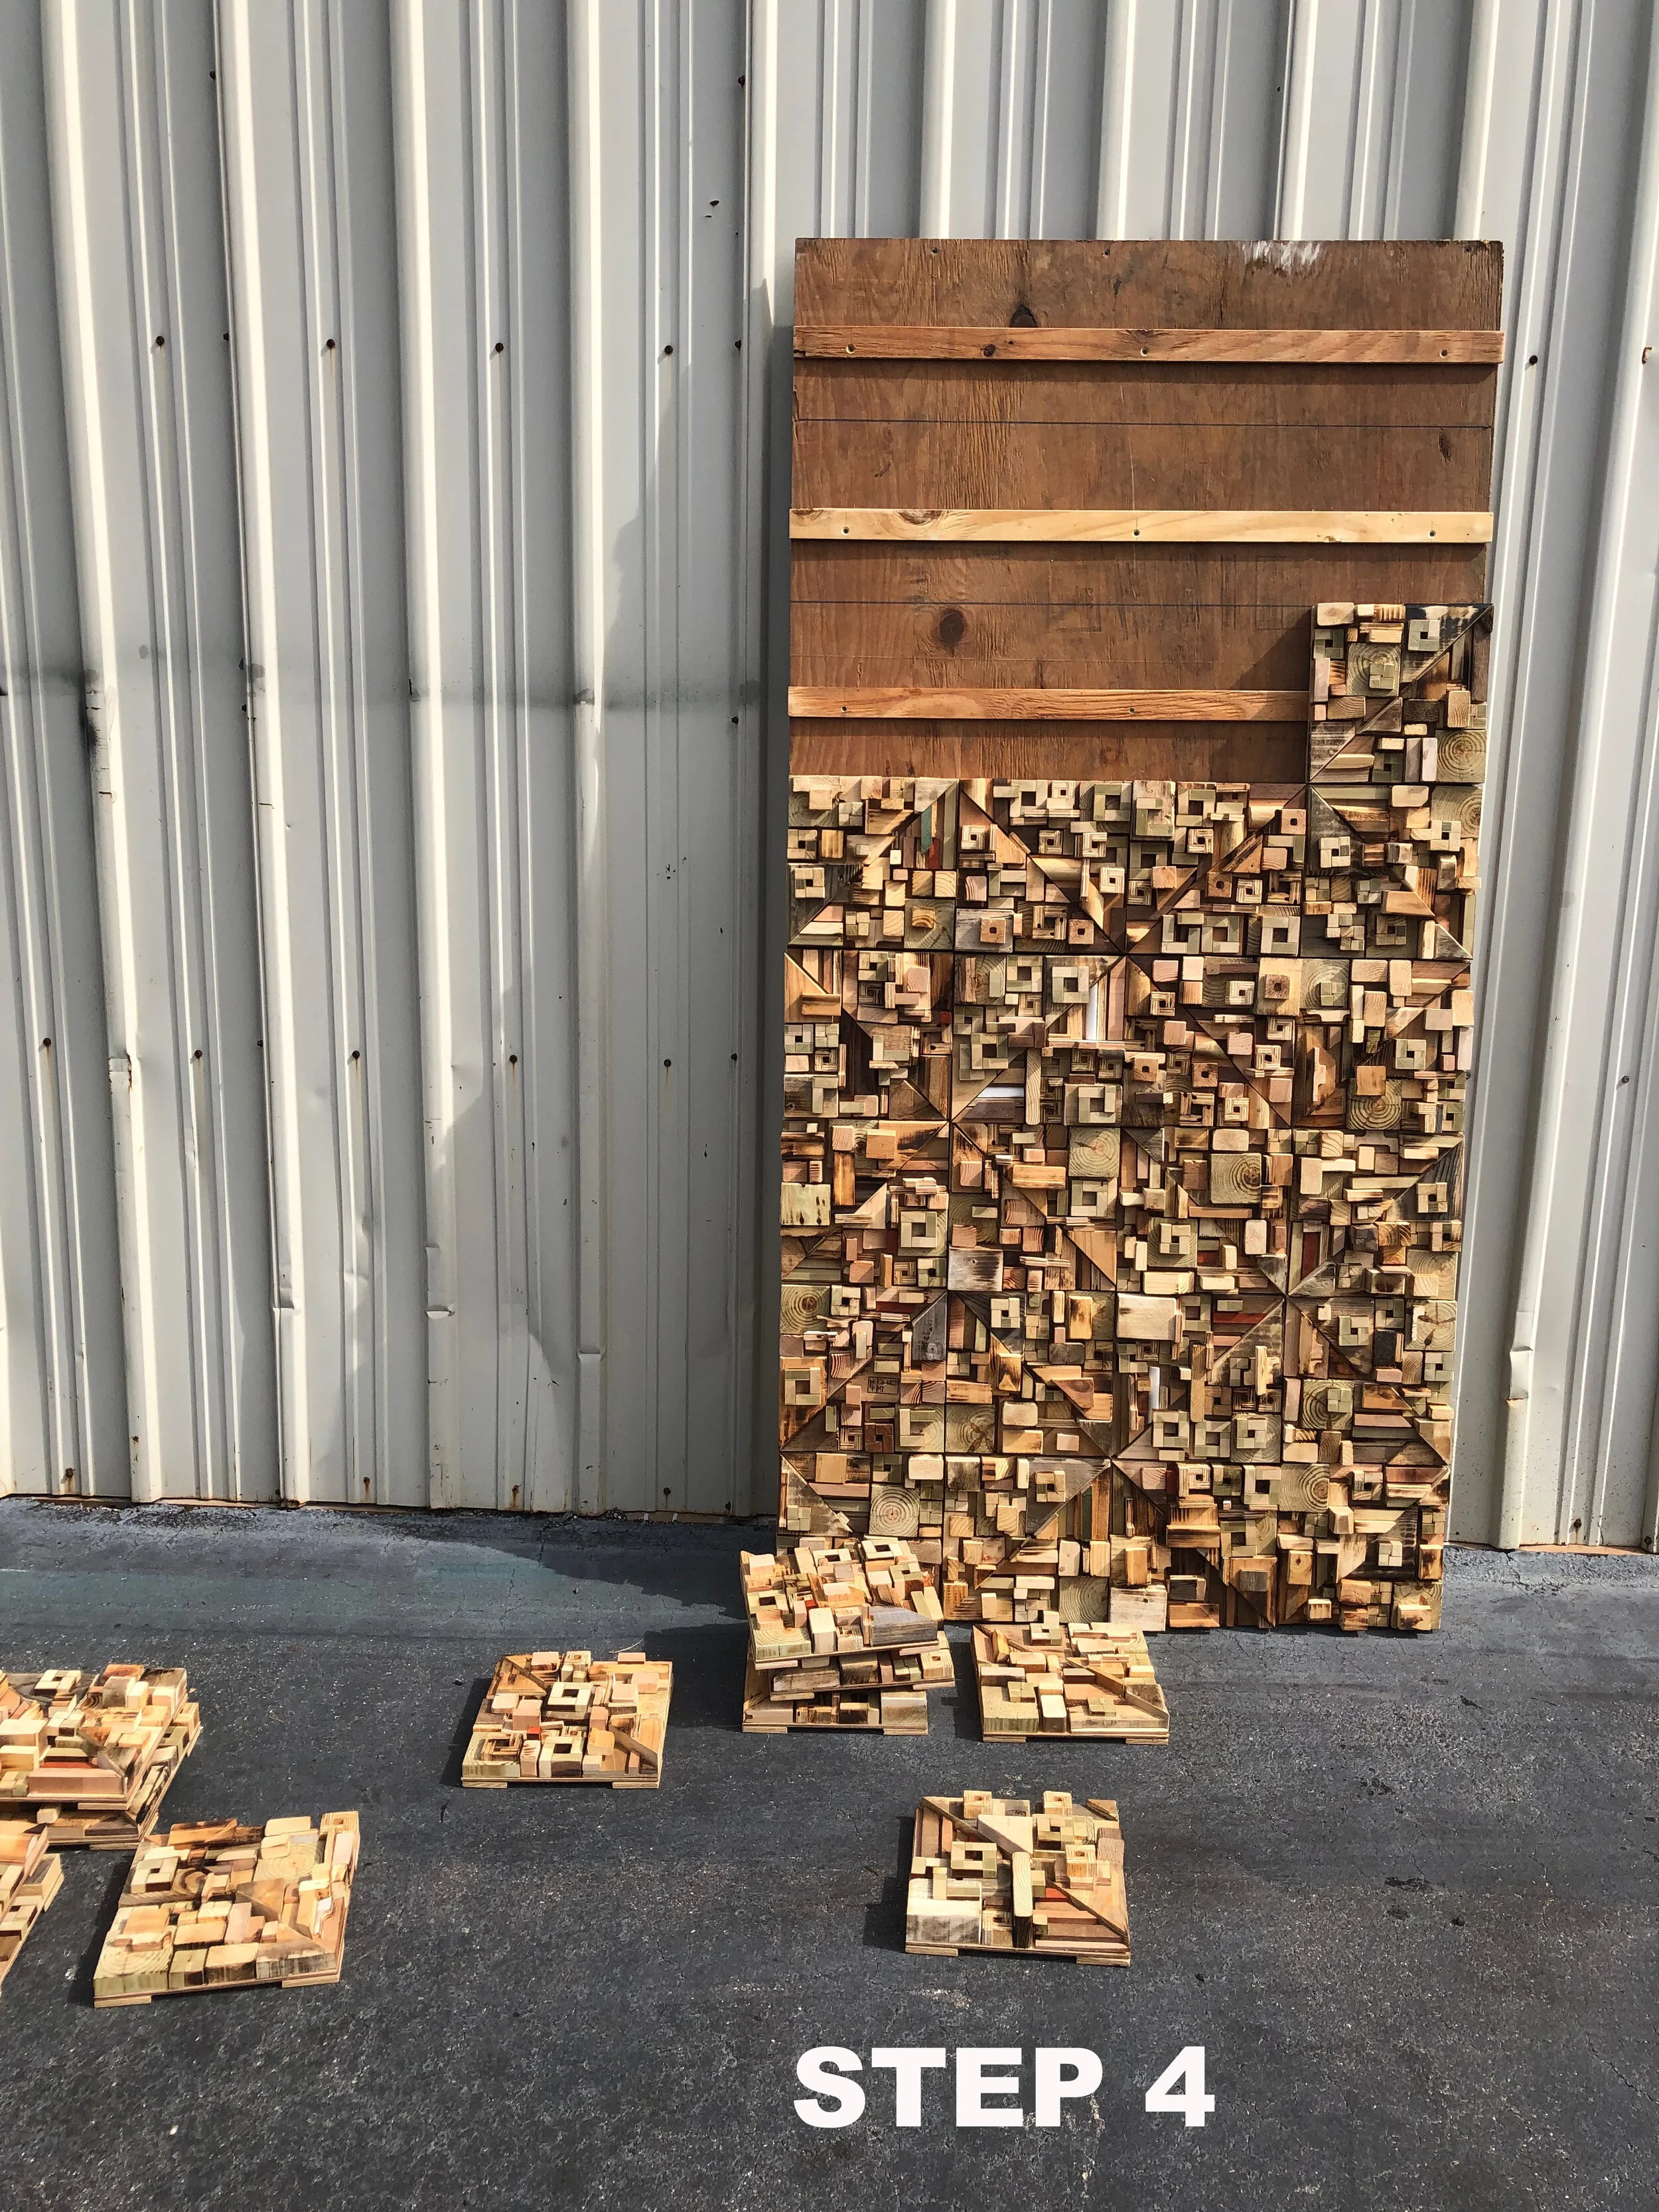
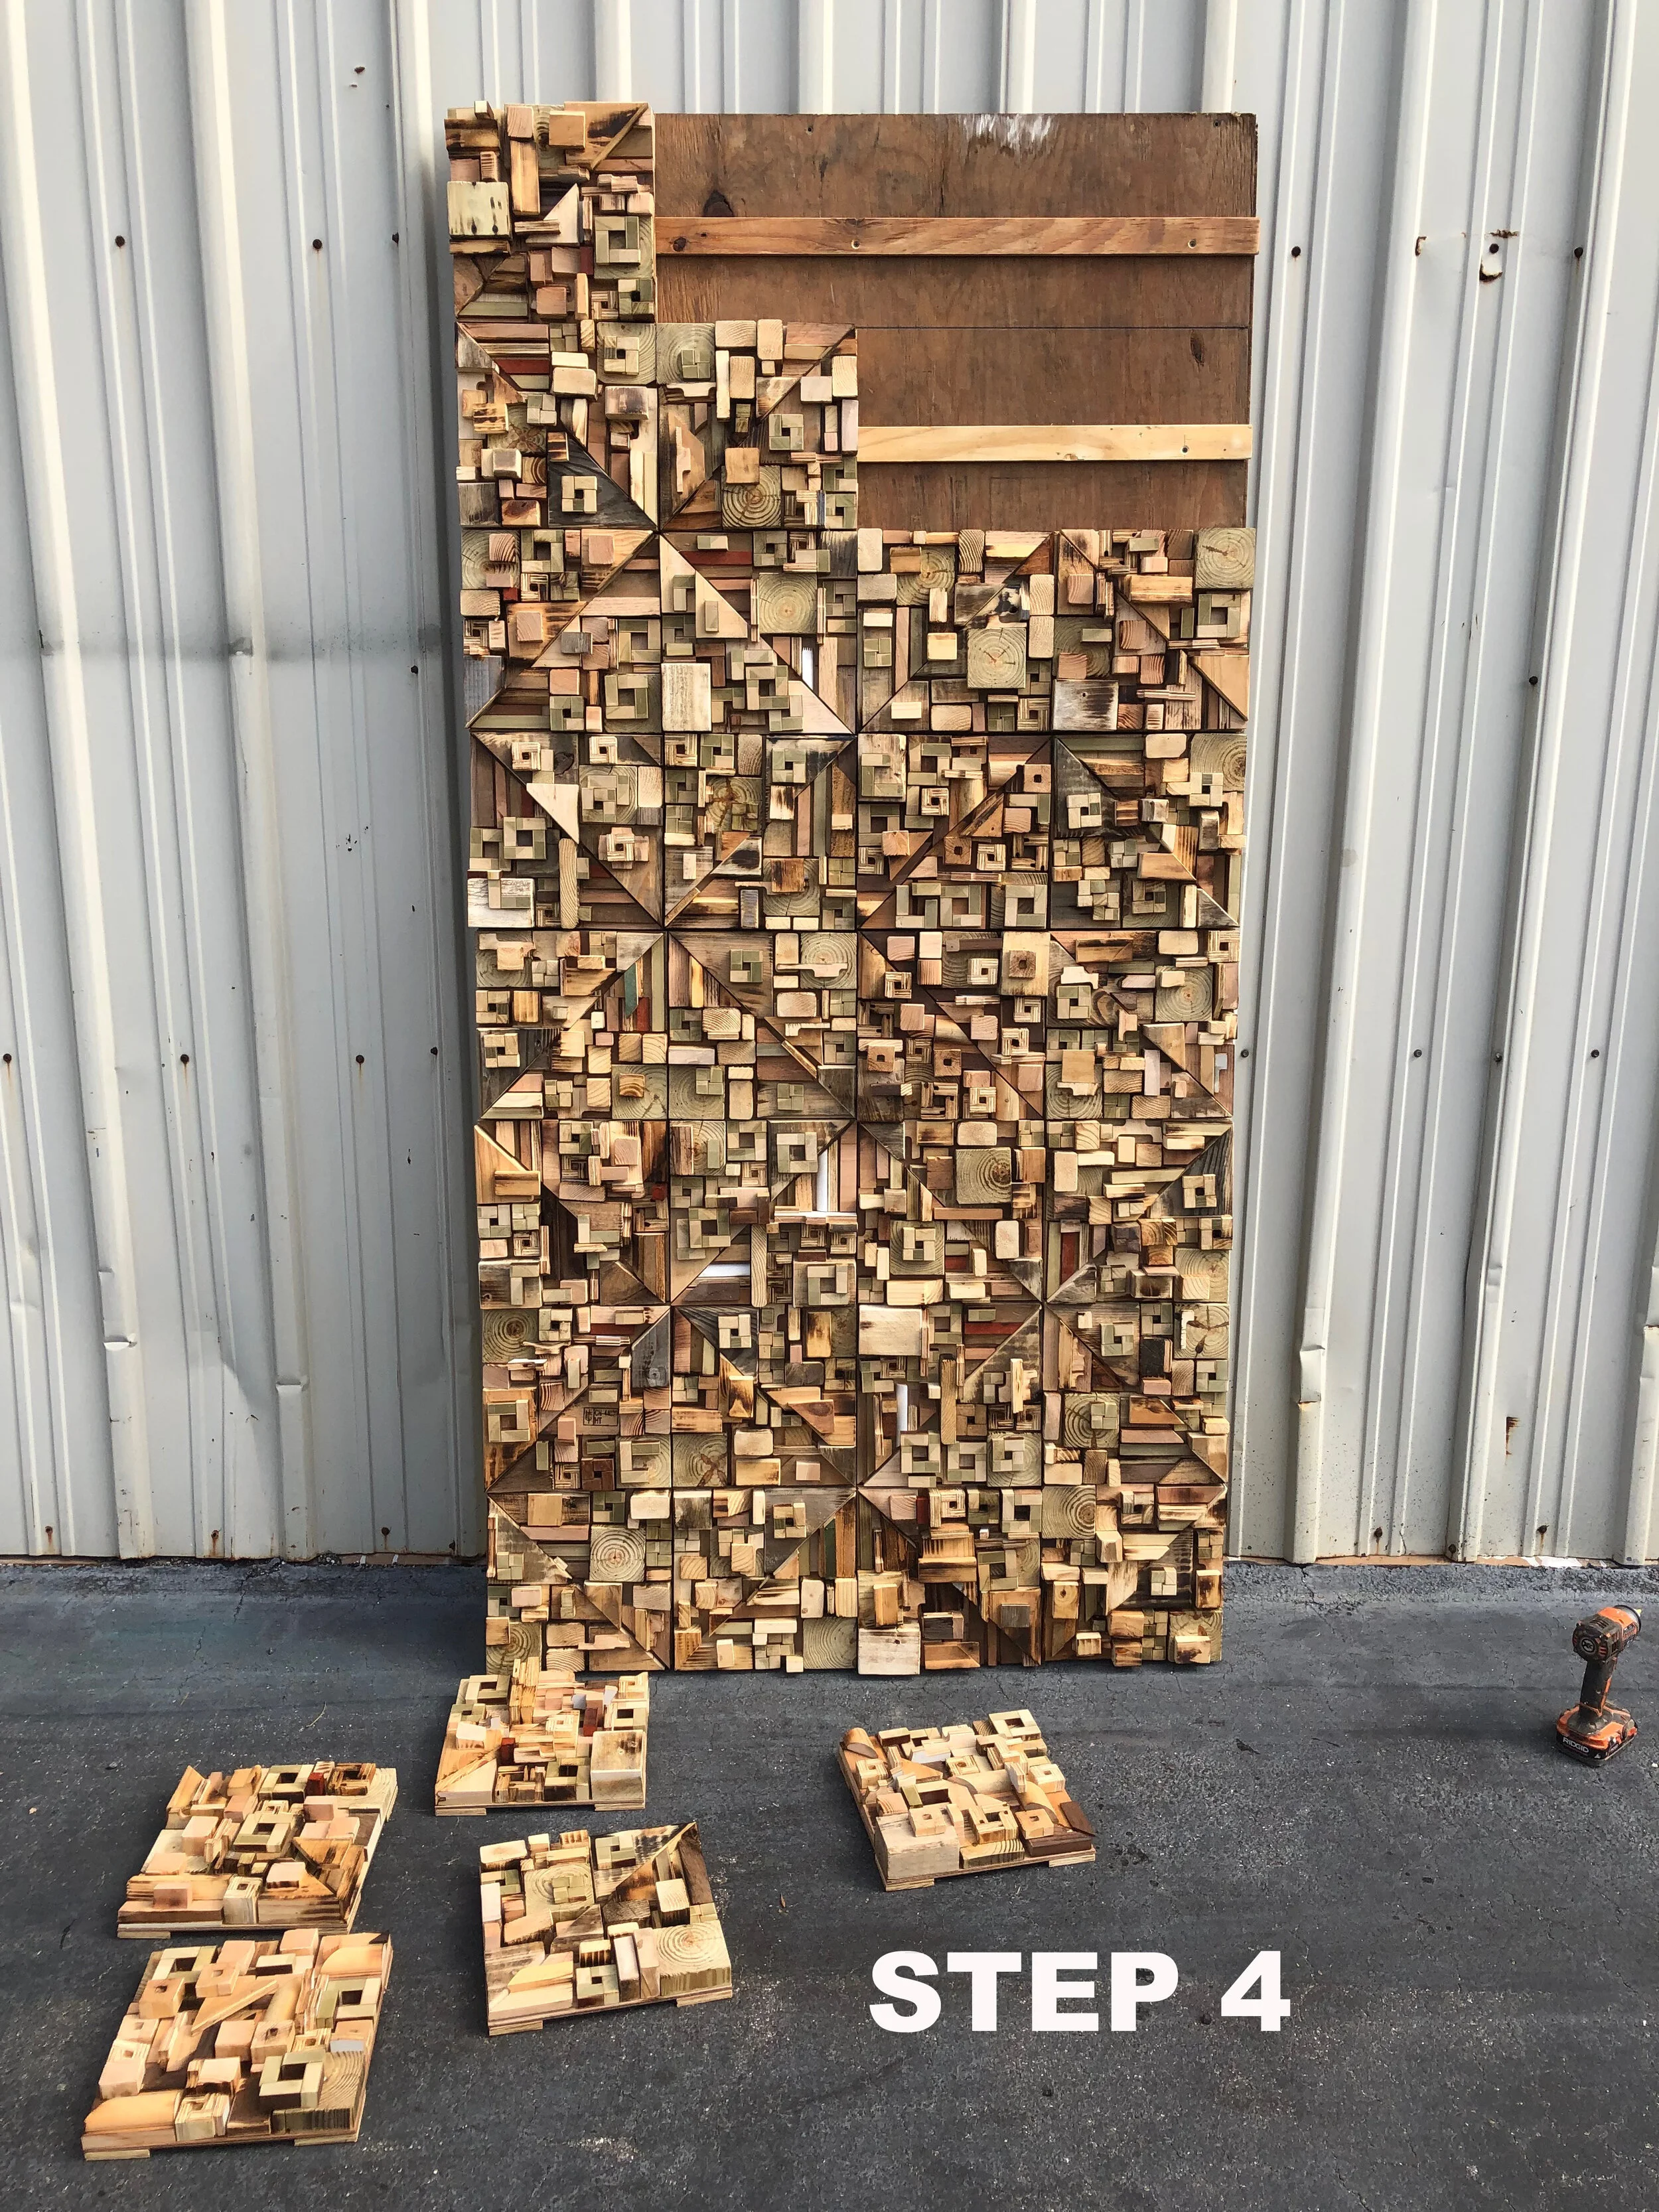
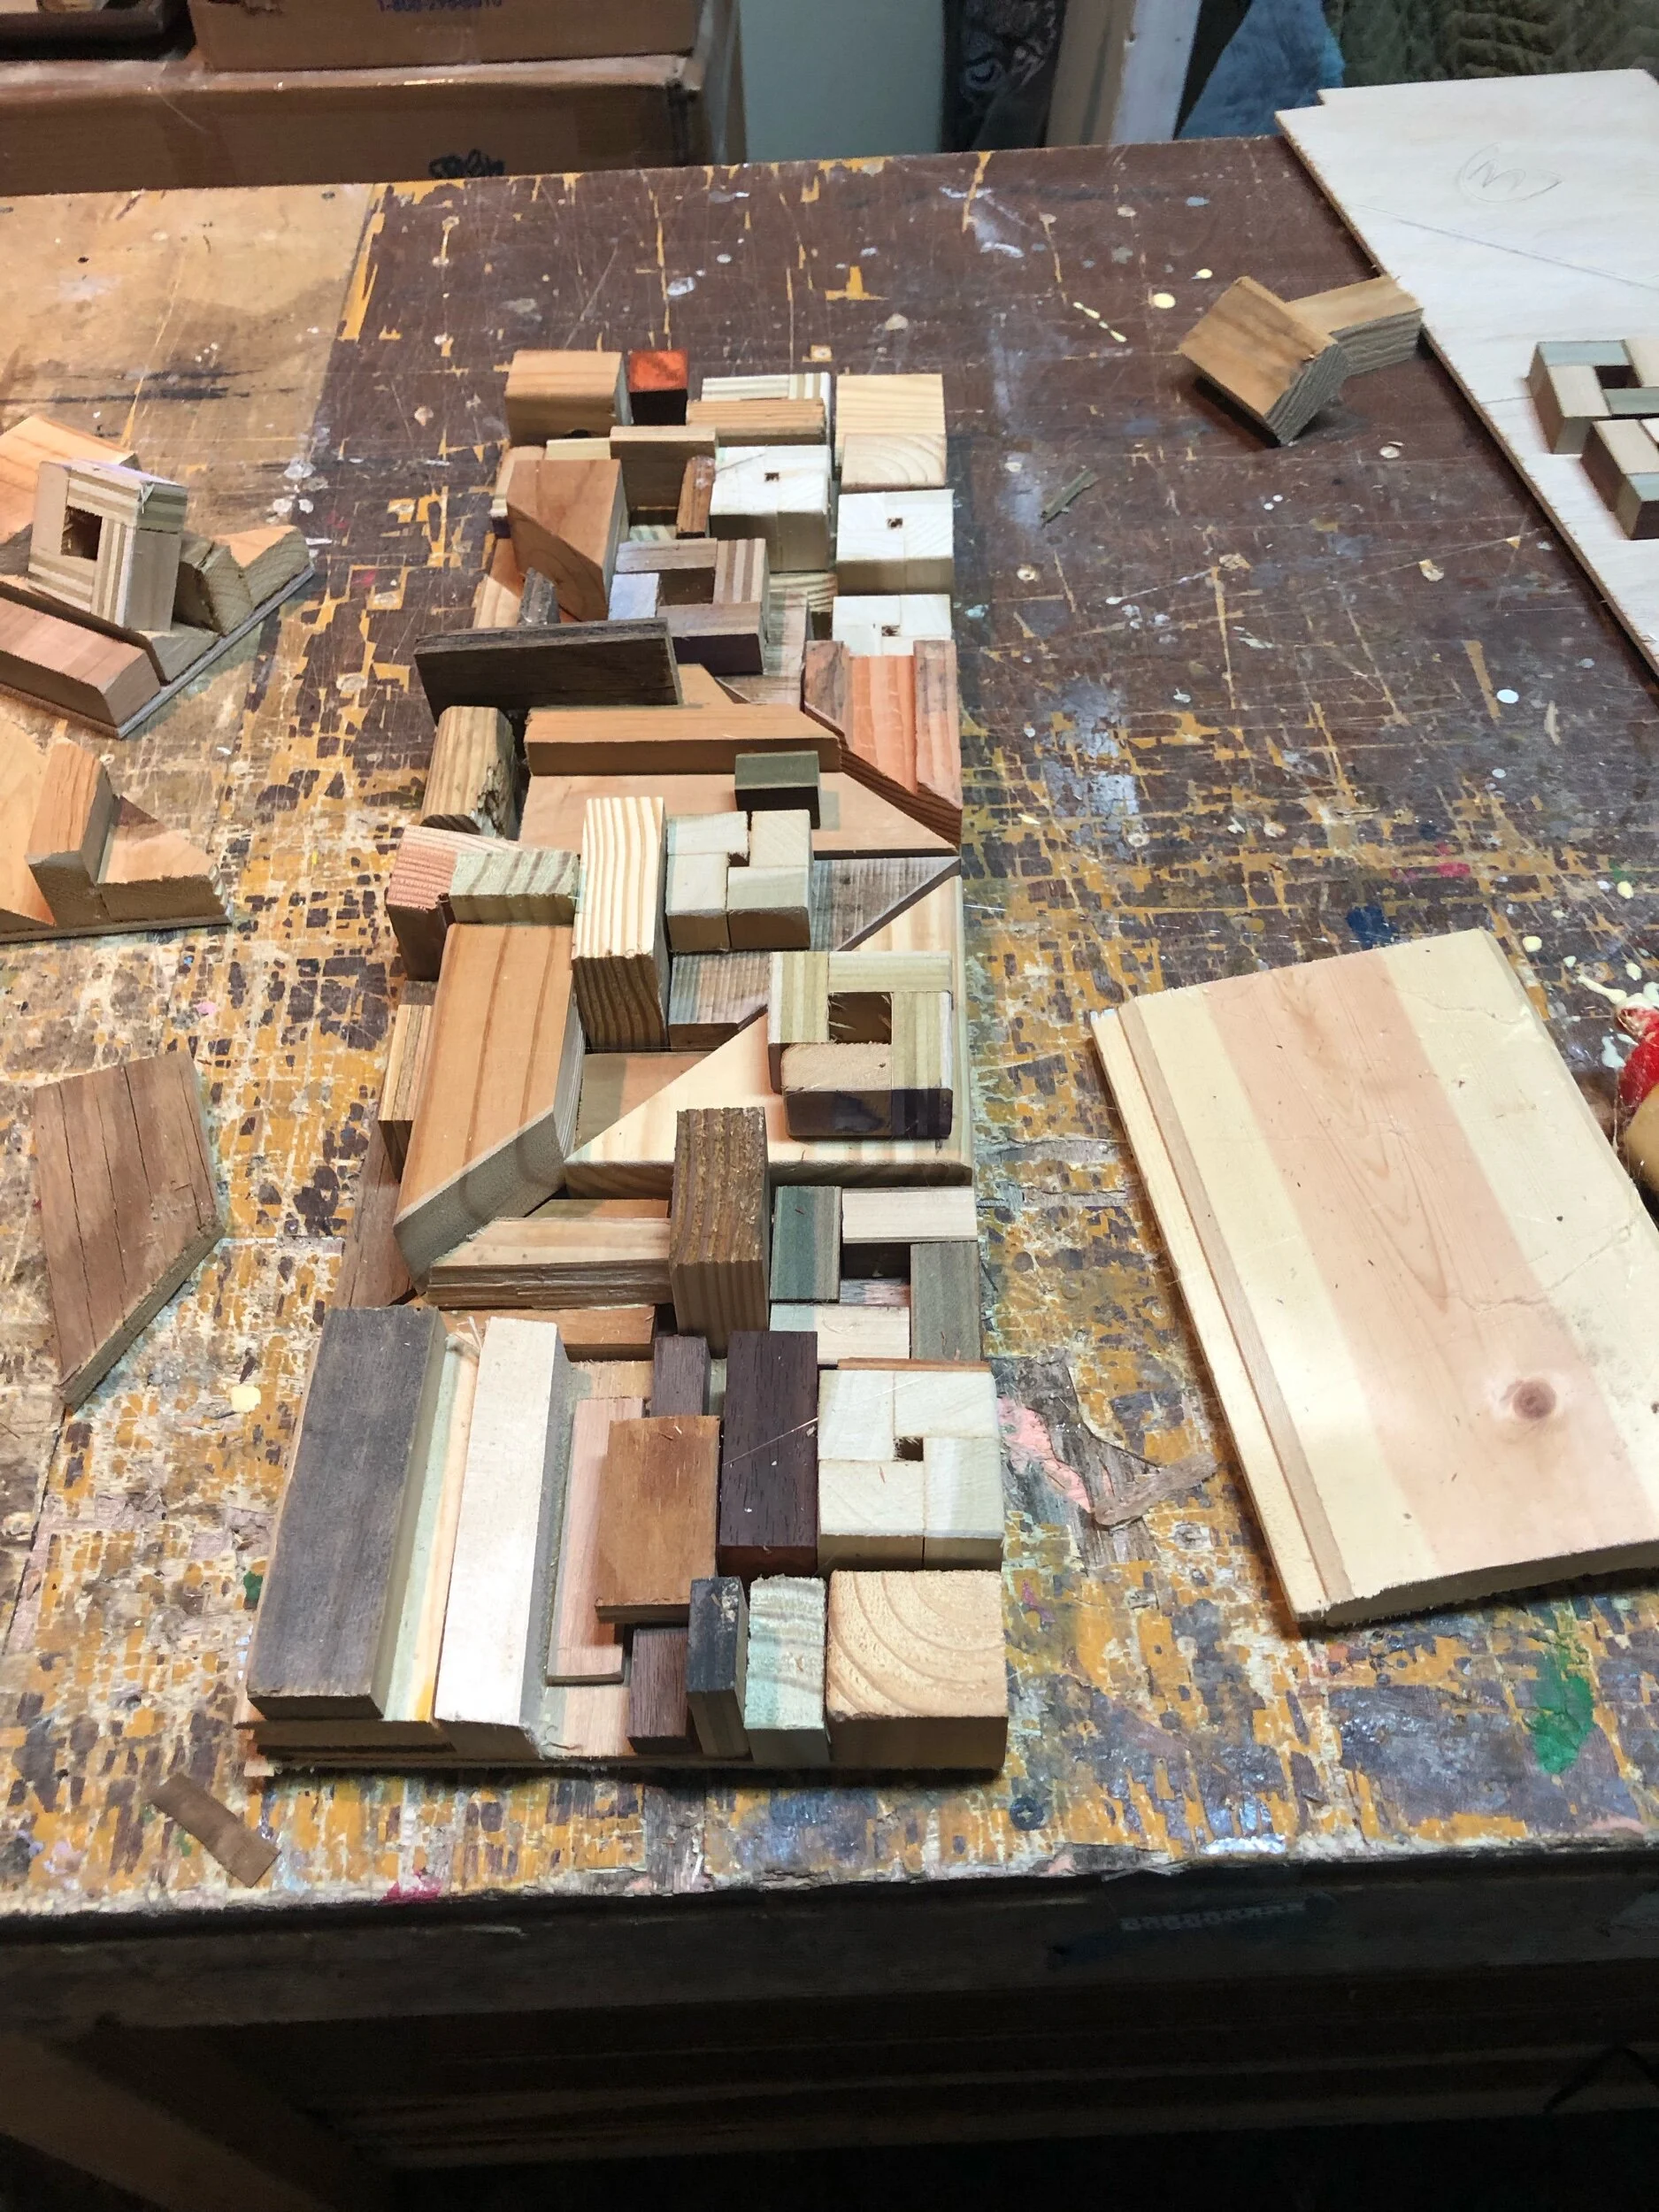
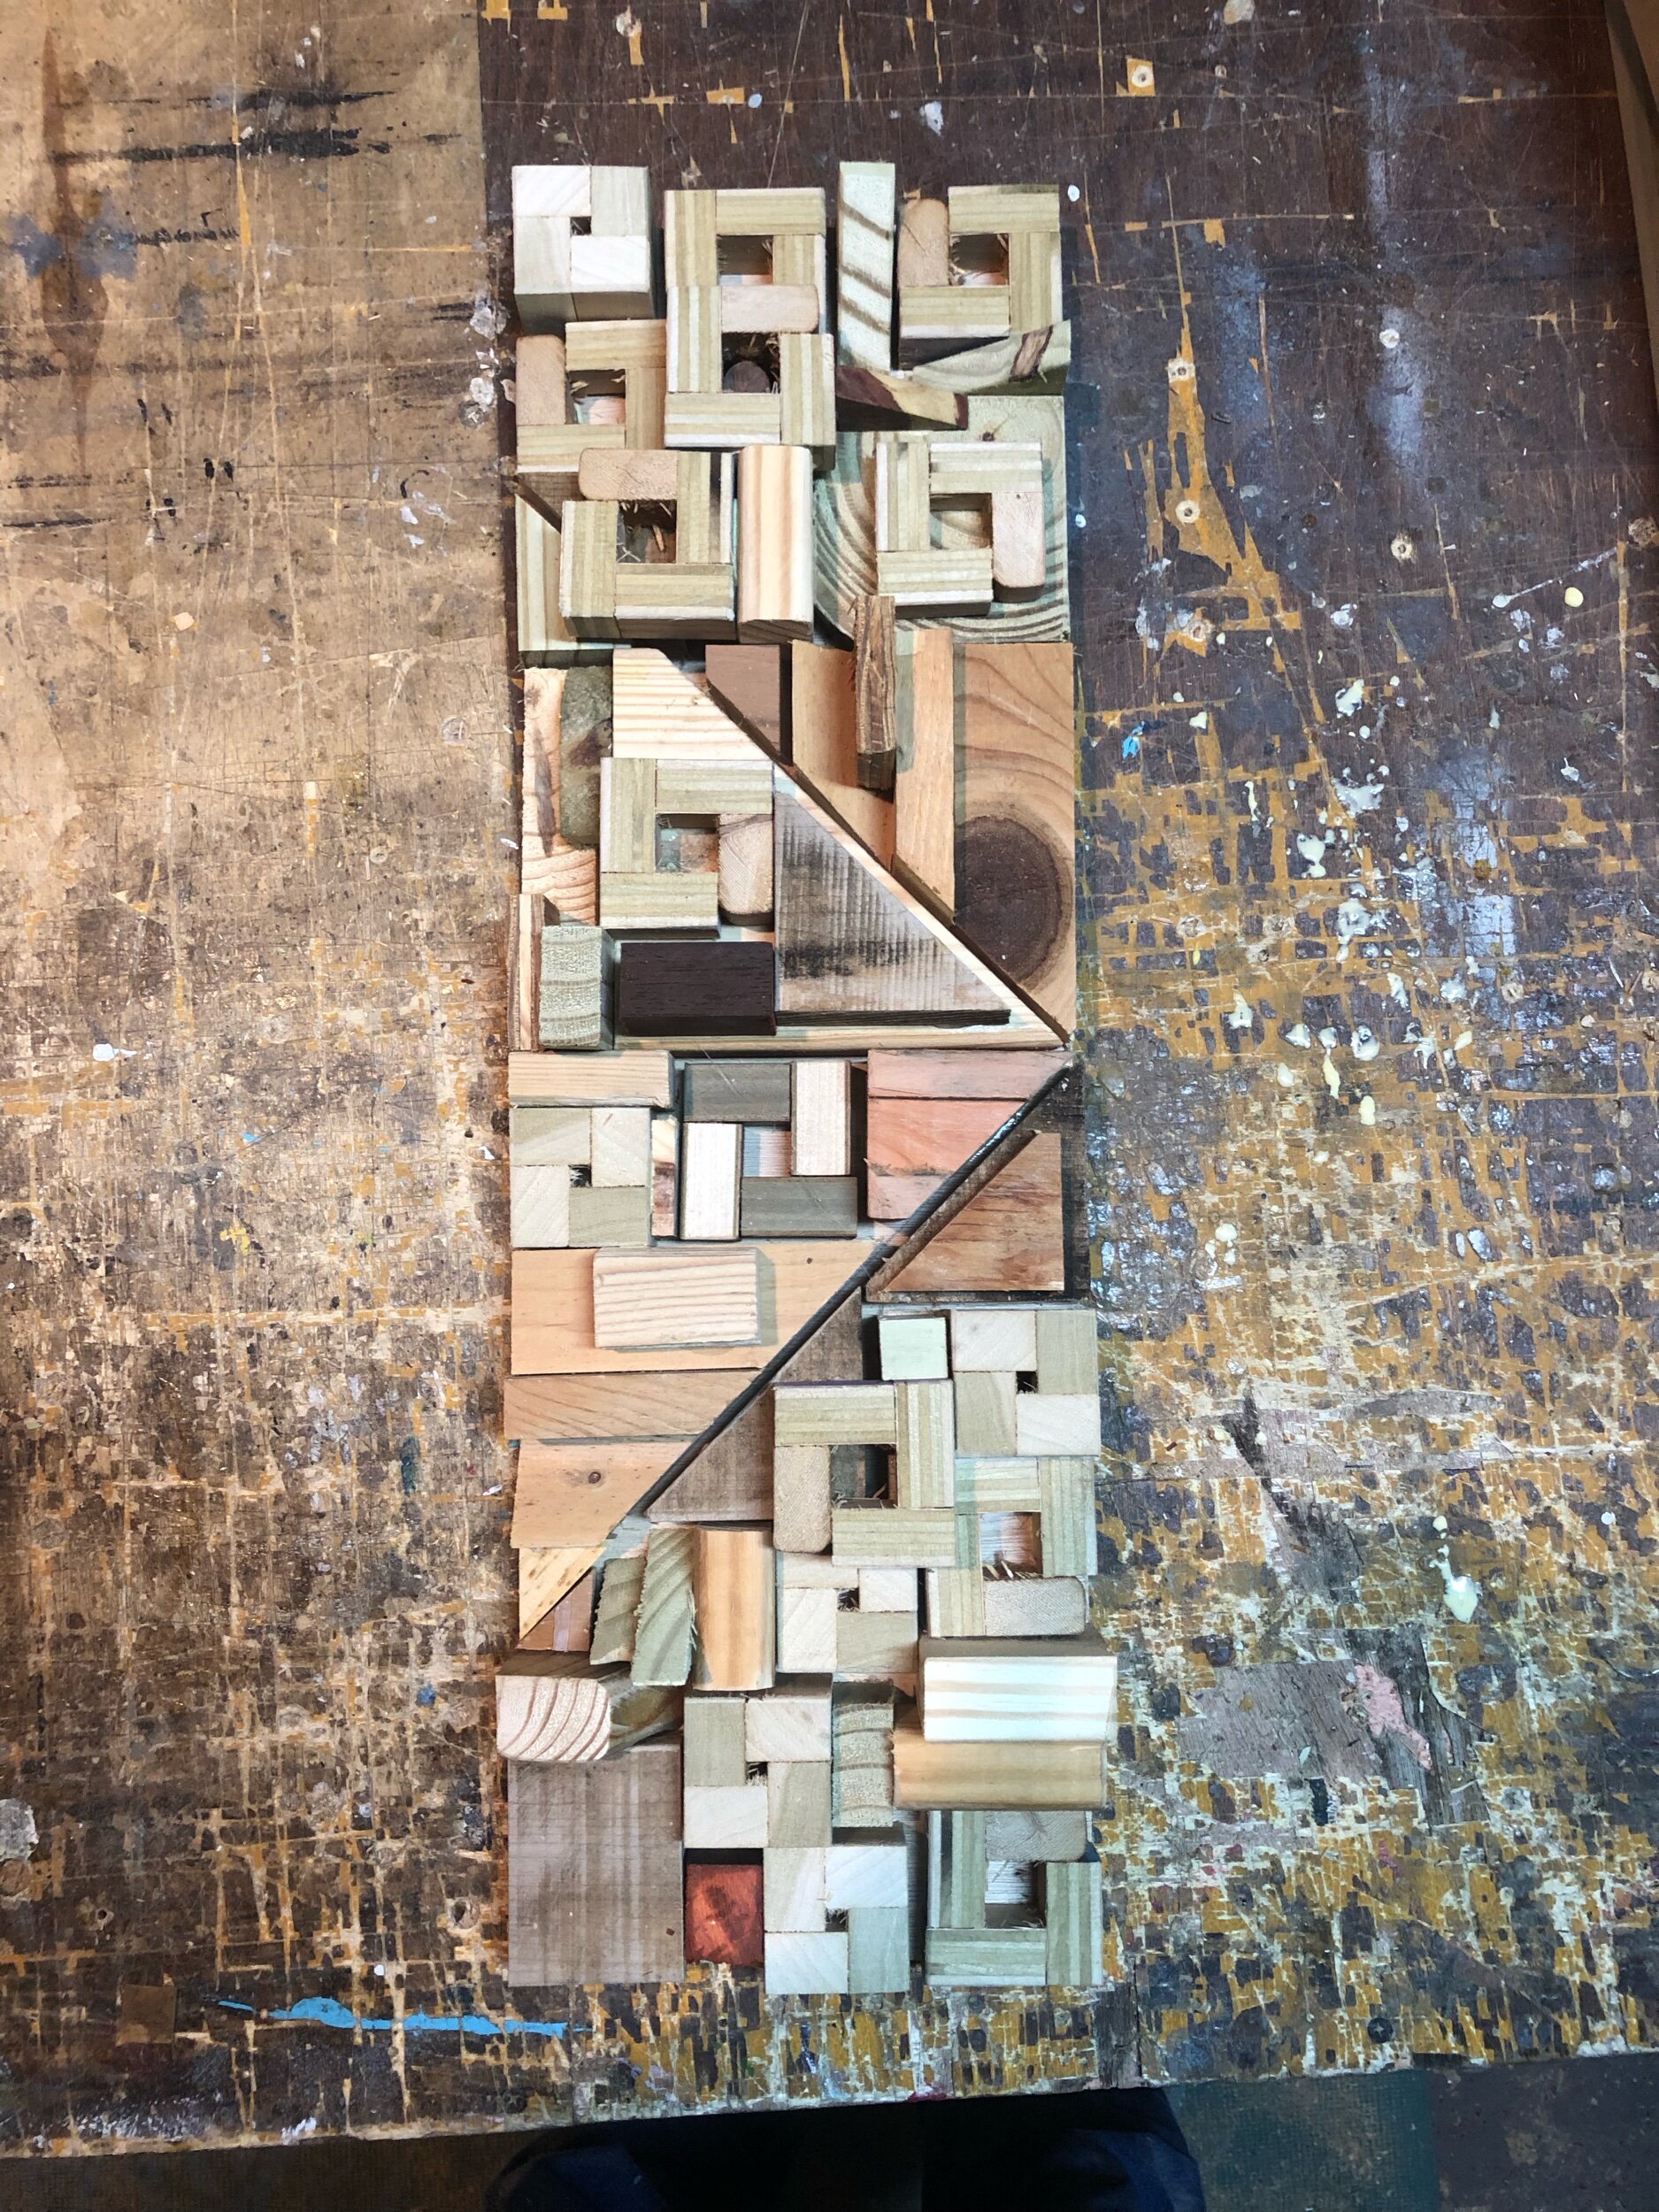
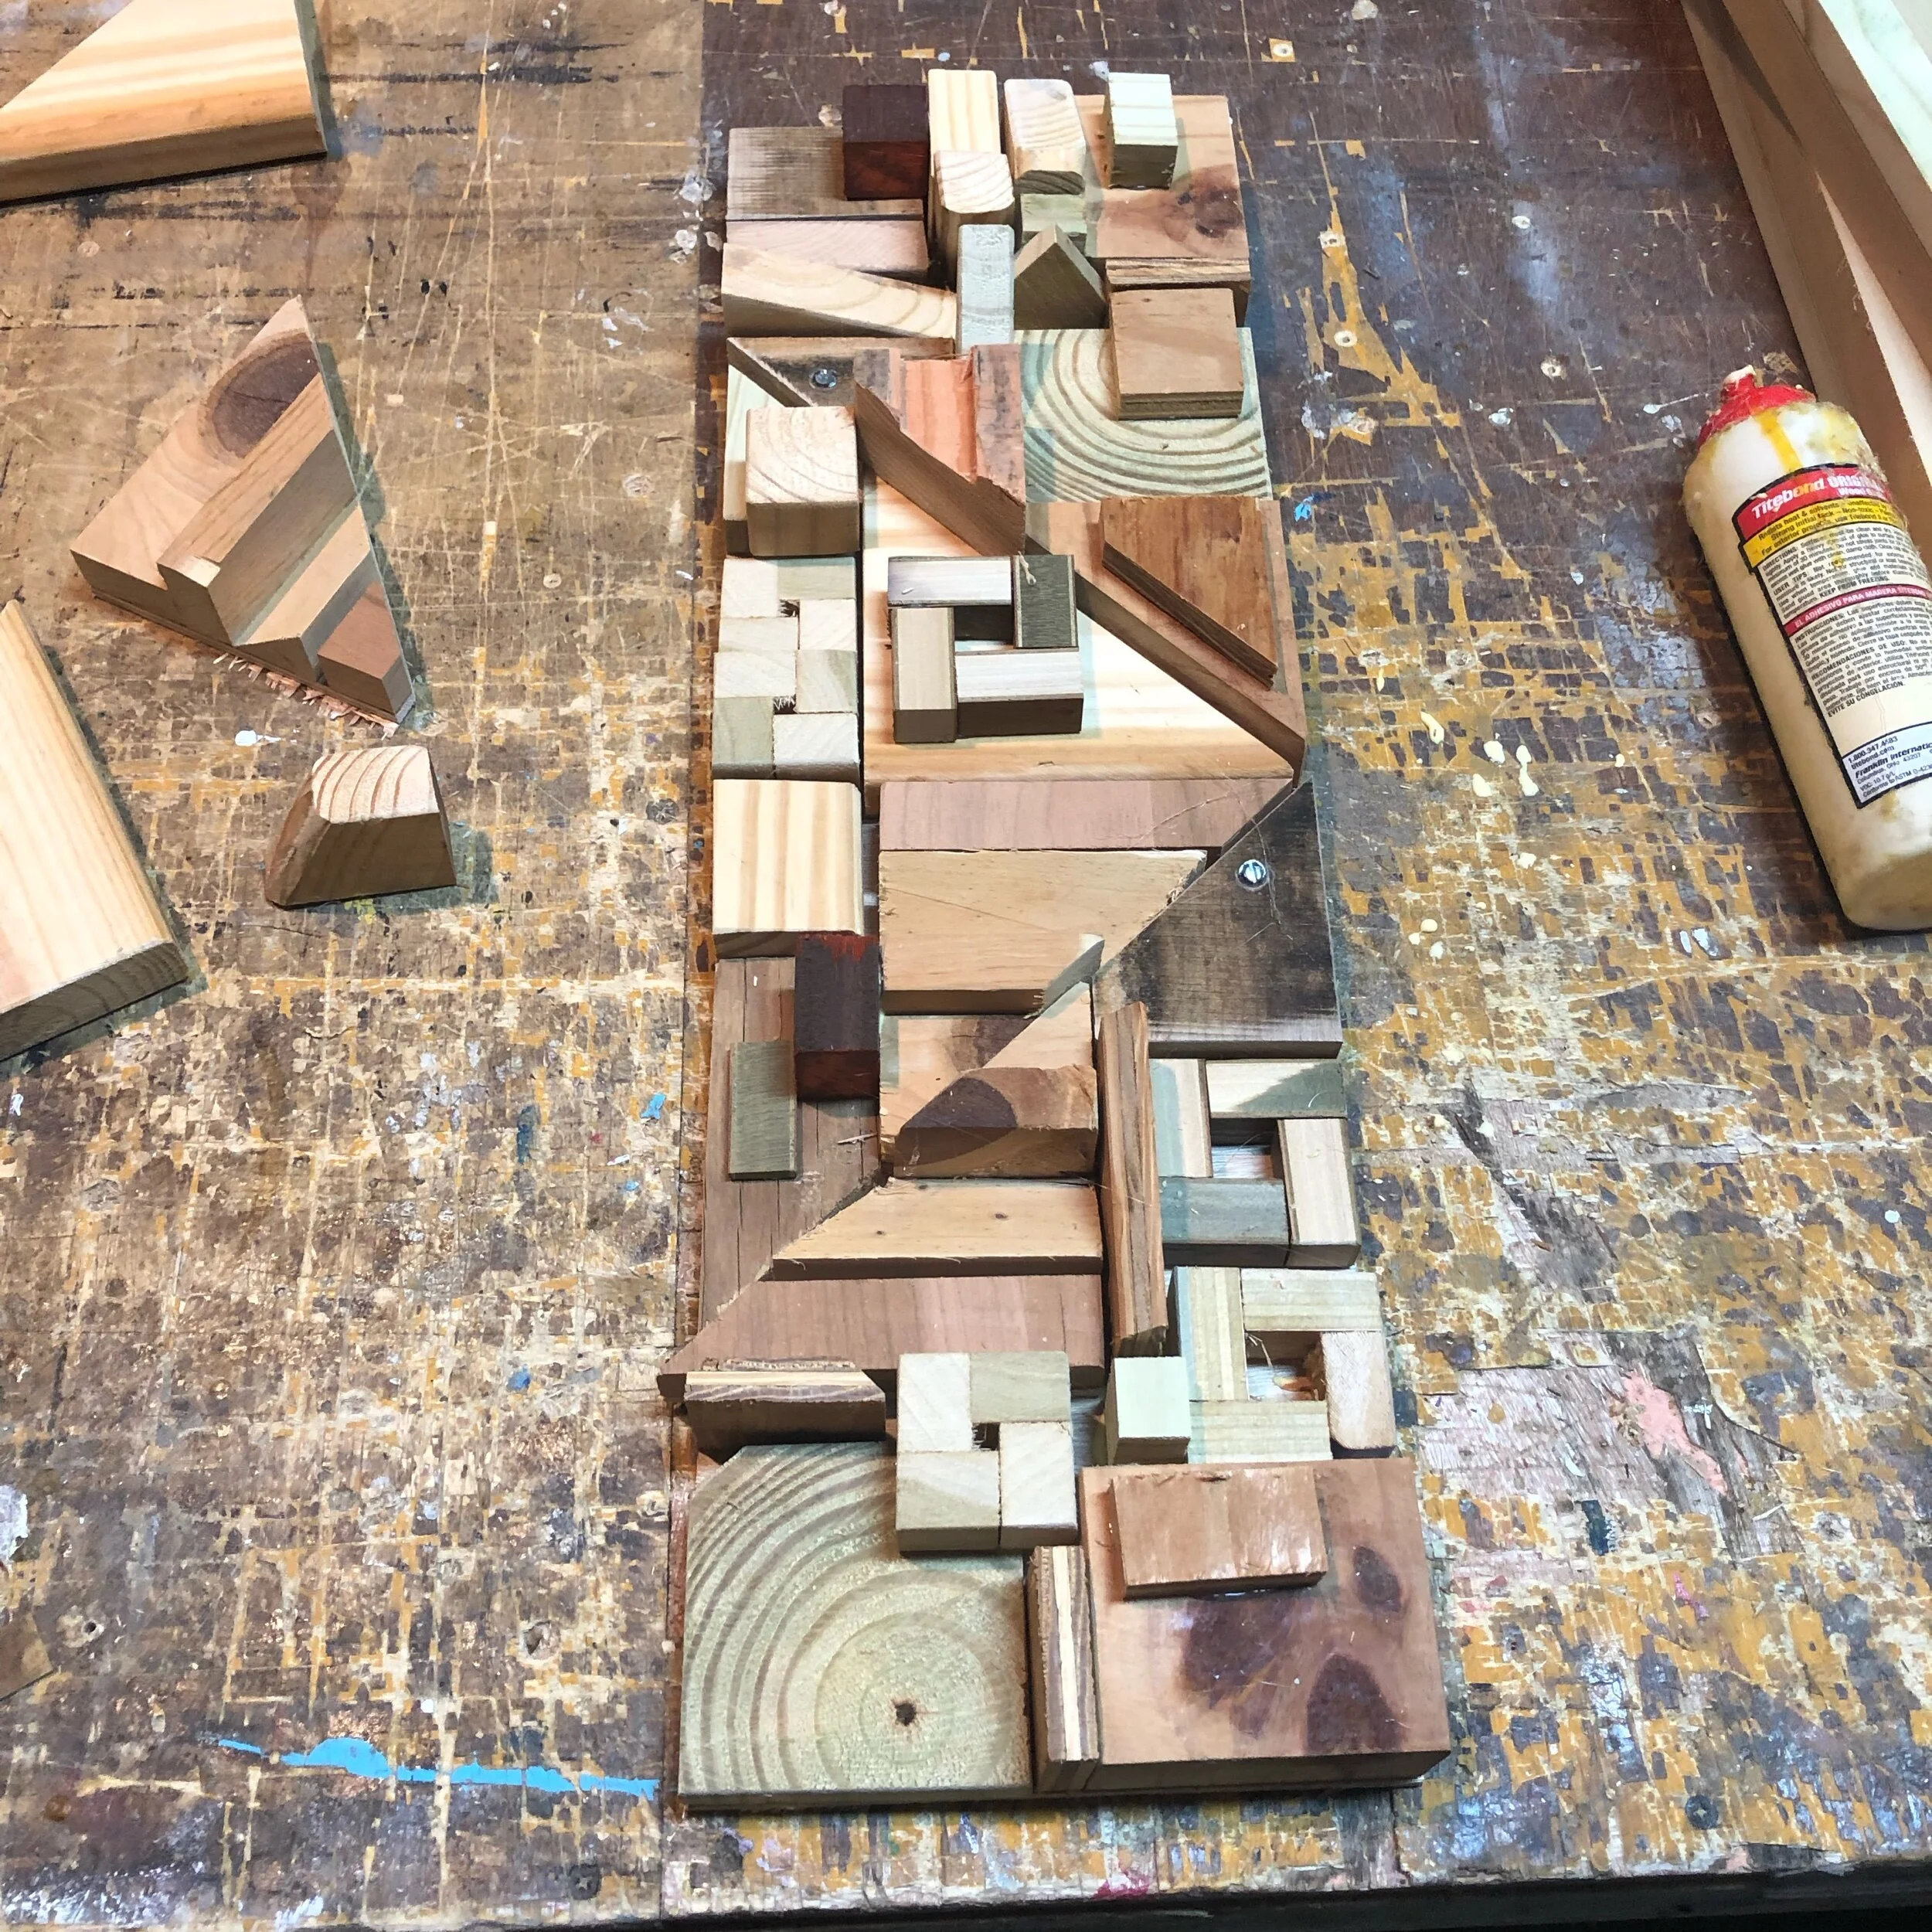
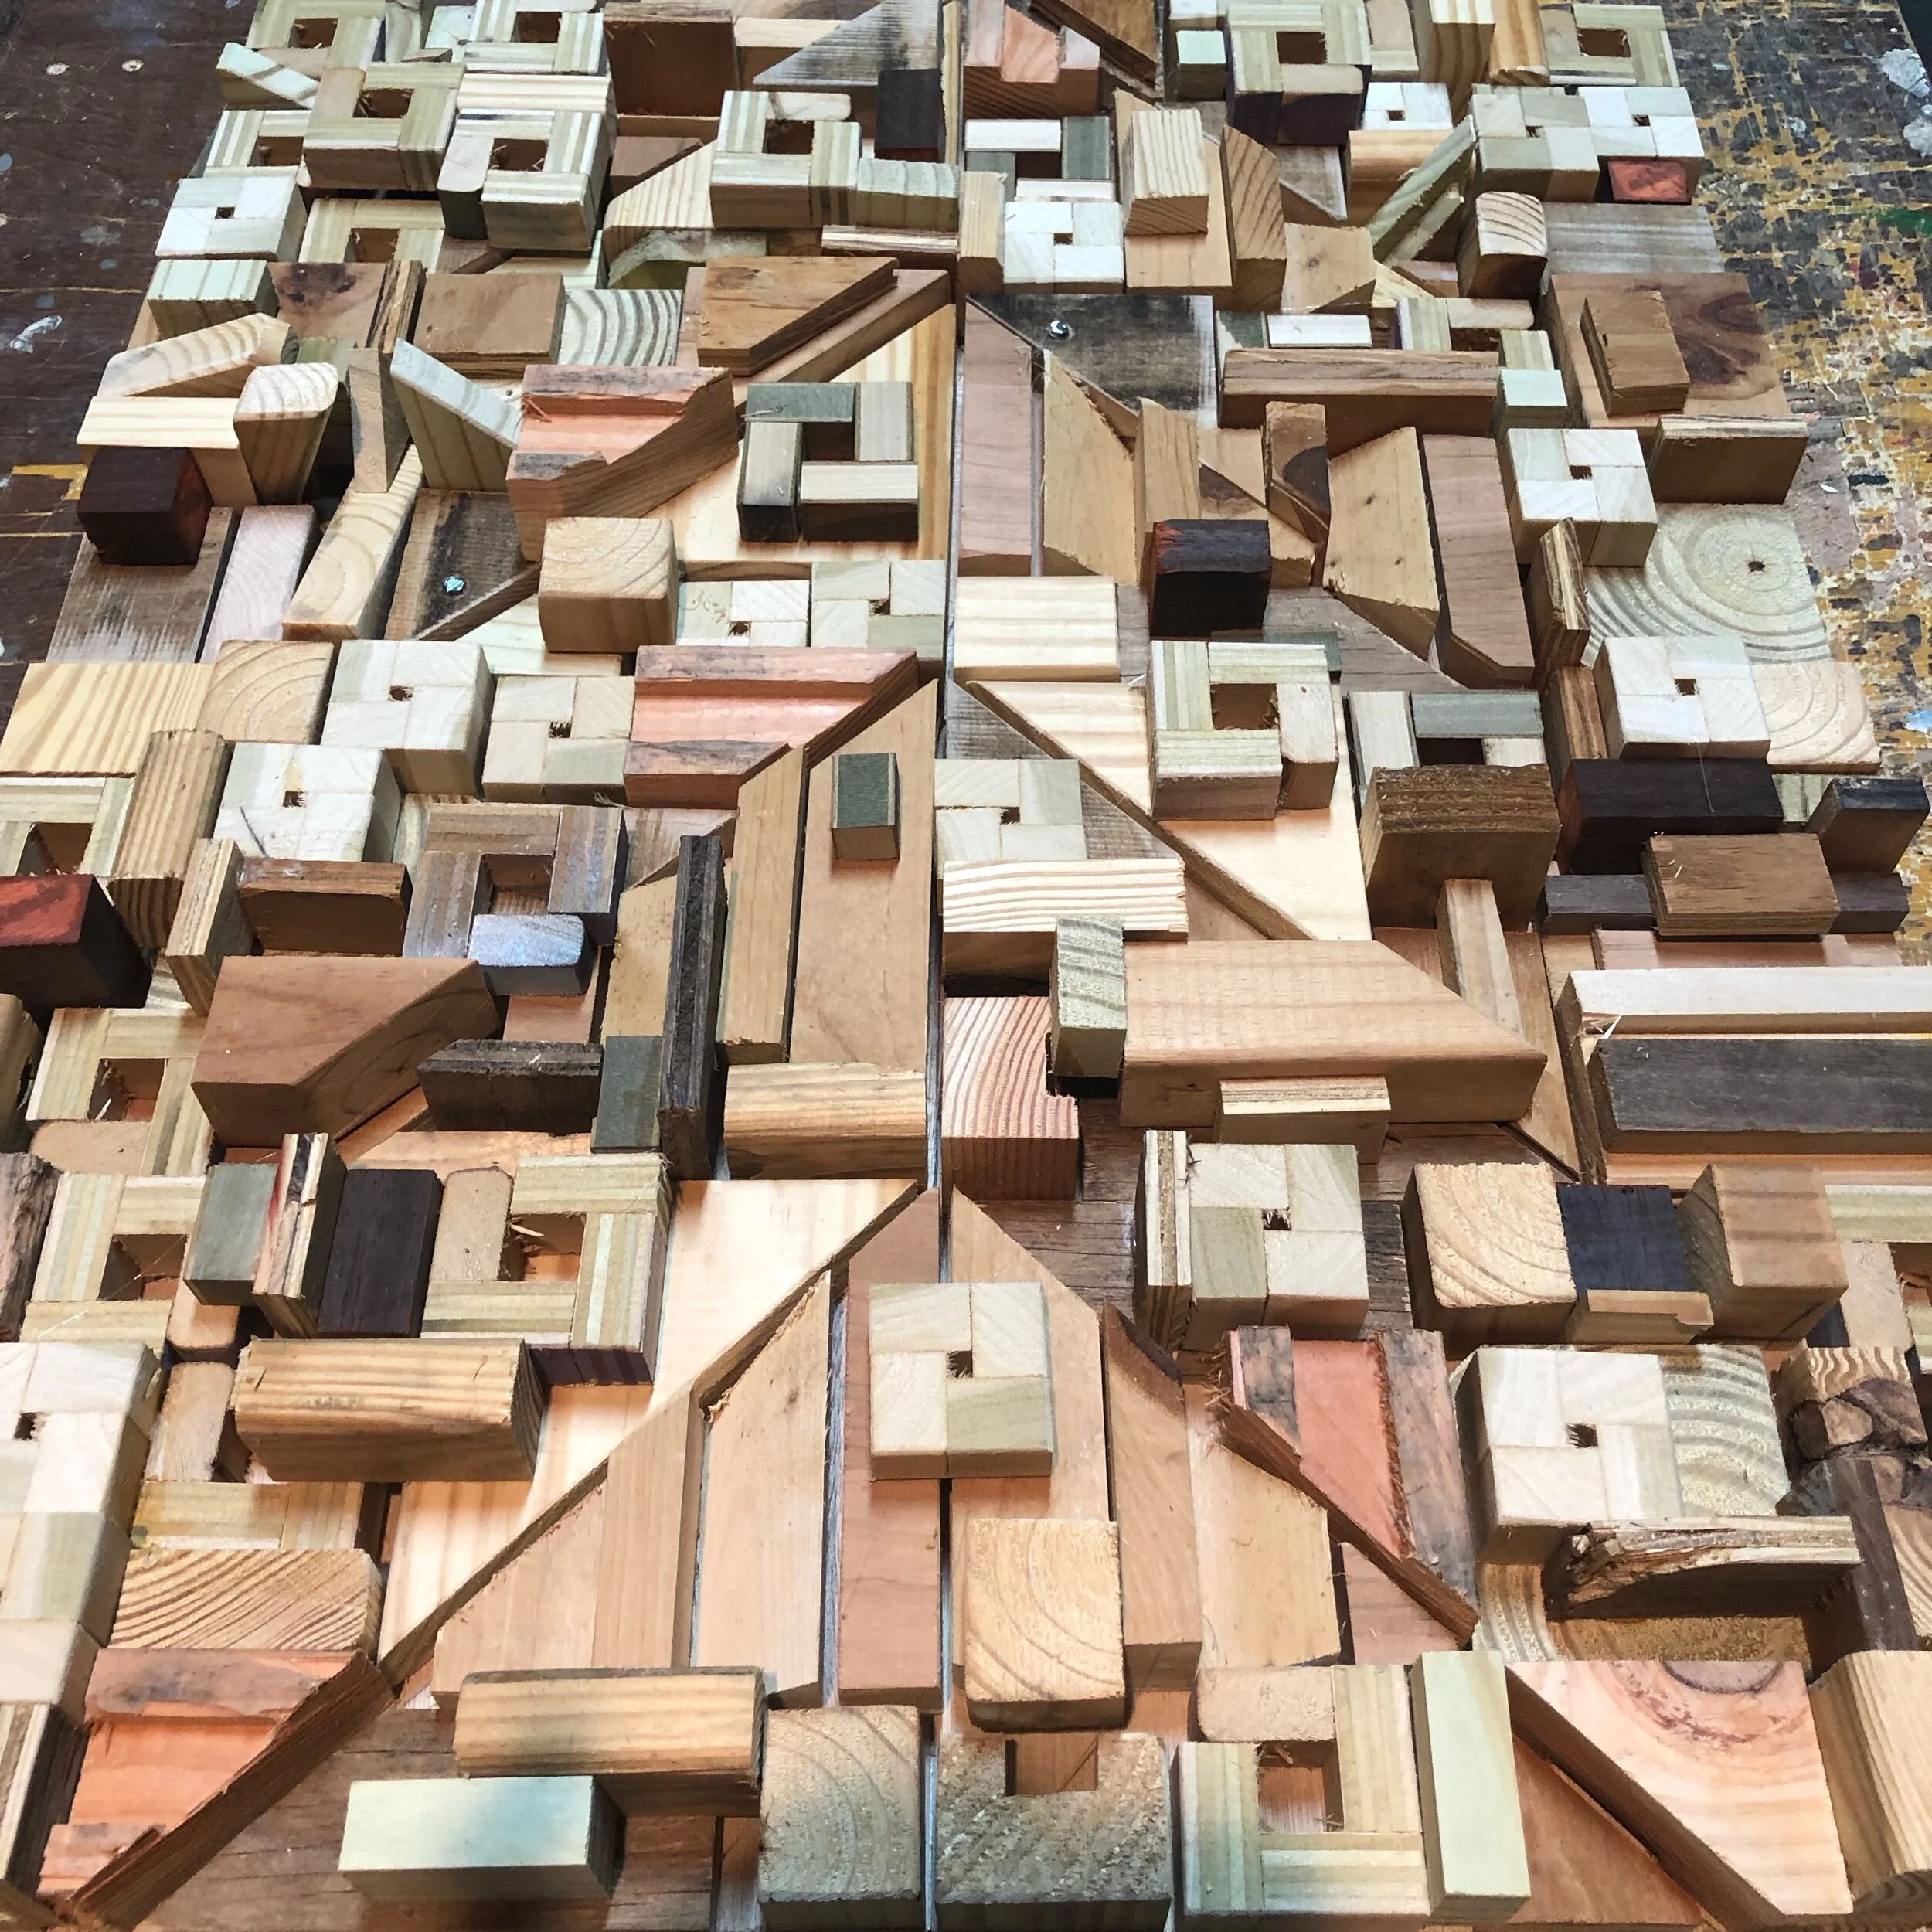
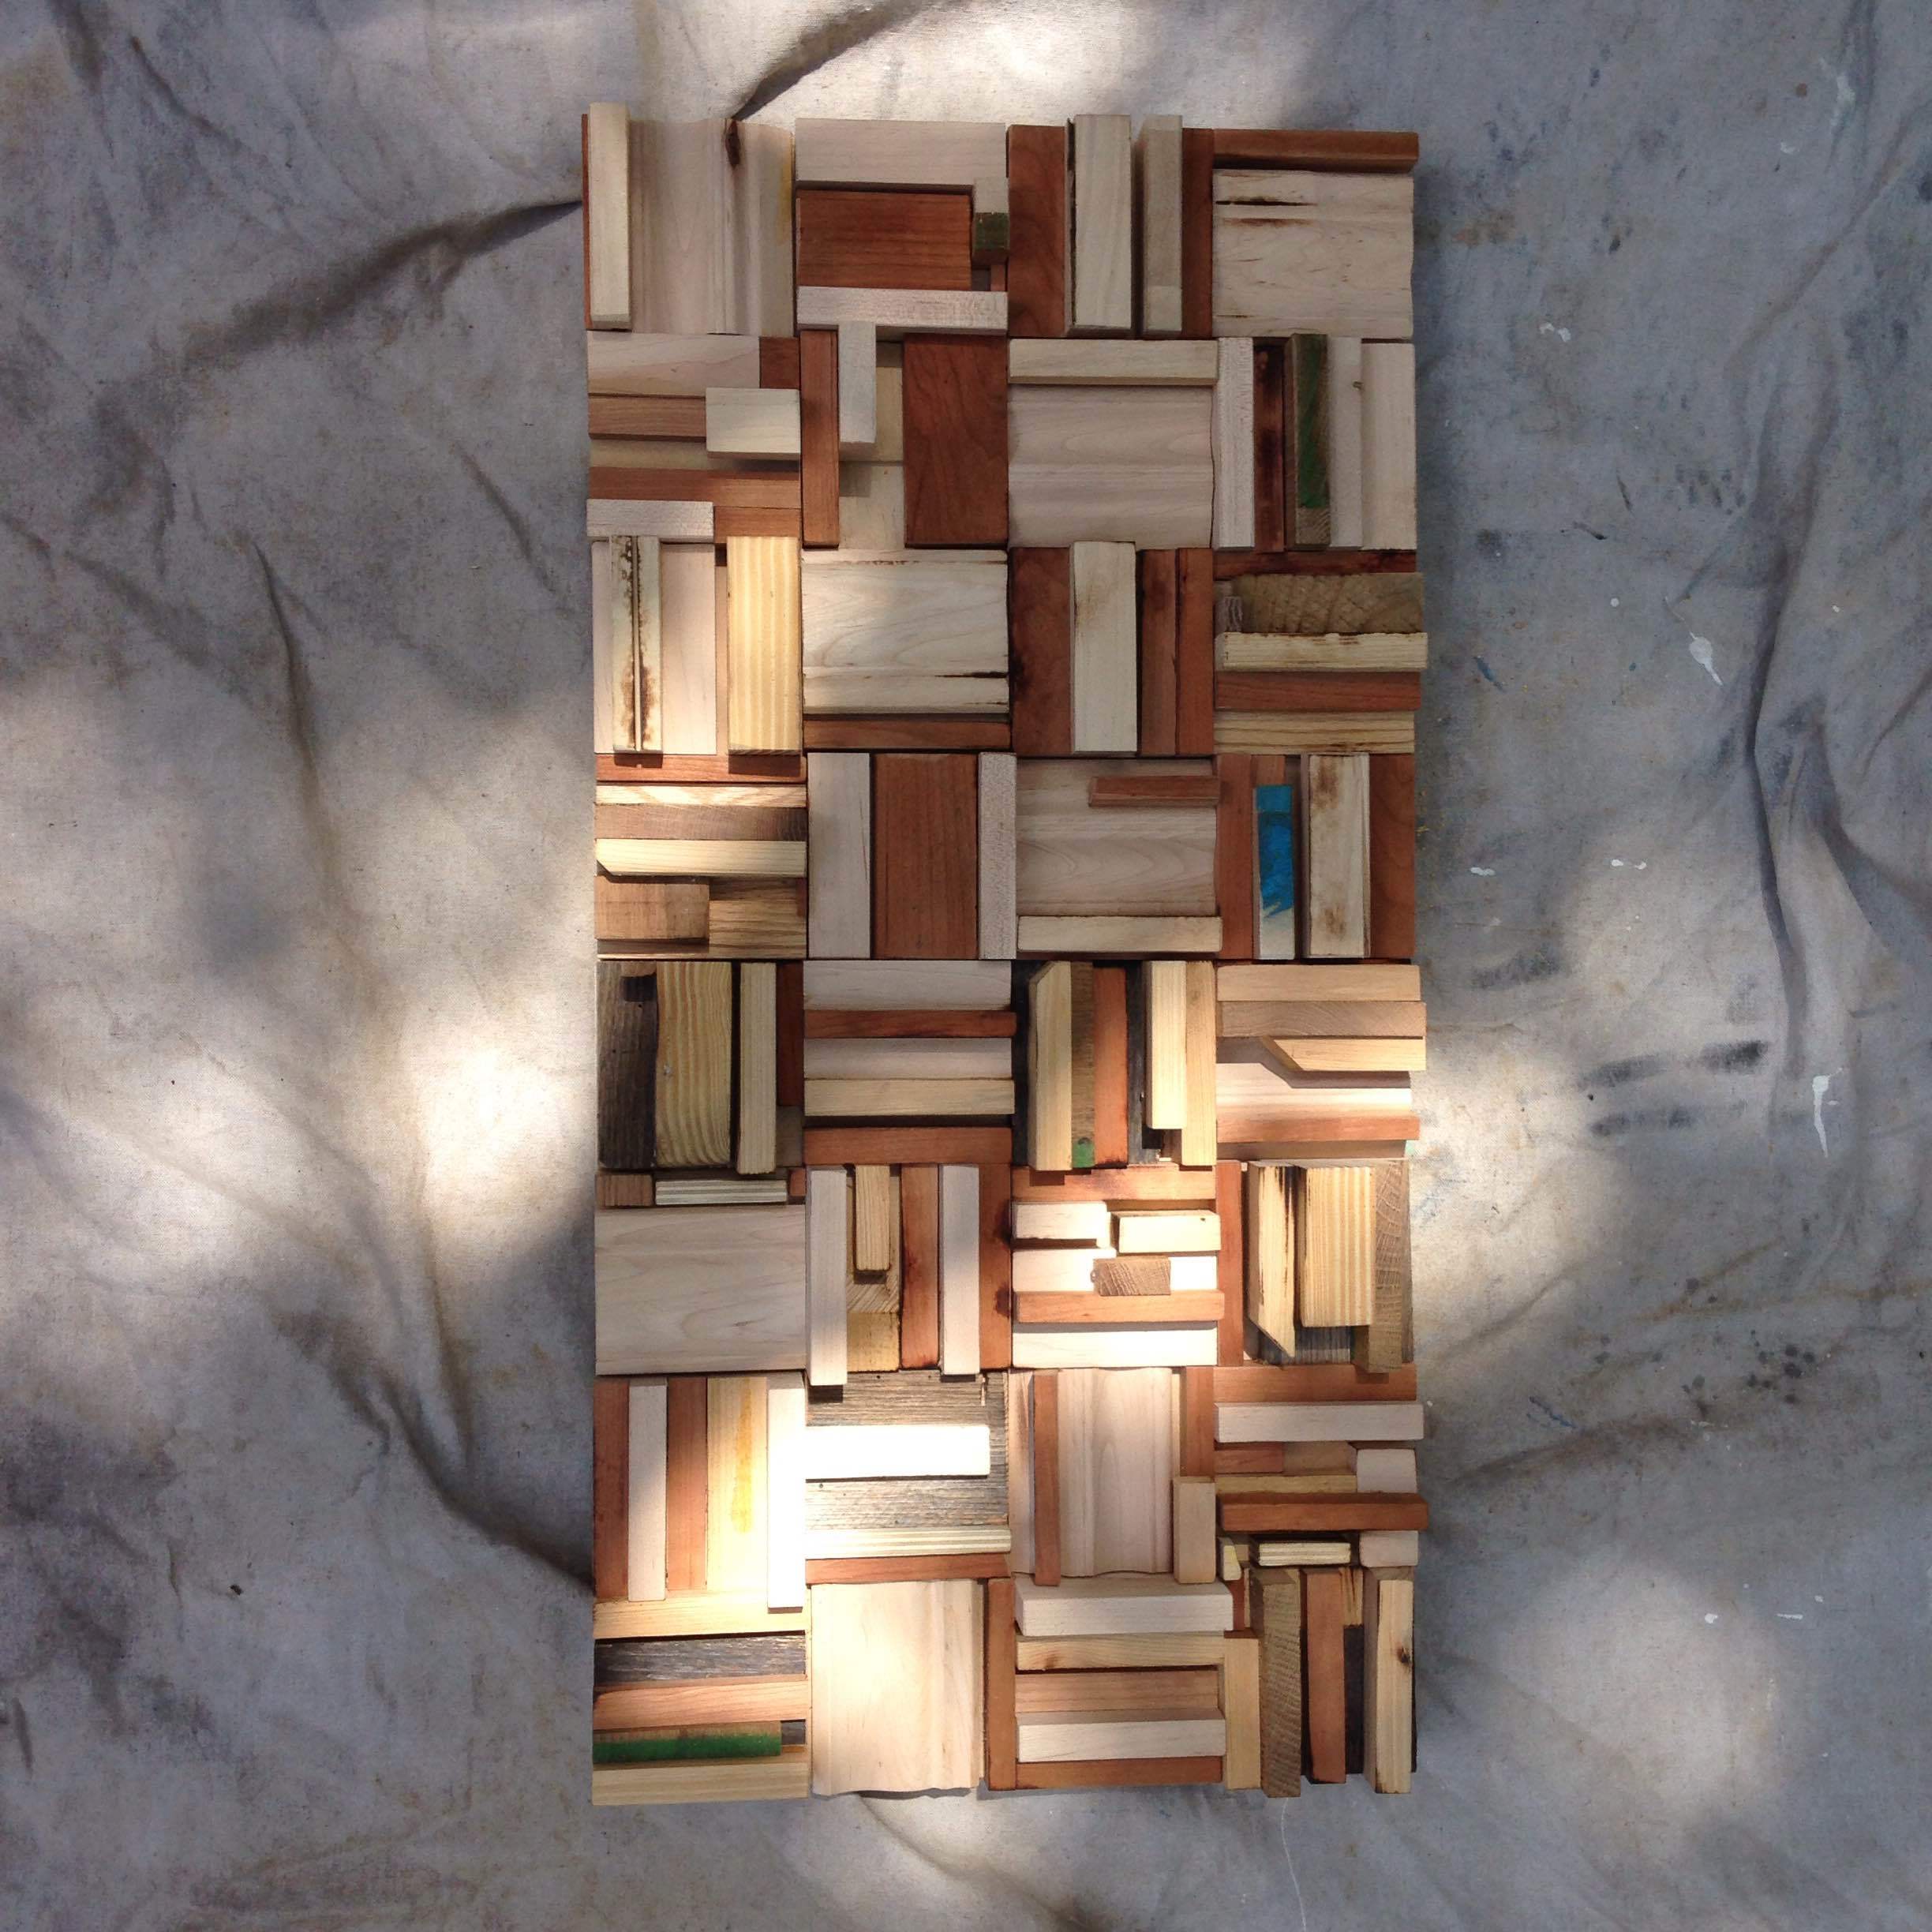
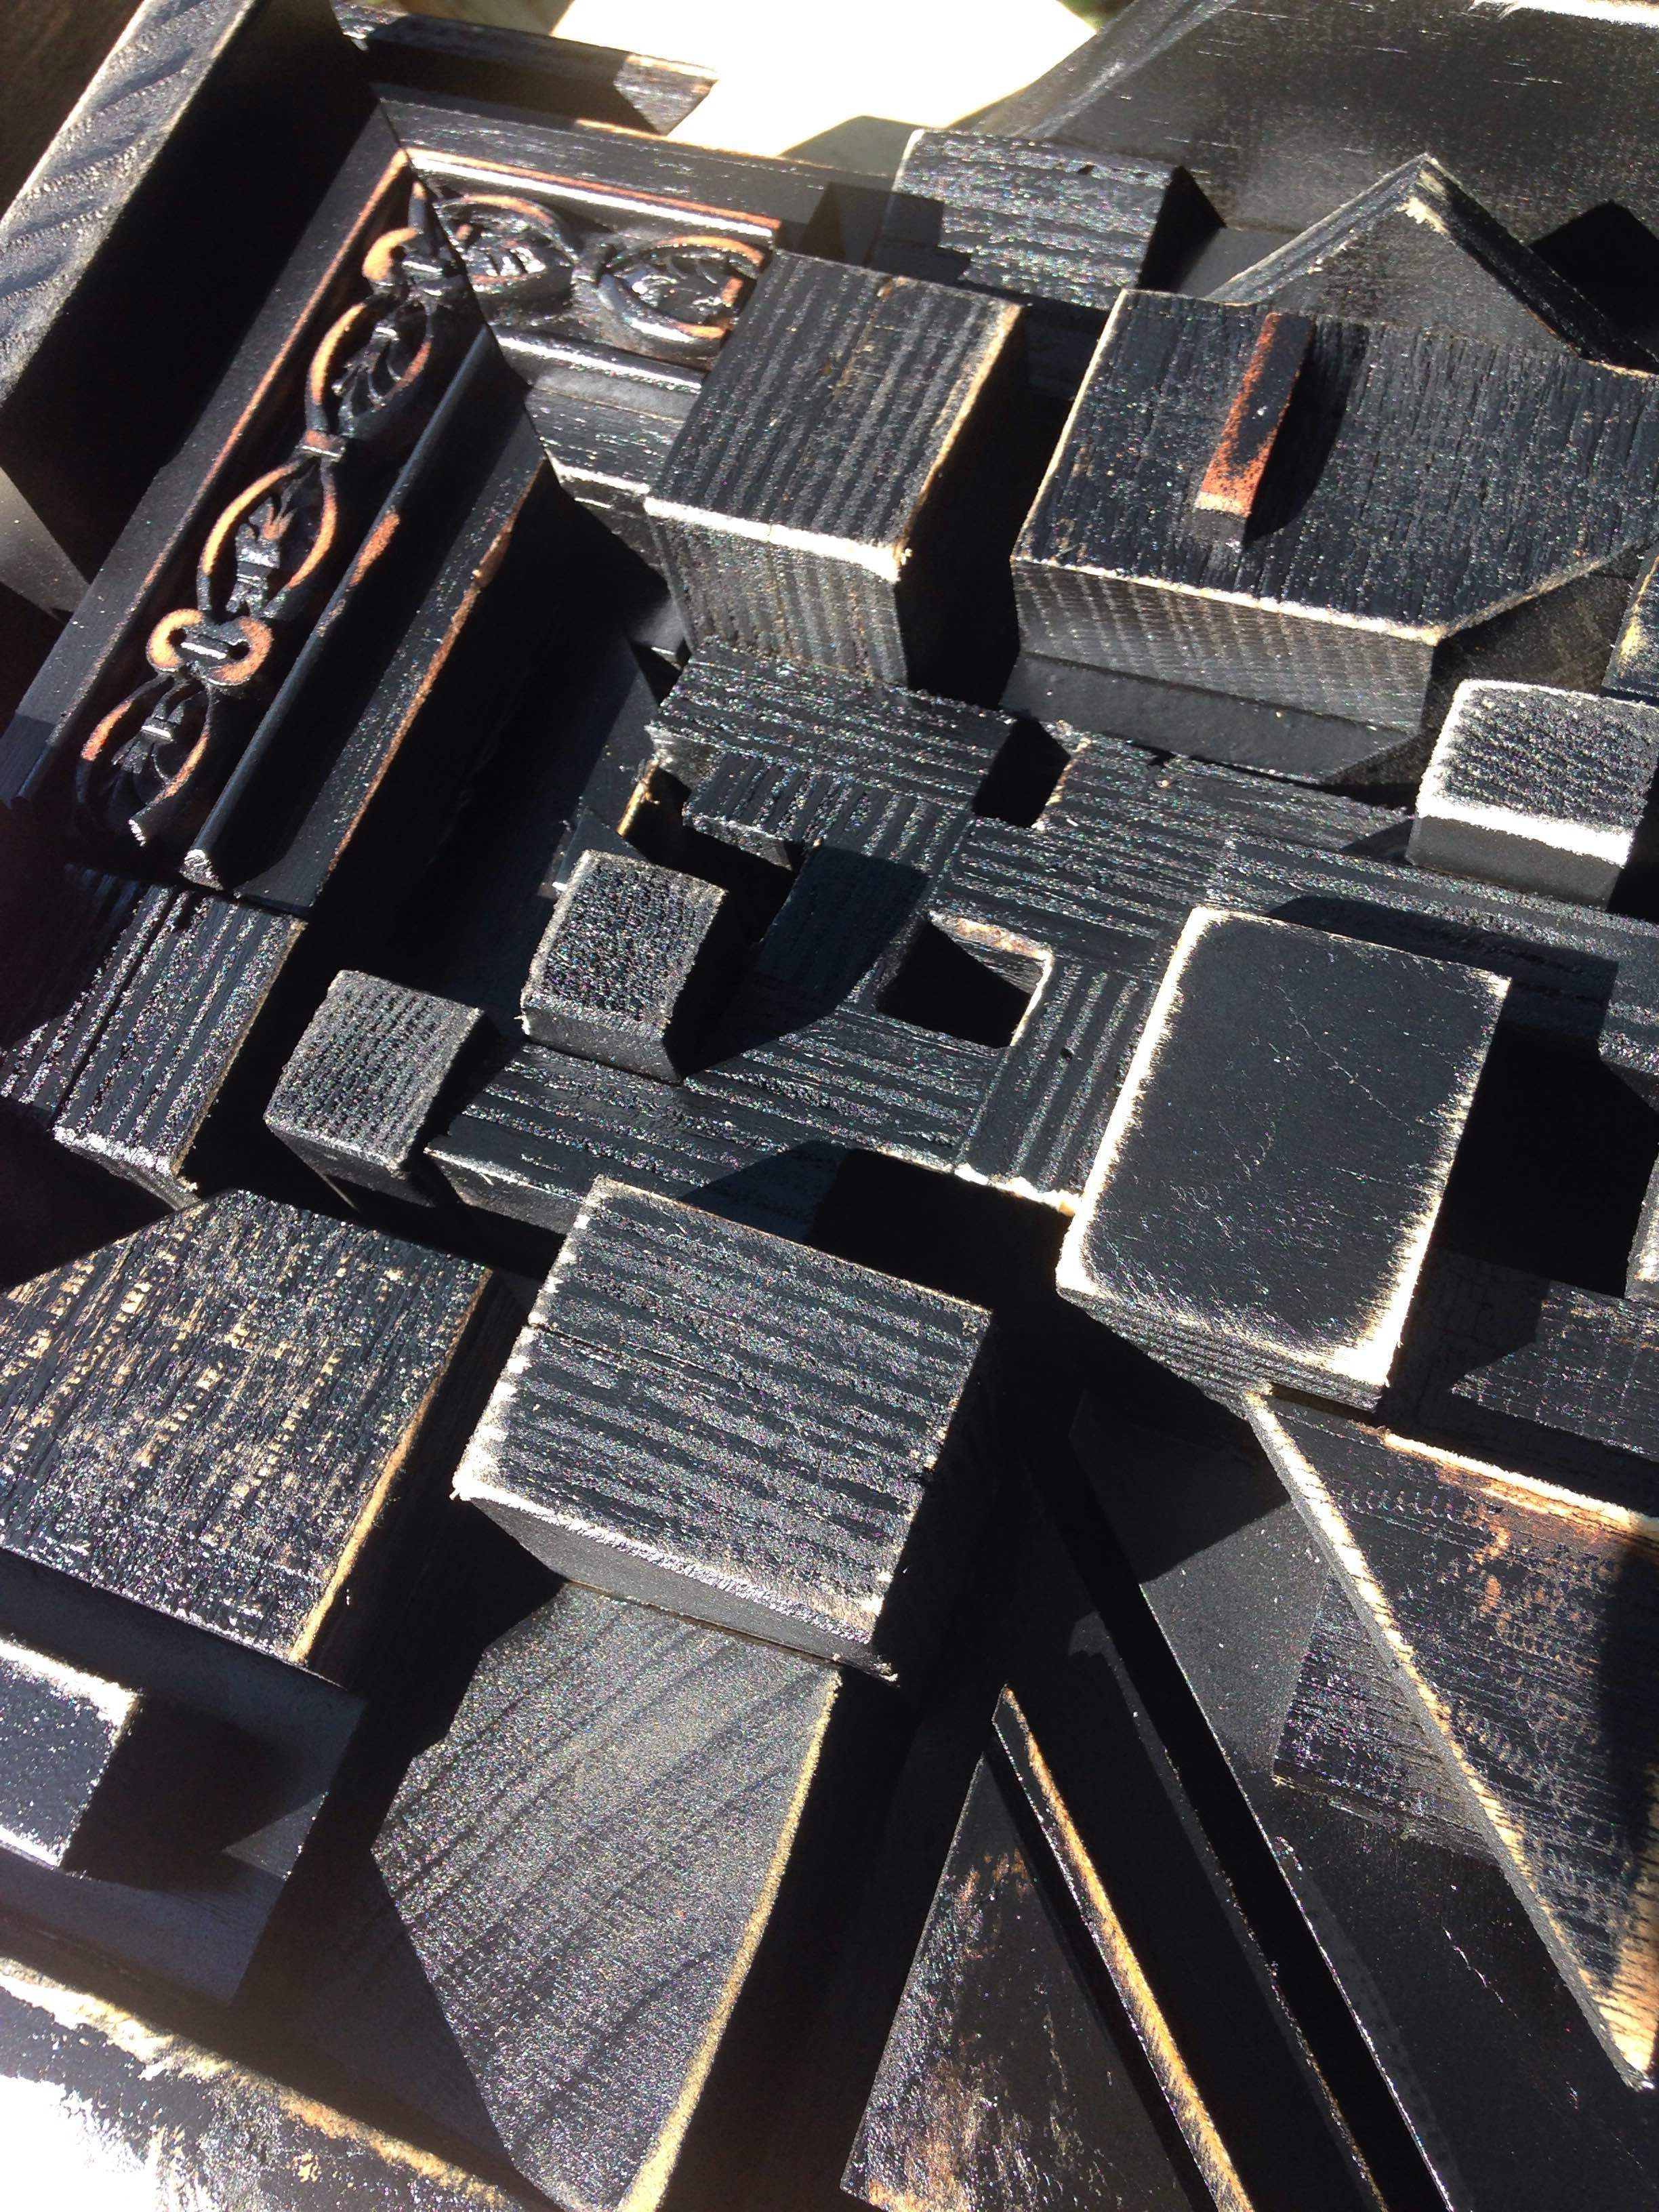
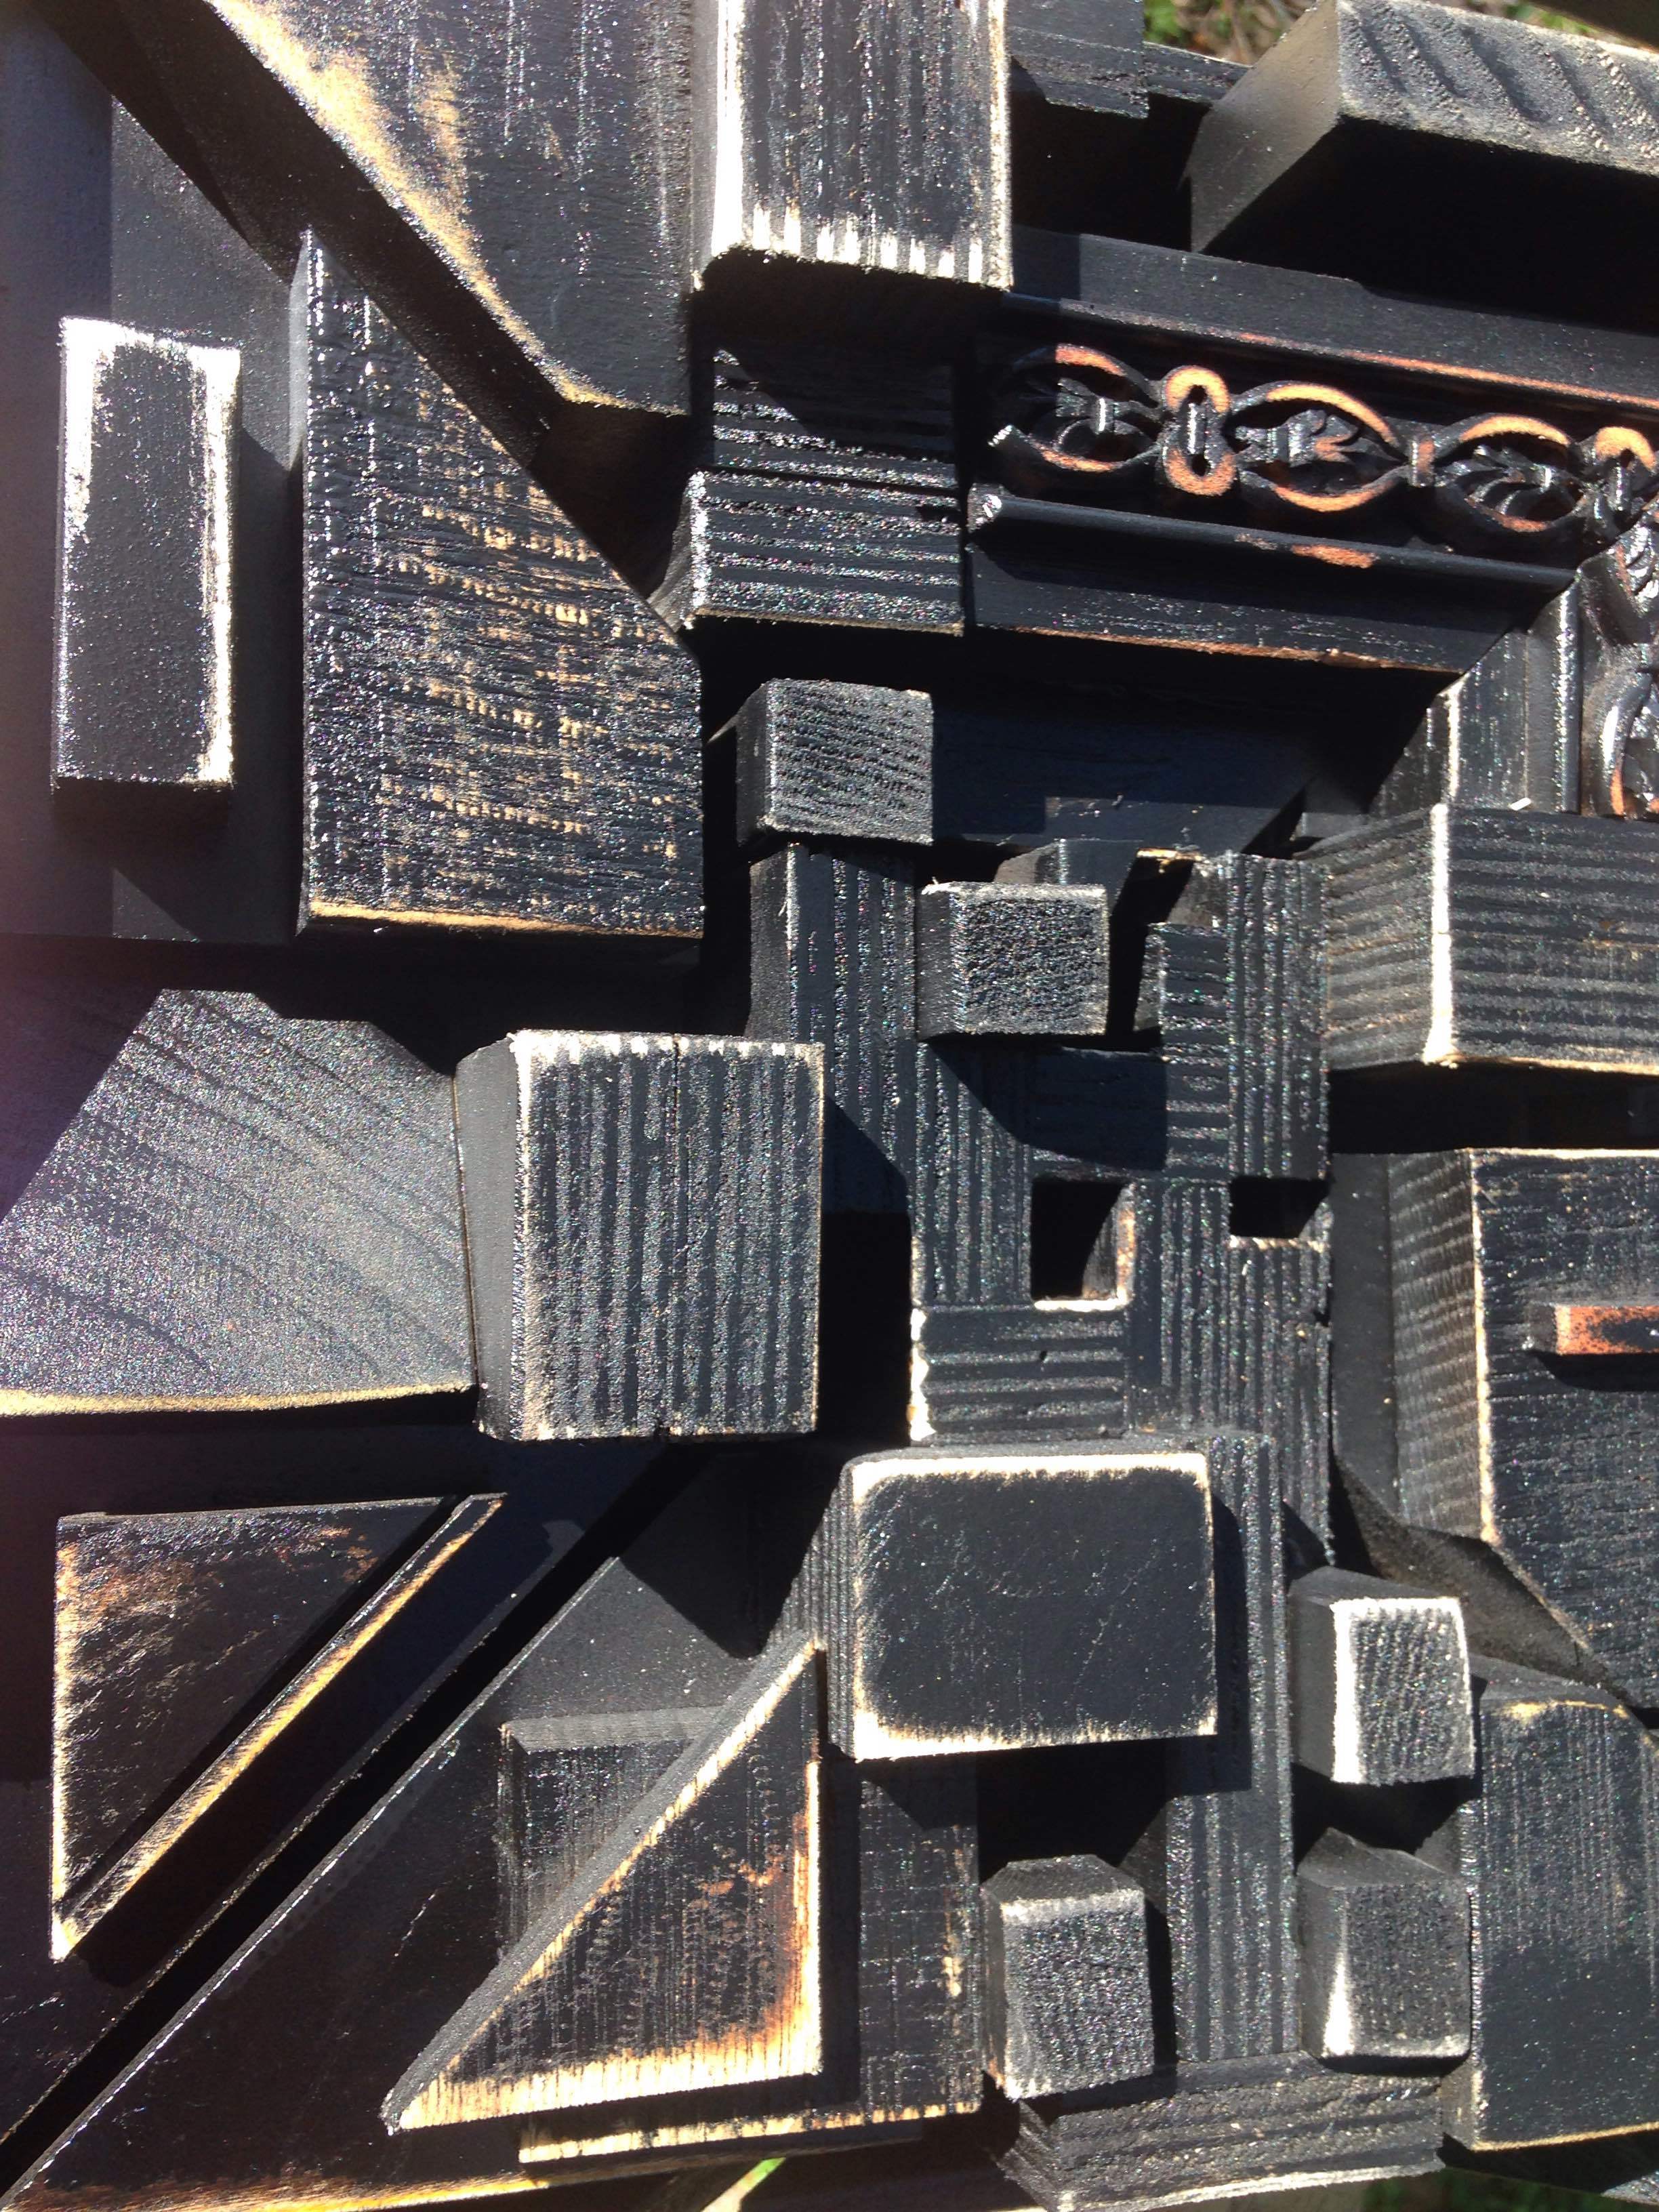
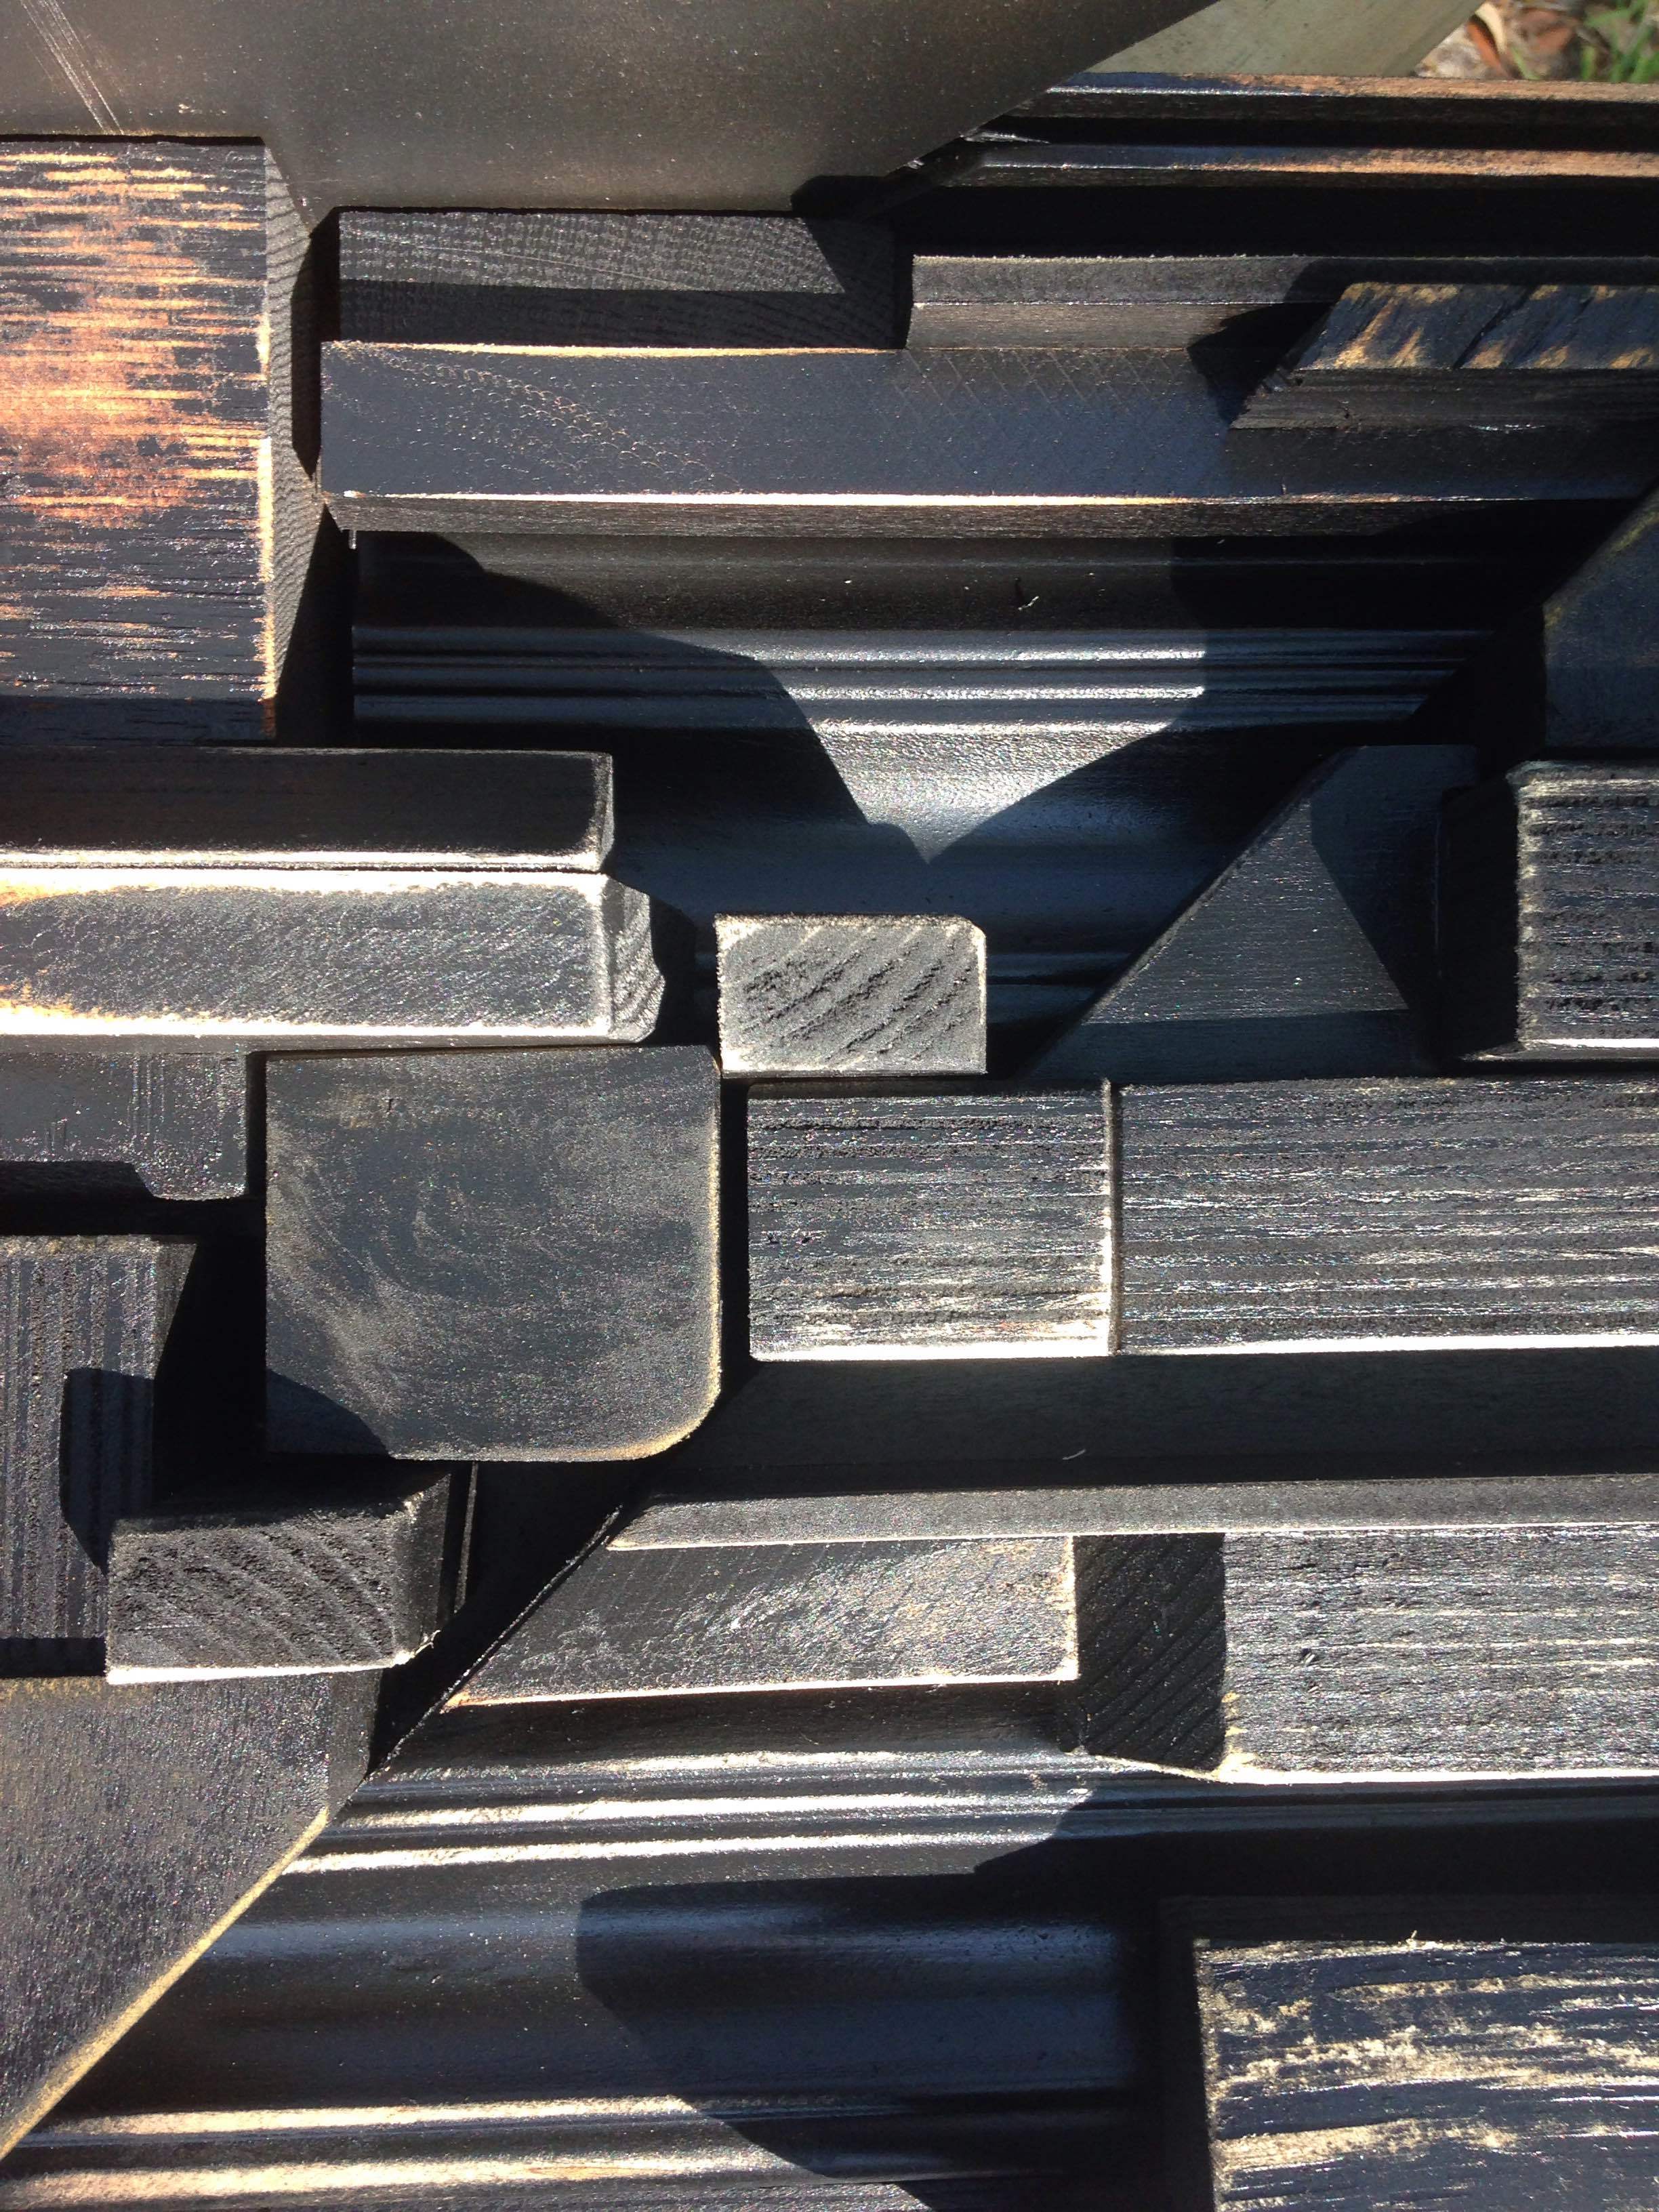
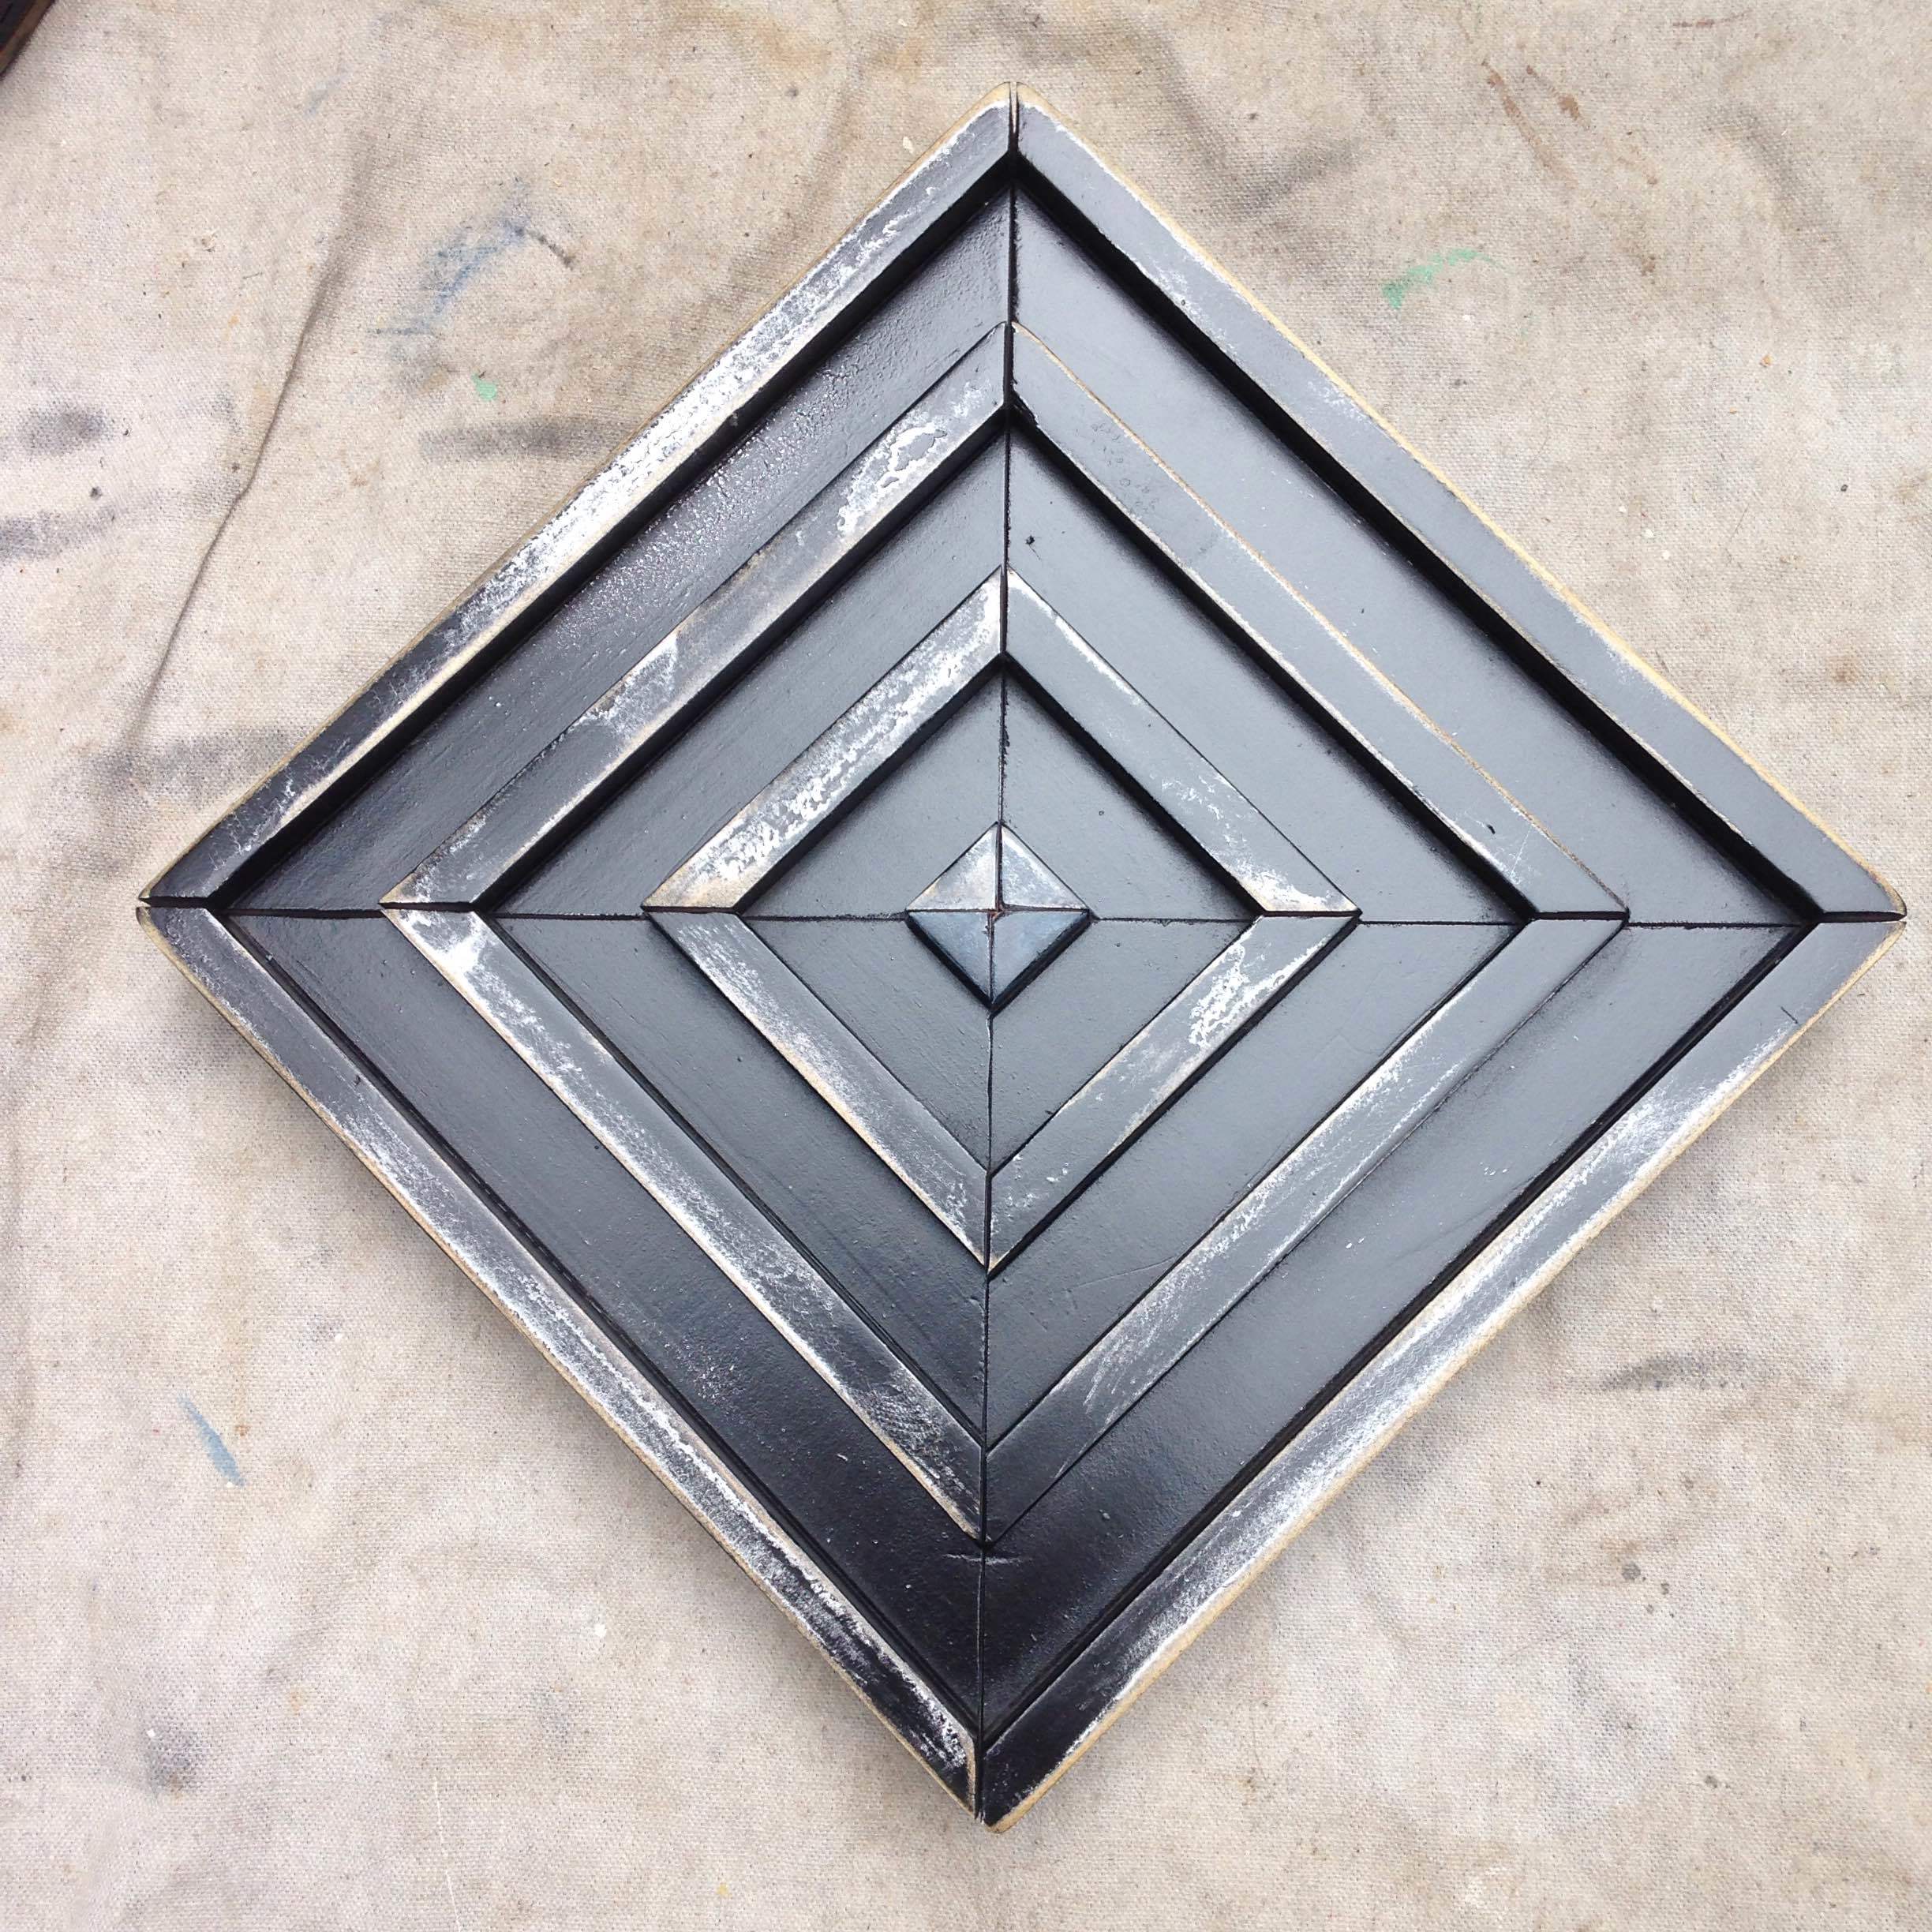
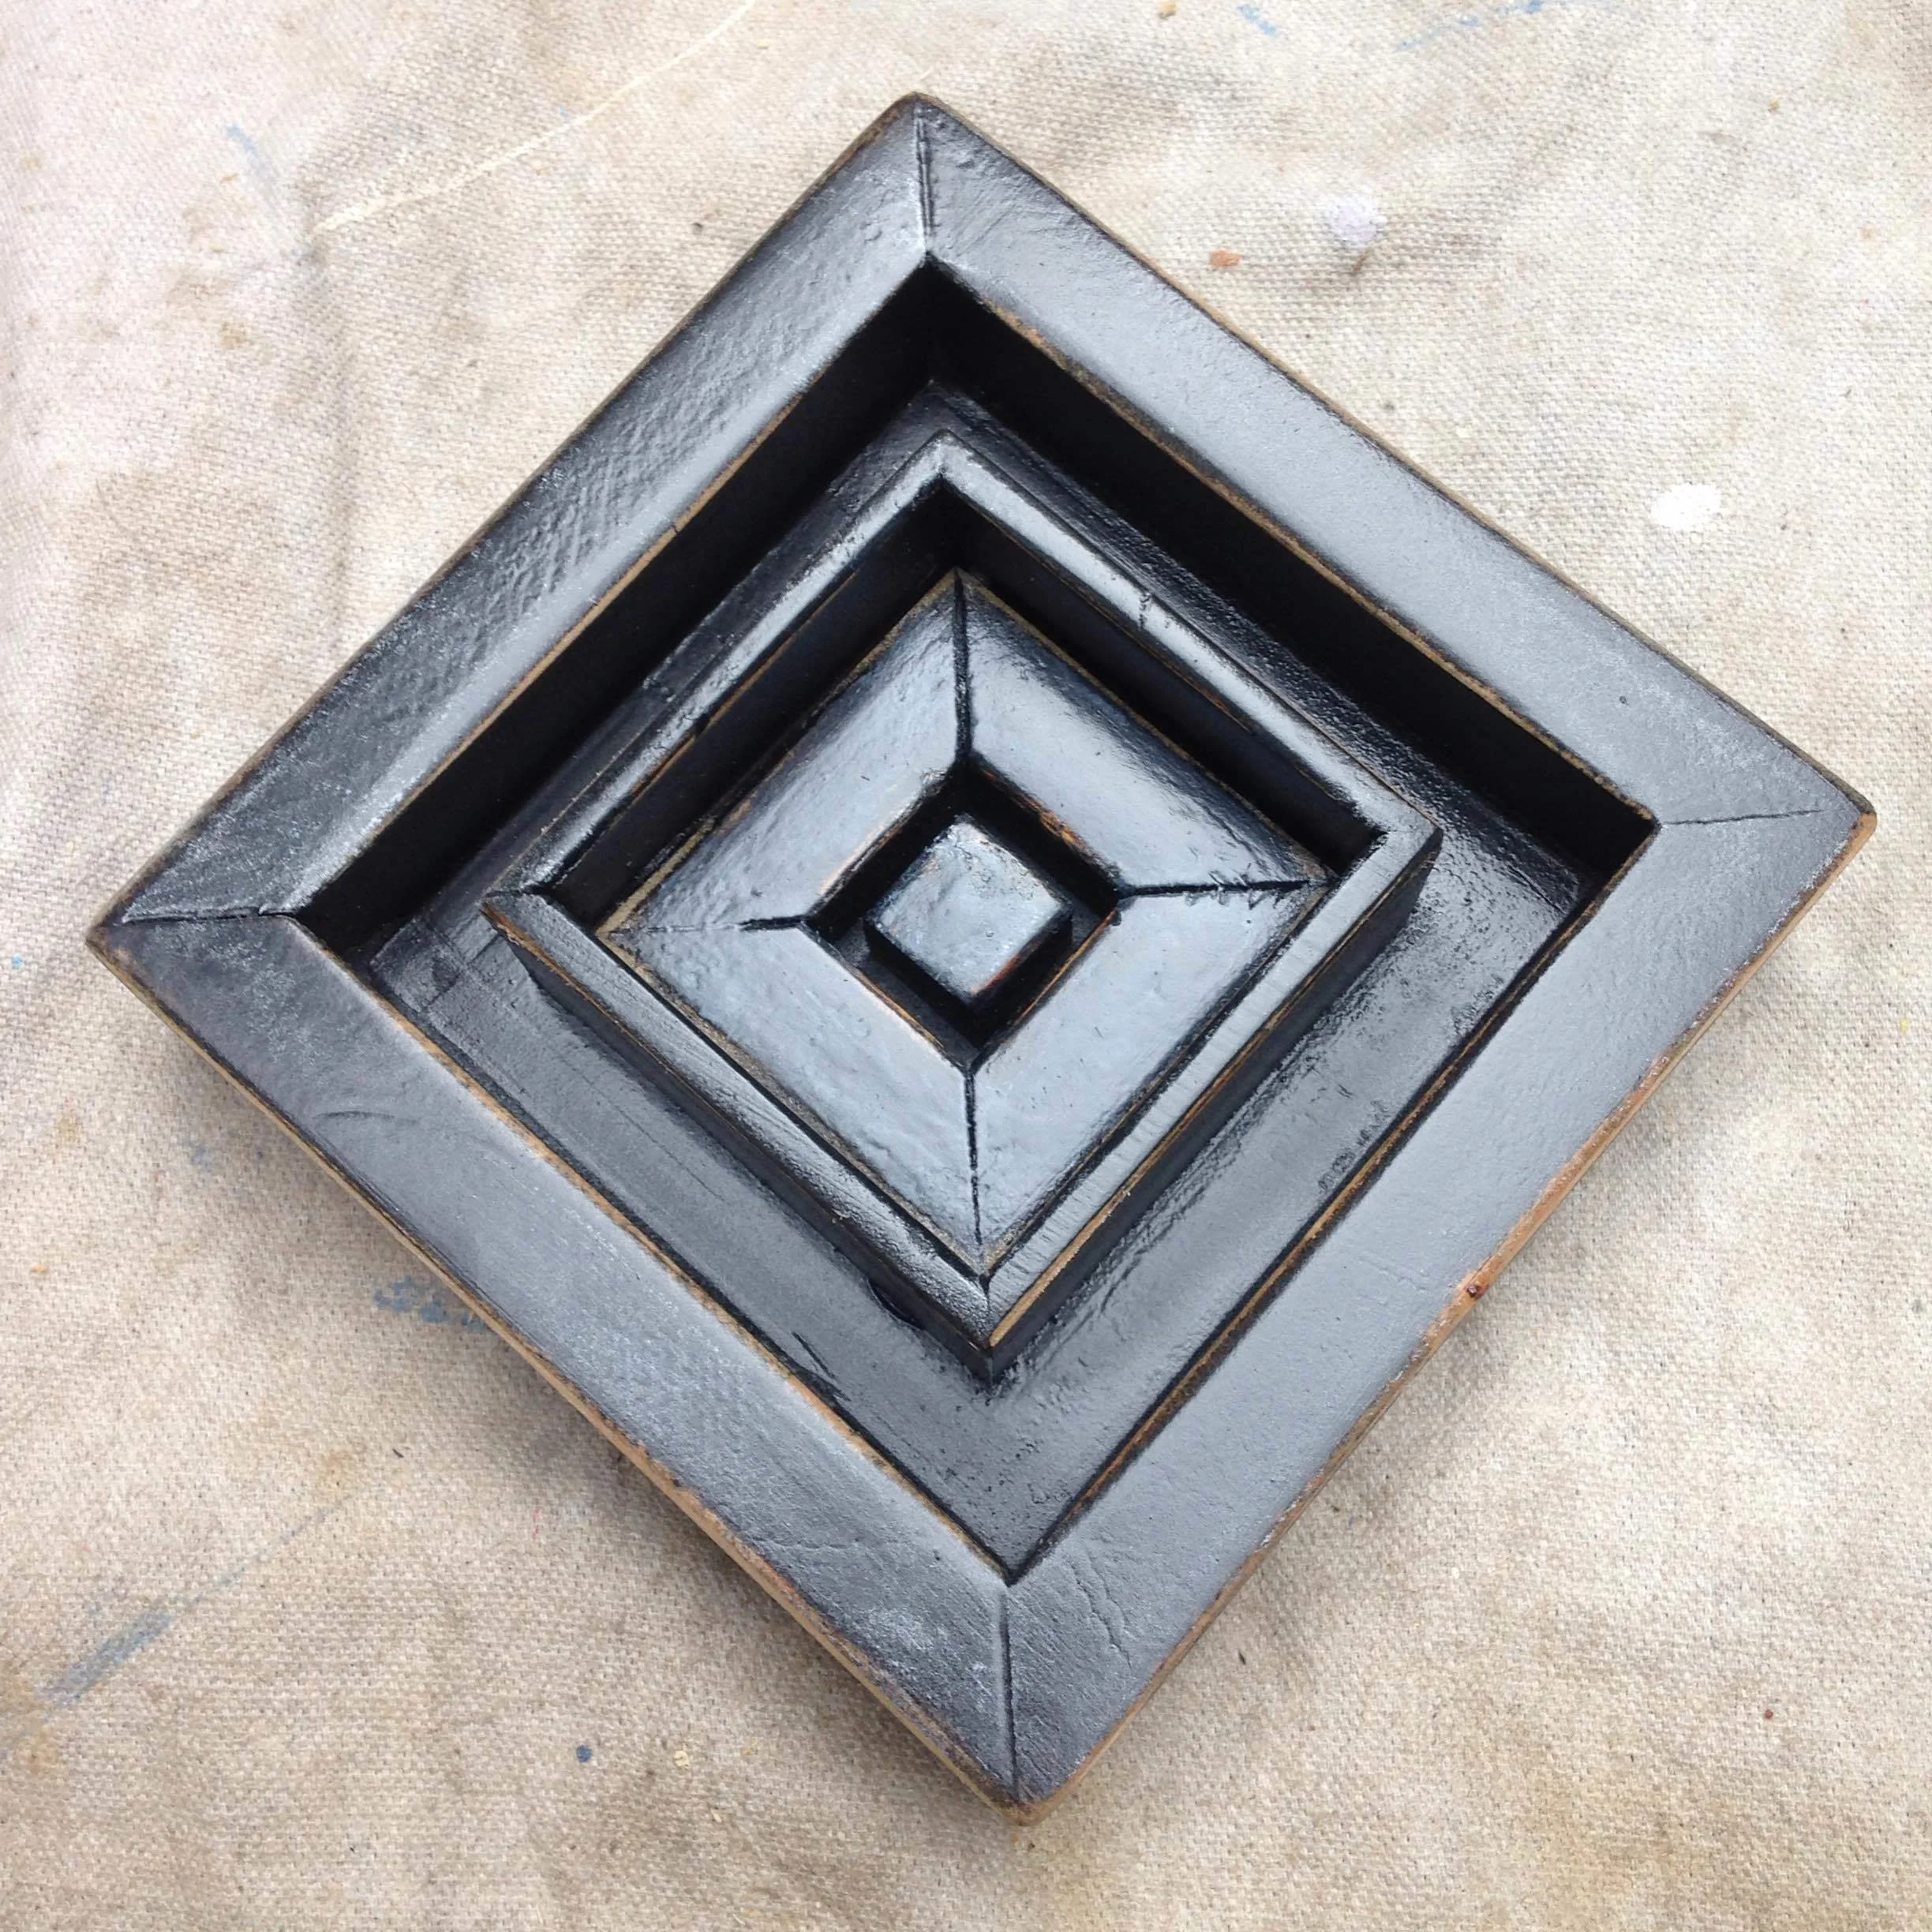
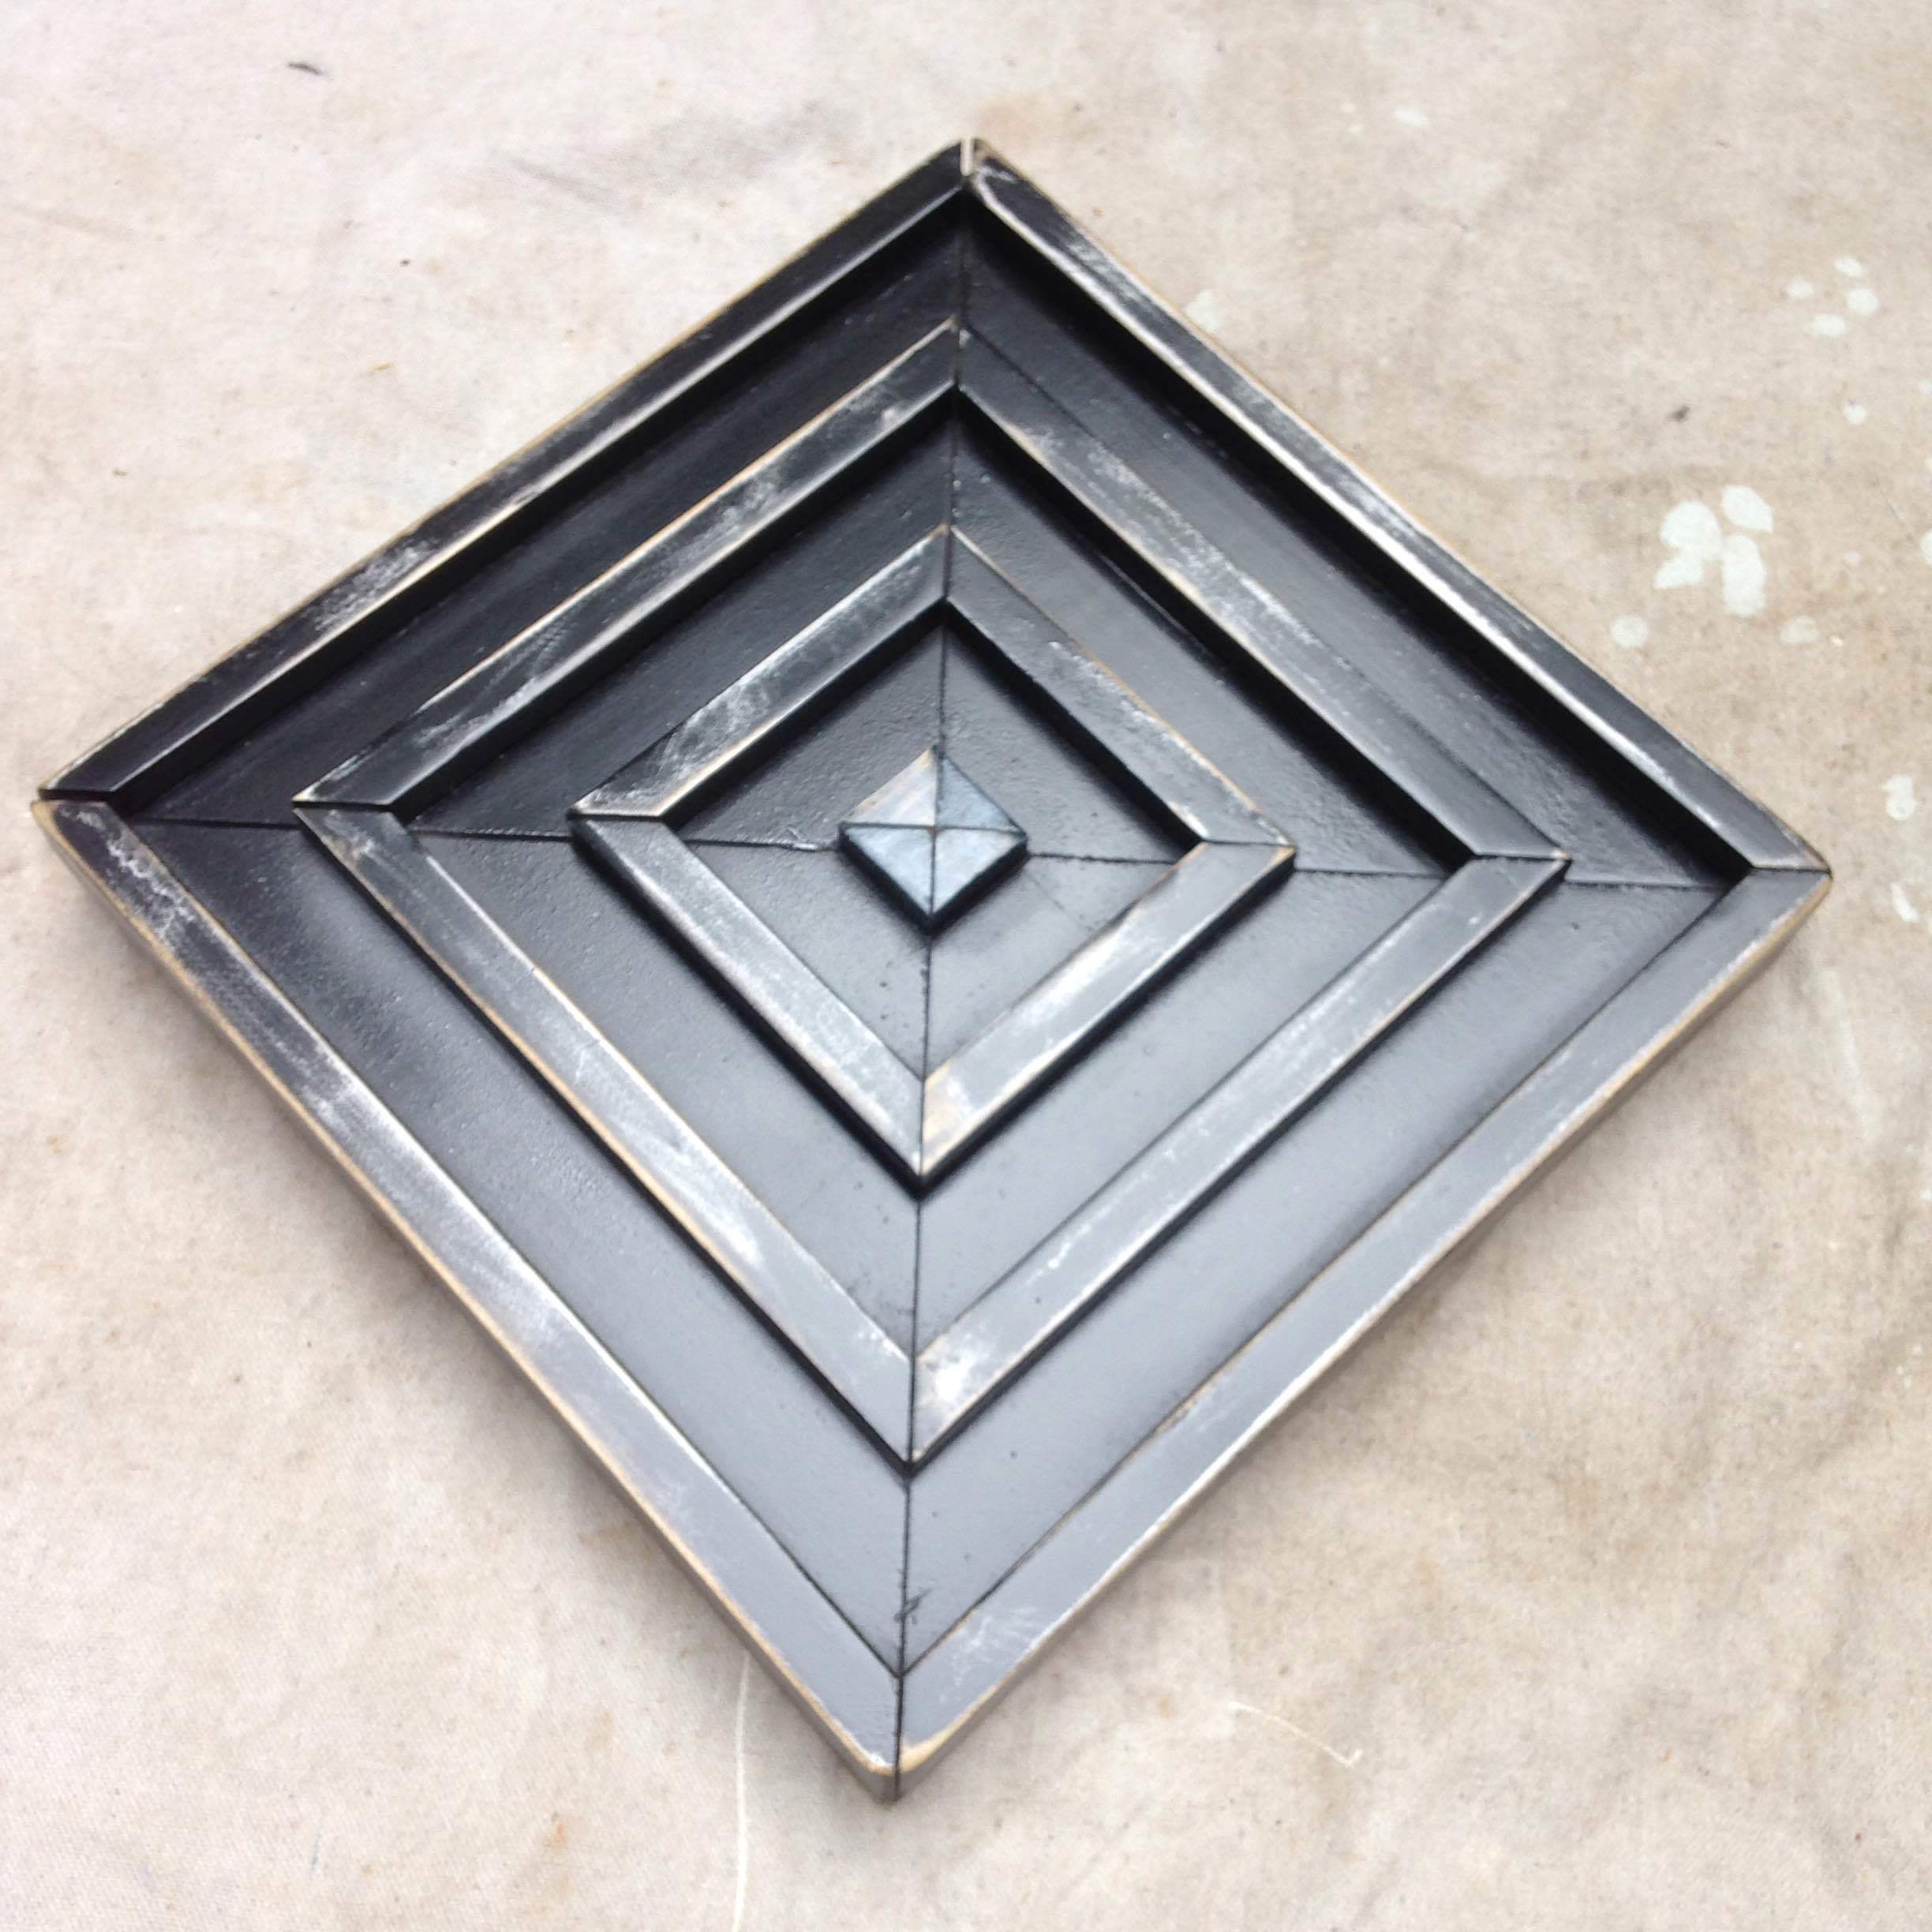
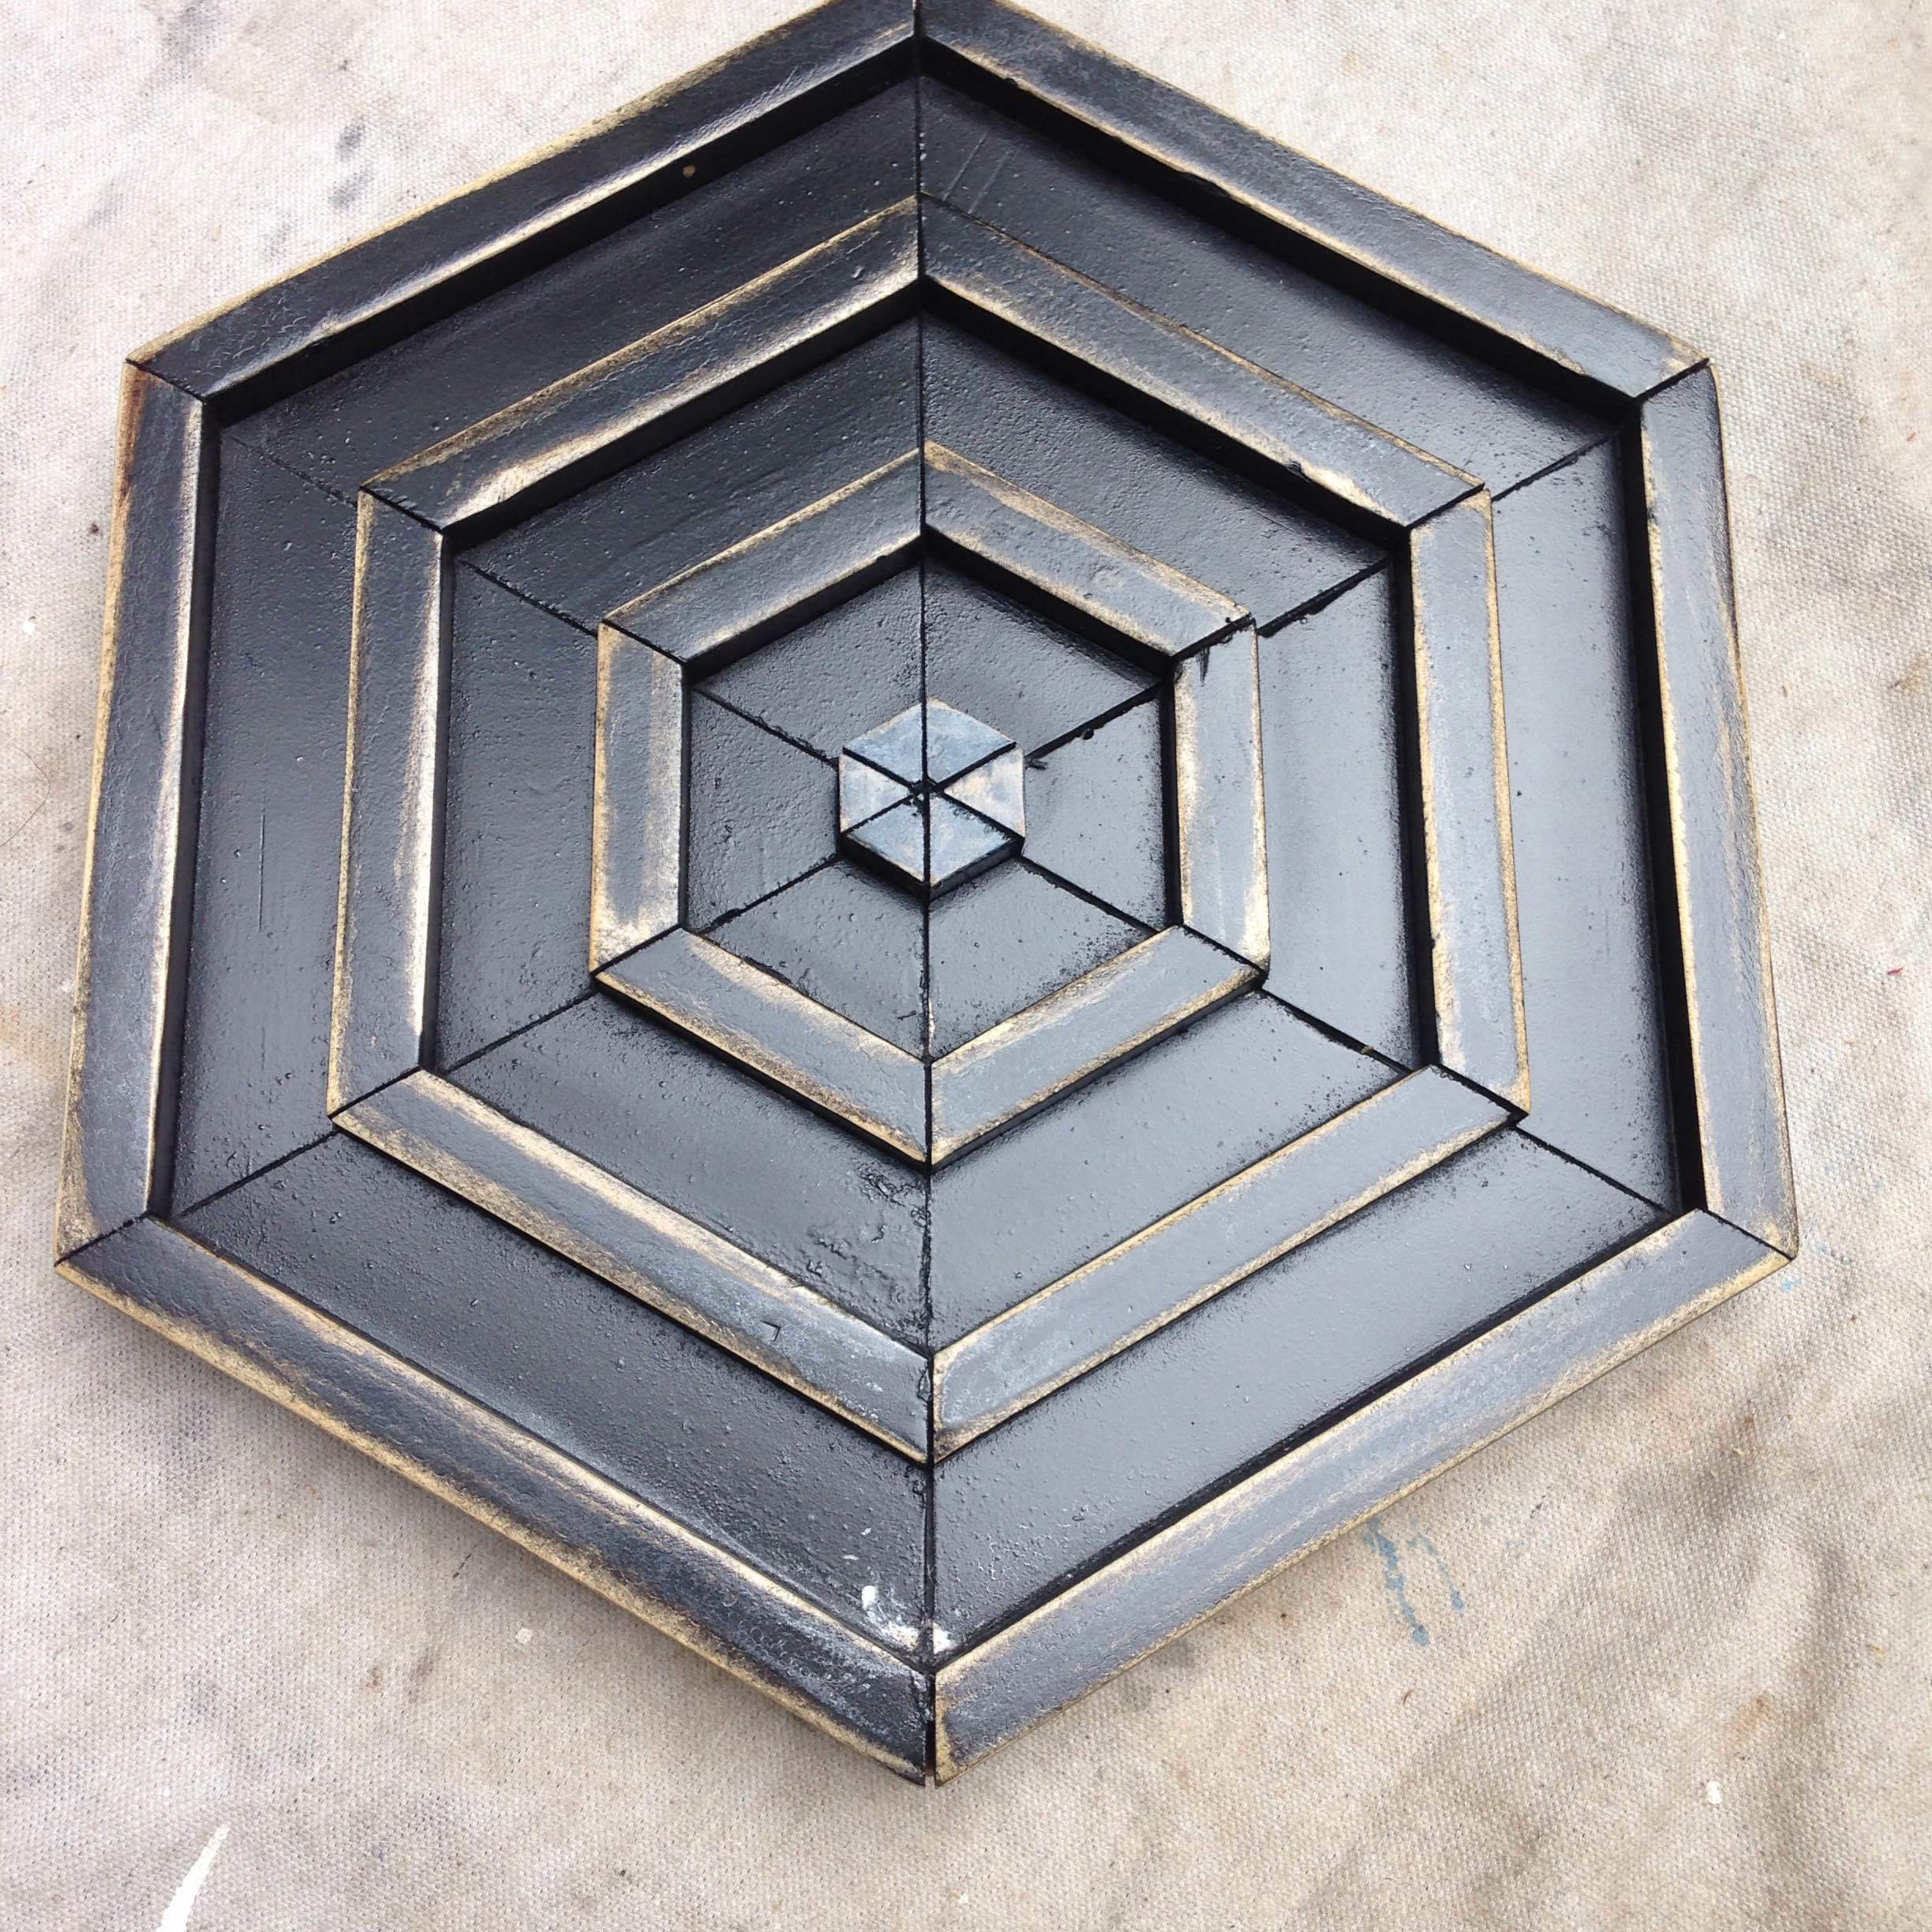
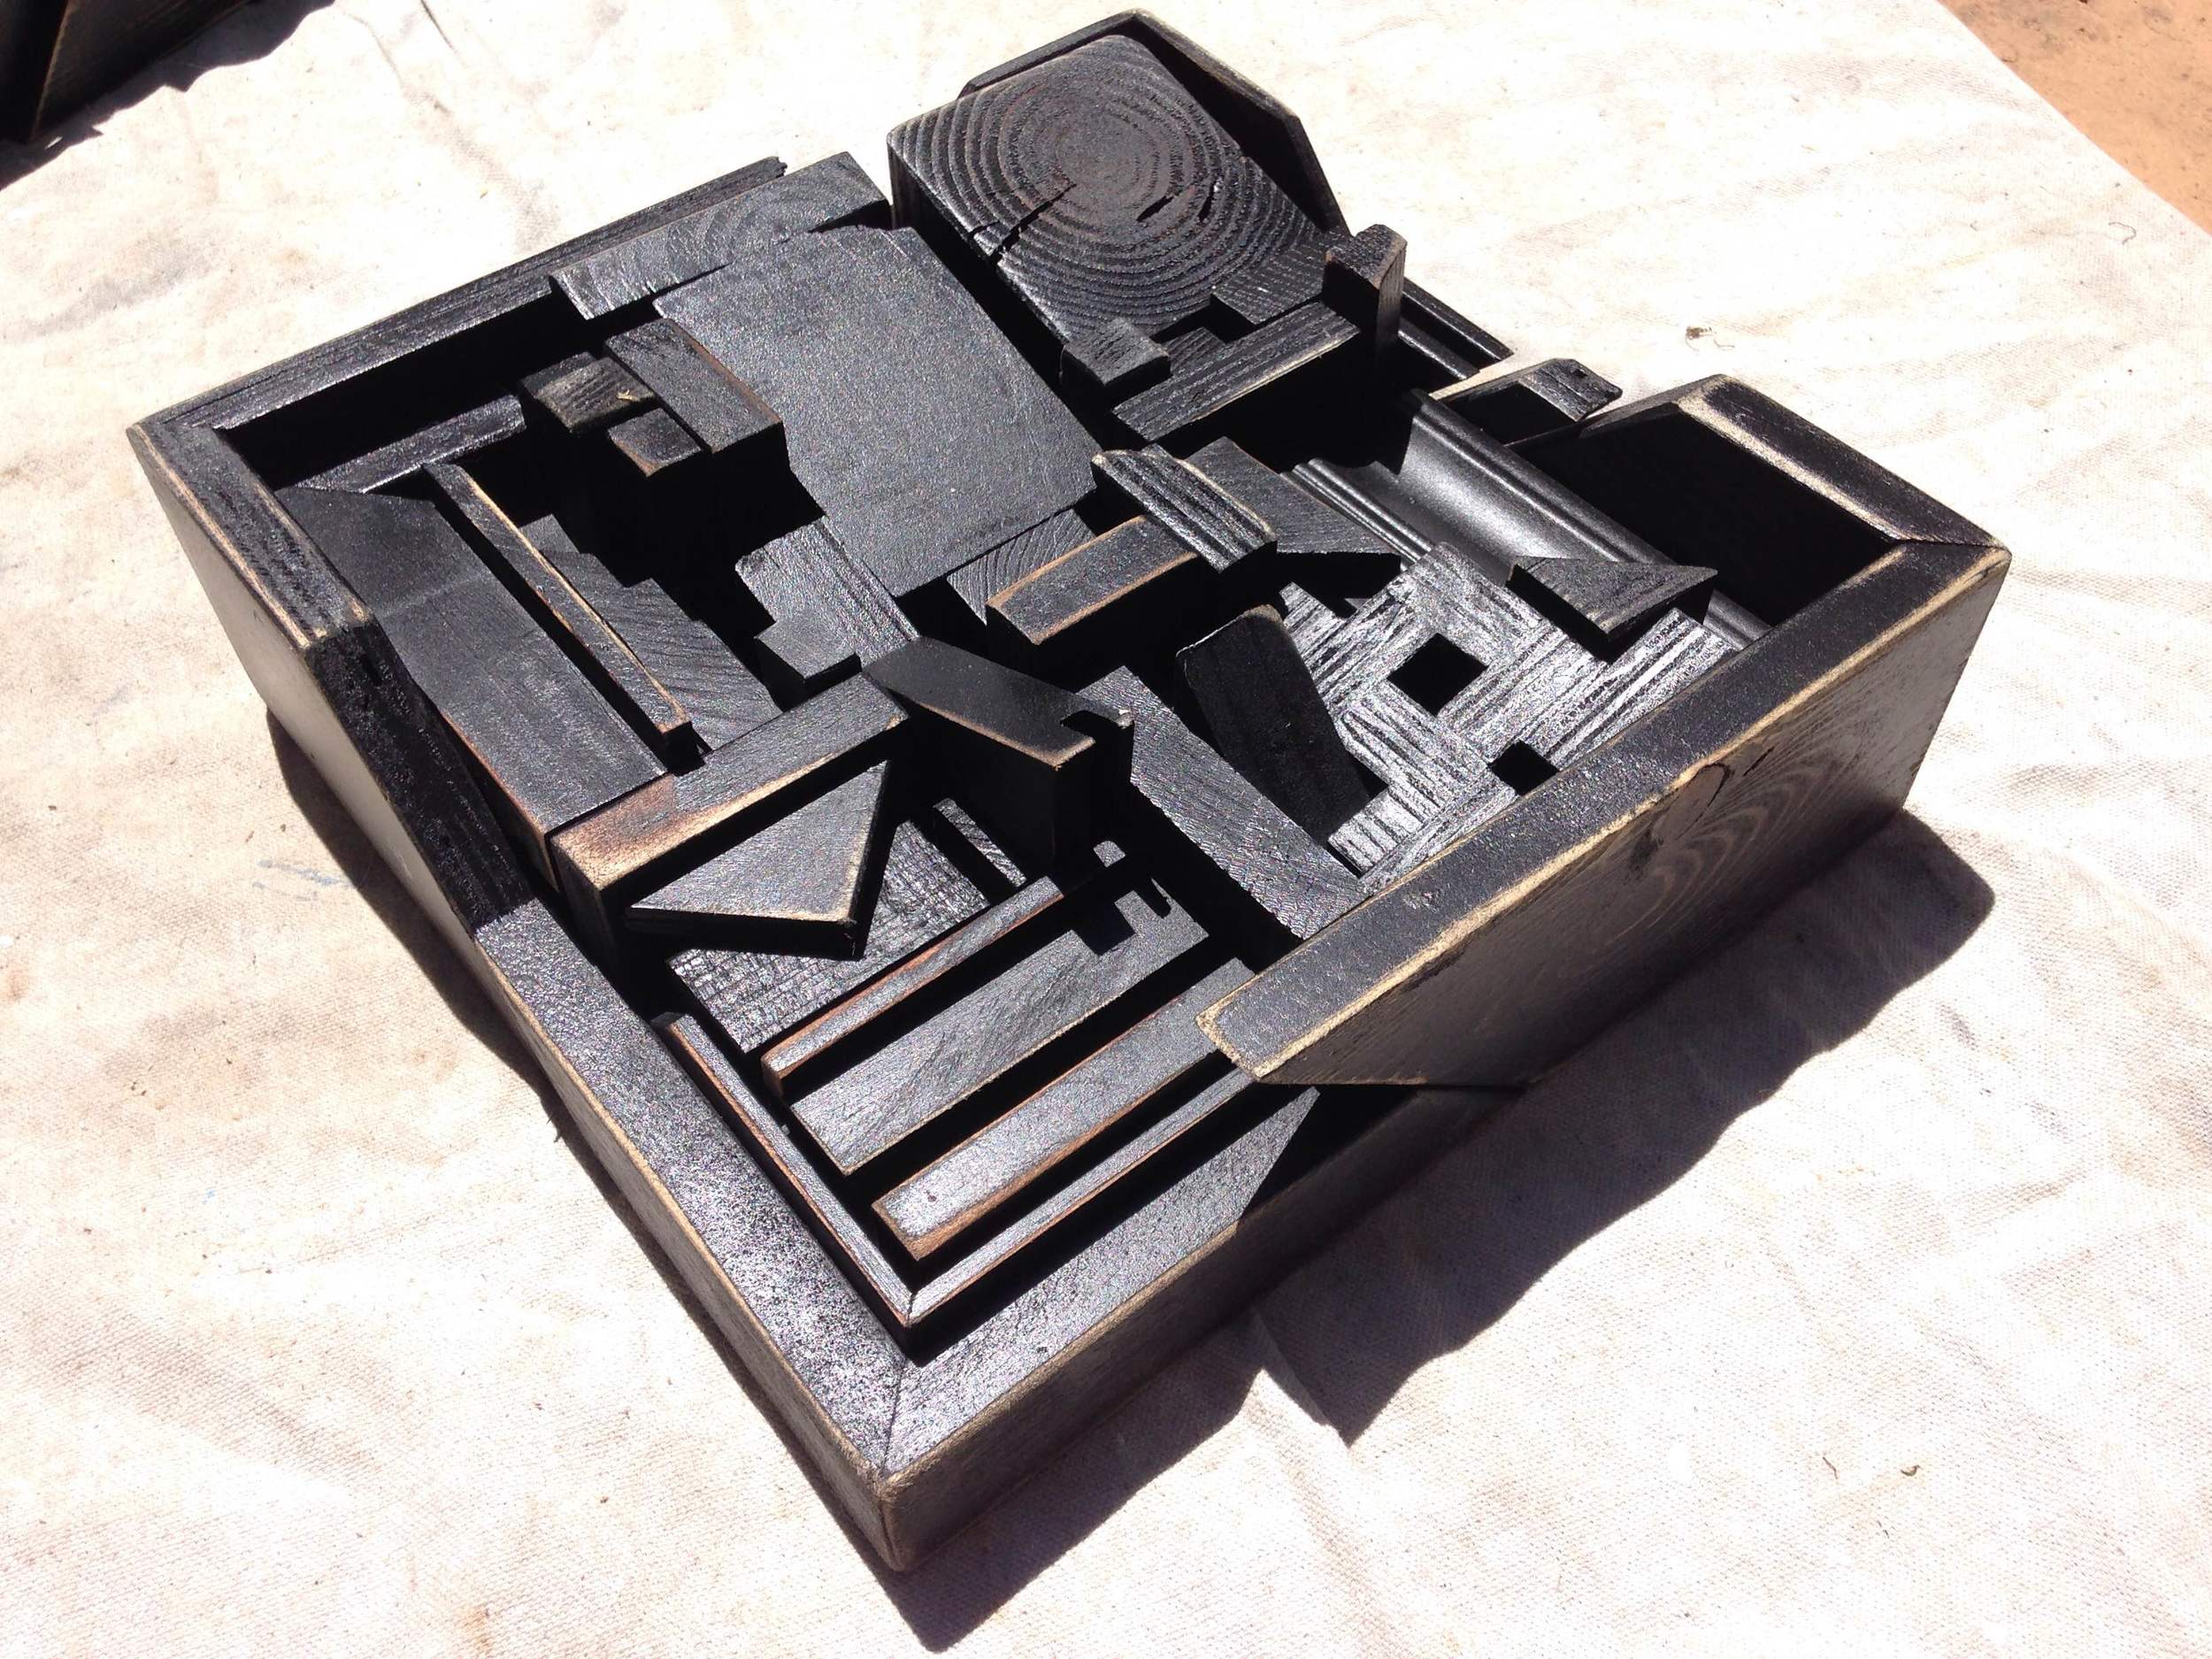
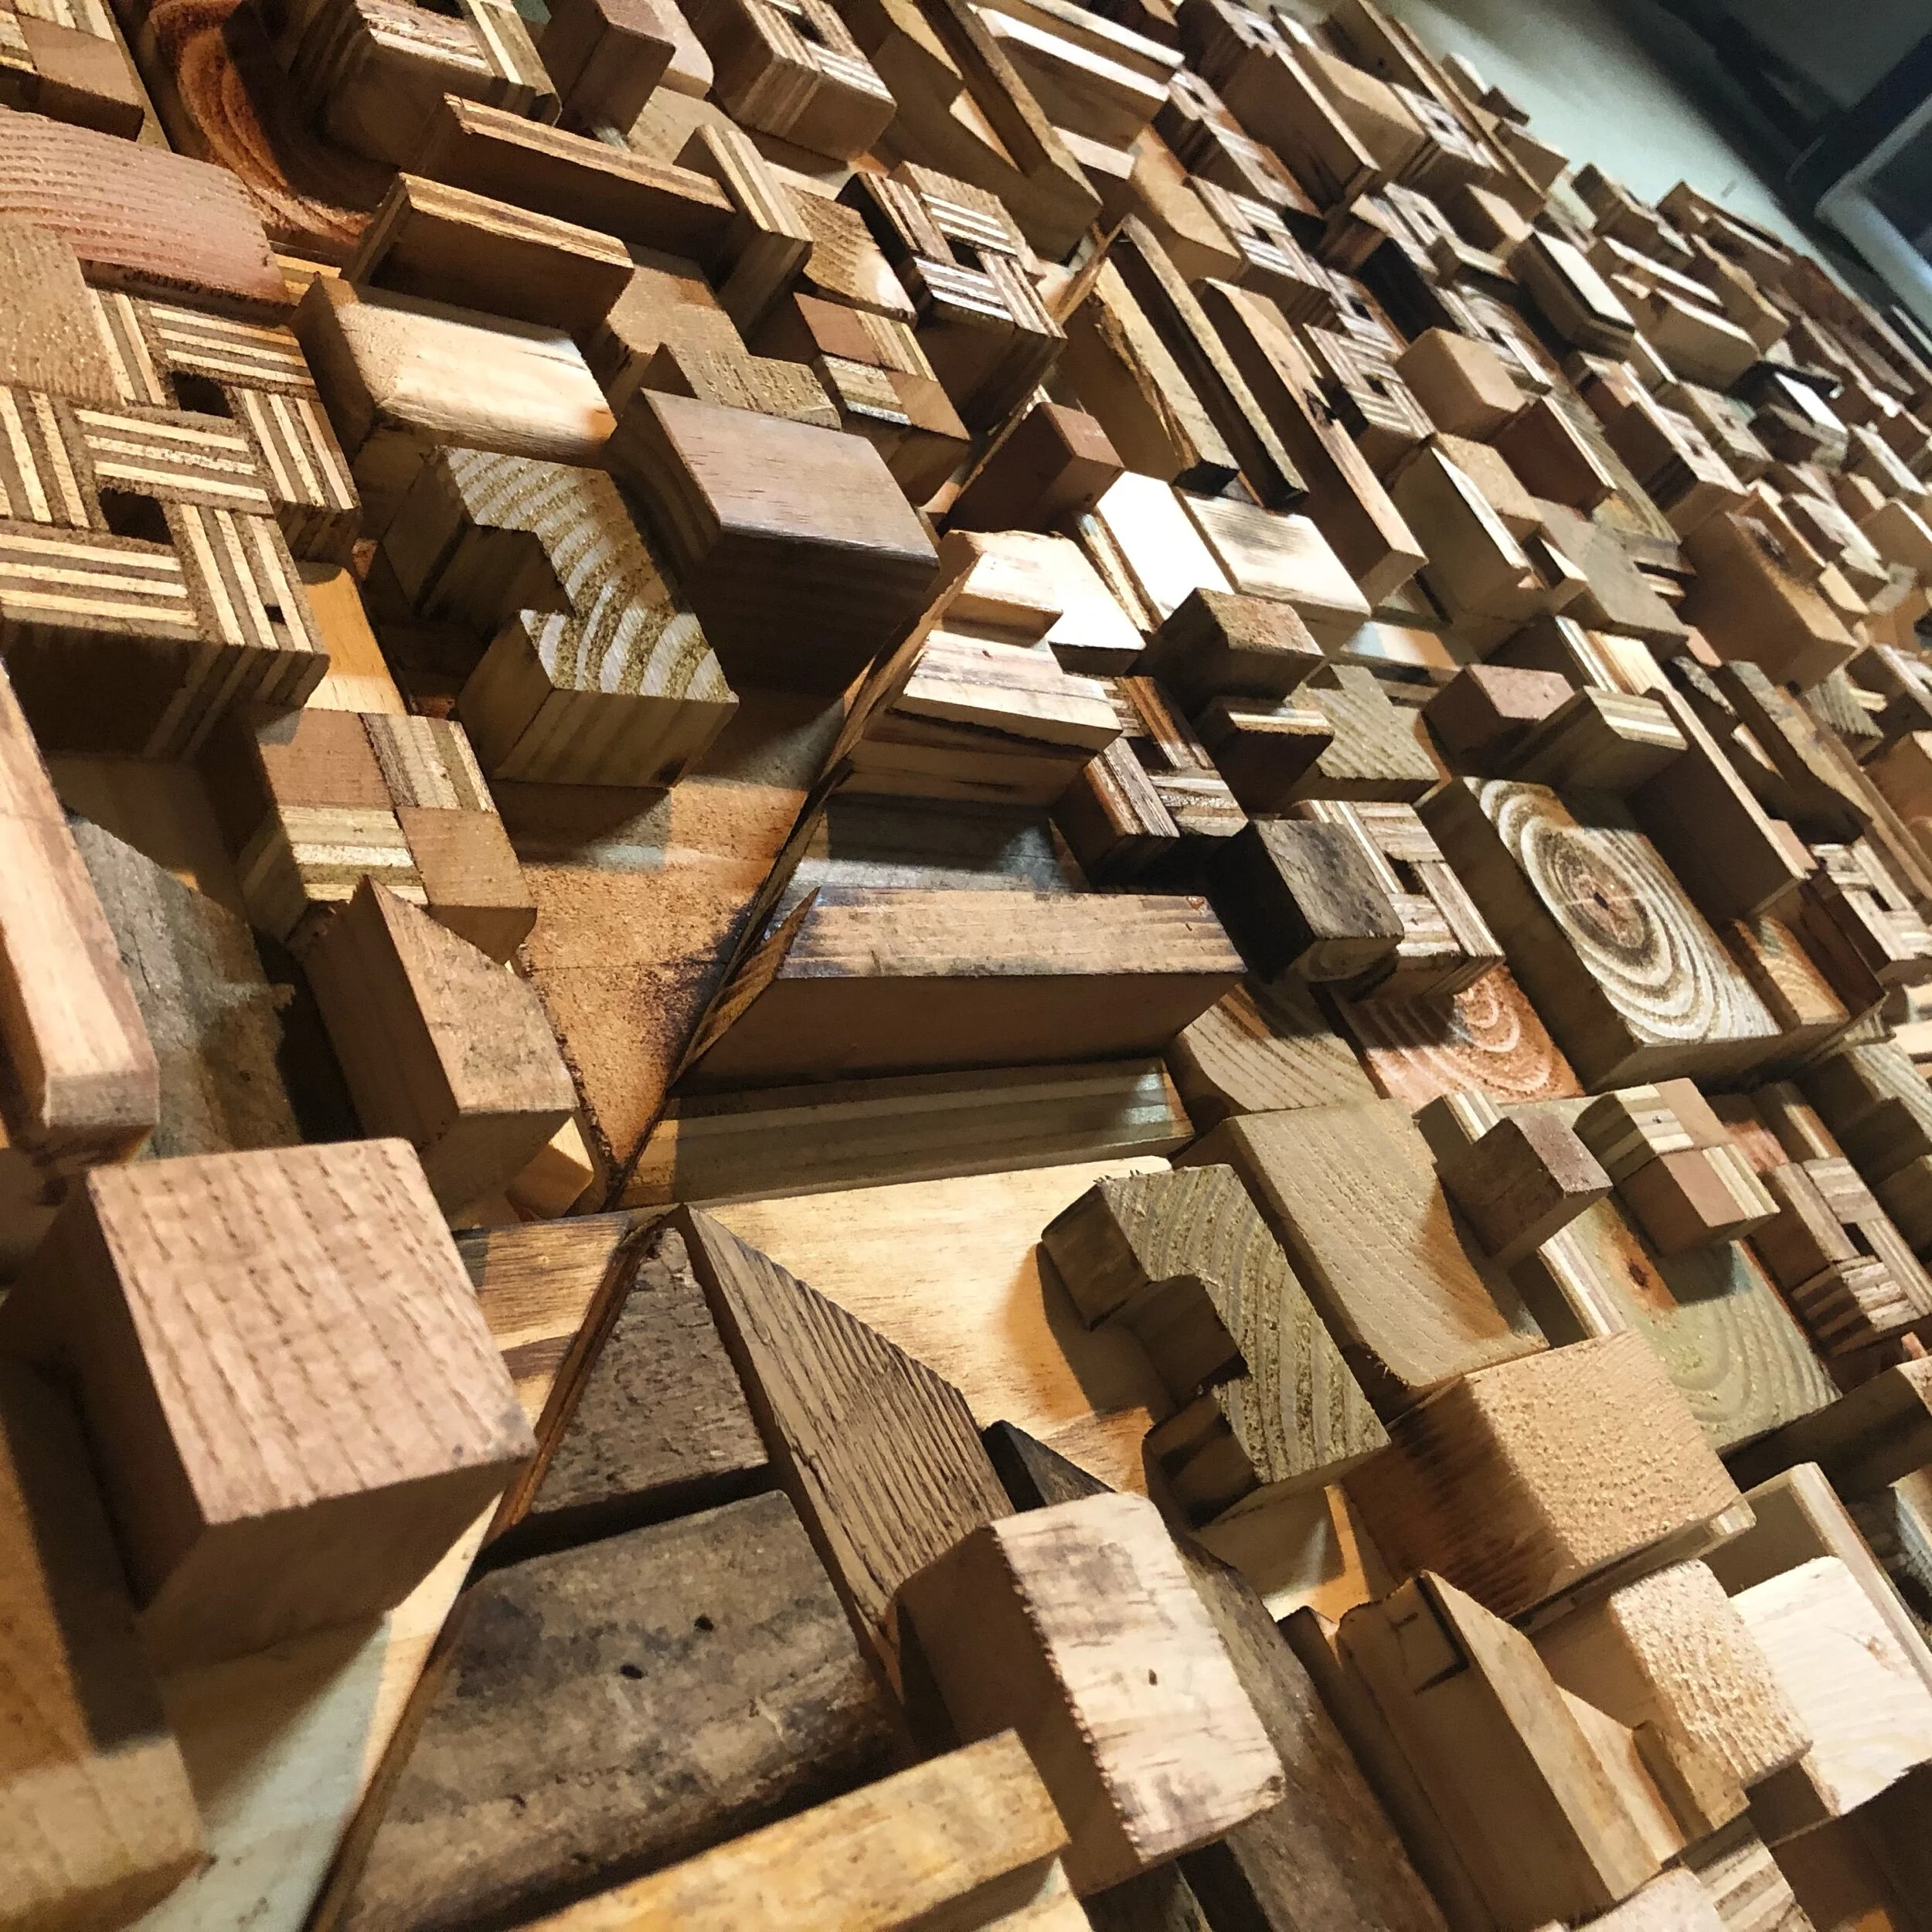
7-27-20:: And it’ s starting to take shape. Looks like the next step will glue up tomorrow. Then the final touches and then it’s ship city! Here is a peek..
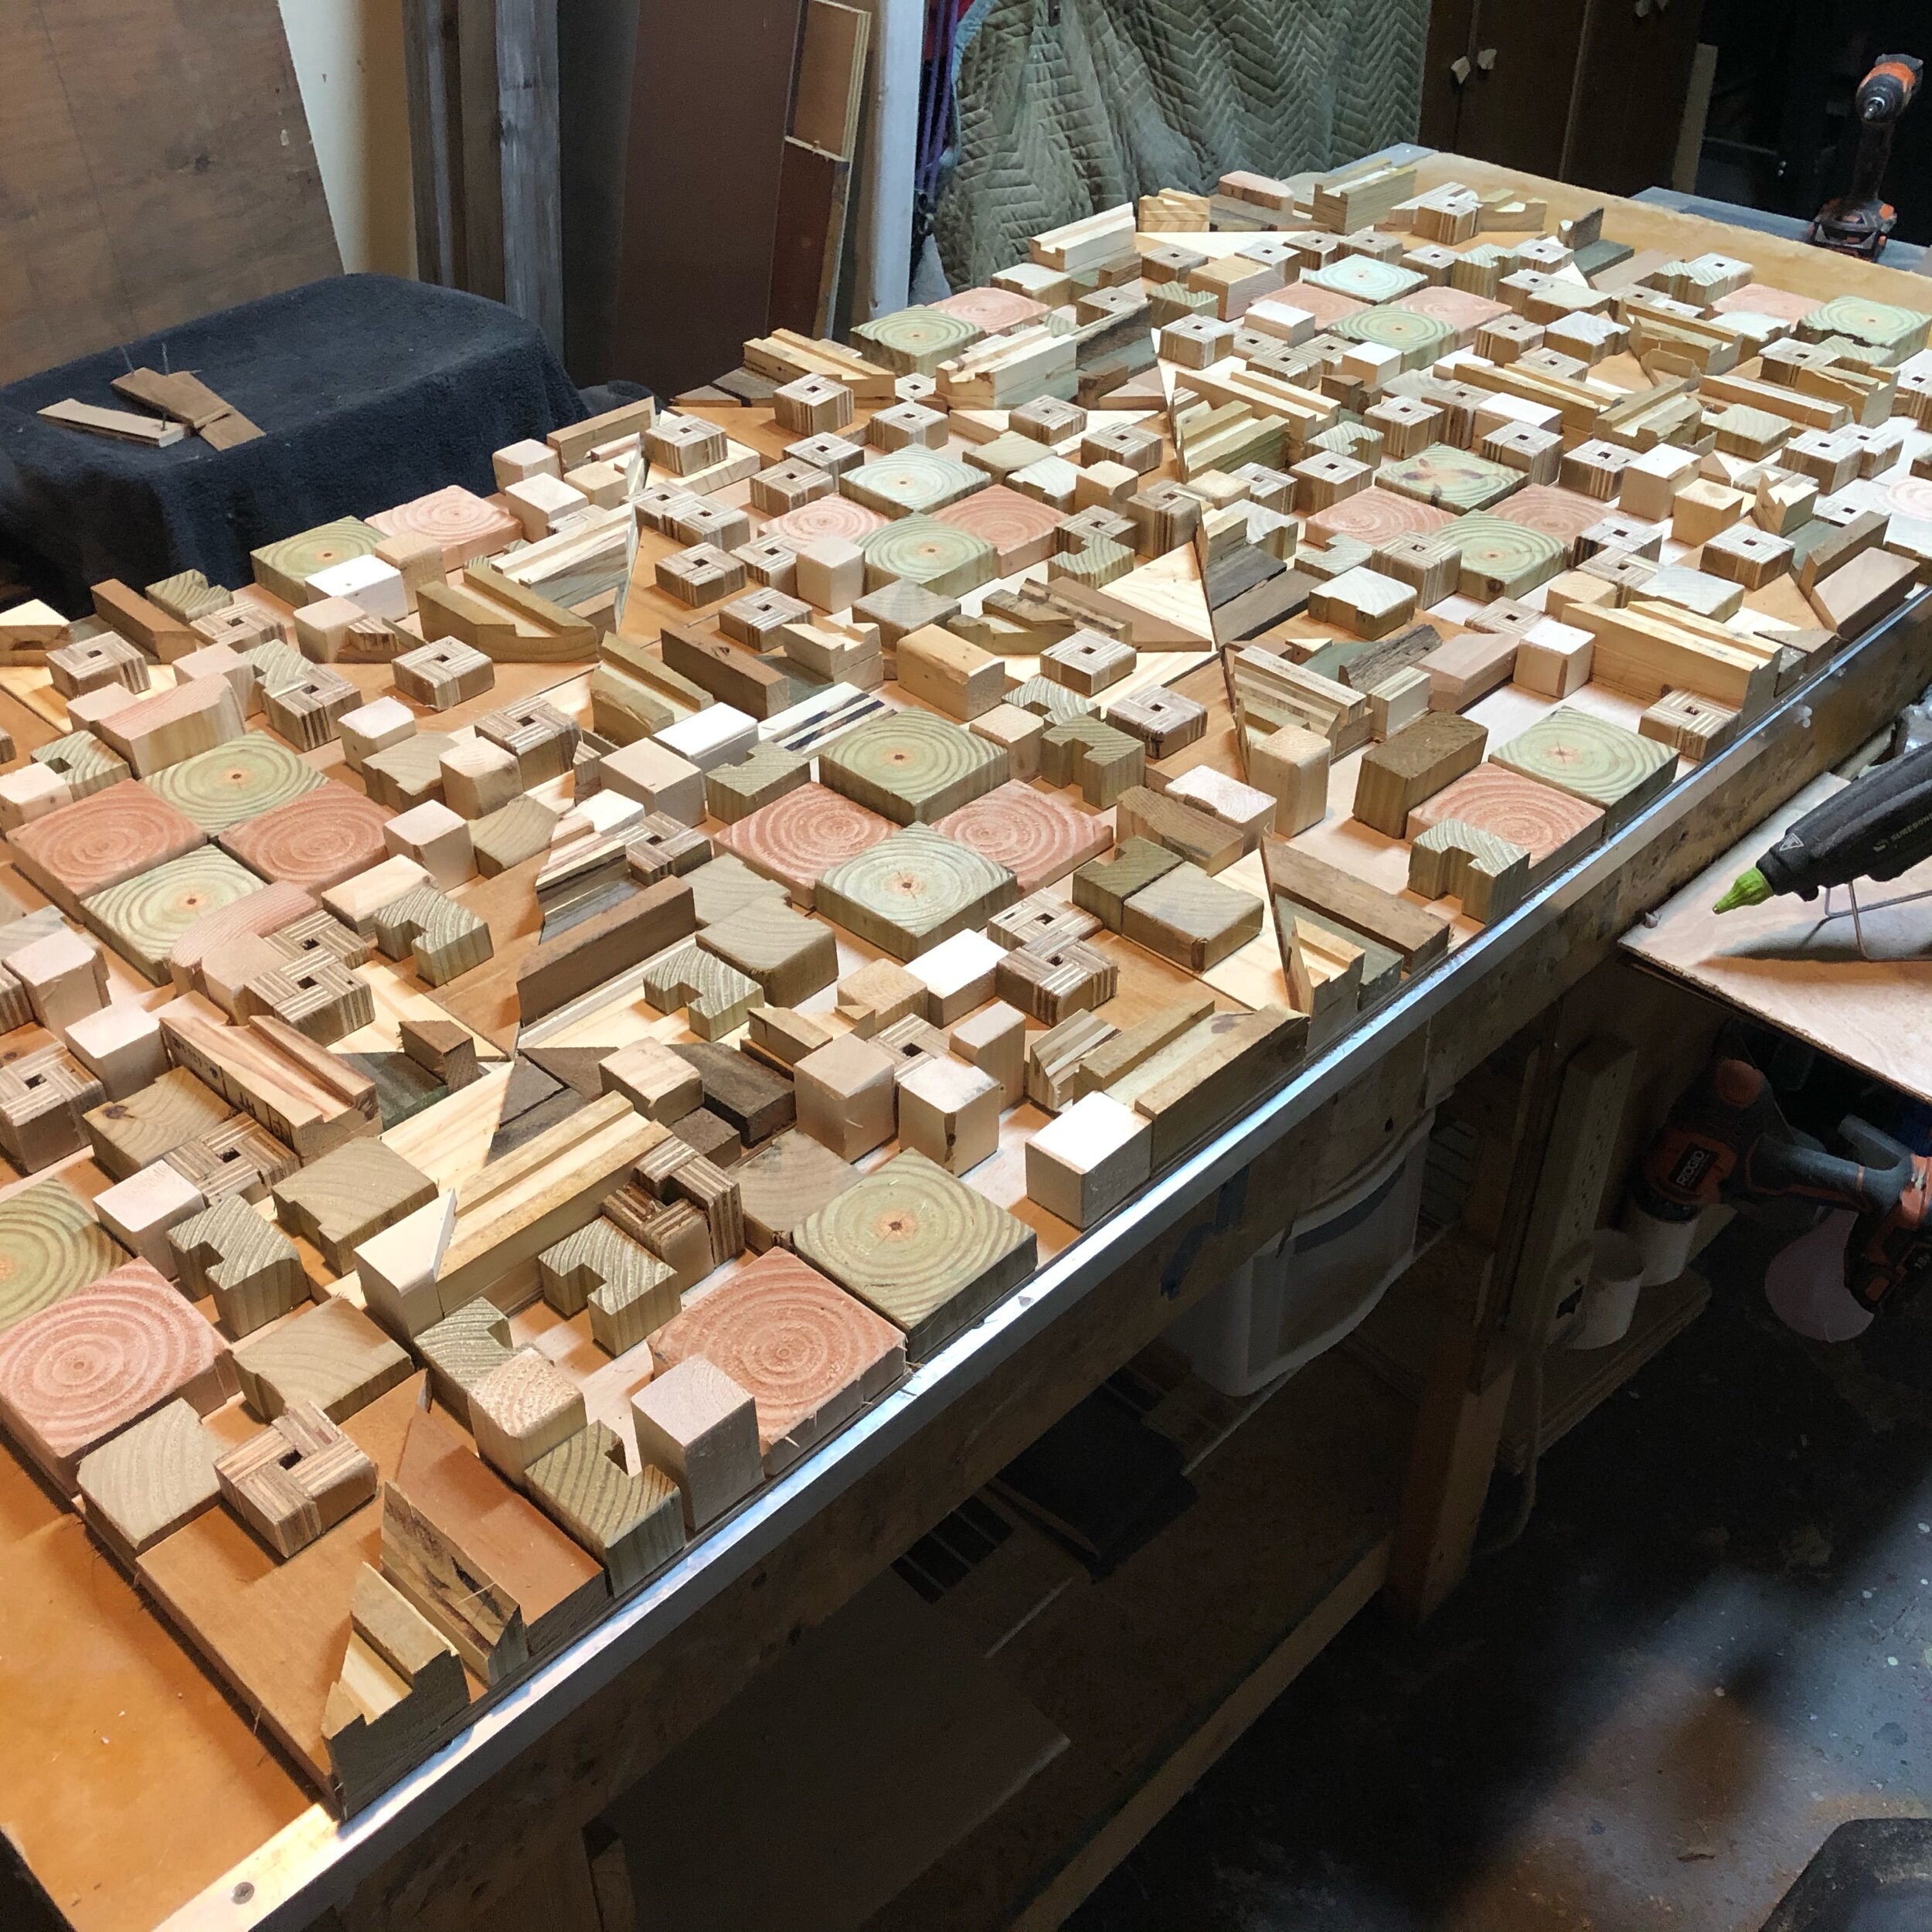
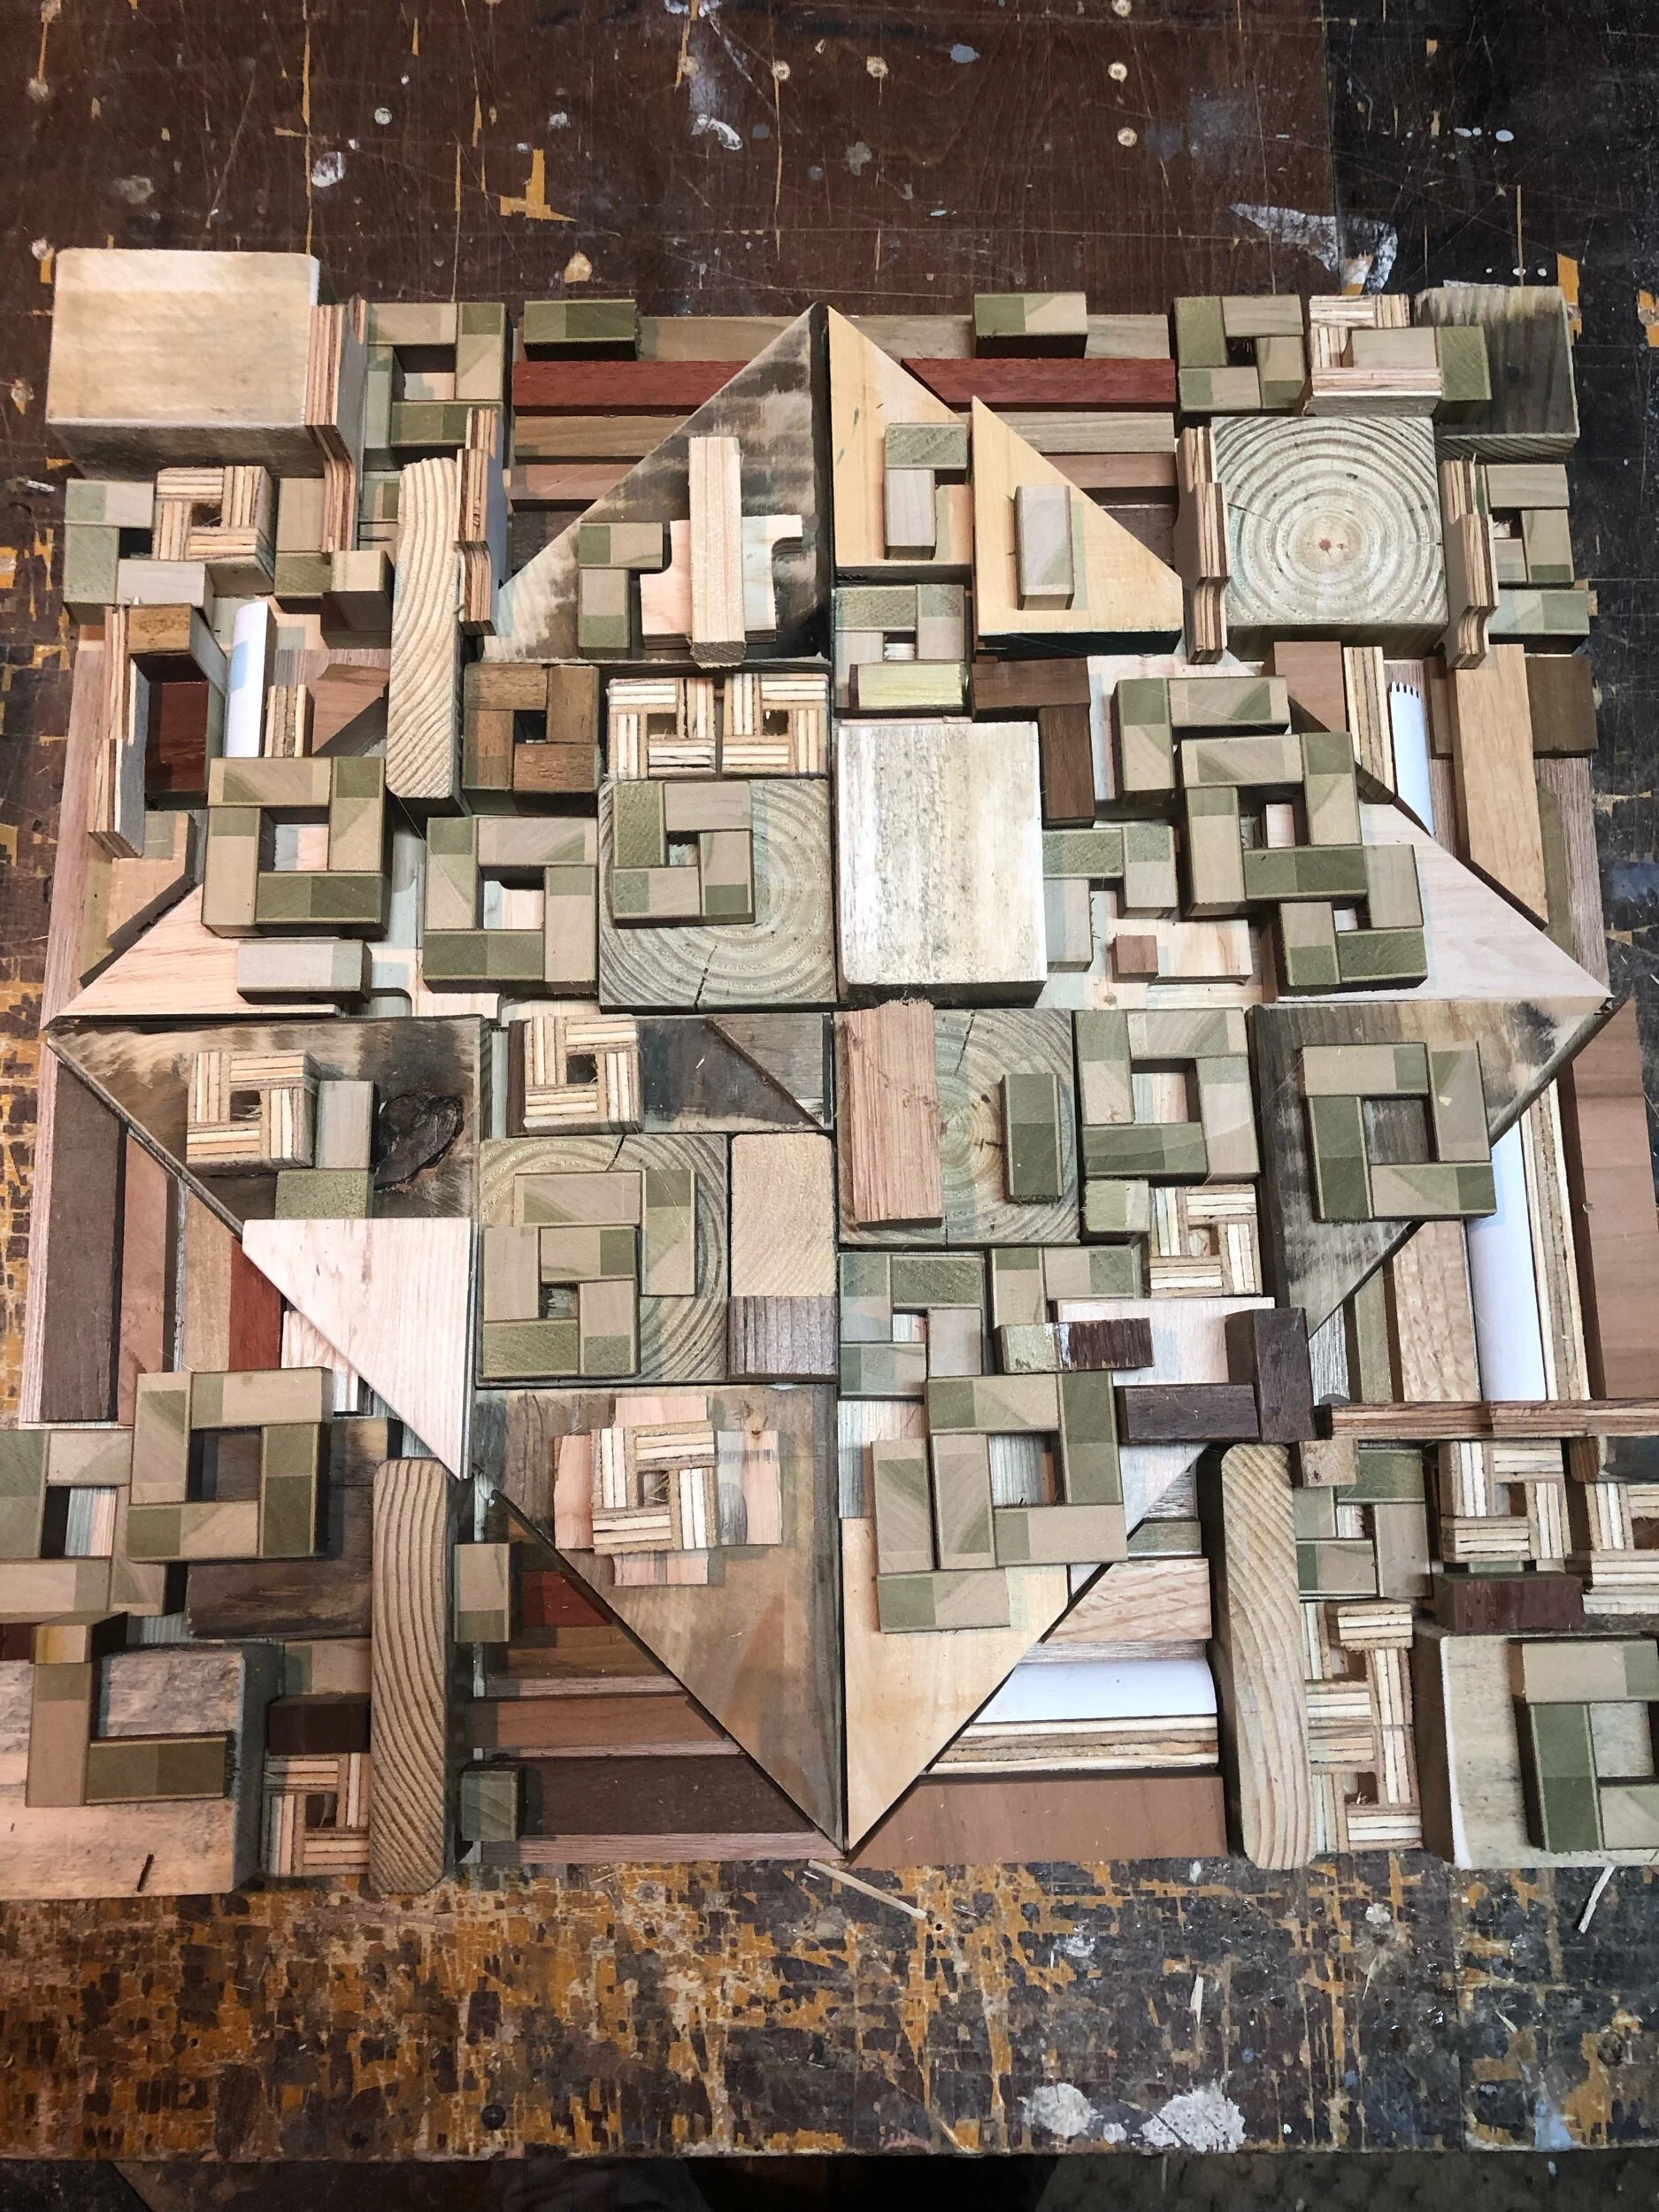
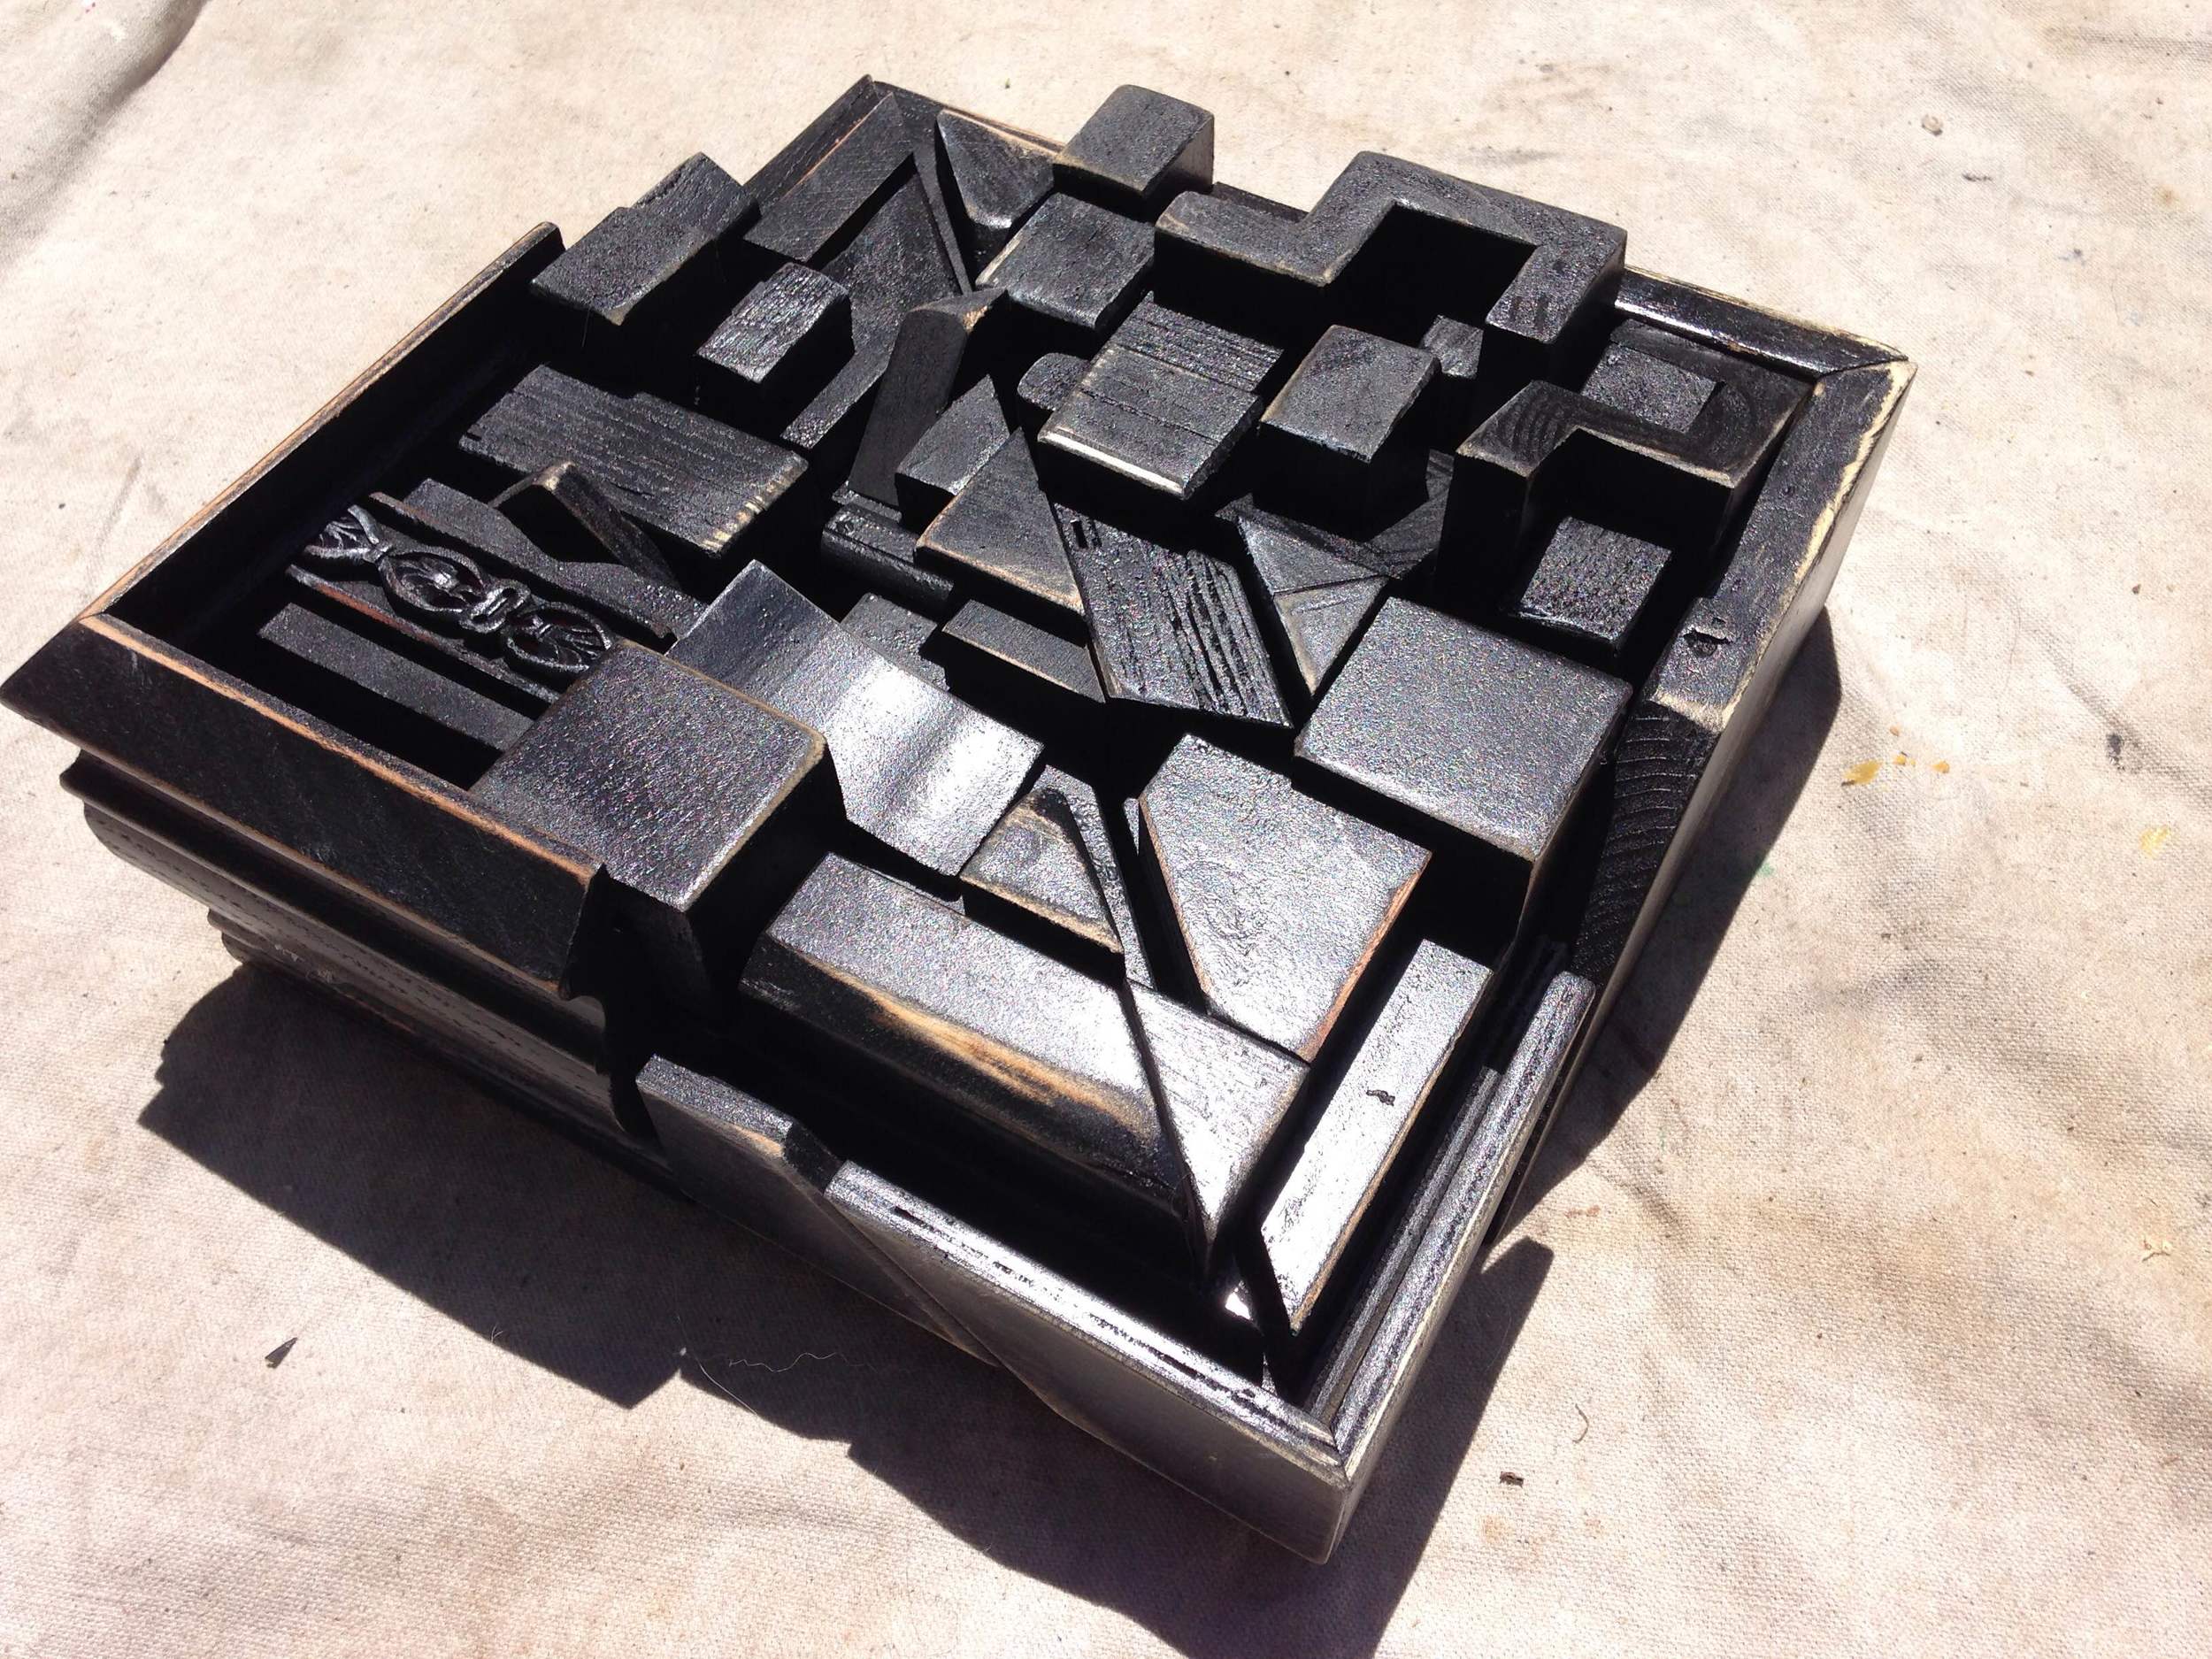
7-28-20: Next phase complete! Let’s let it glue up and finish it up tomorrow.

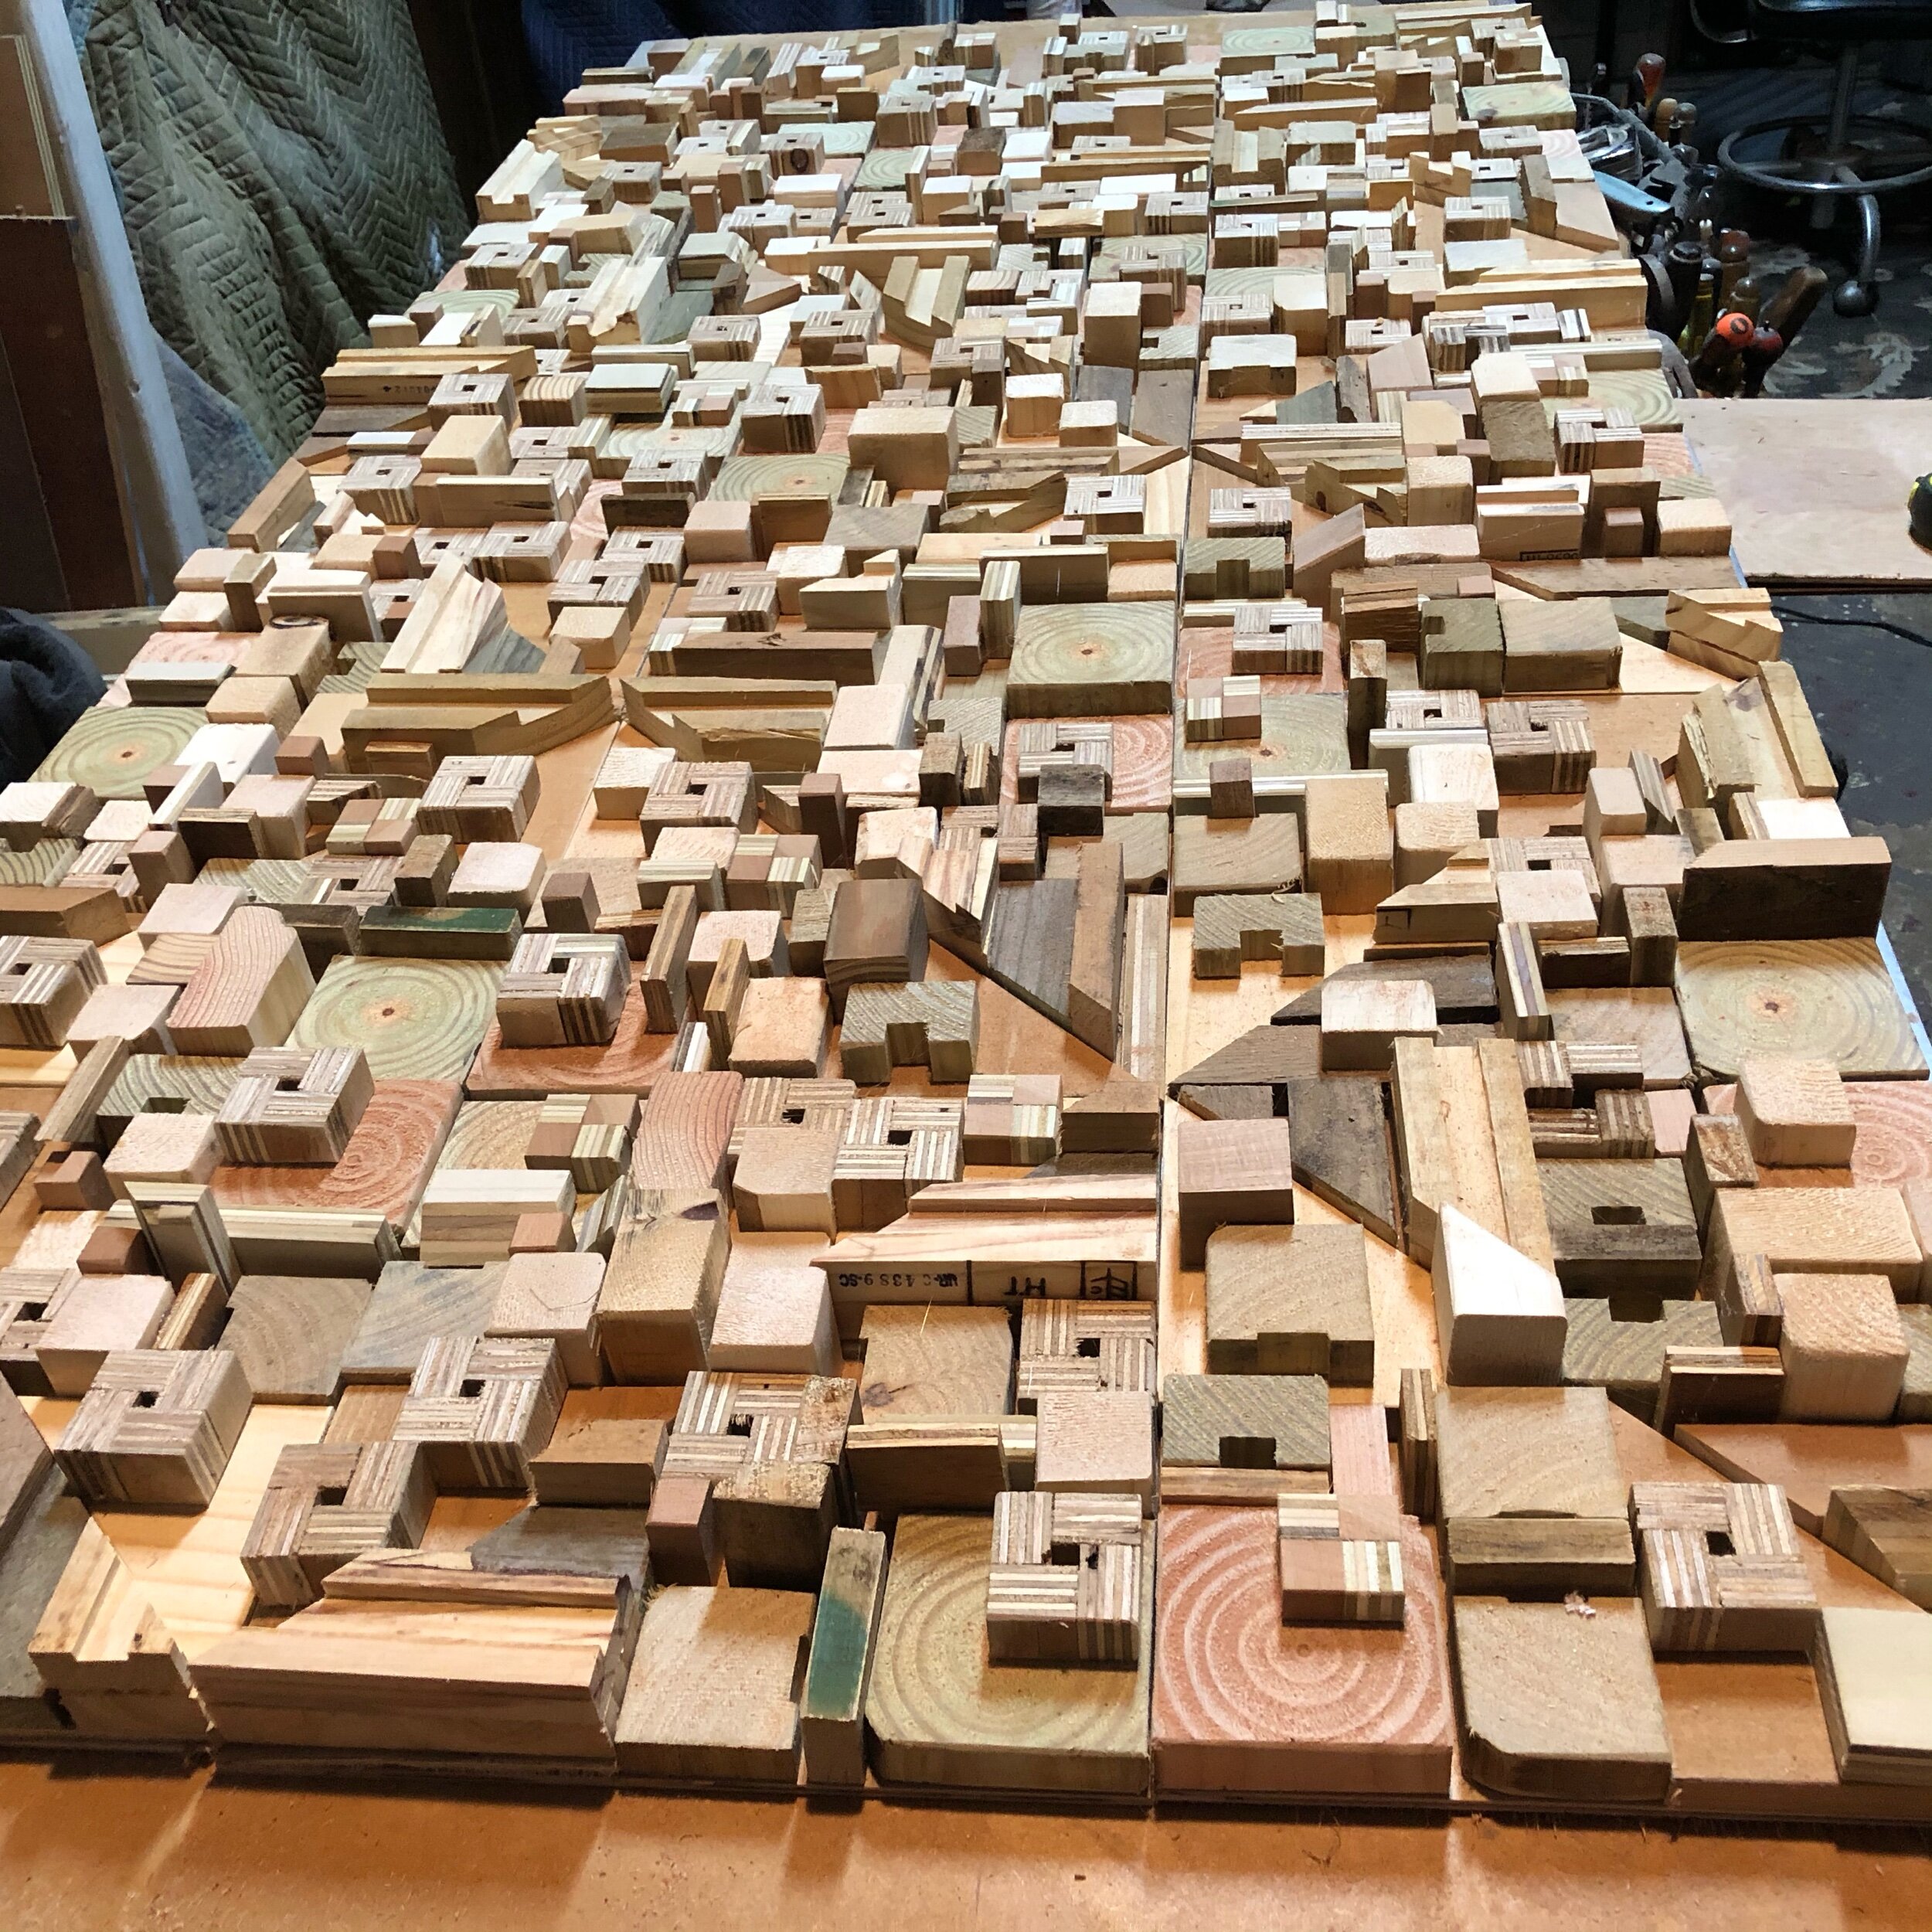
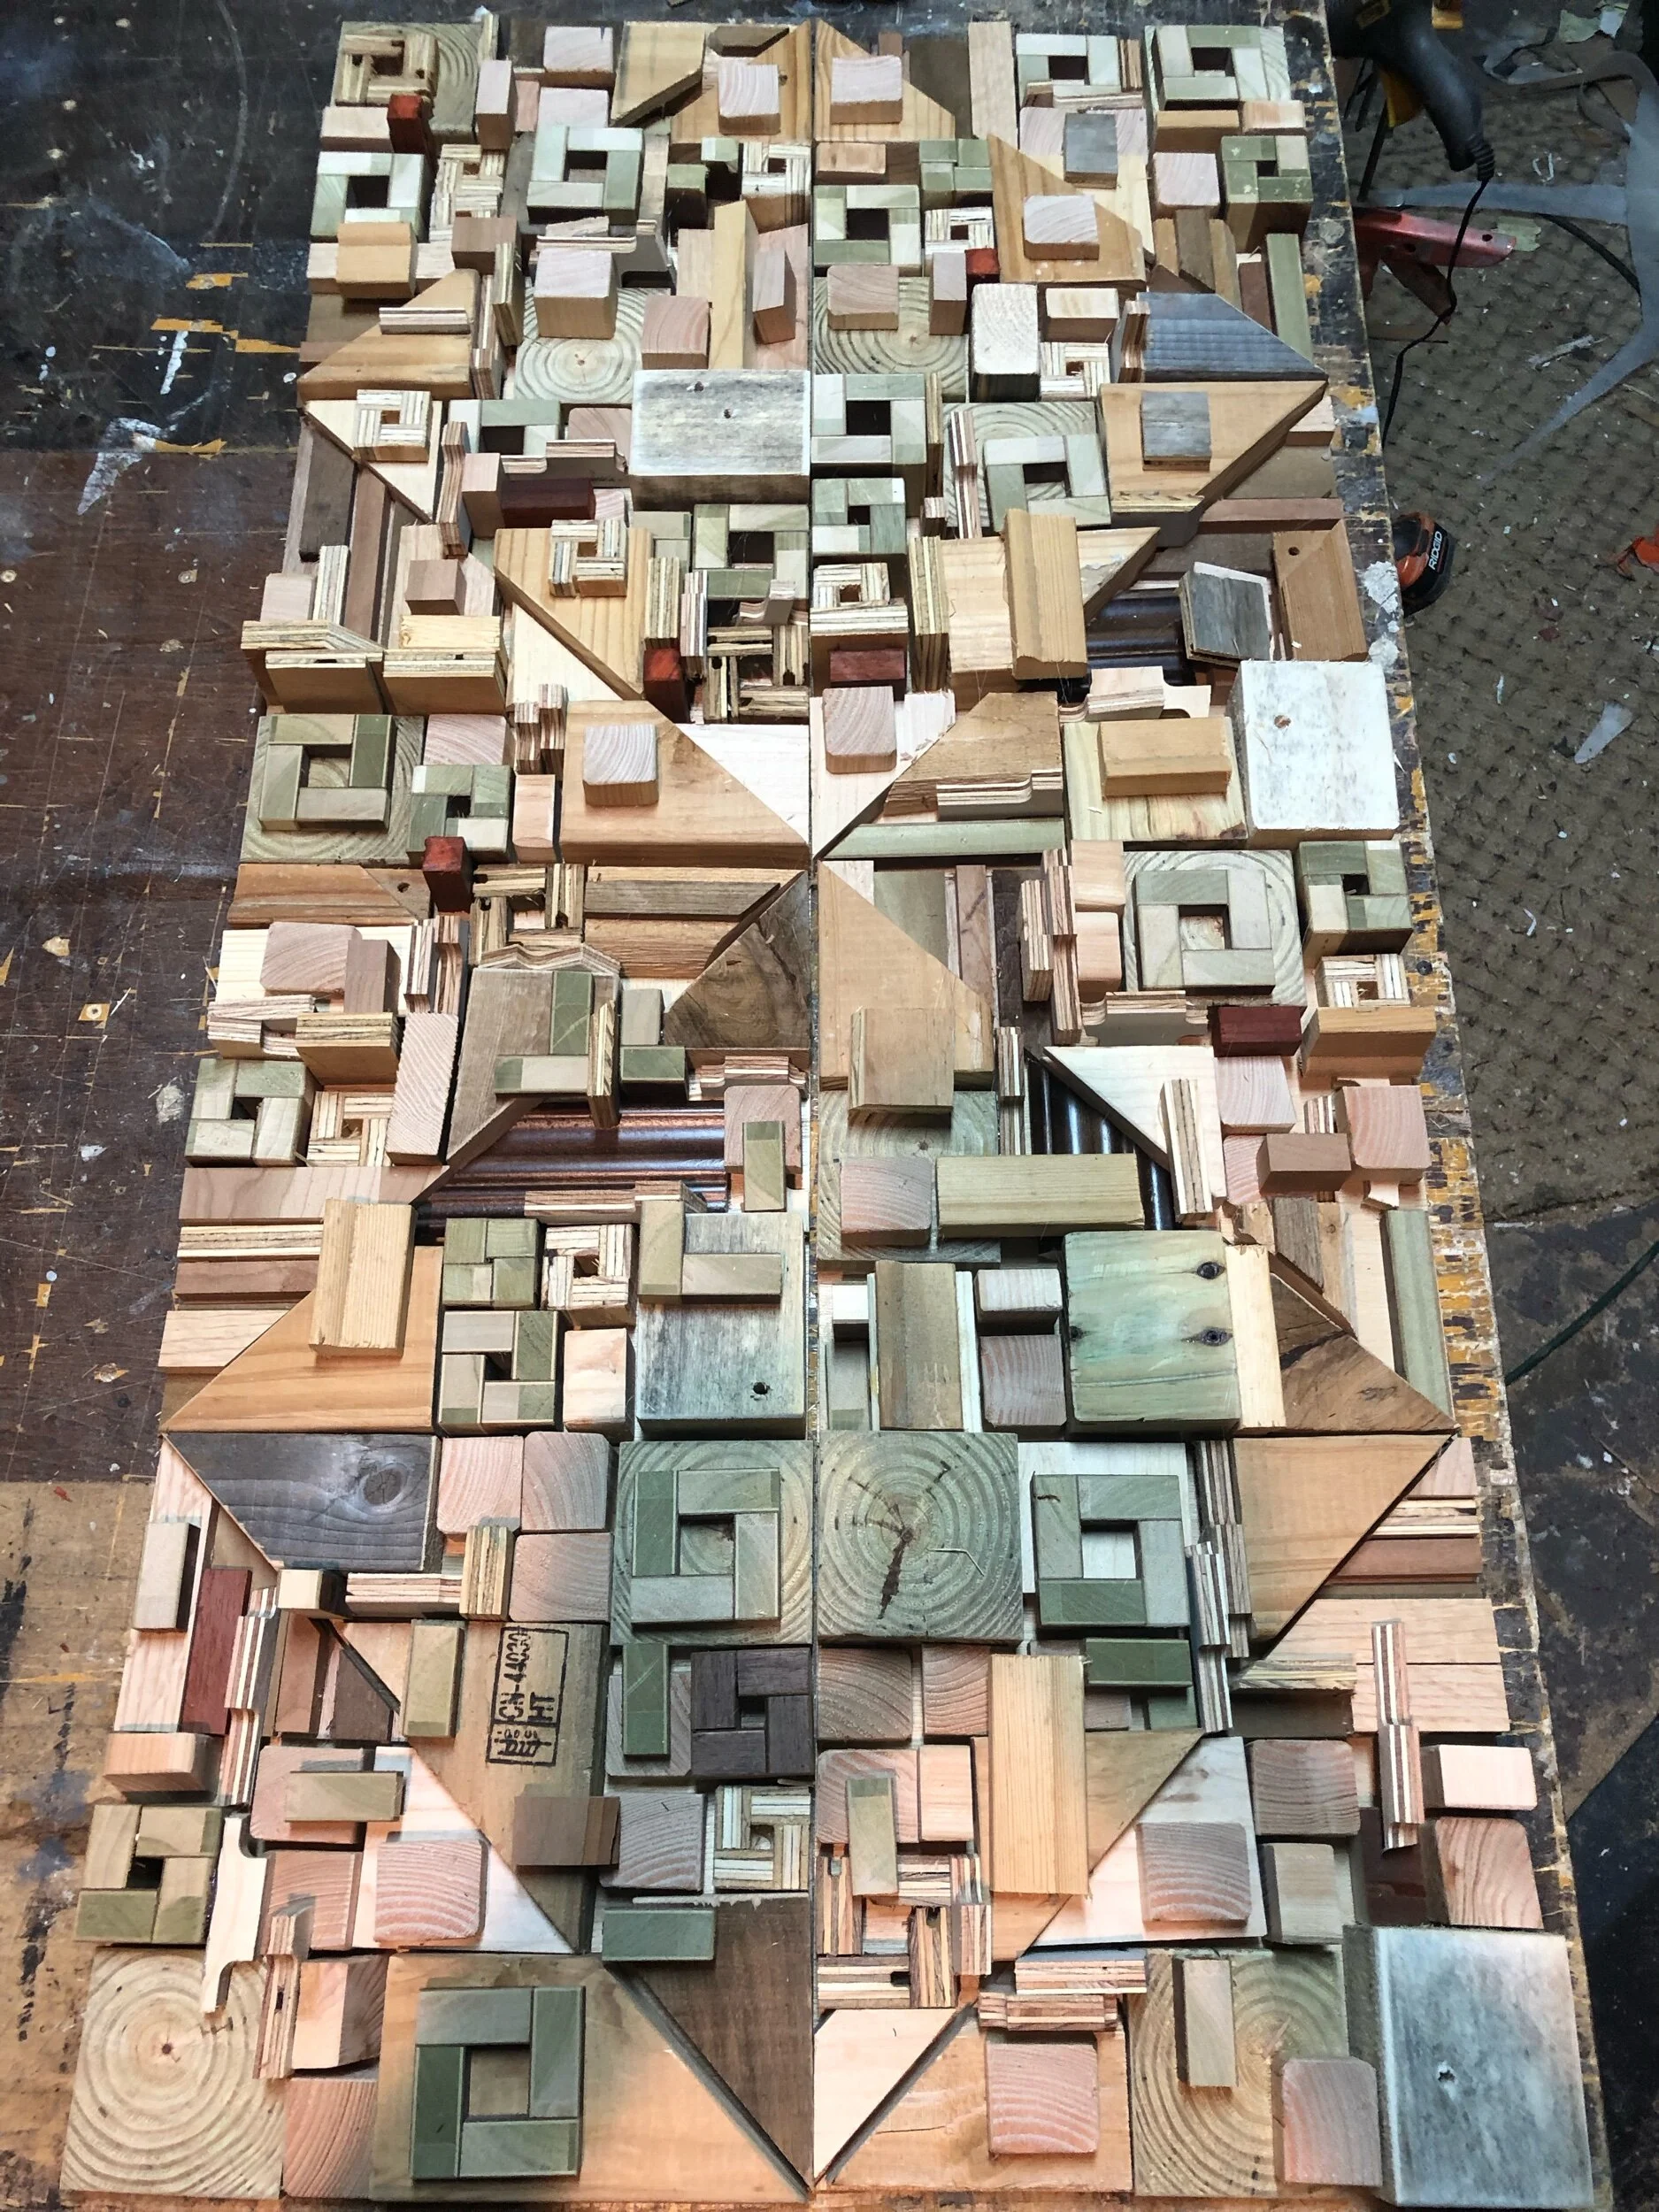
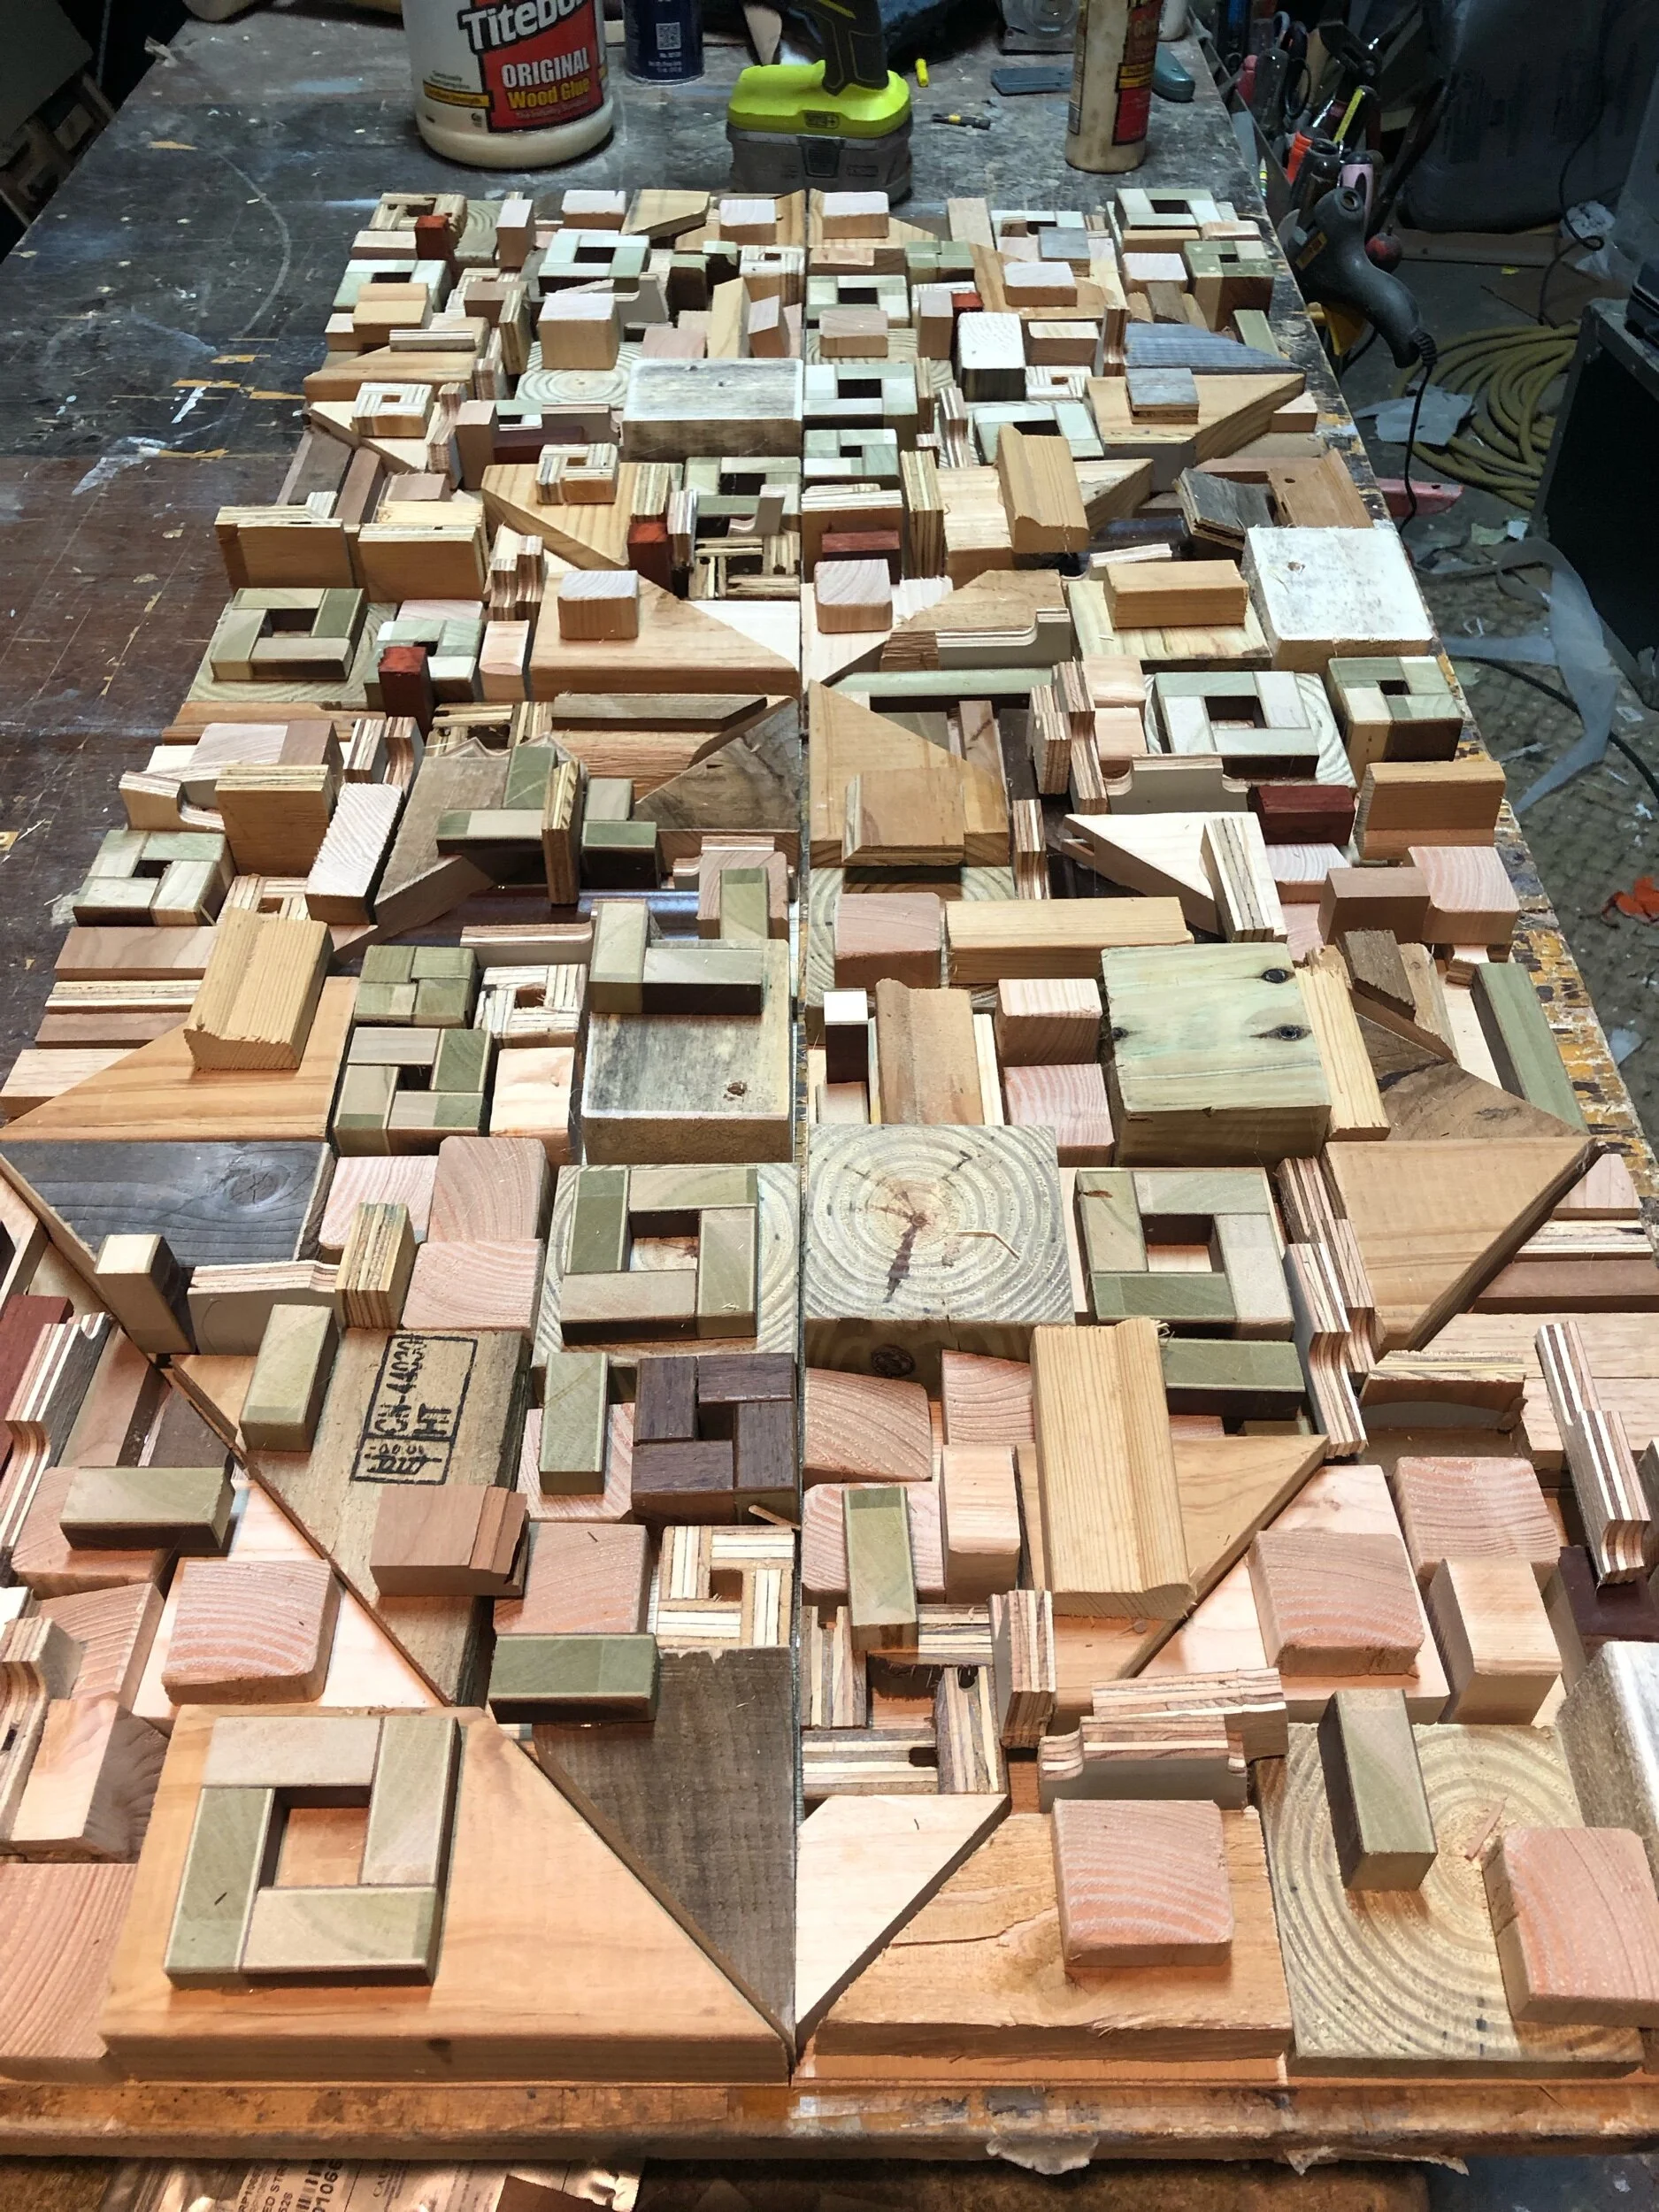
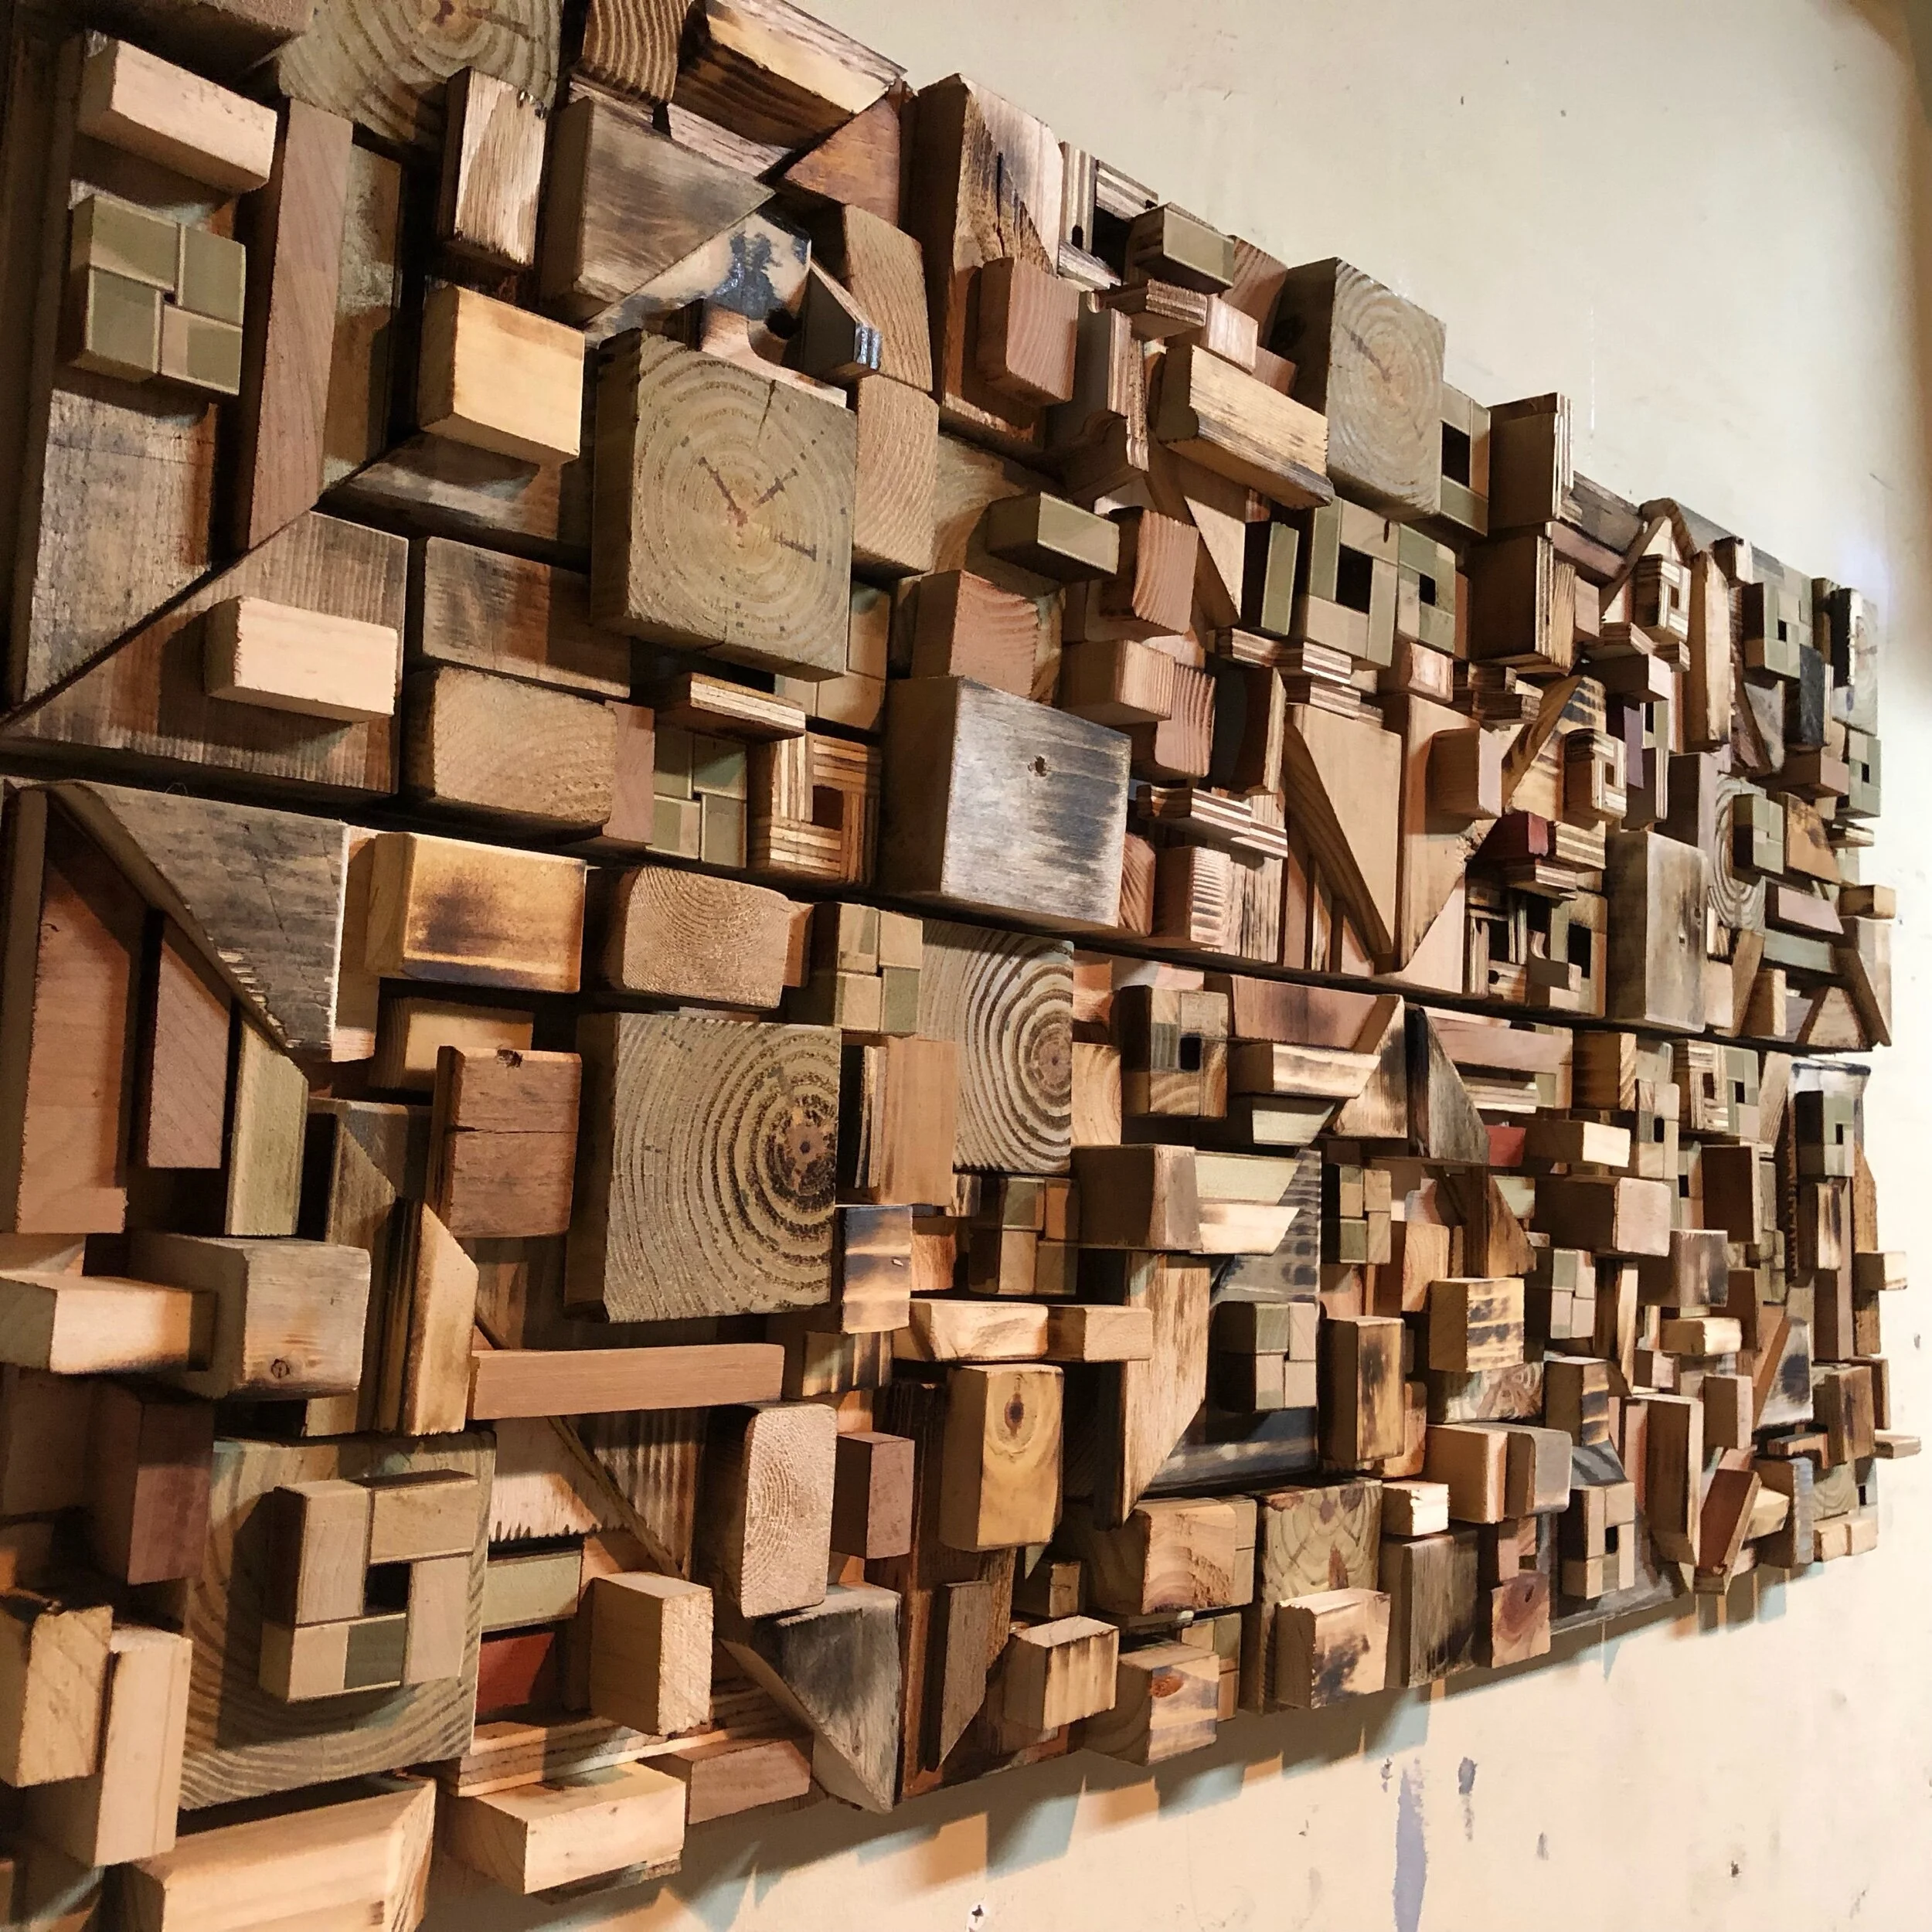
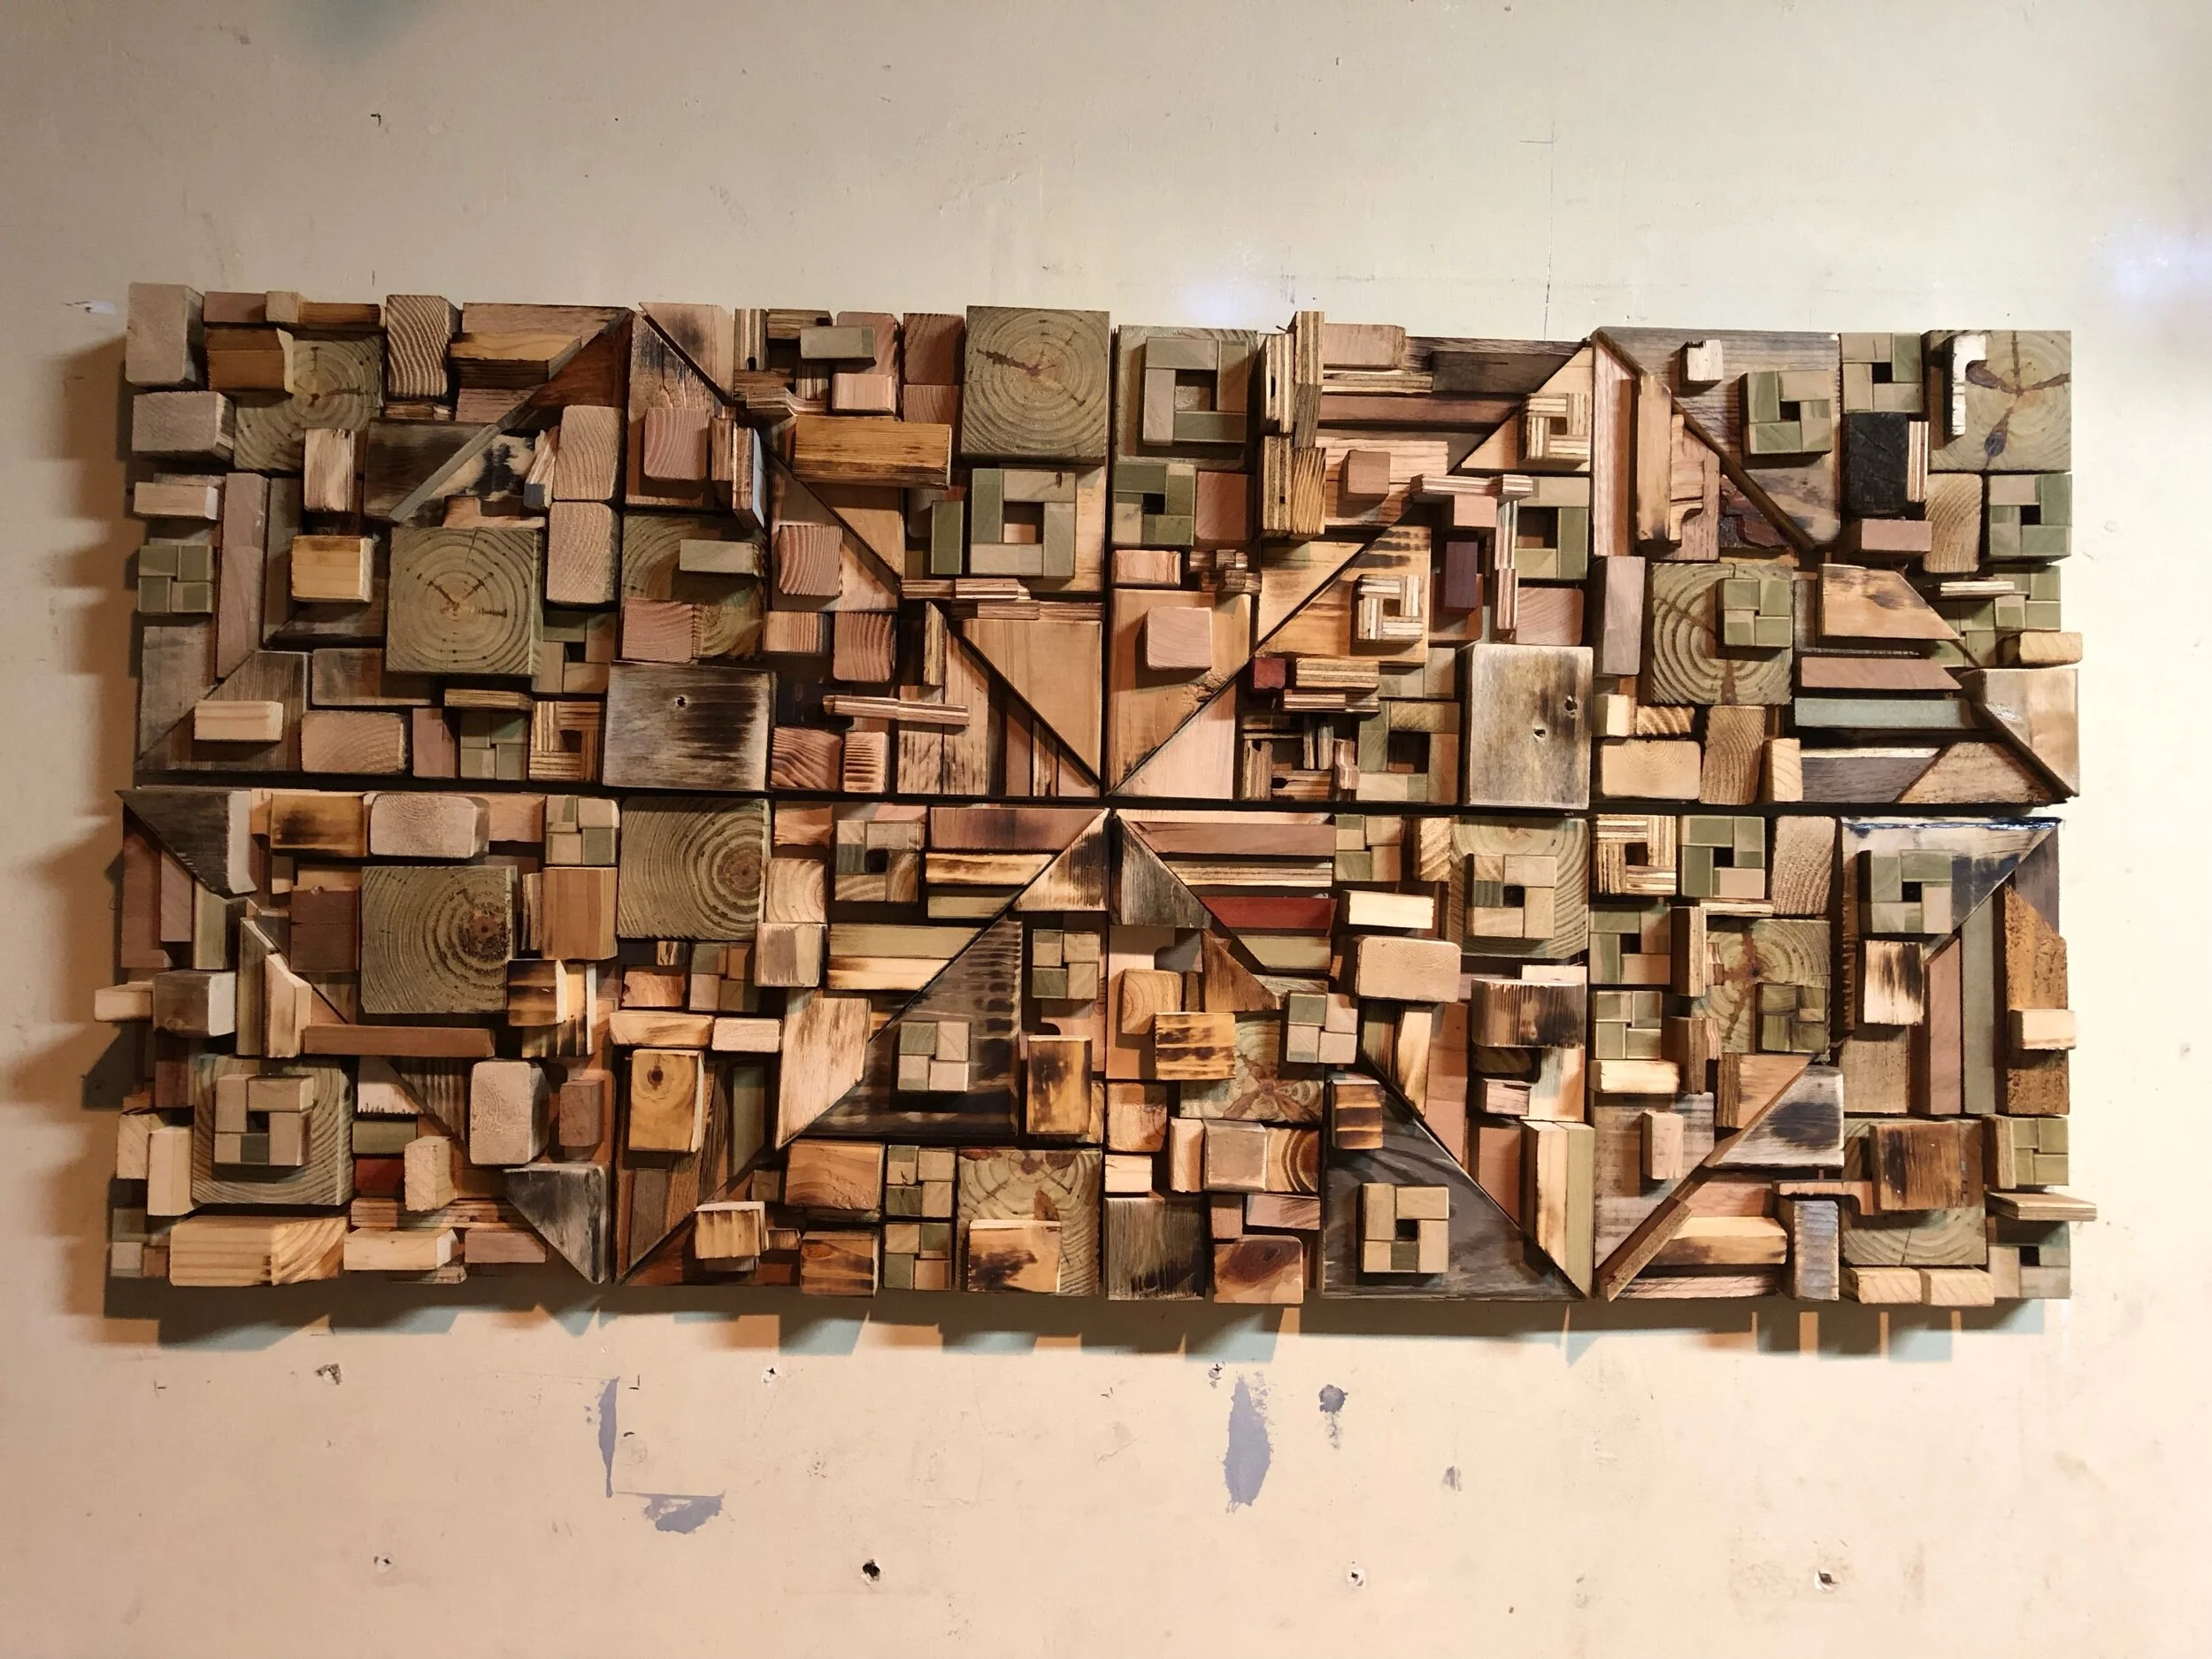
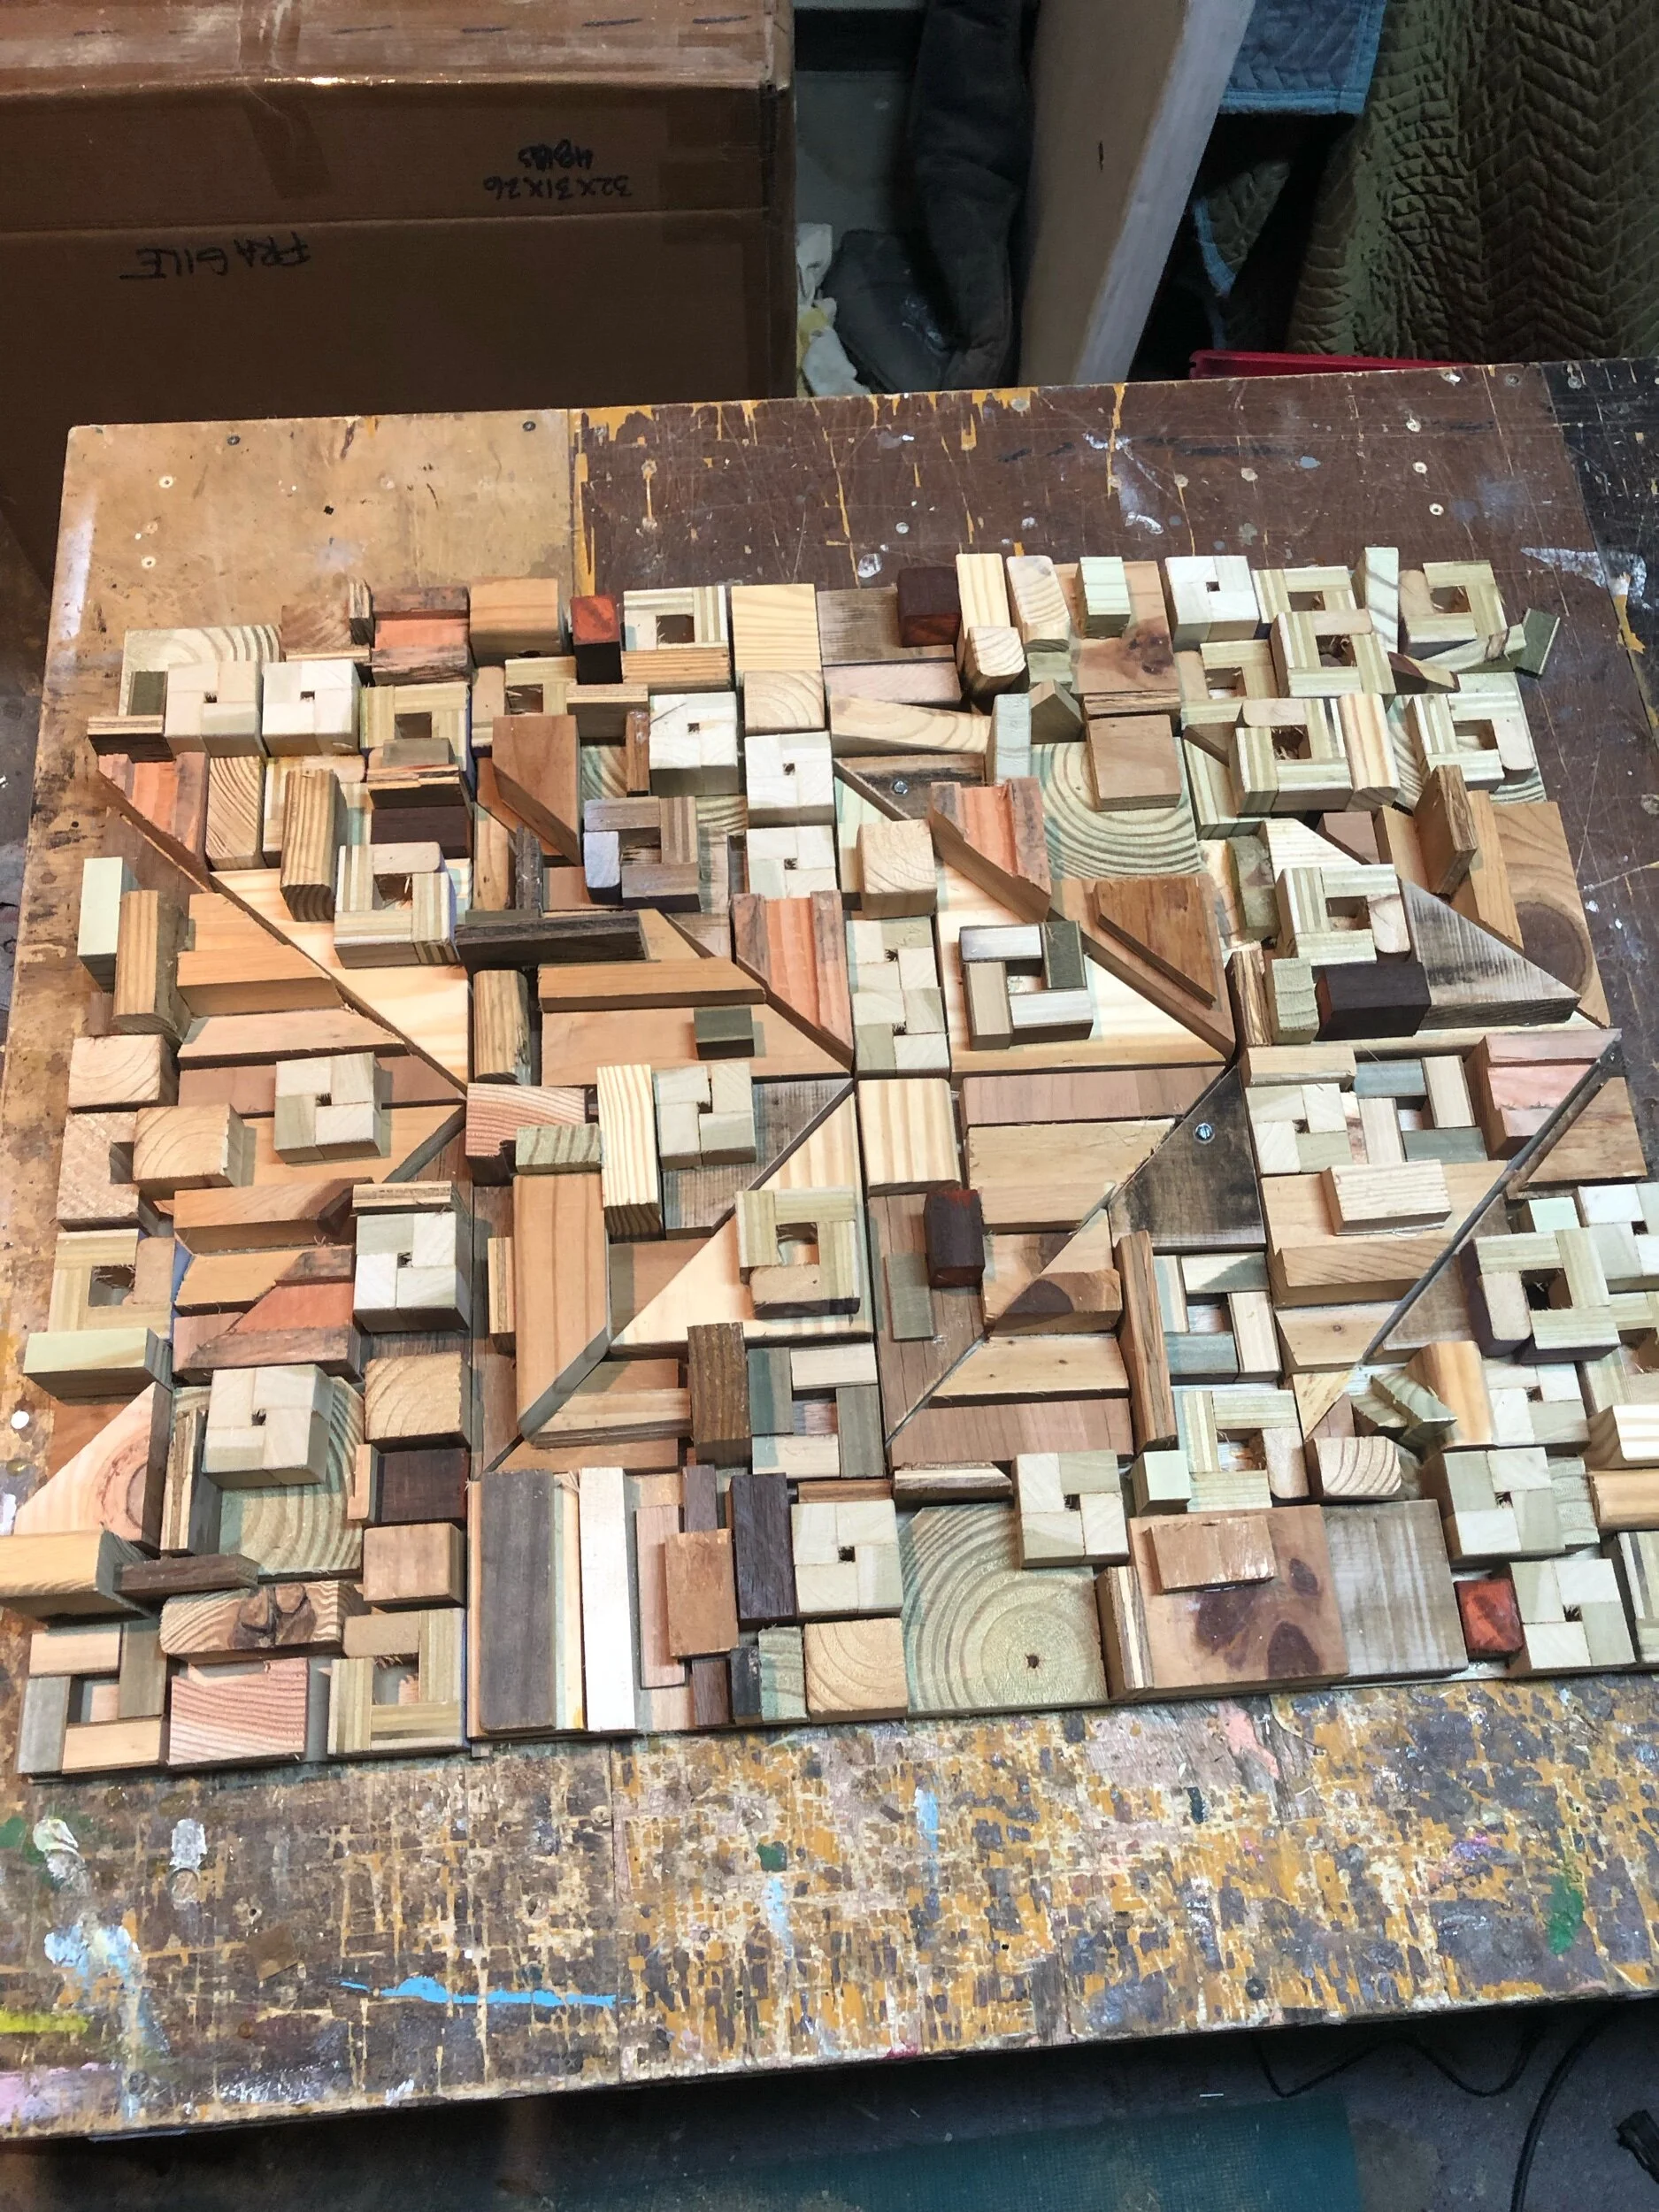
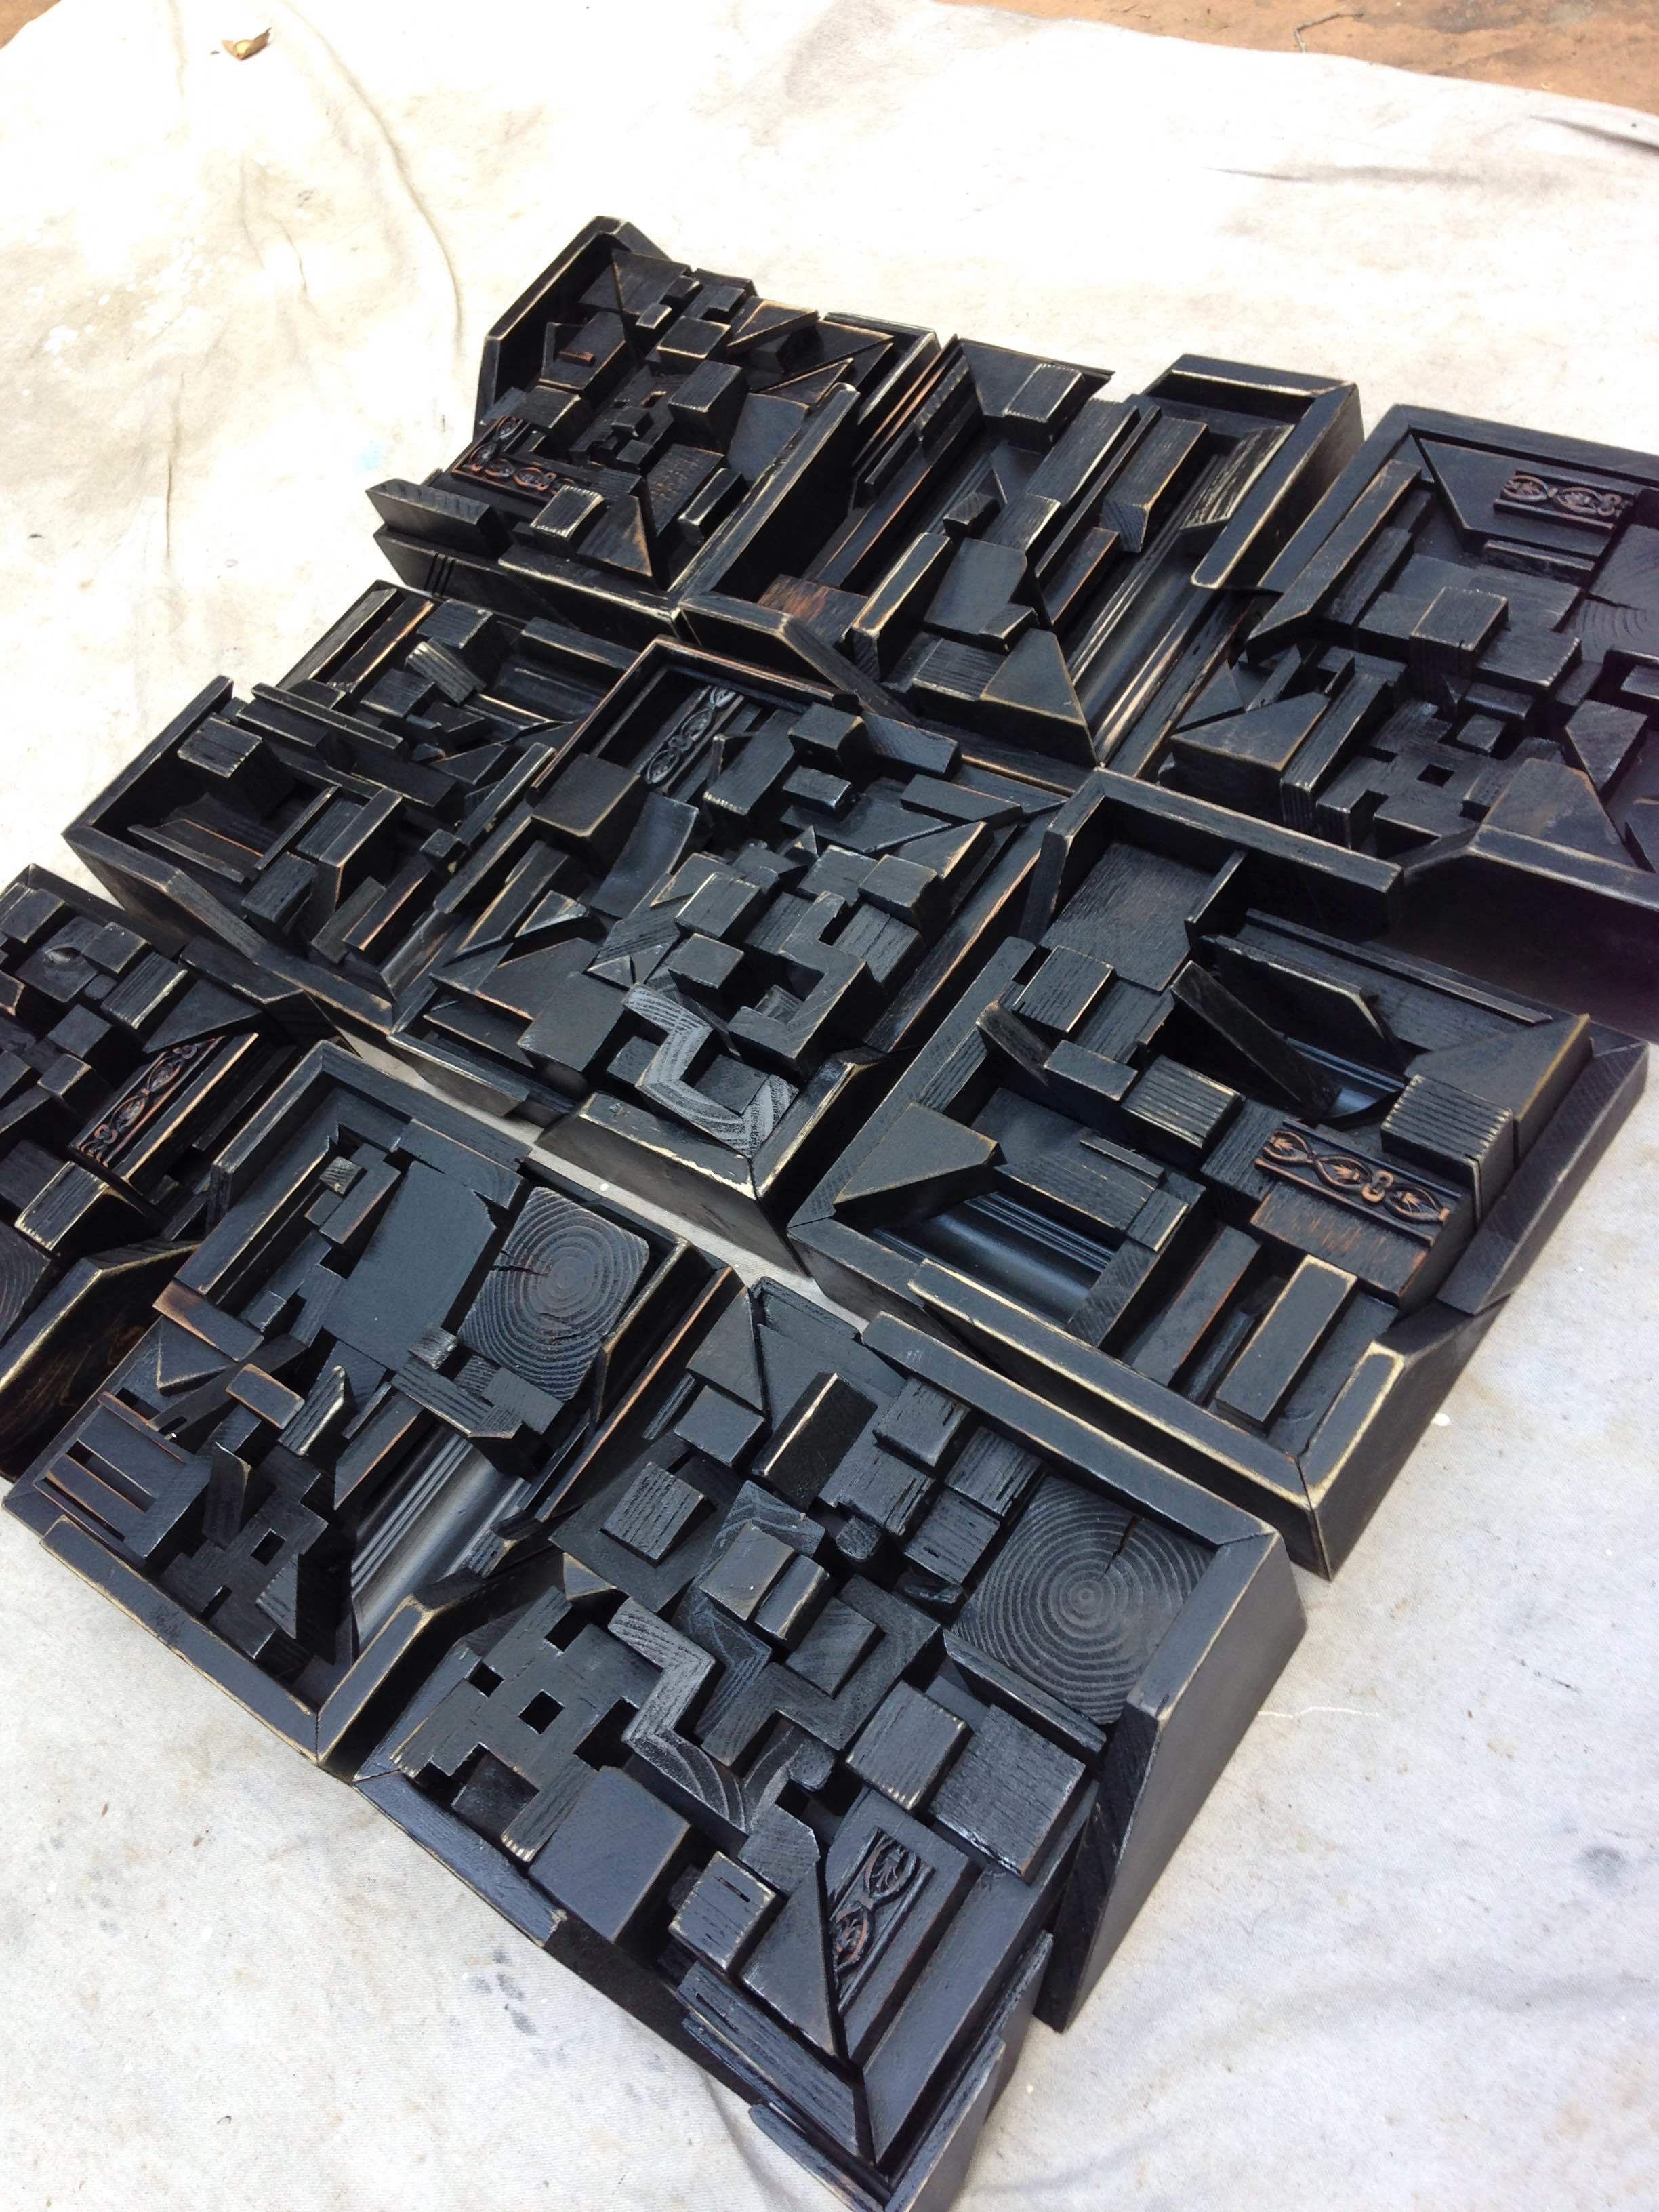
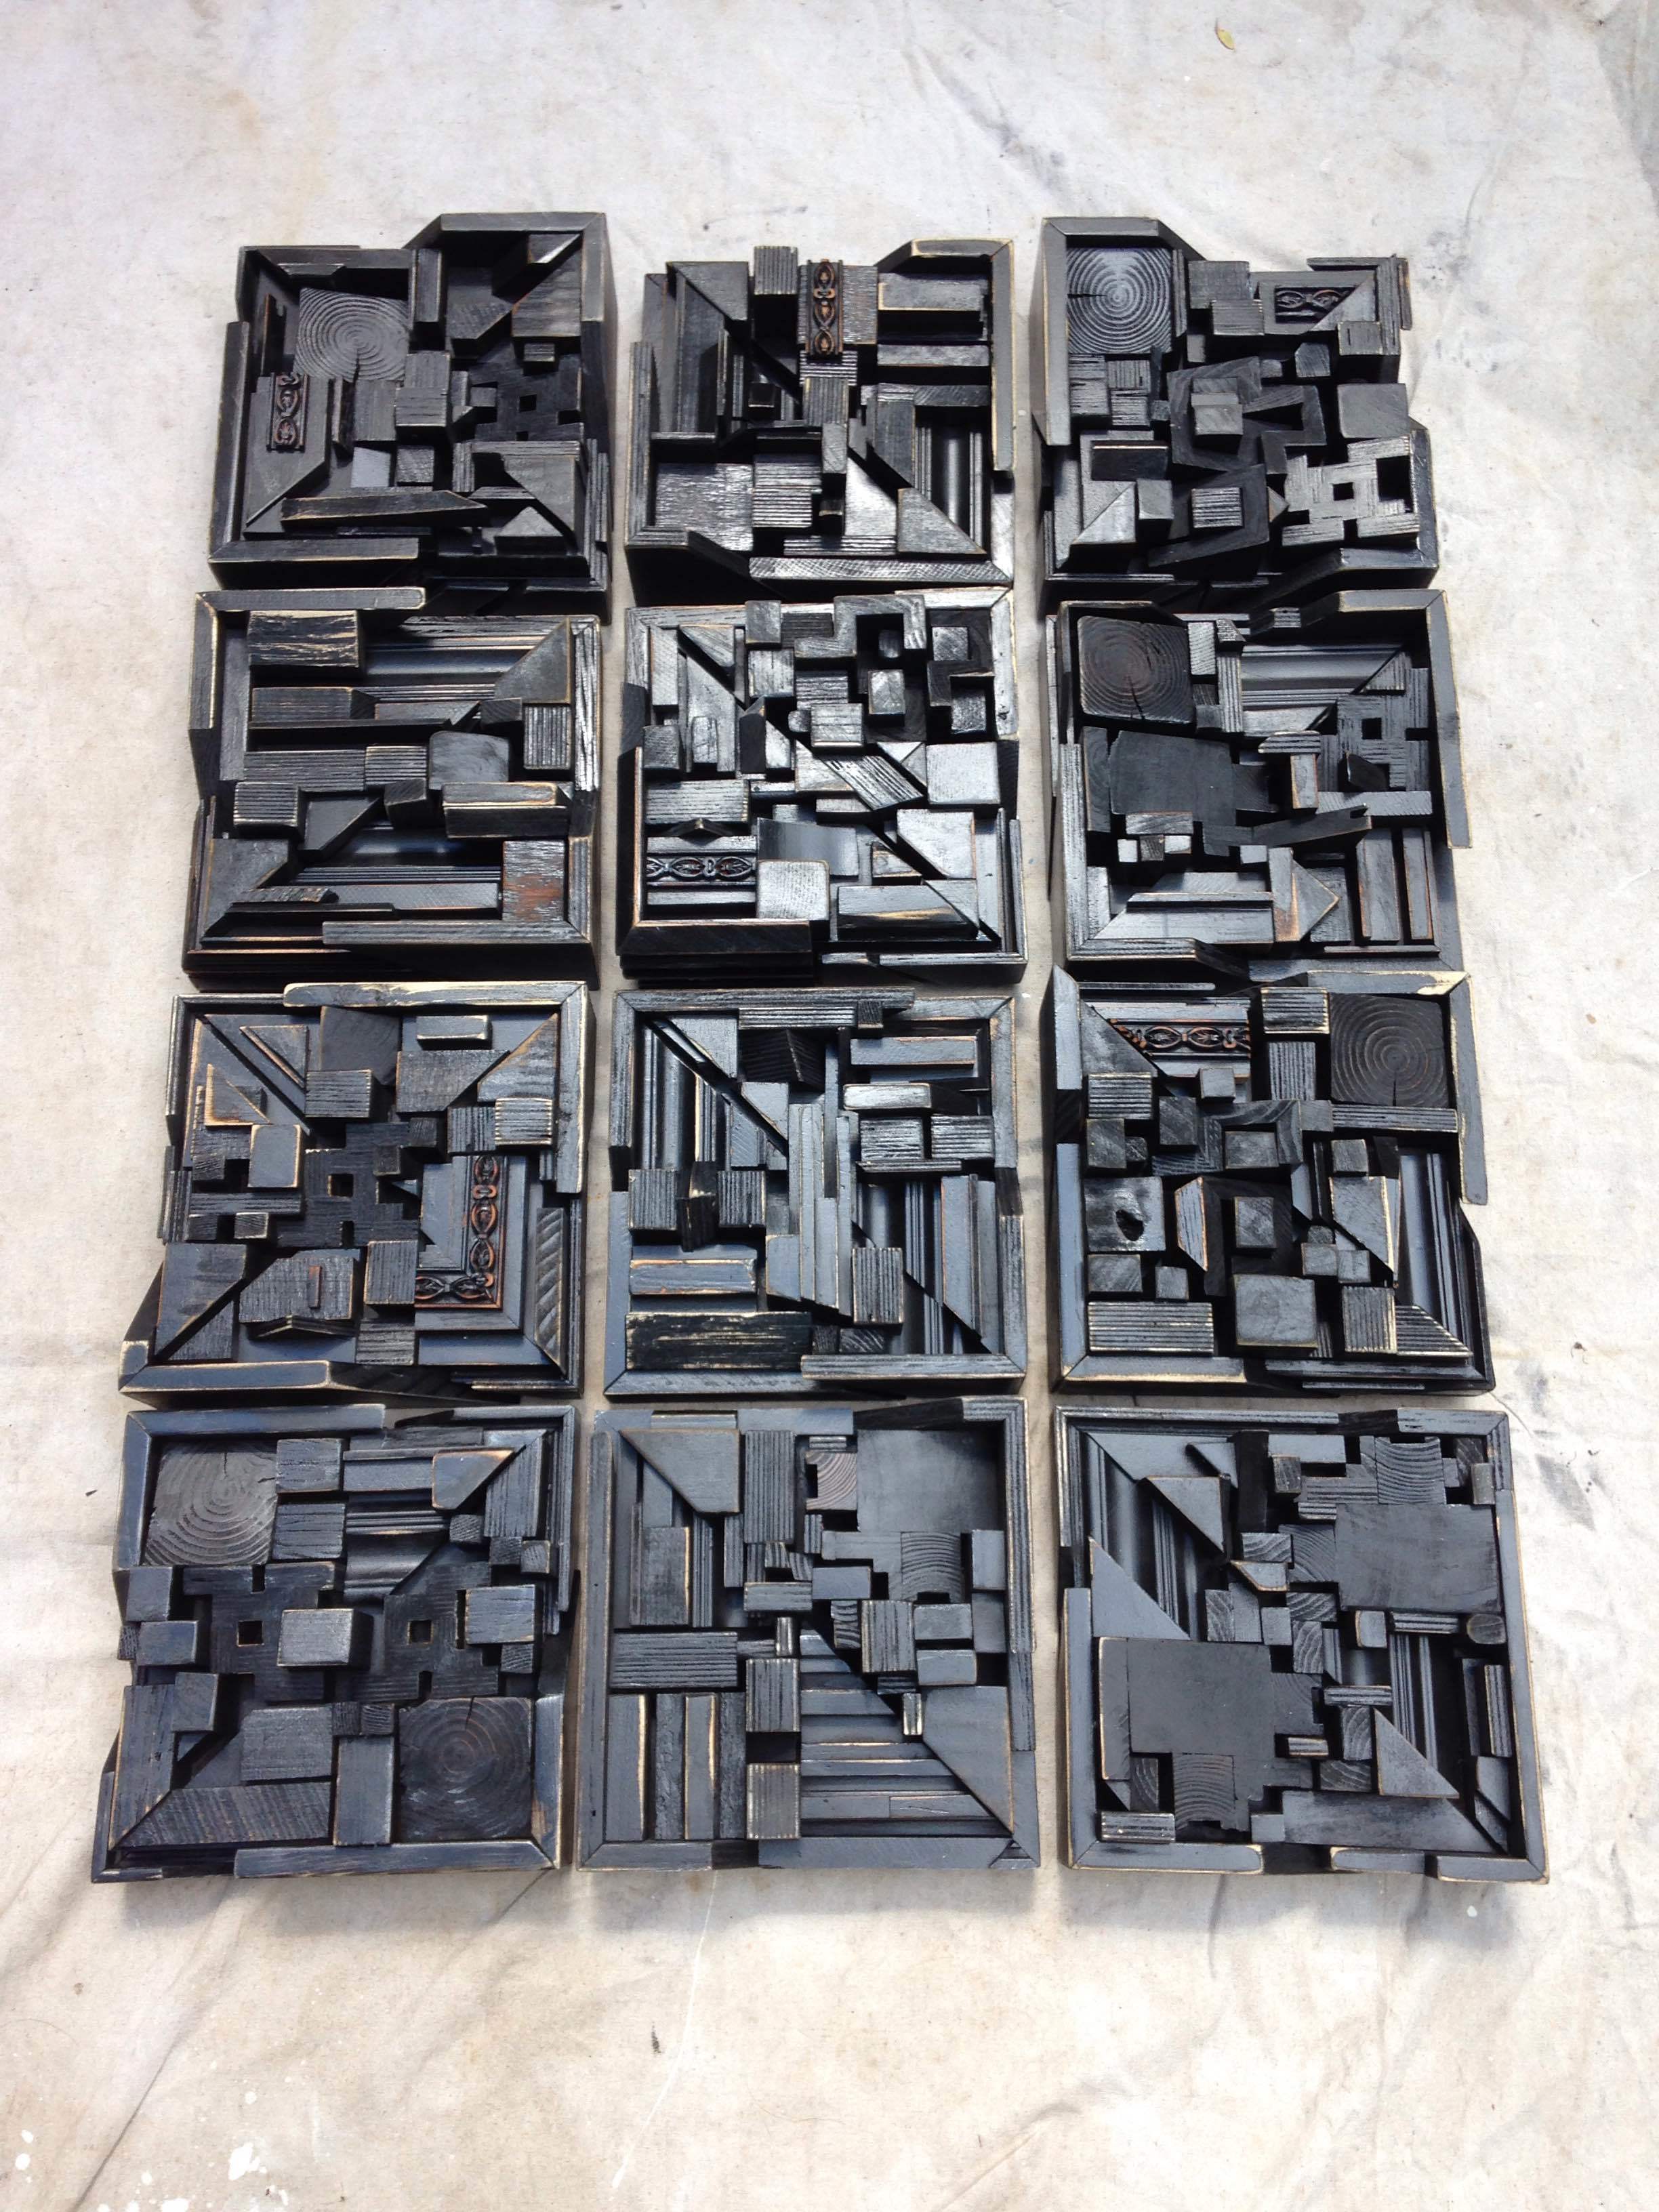
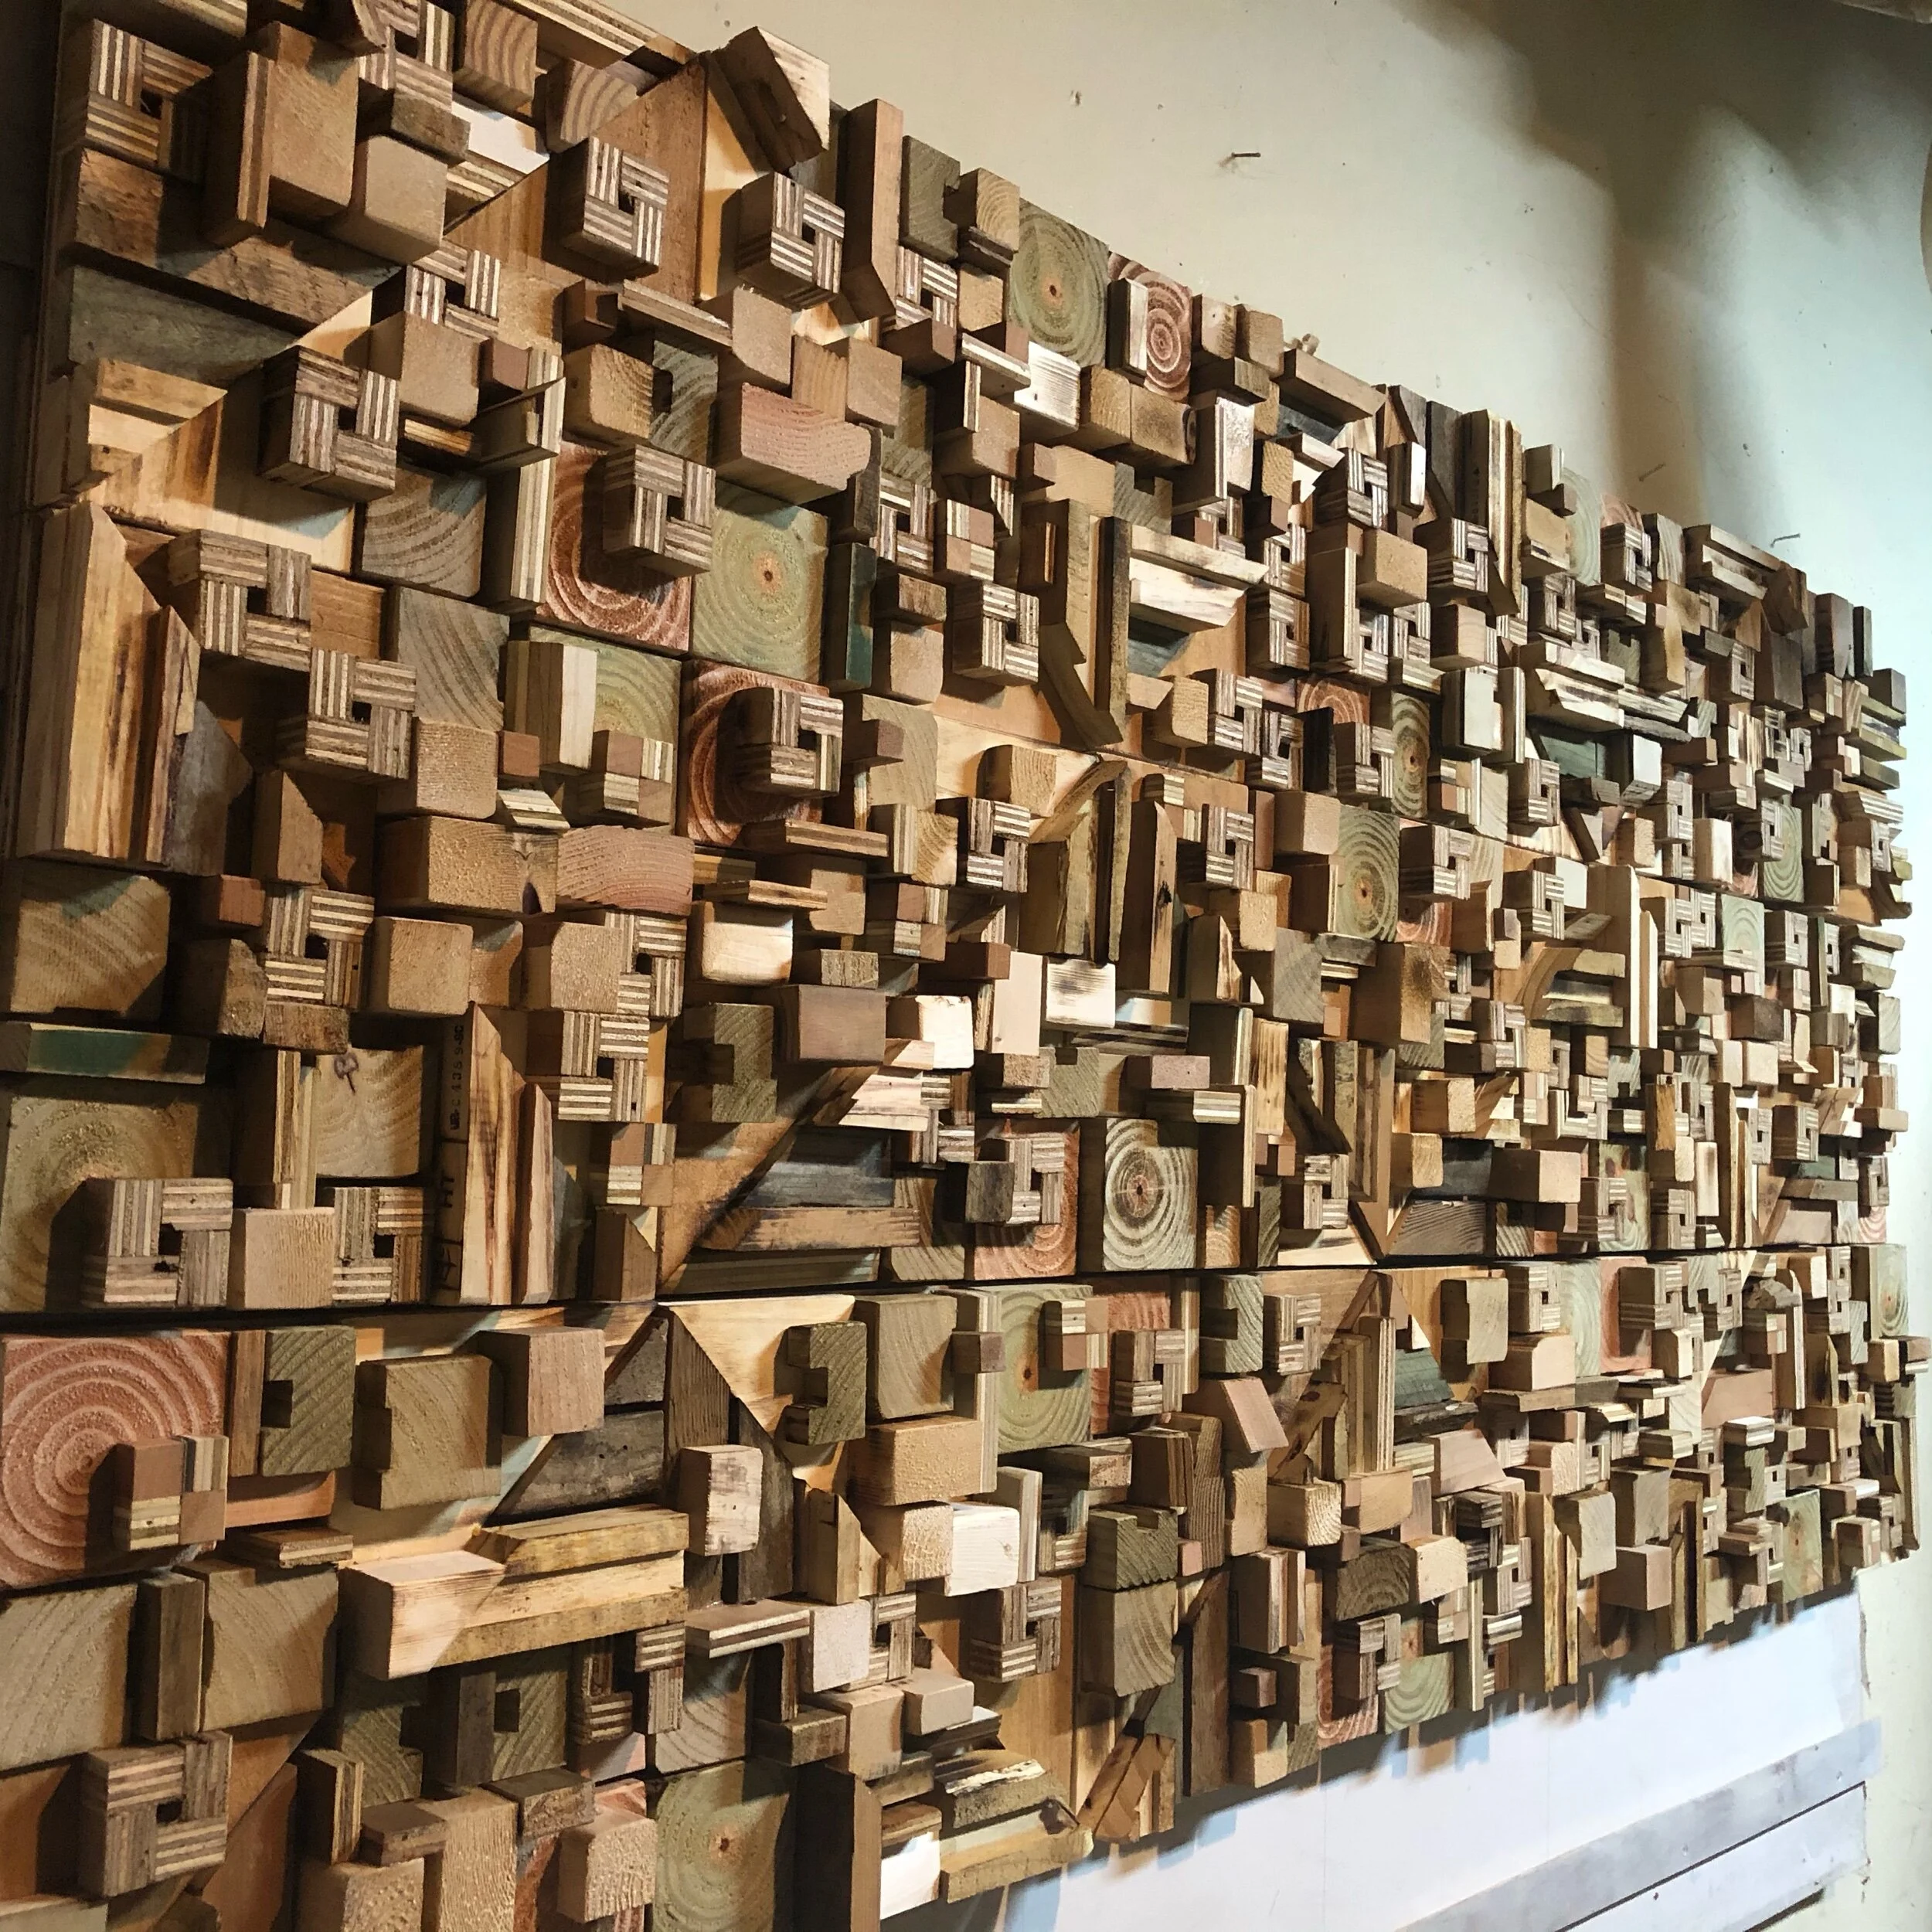
7-28-20: Good news! Your project is complete!. It will be packed tomorrow and will hit Fed Ex on Friday. Look for a tracking number in an email soon. Also, stay tuned here for a map of the layout for an easier installation.
Thank you for waiting and stay safe!
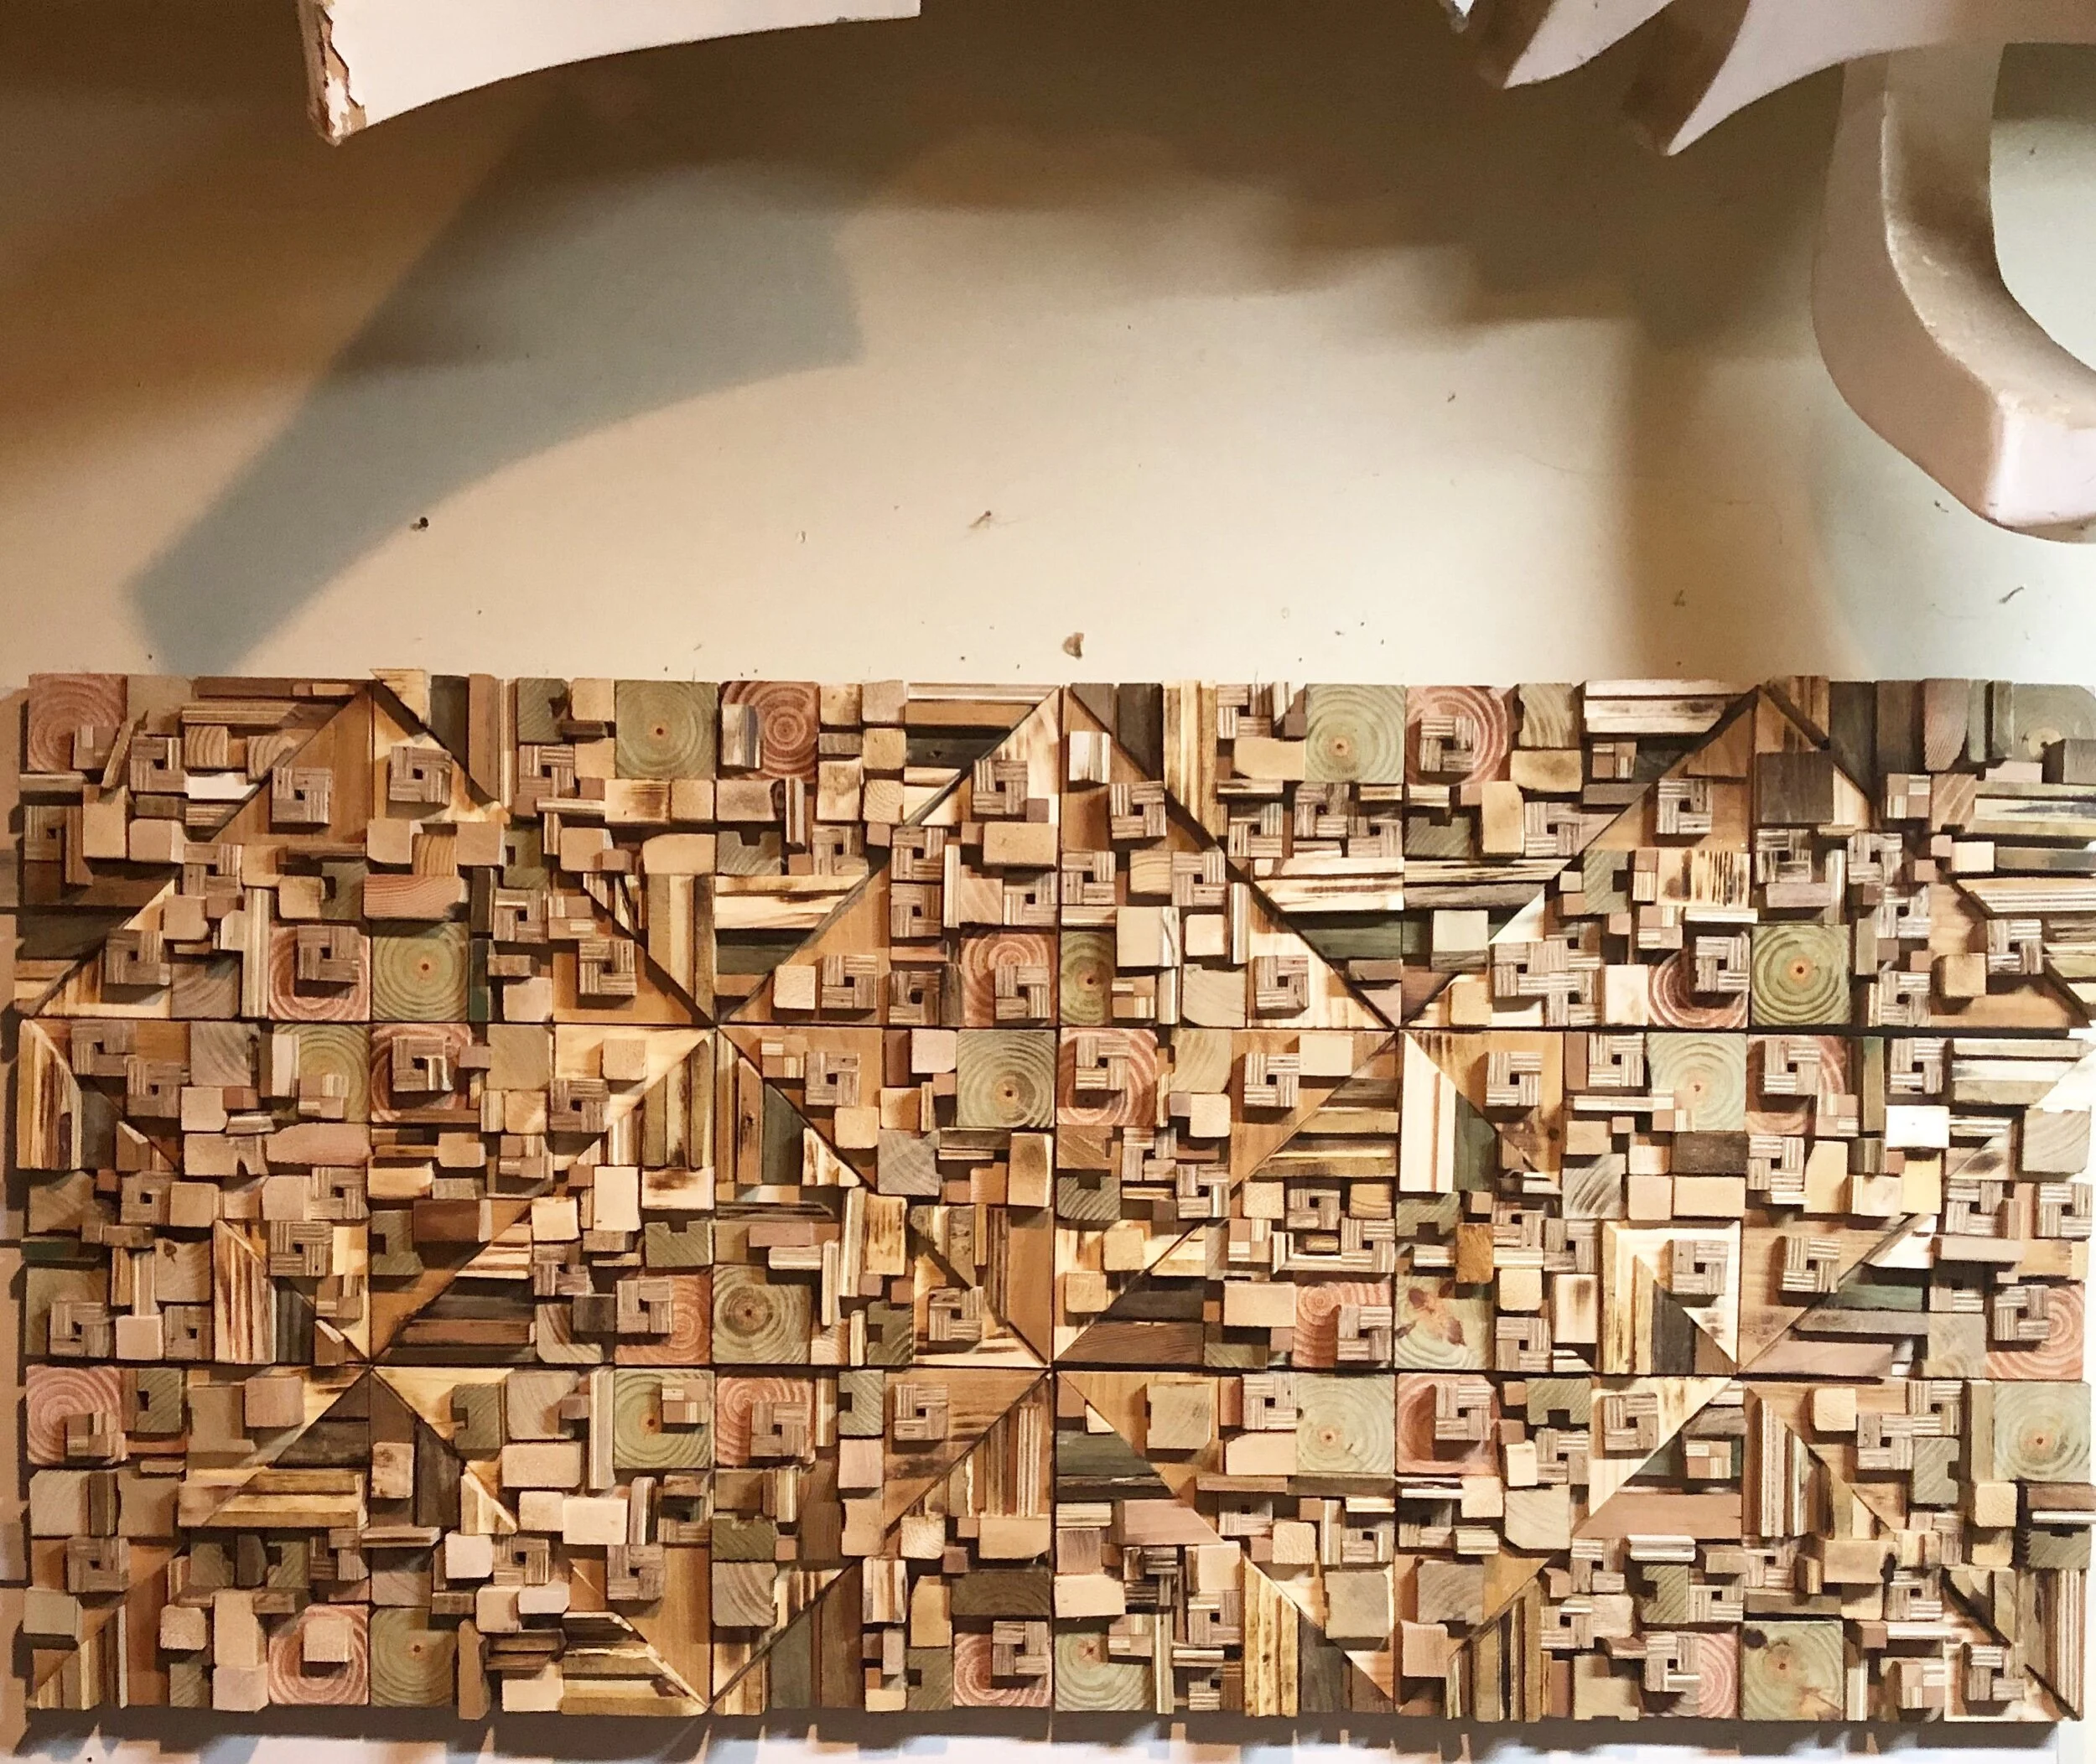


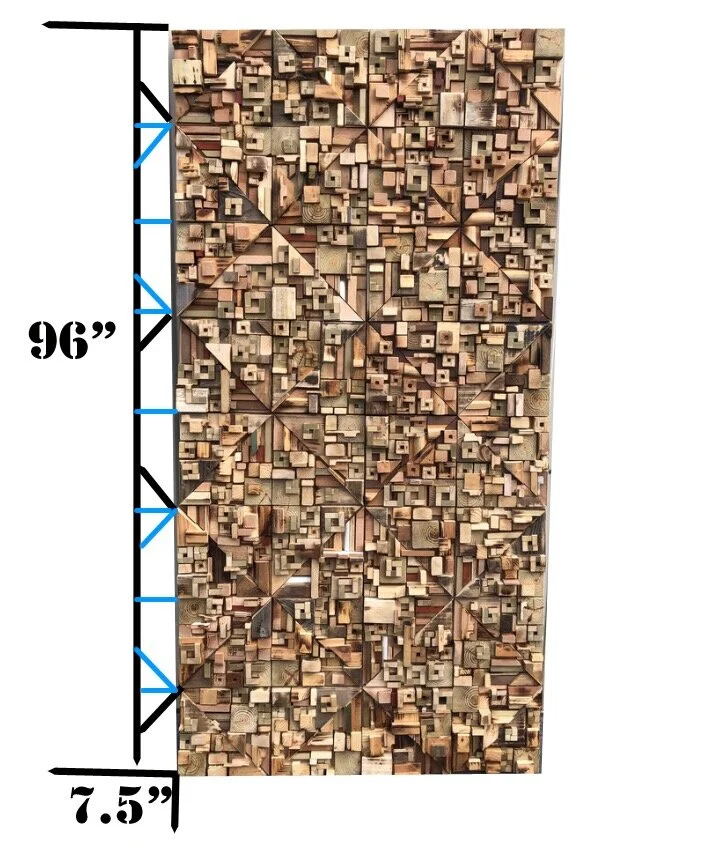
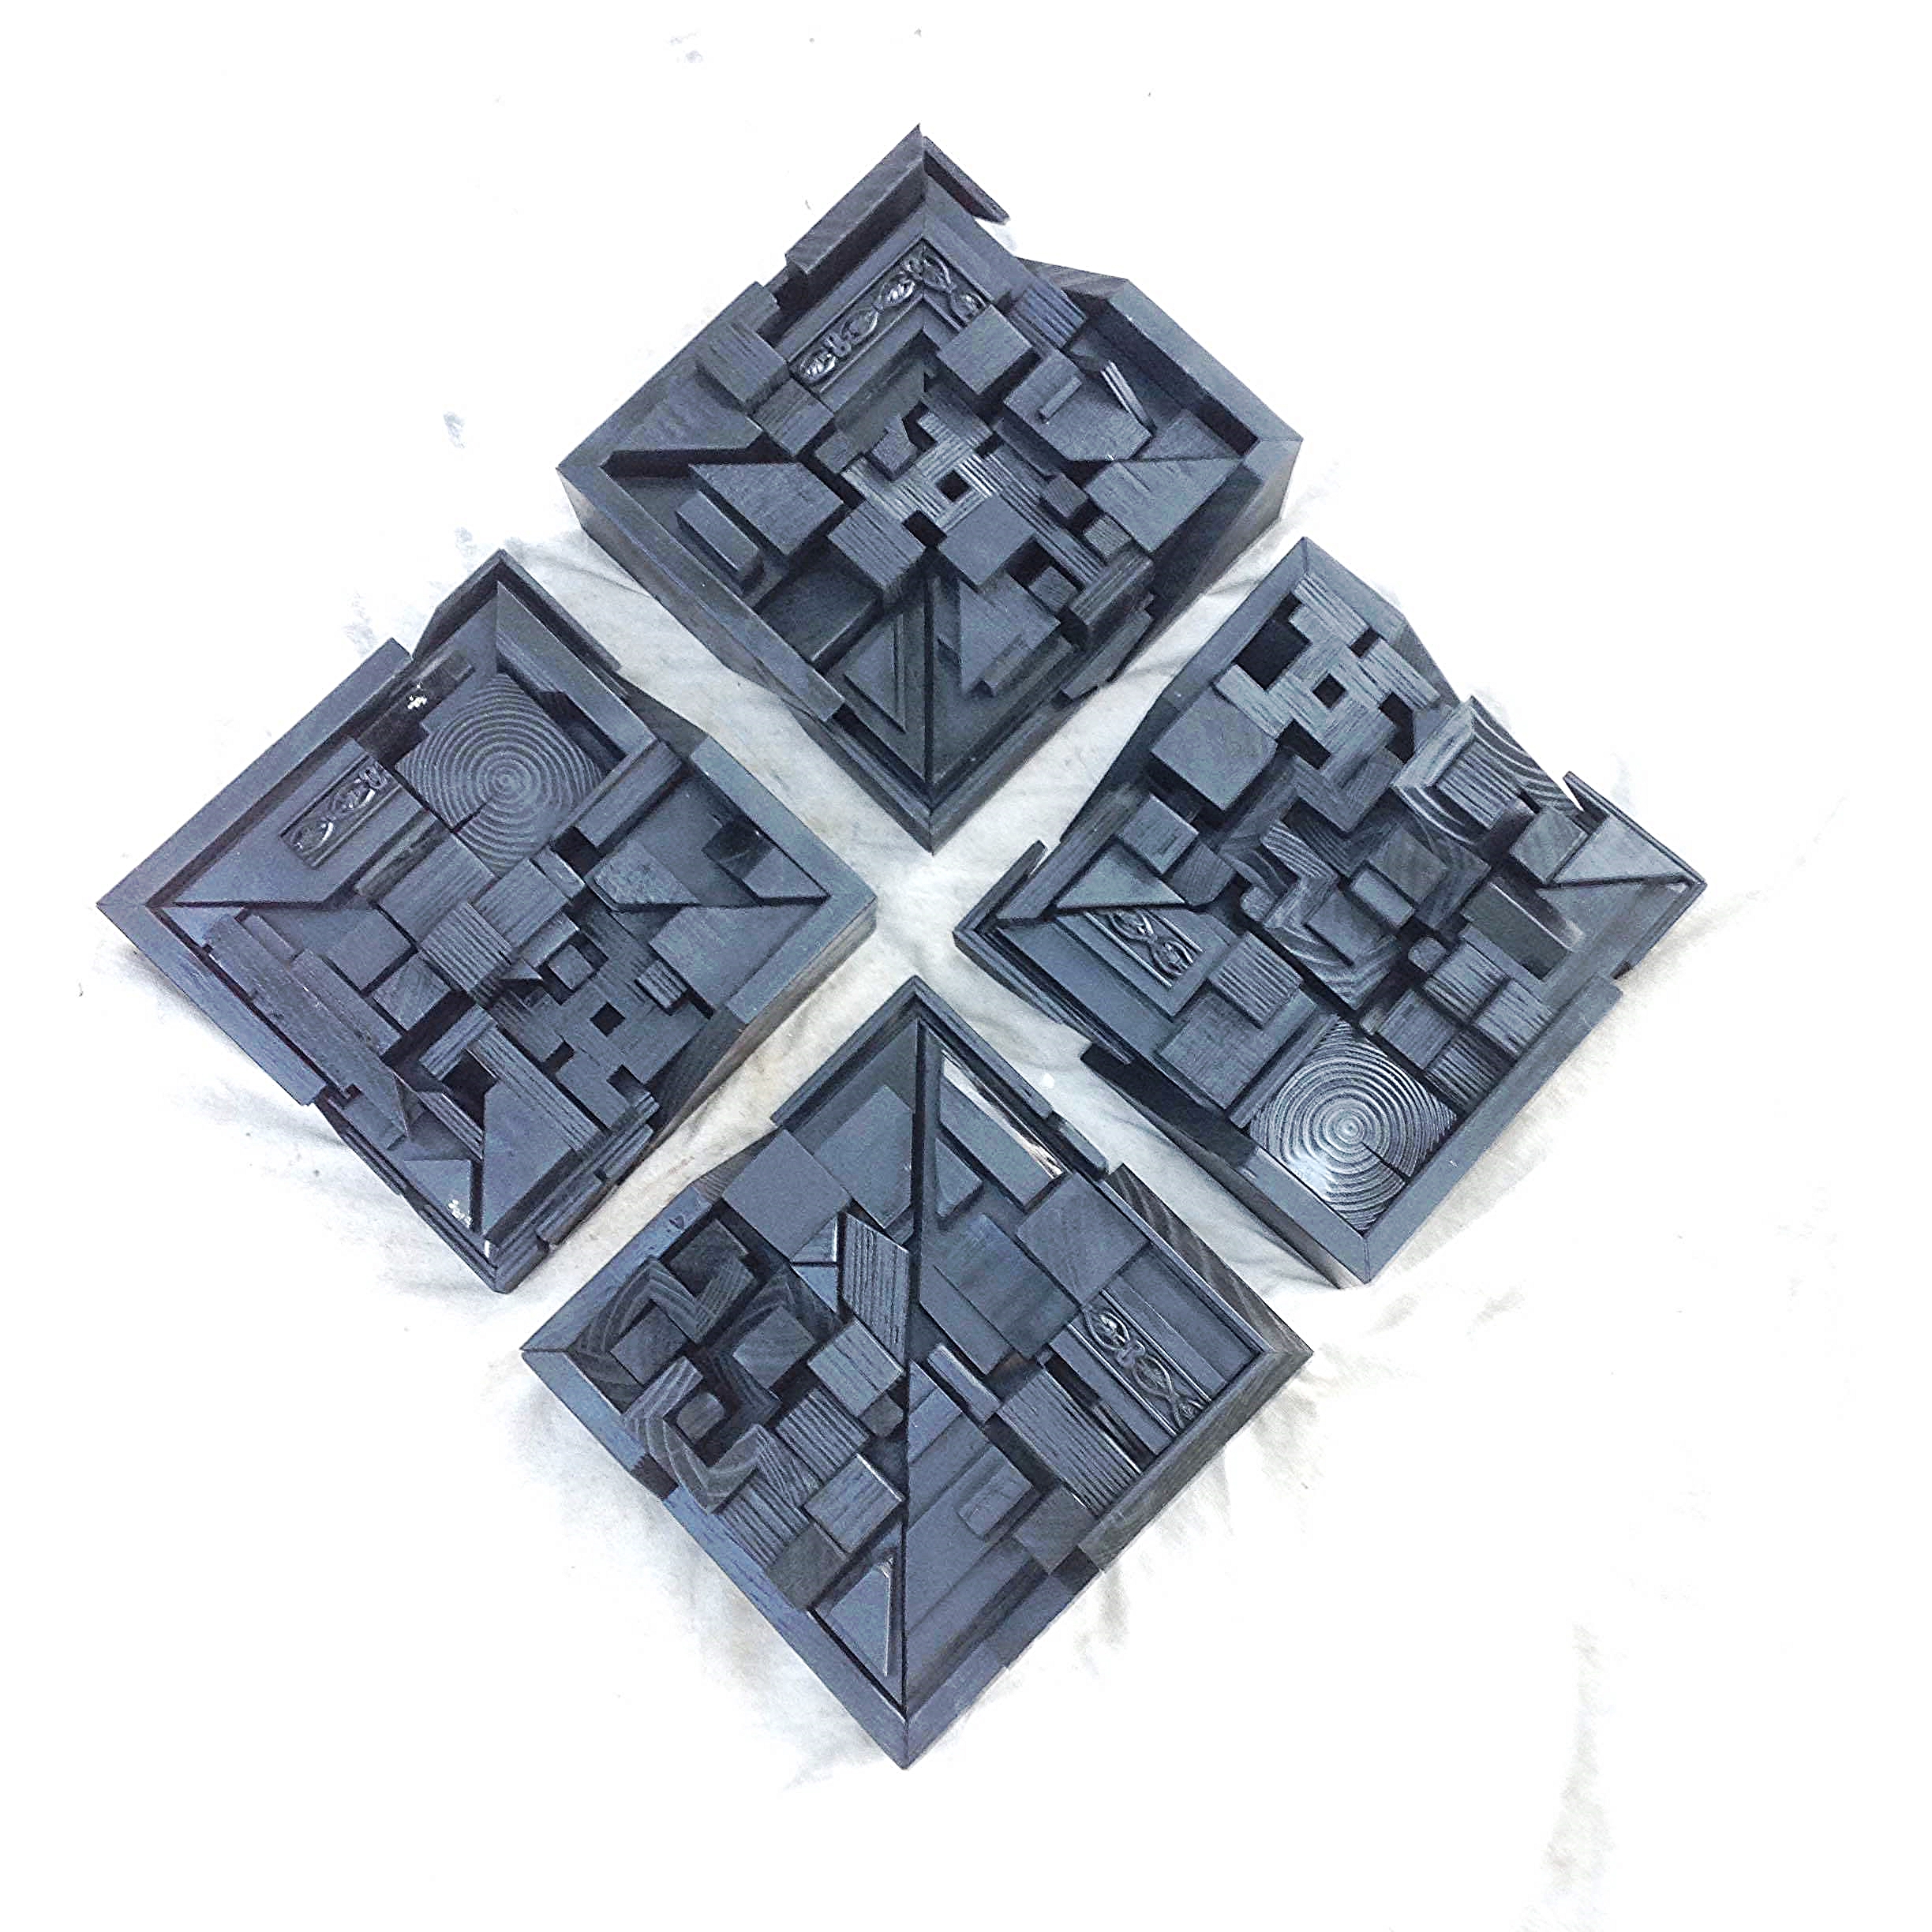
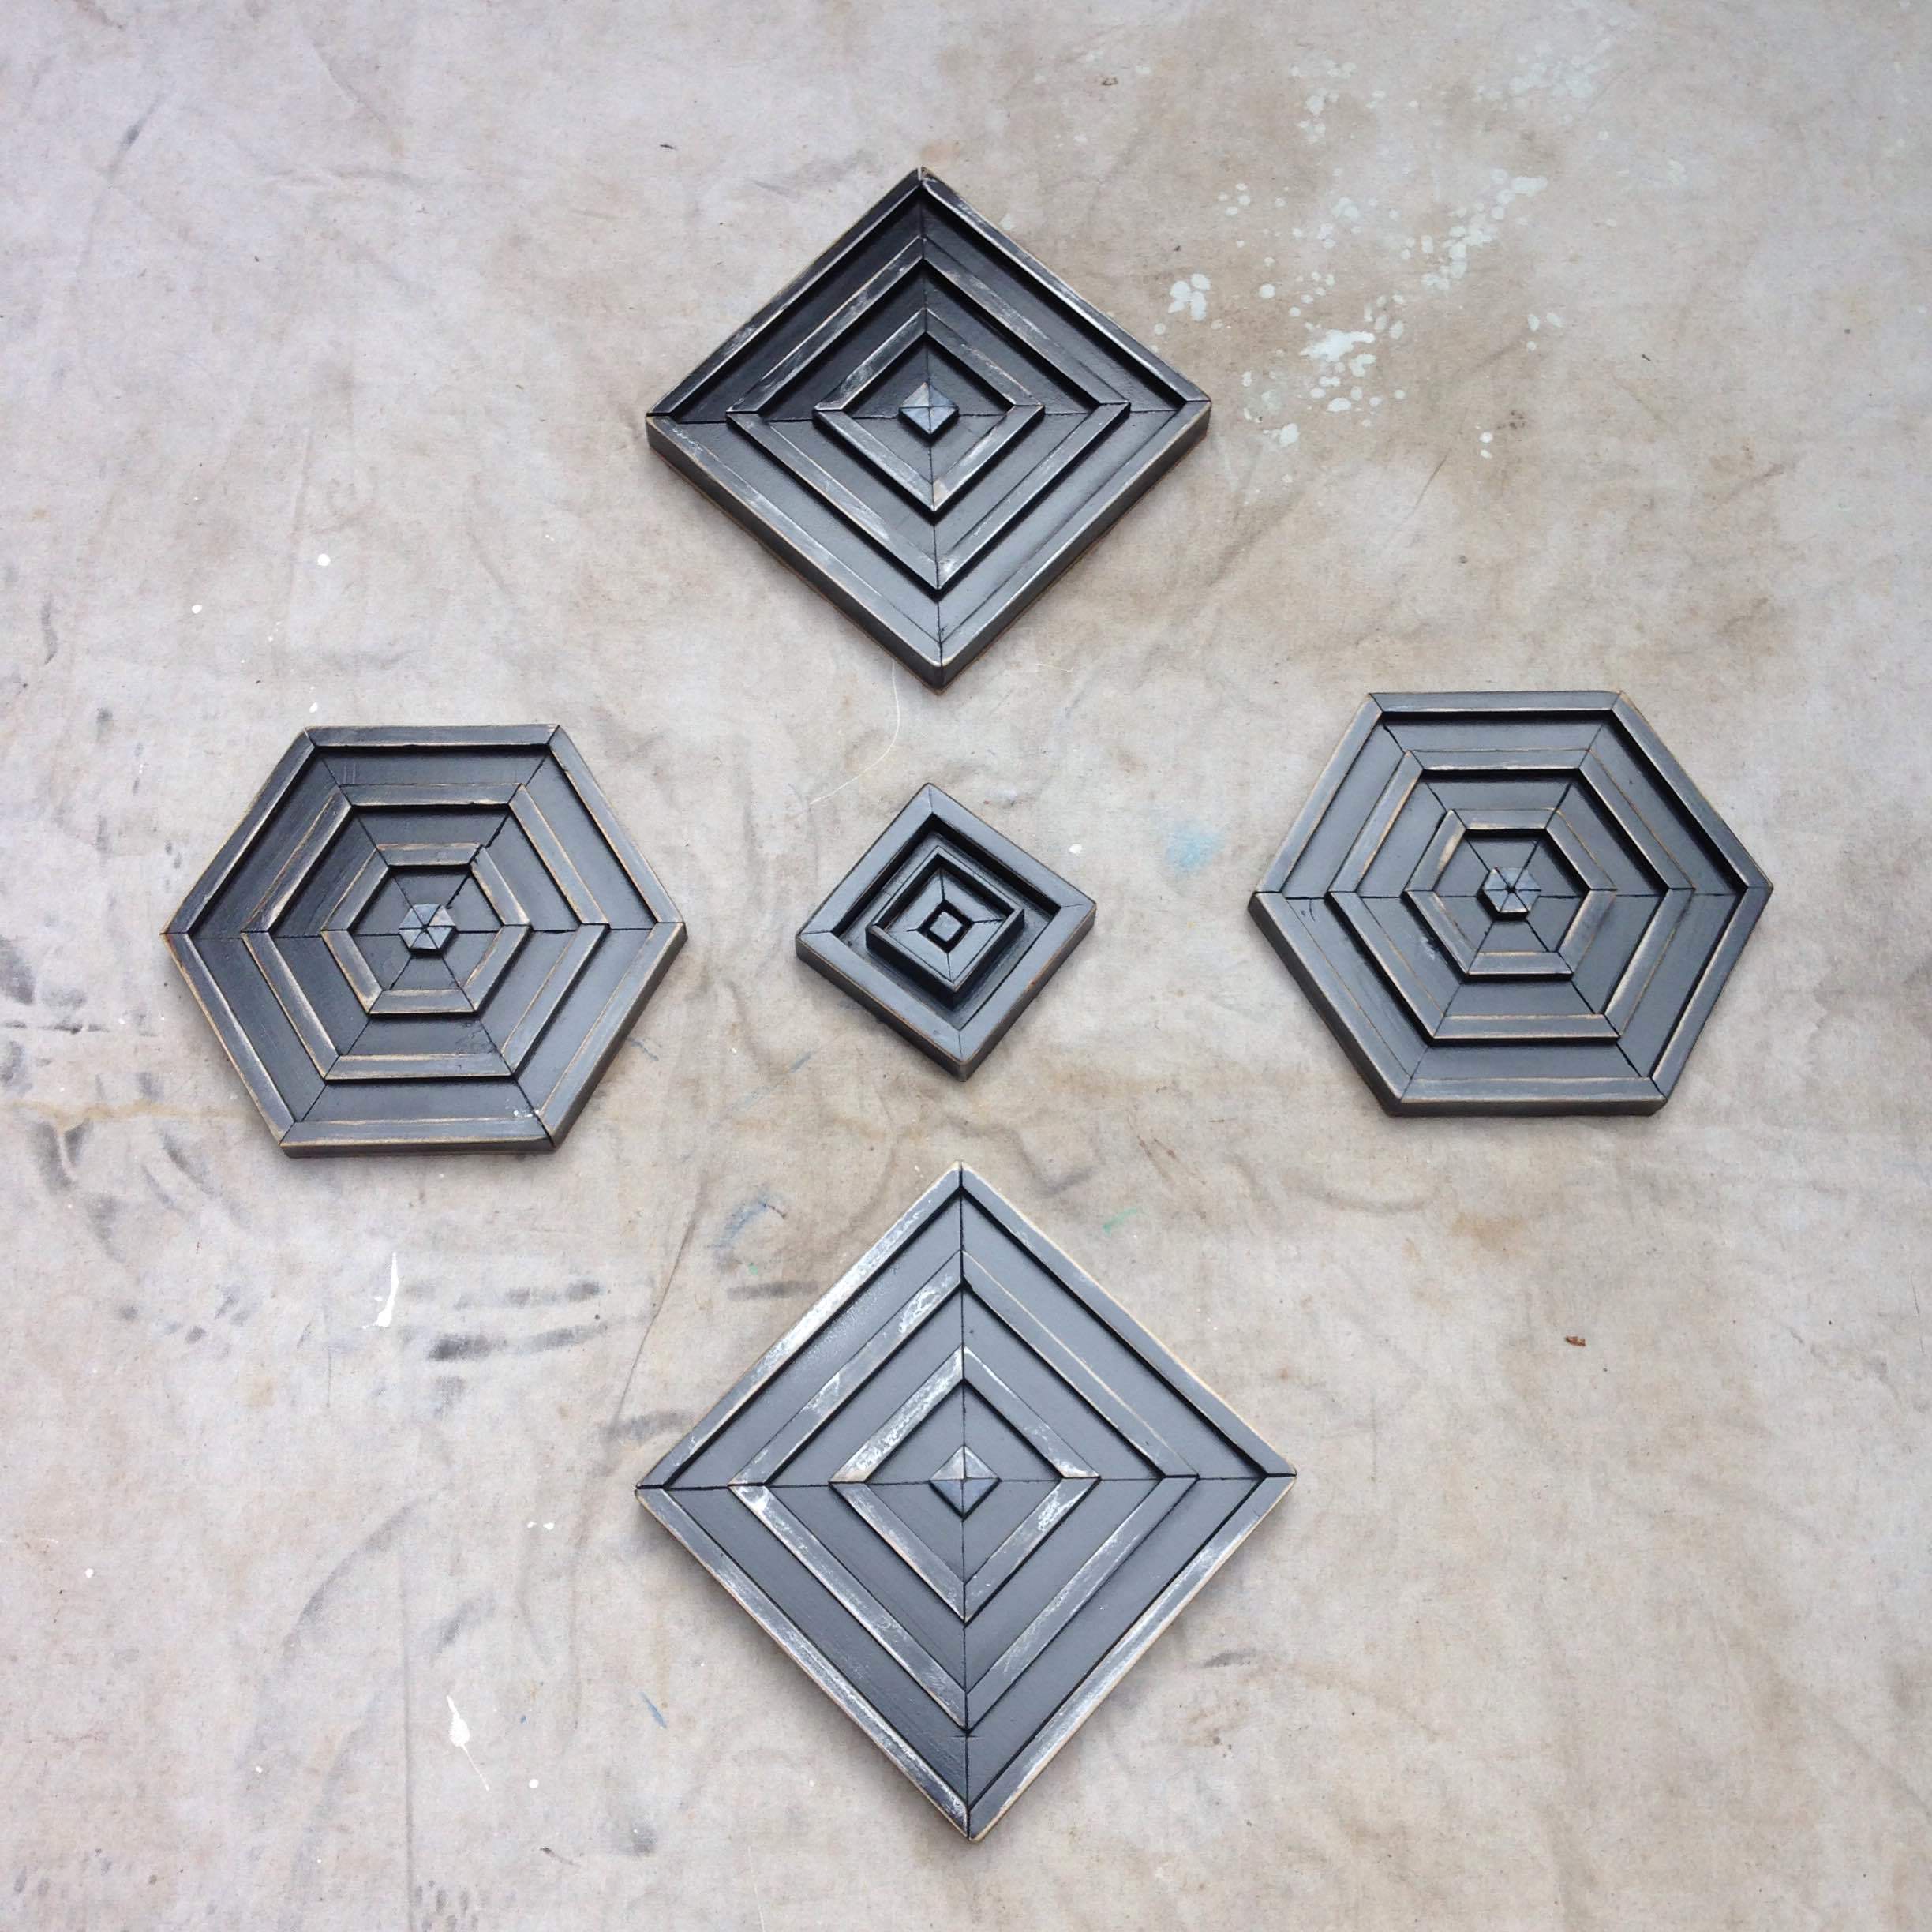
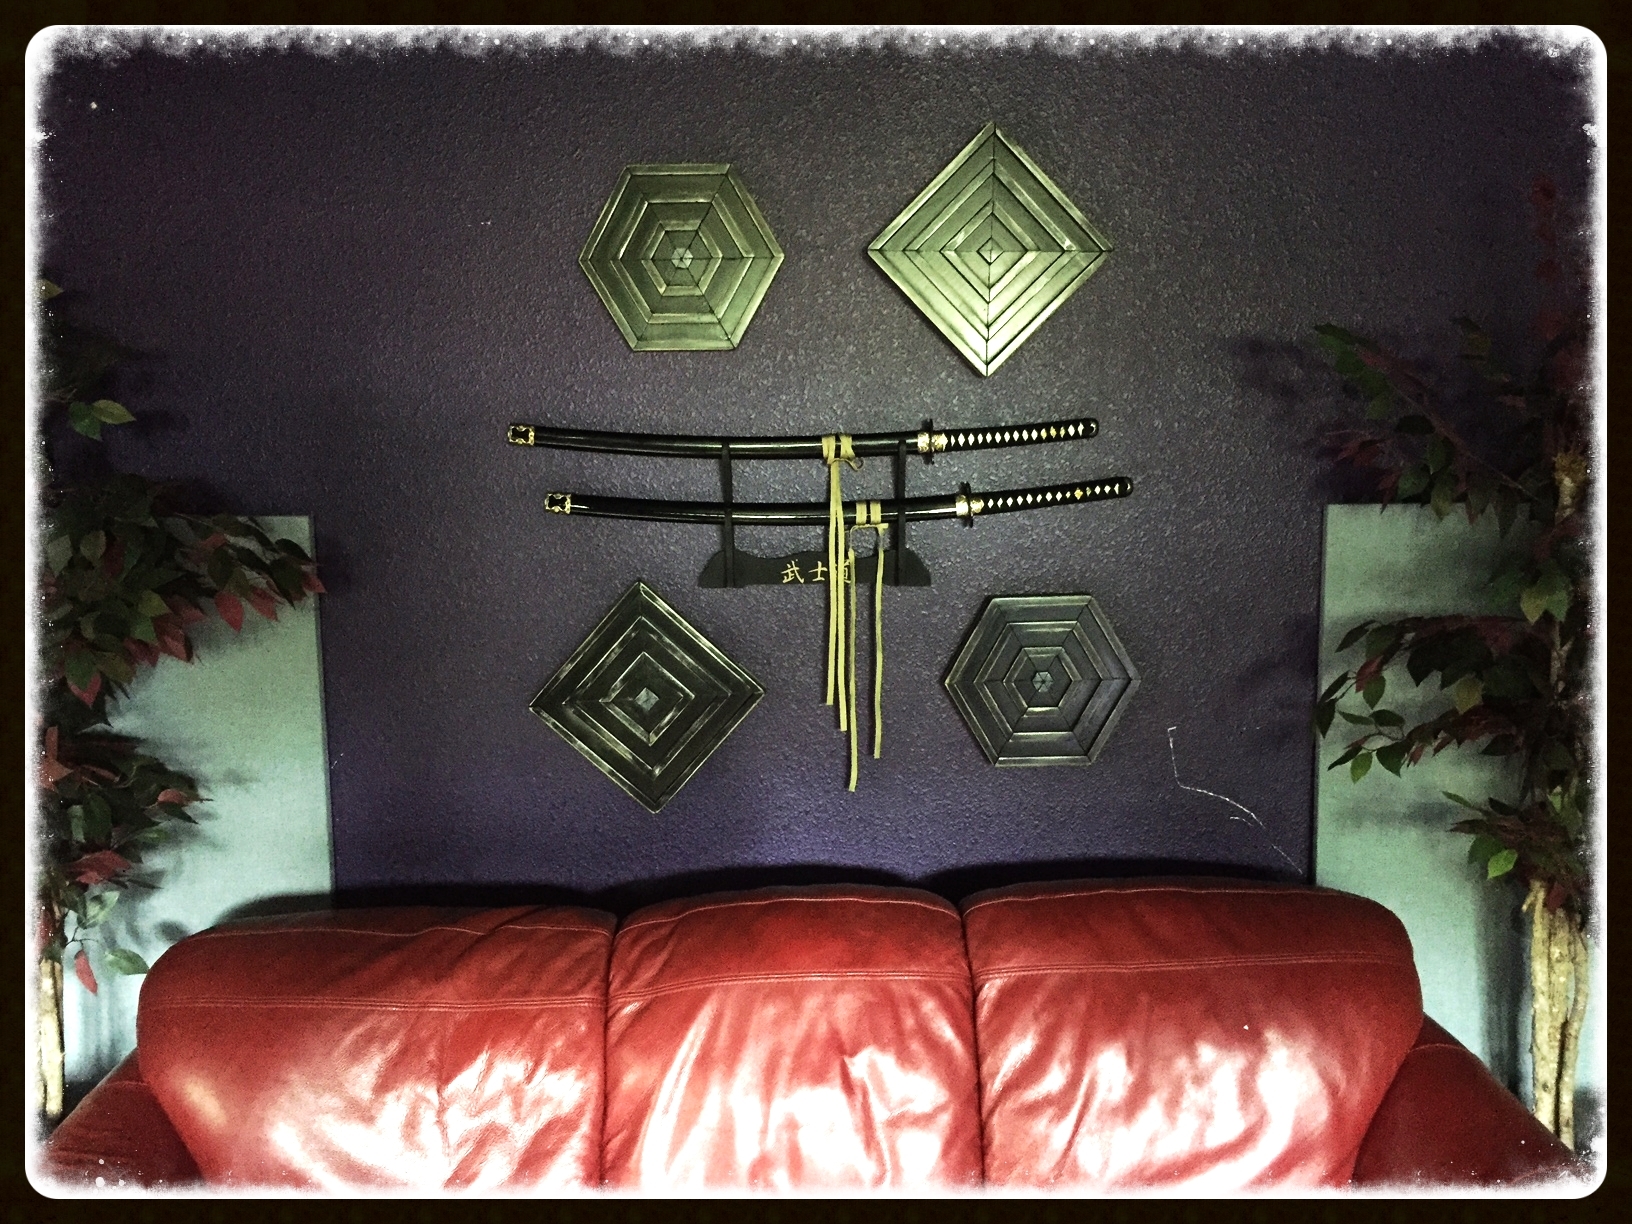
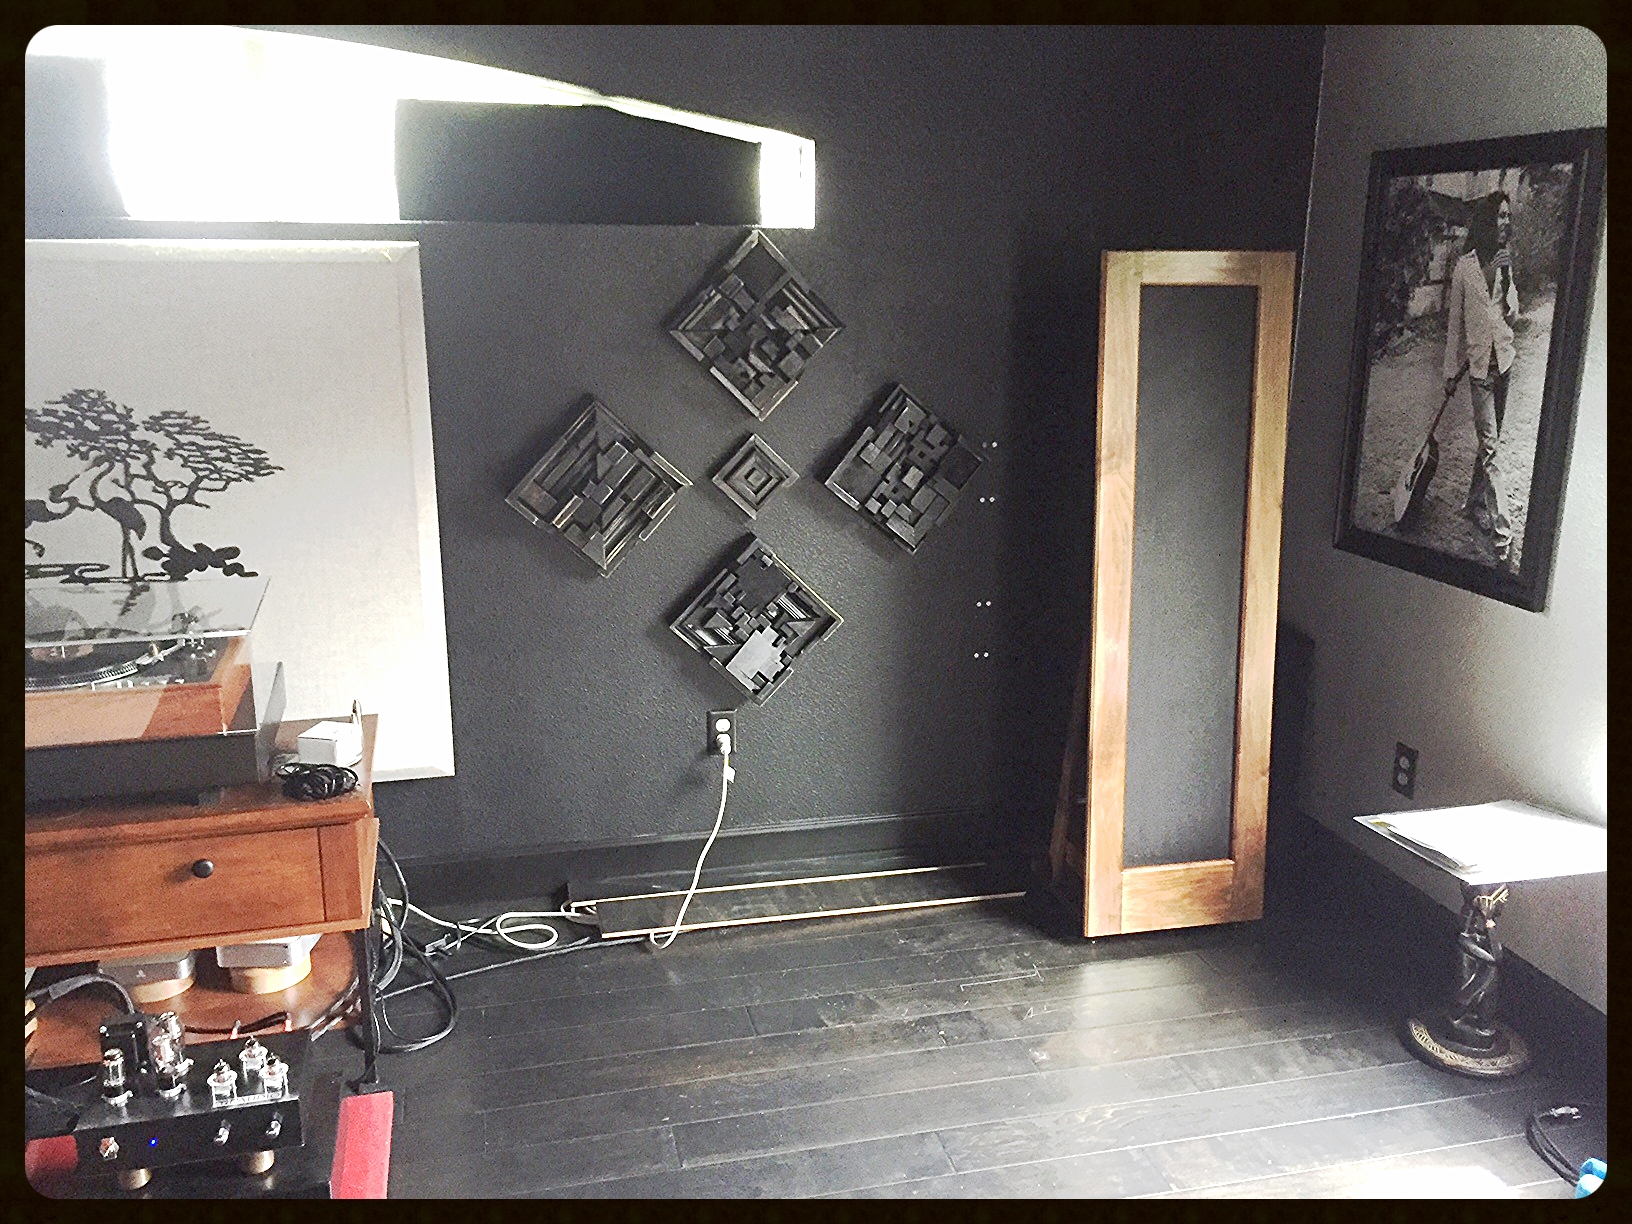
7-31-20: And they’re off! Also, see the layout pic above. You’ll see numbers in the center of the cleats on the panels. They are numbers you see above. There is another number in the lower corner. That is for “four pack groupings” for resale down the road if need be (see the other pic for that) but for now just mull over the 18 footer.. Cheers! and Thank you for supporting small business at this time….much appreciated.
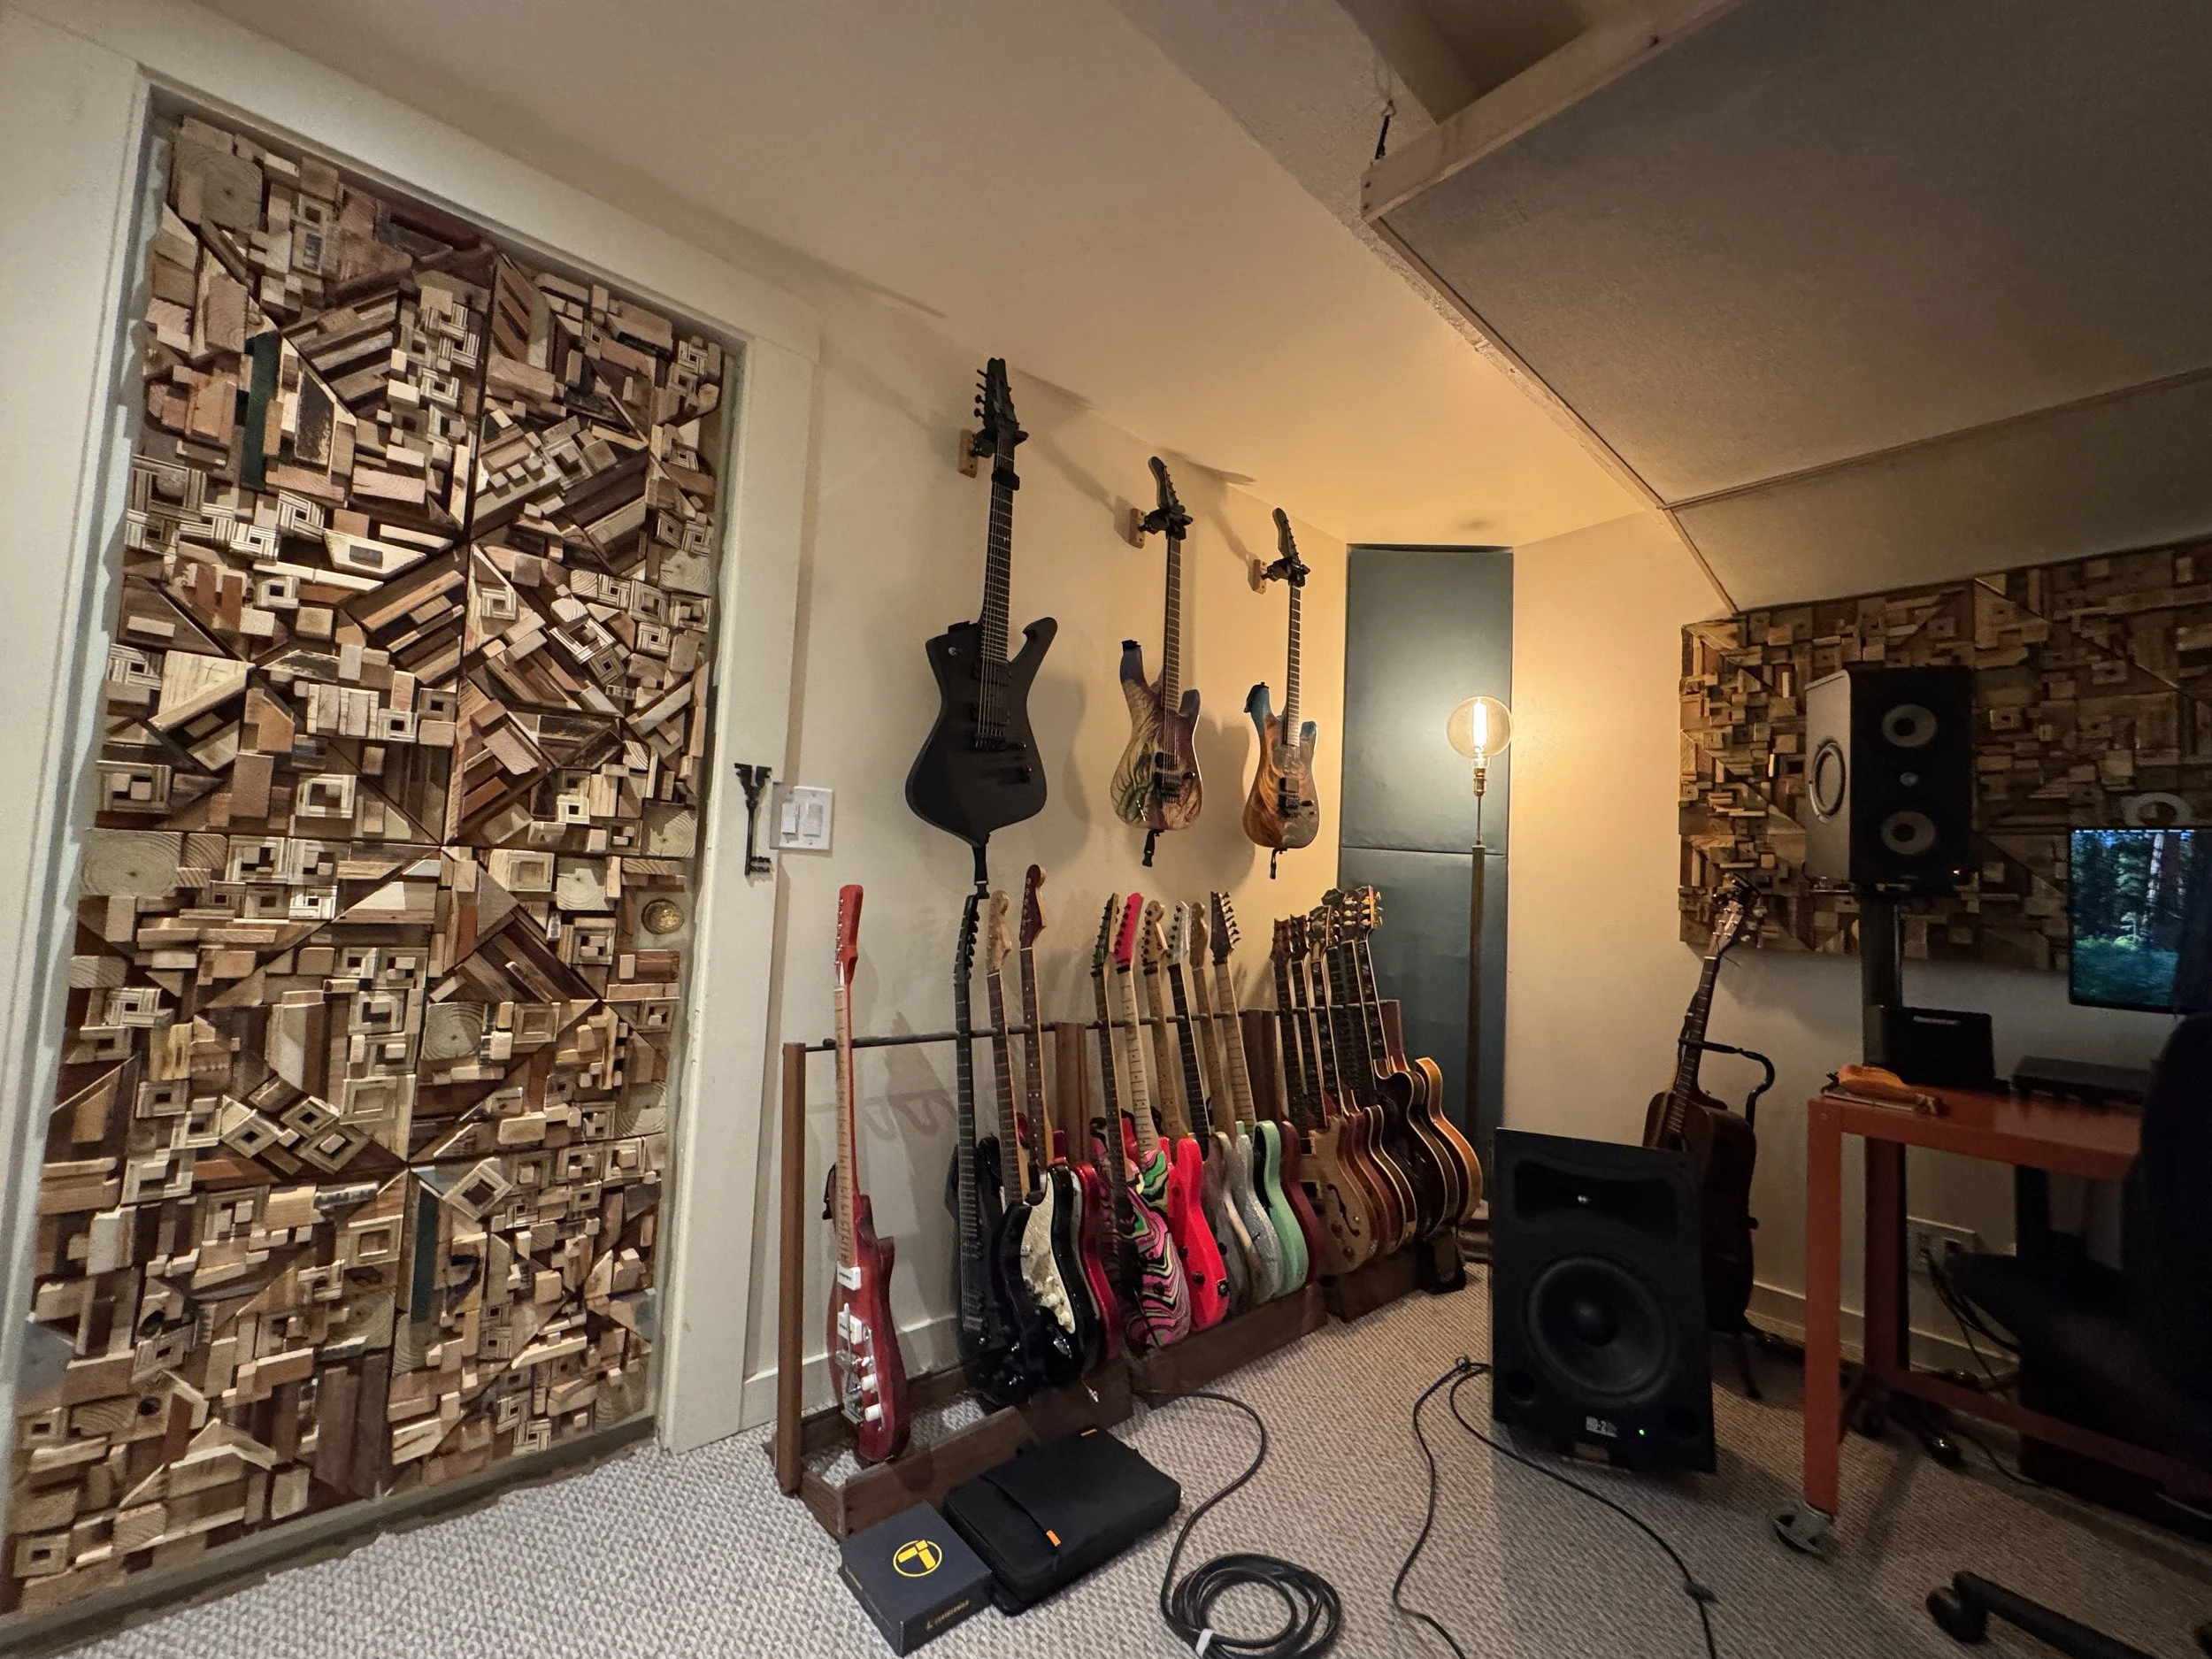
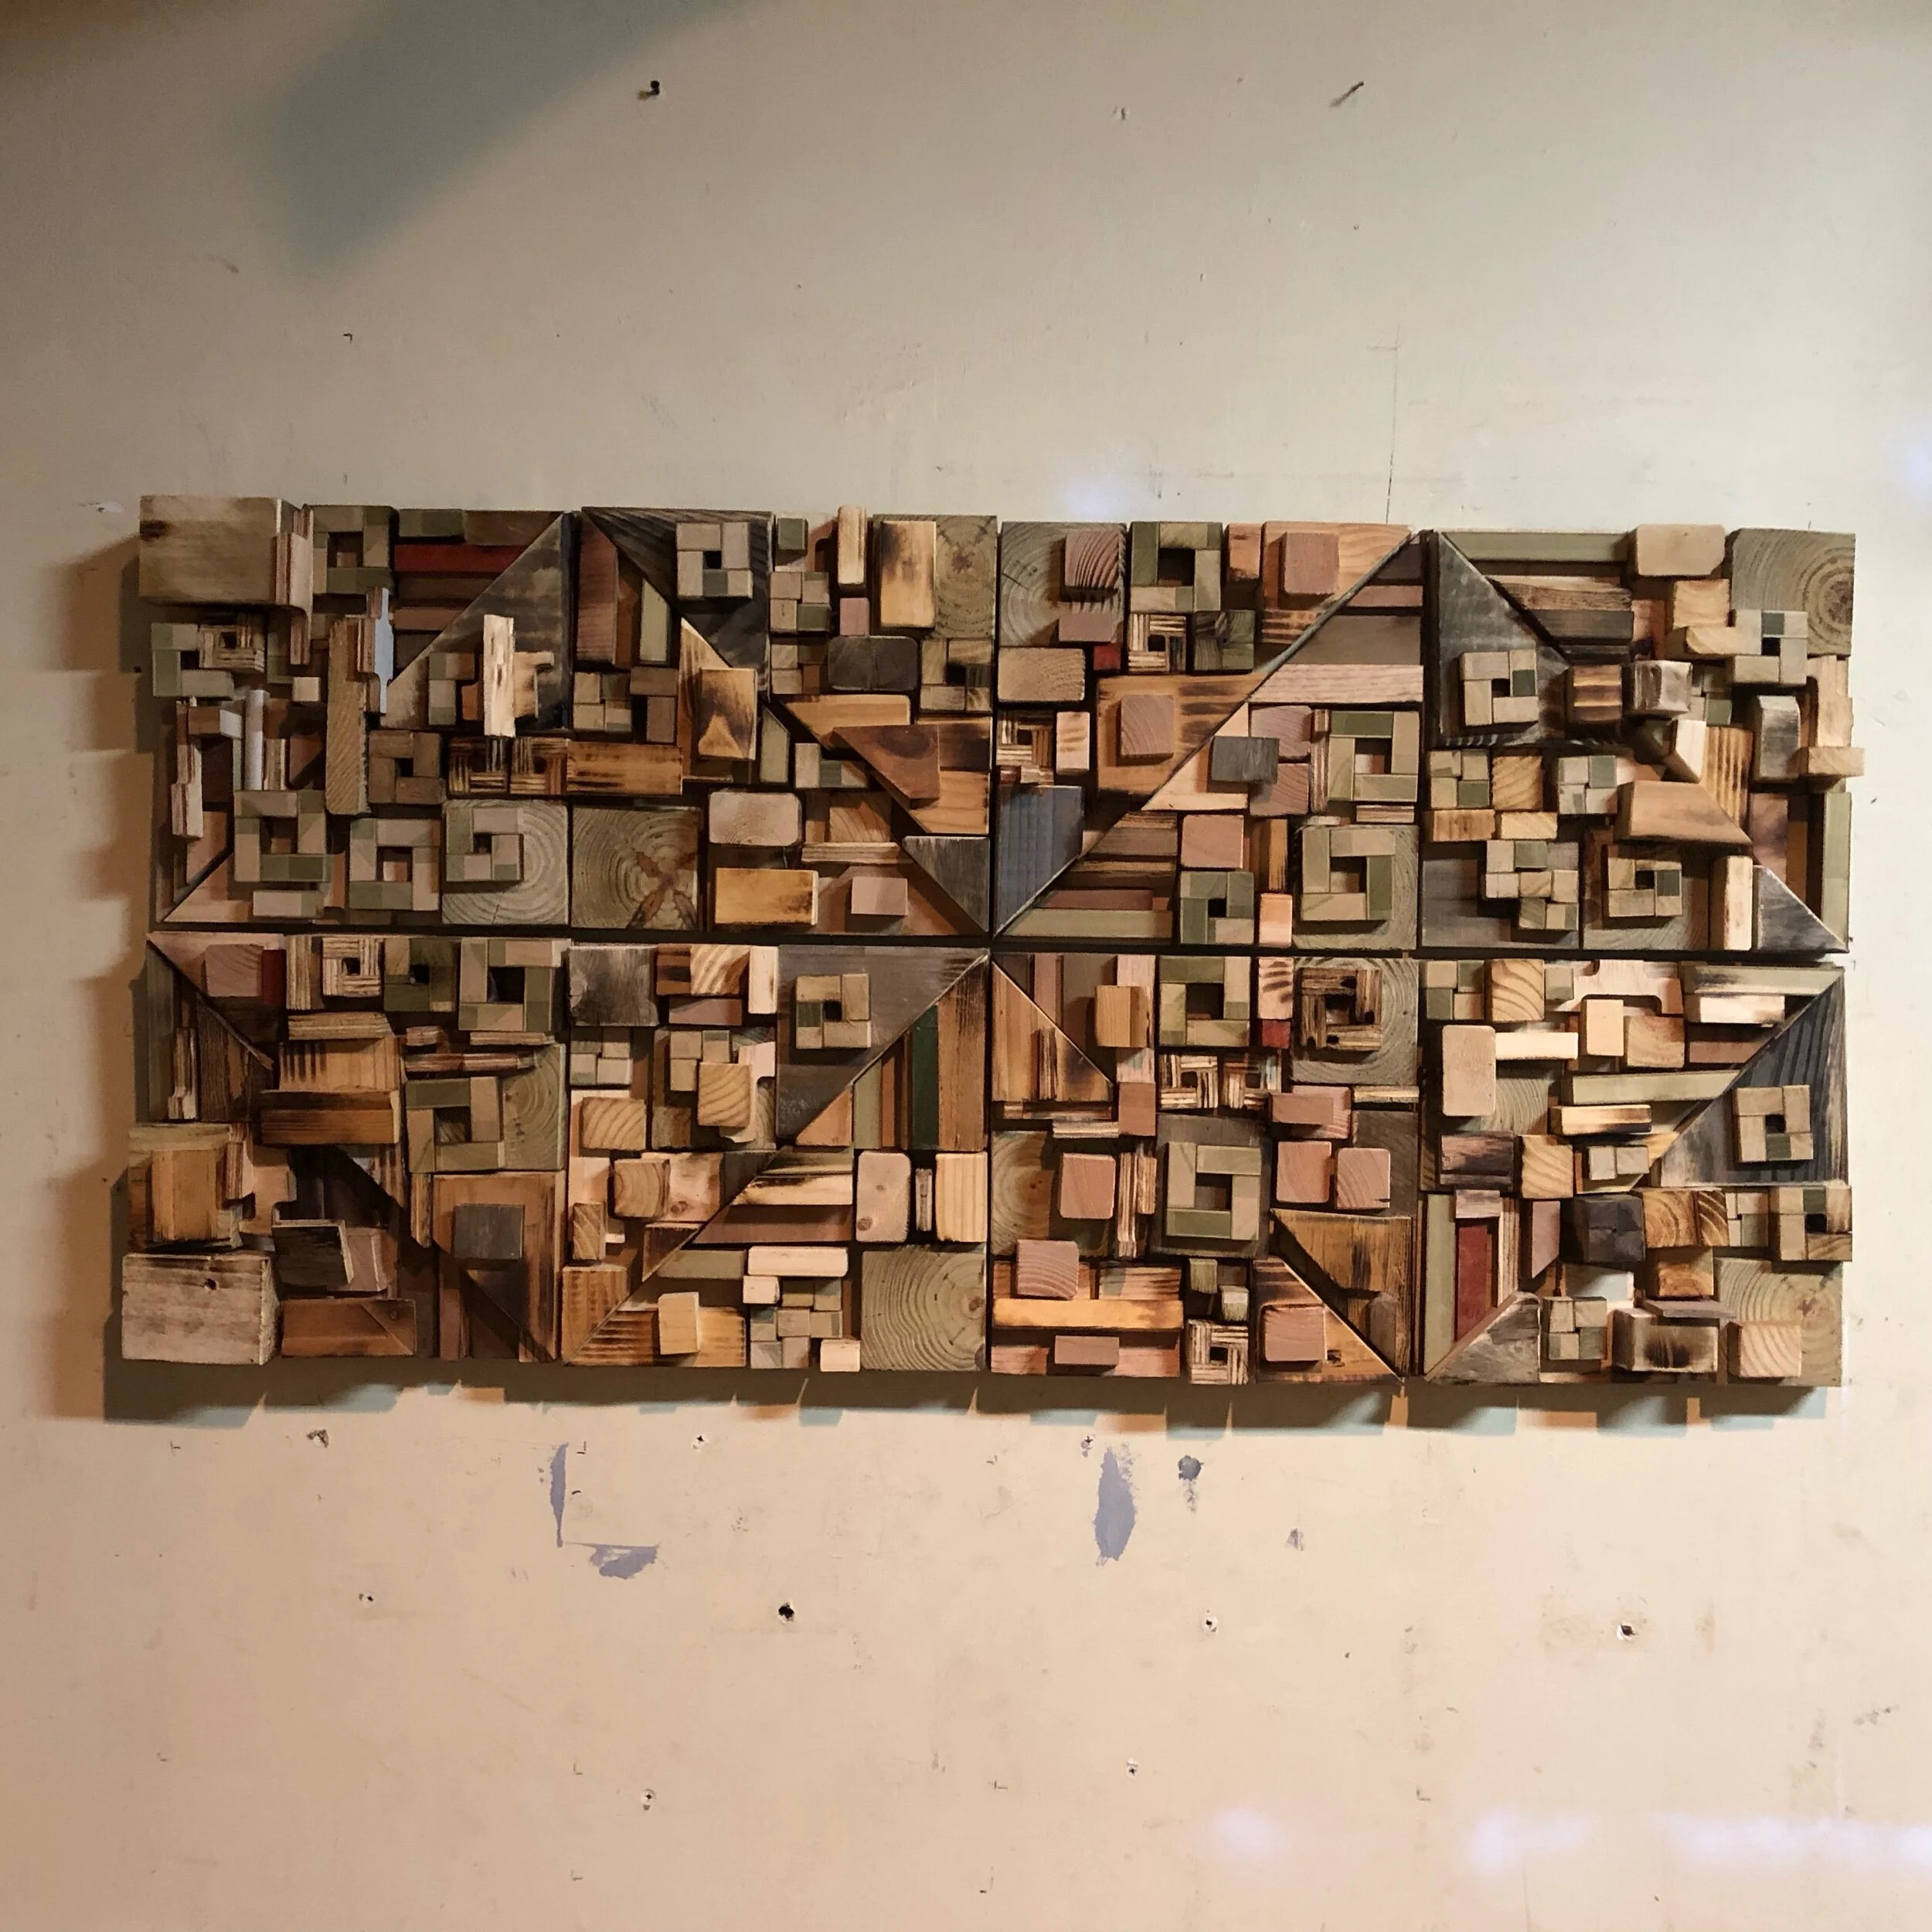
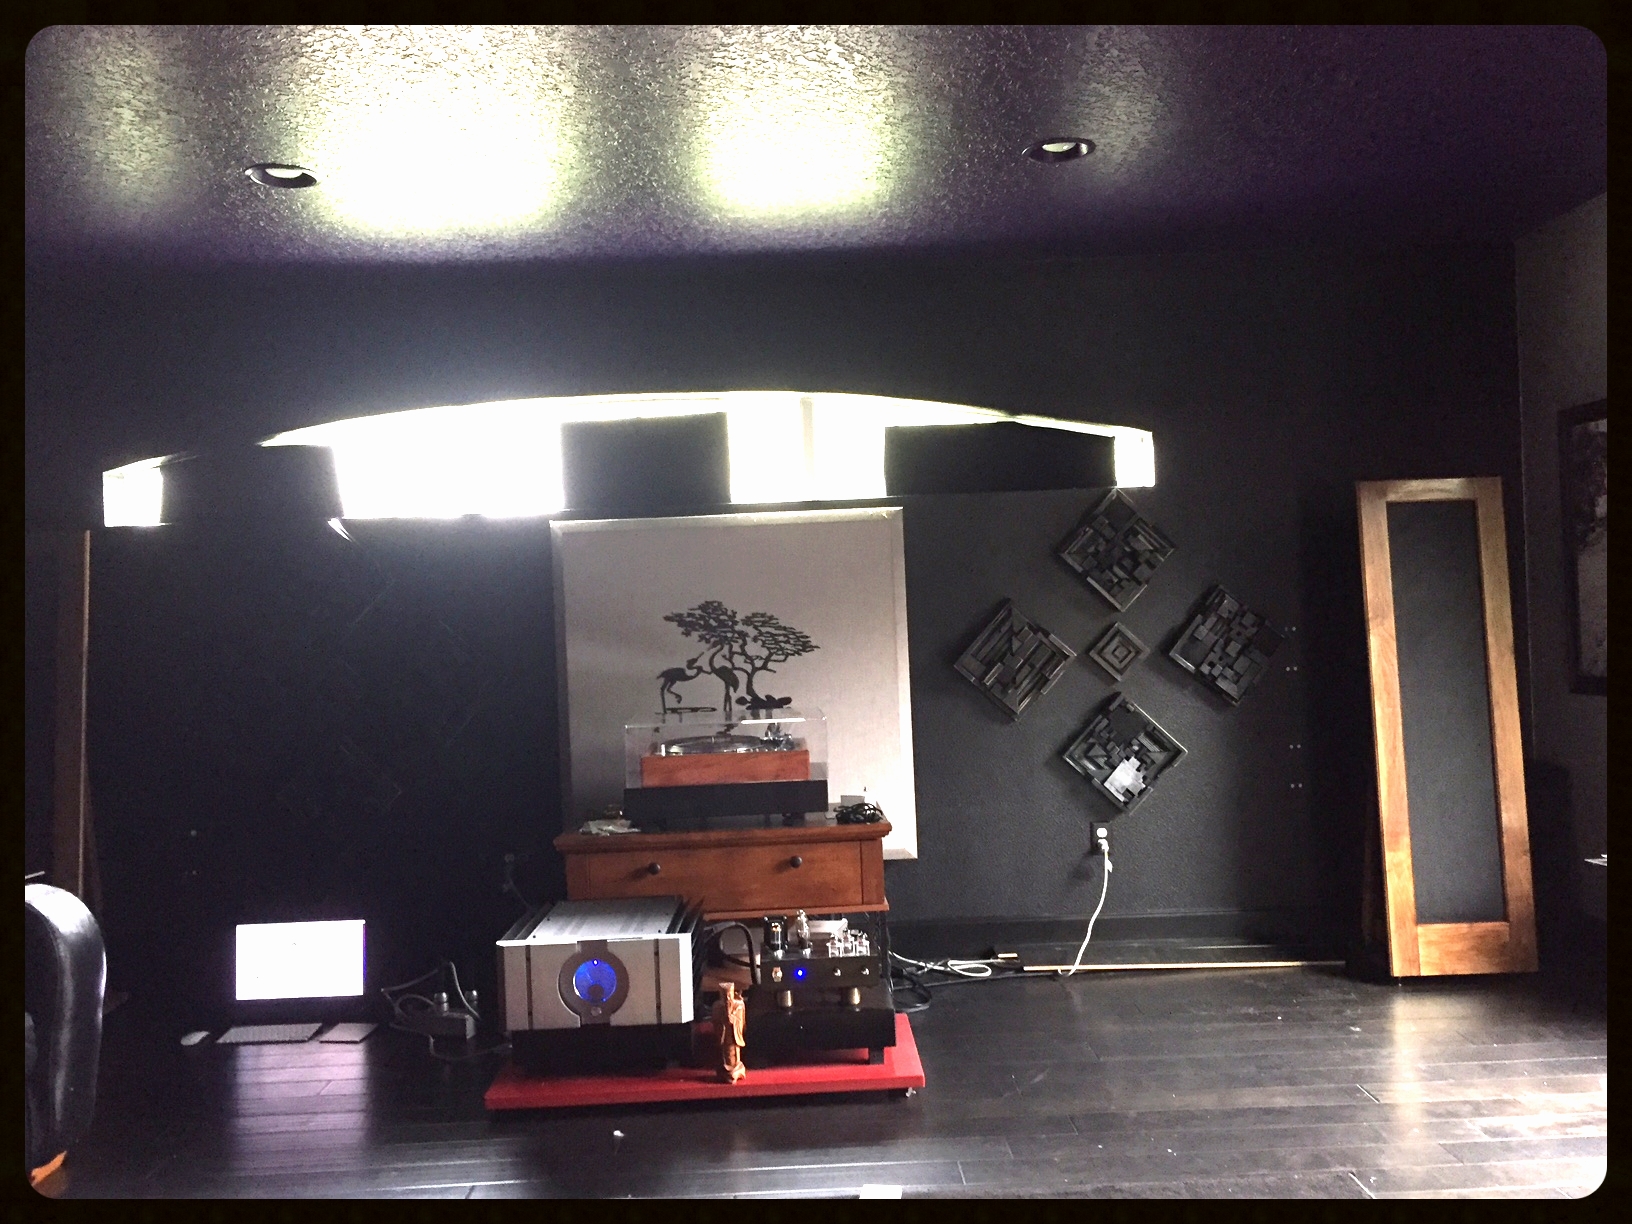
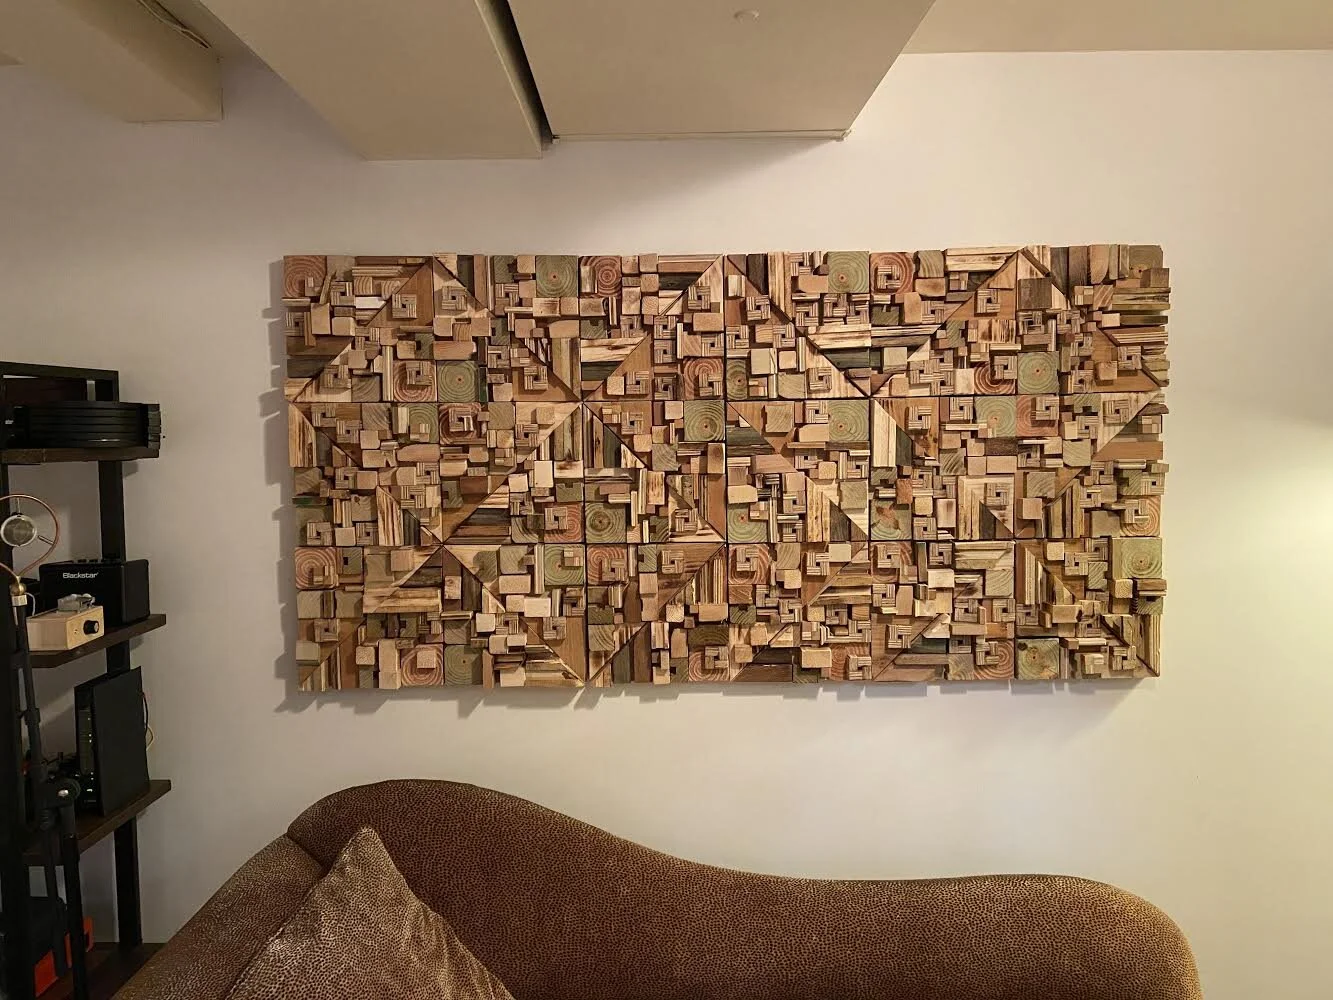
8-13-20: Thank you for sending in the pic! Great arrangement… Thanks again and feel free to stop back by if you need anything else….,
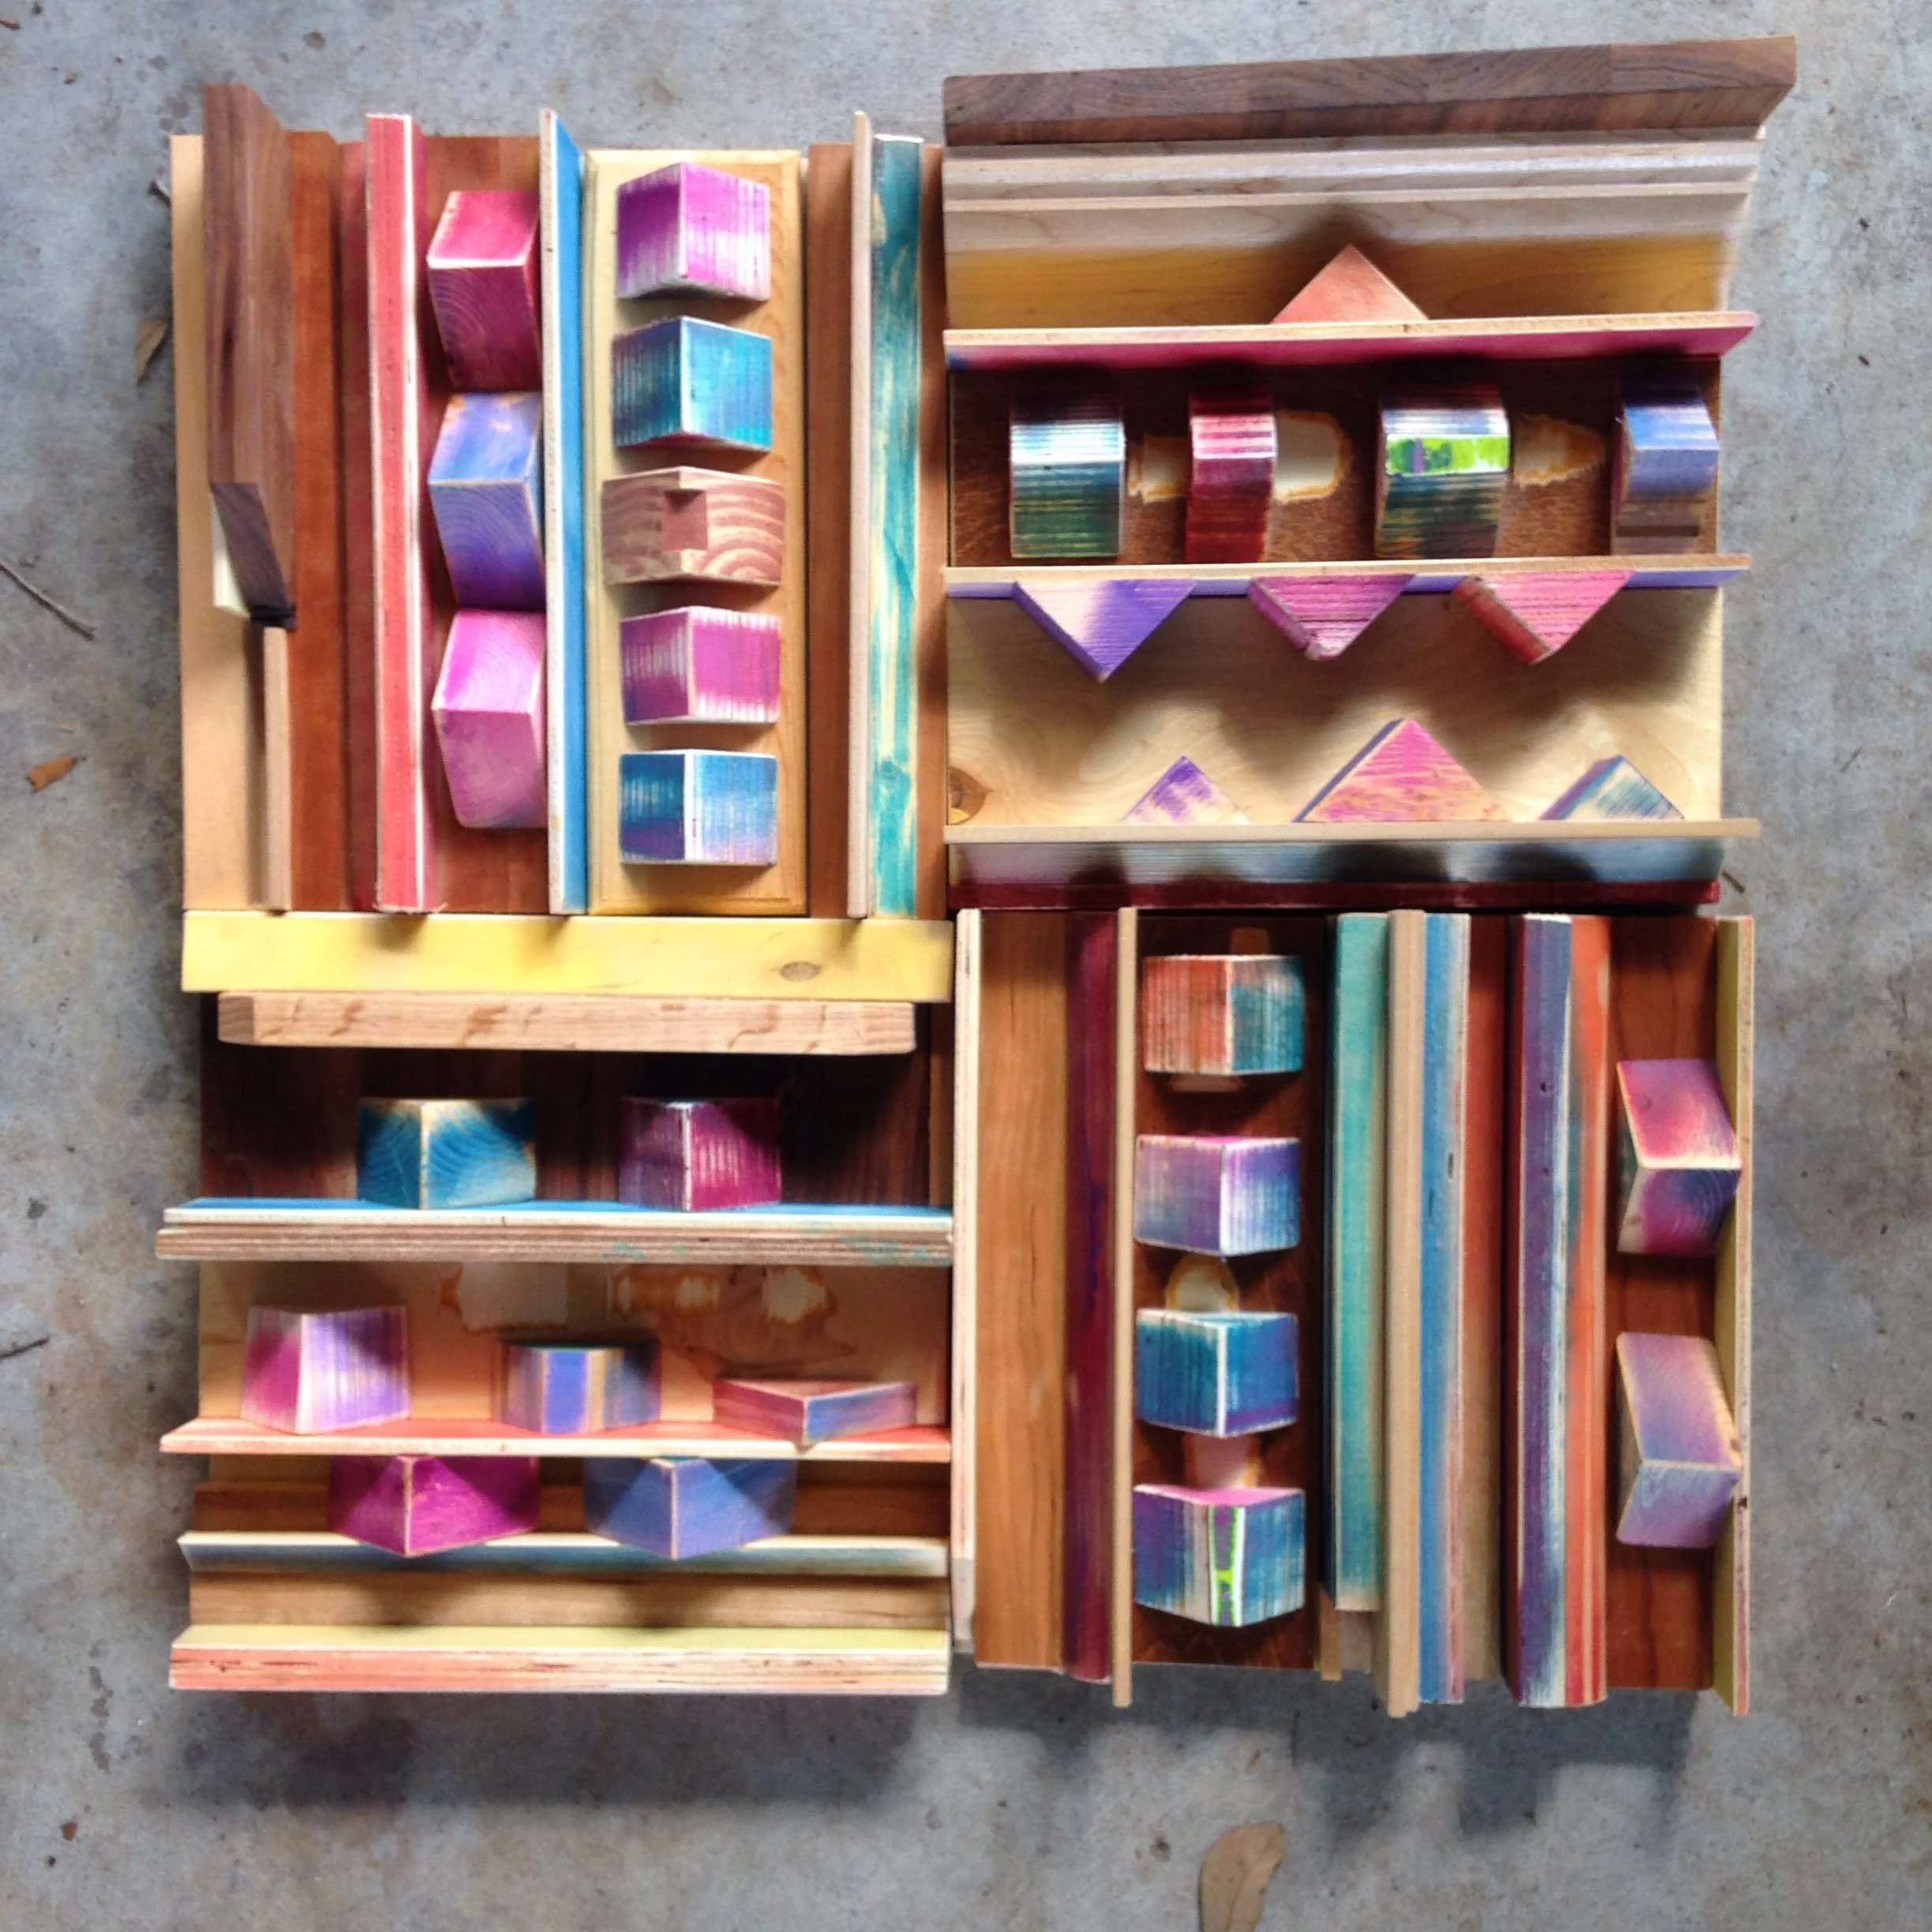
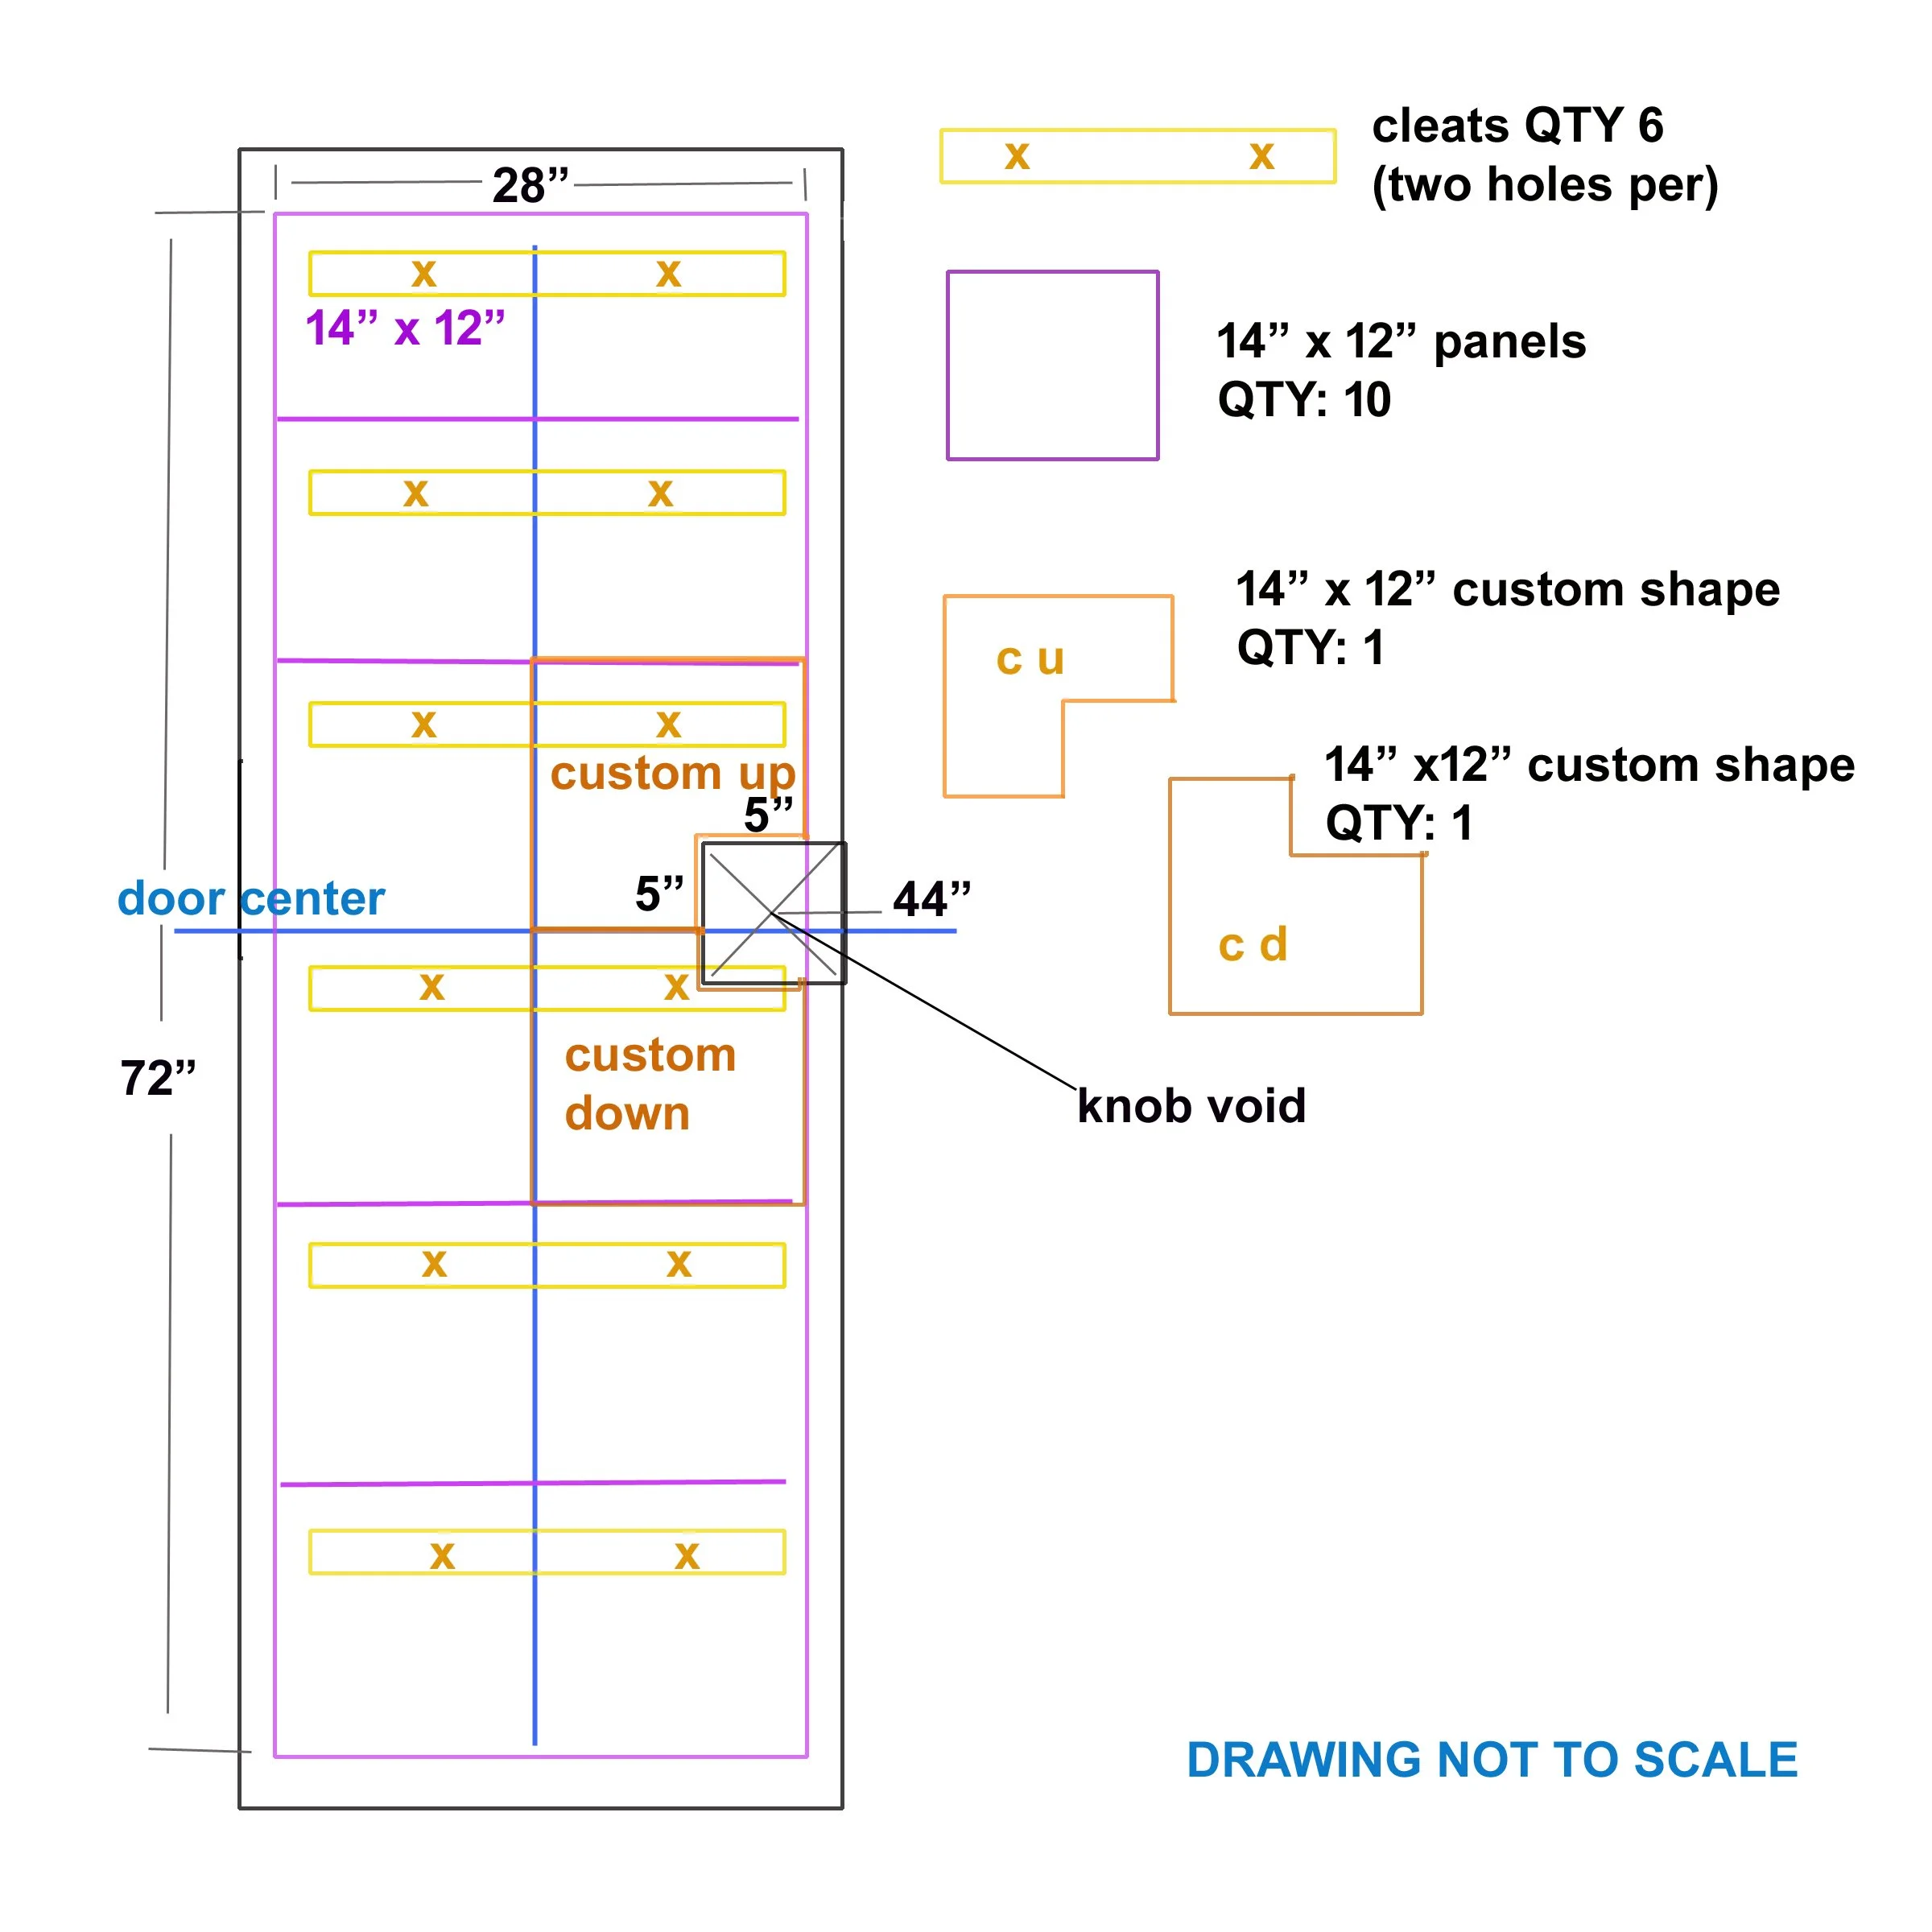
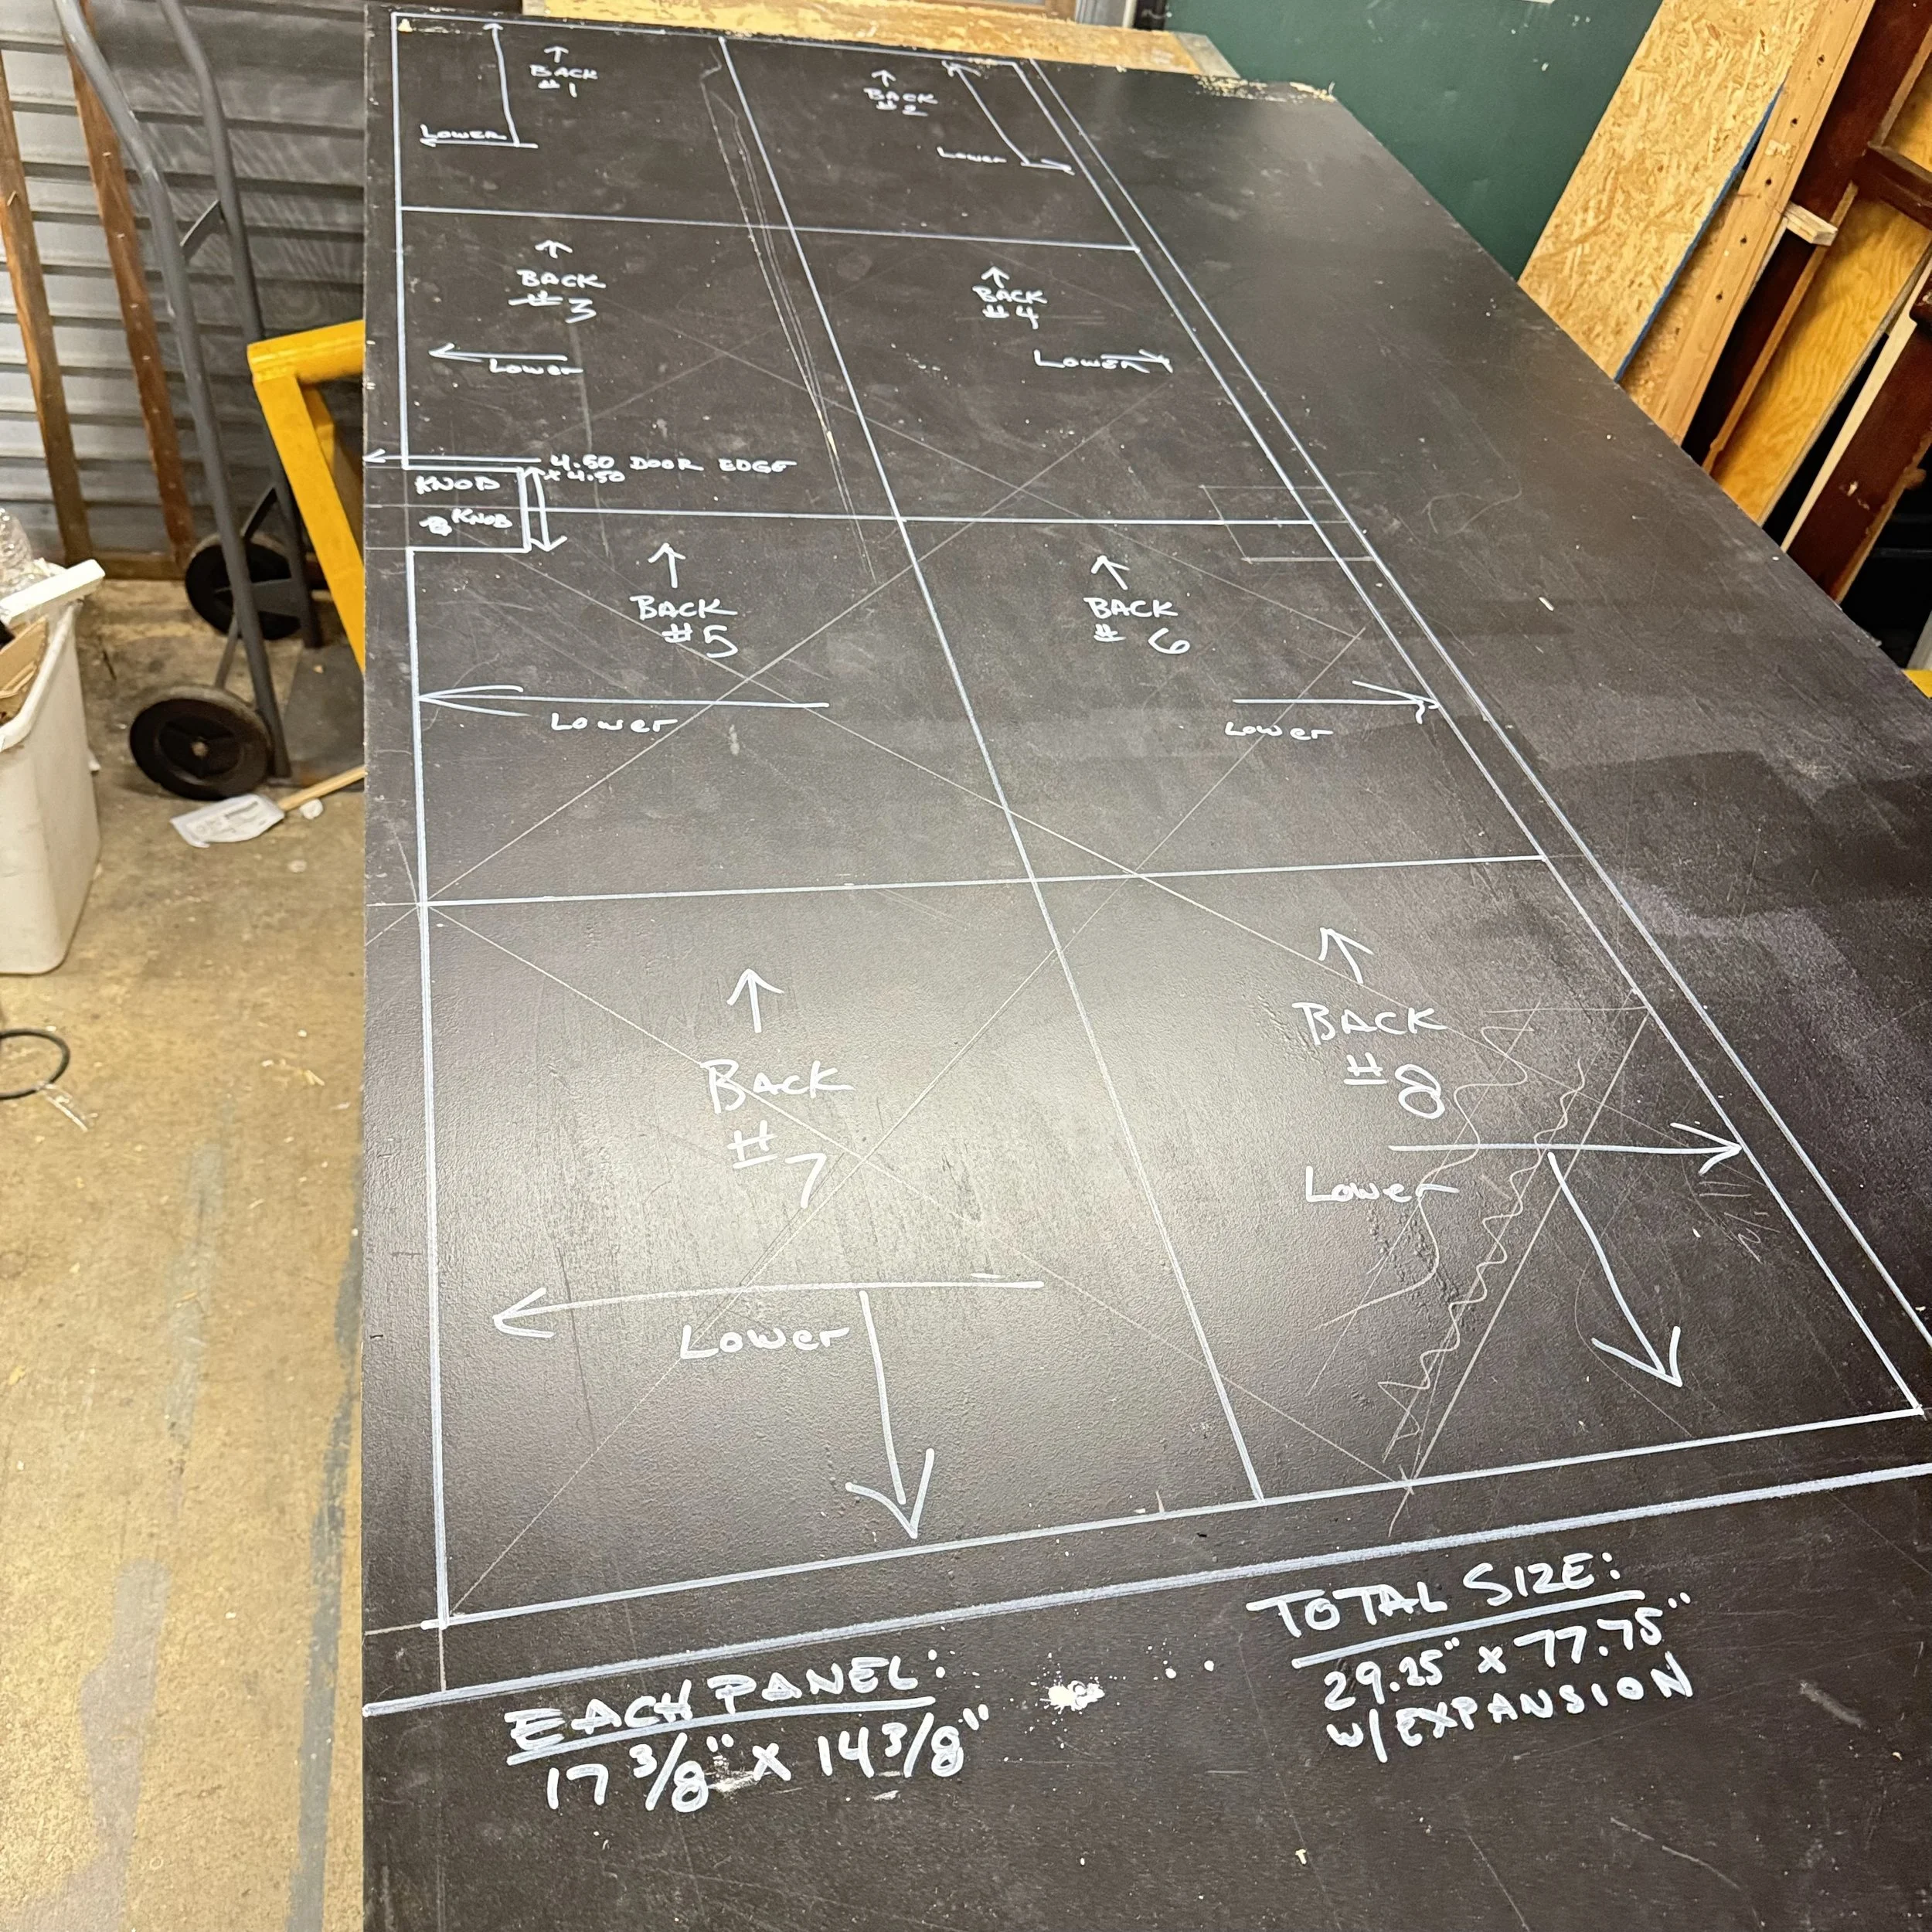
11-30-25: Welcome back Jack! Let’s get to work on the custom door. Your piece is in progress.
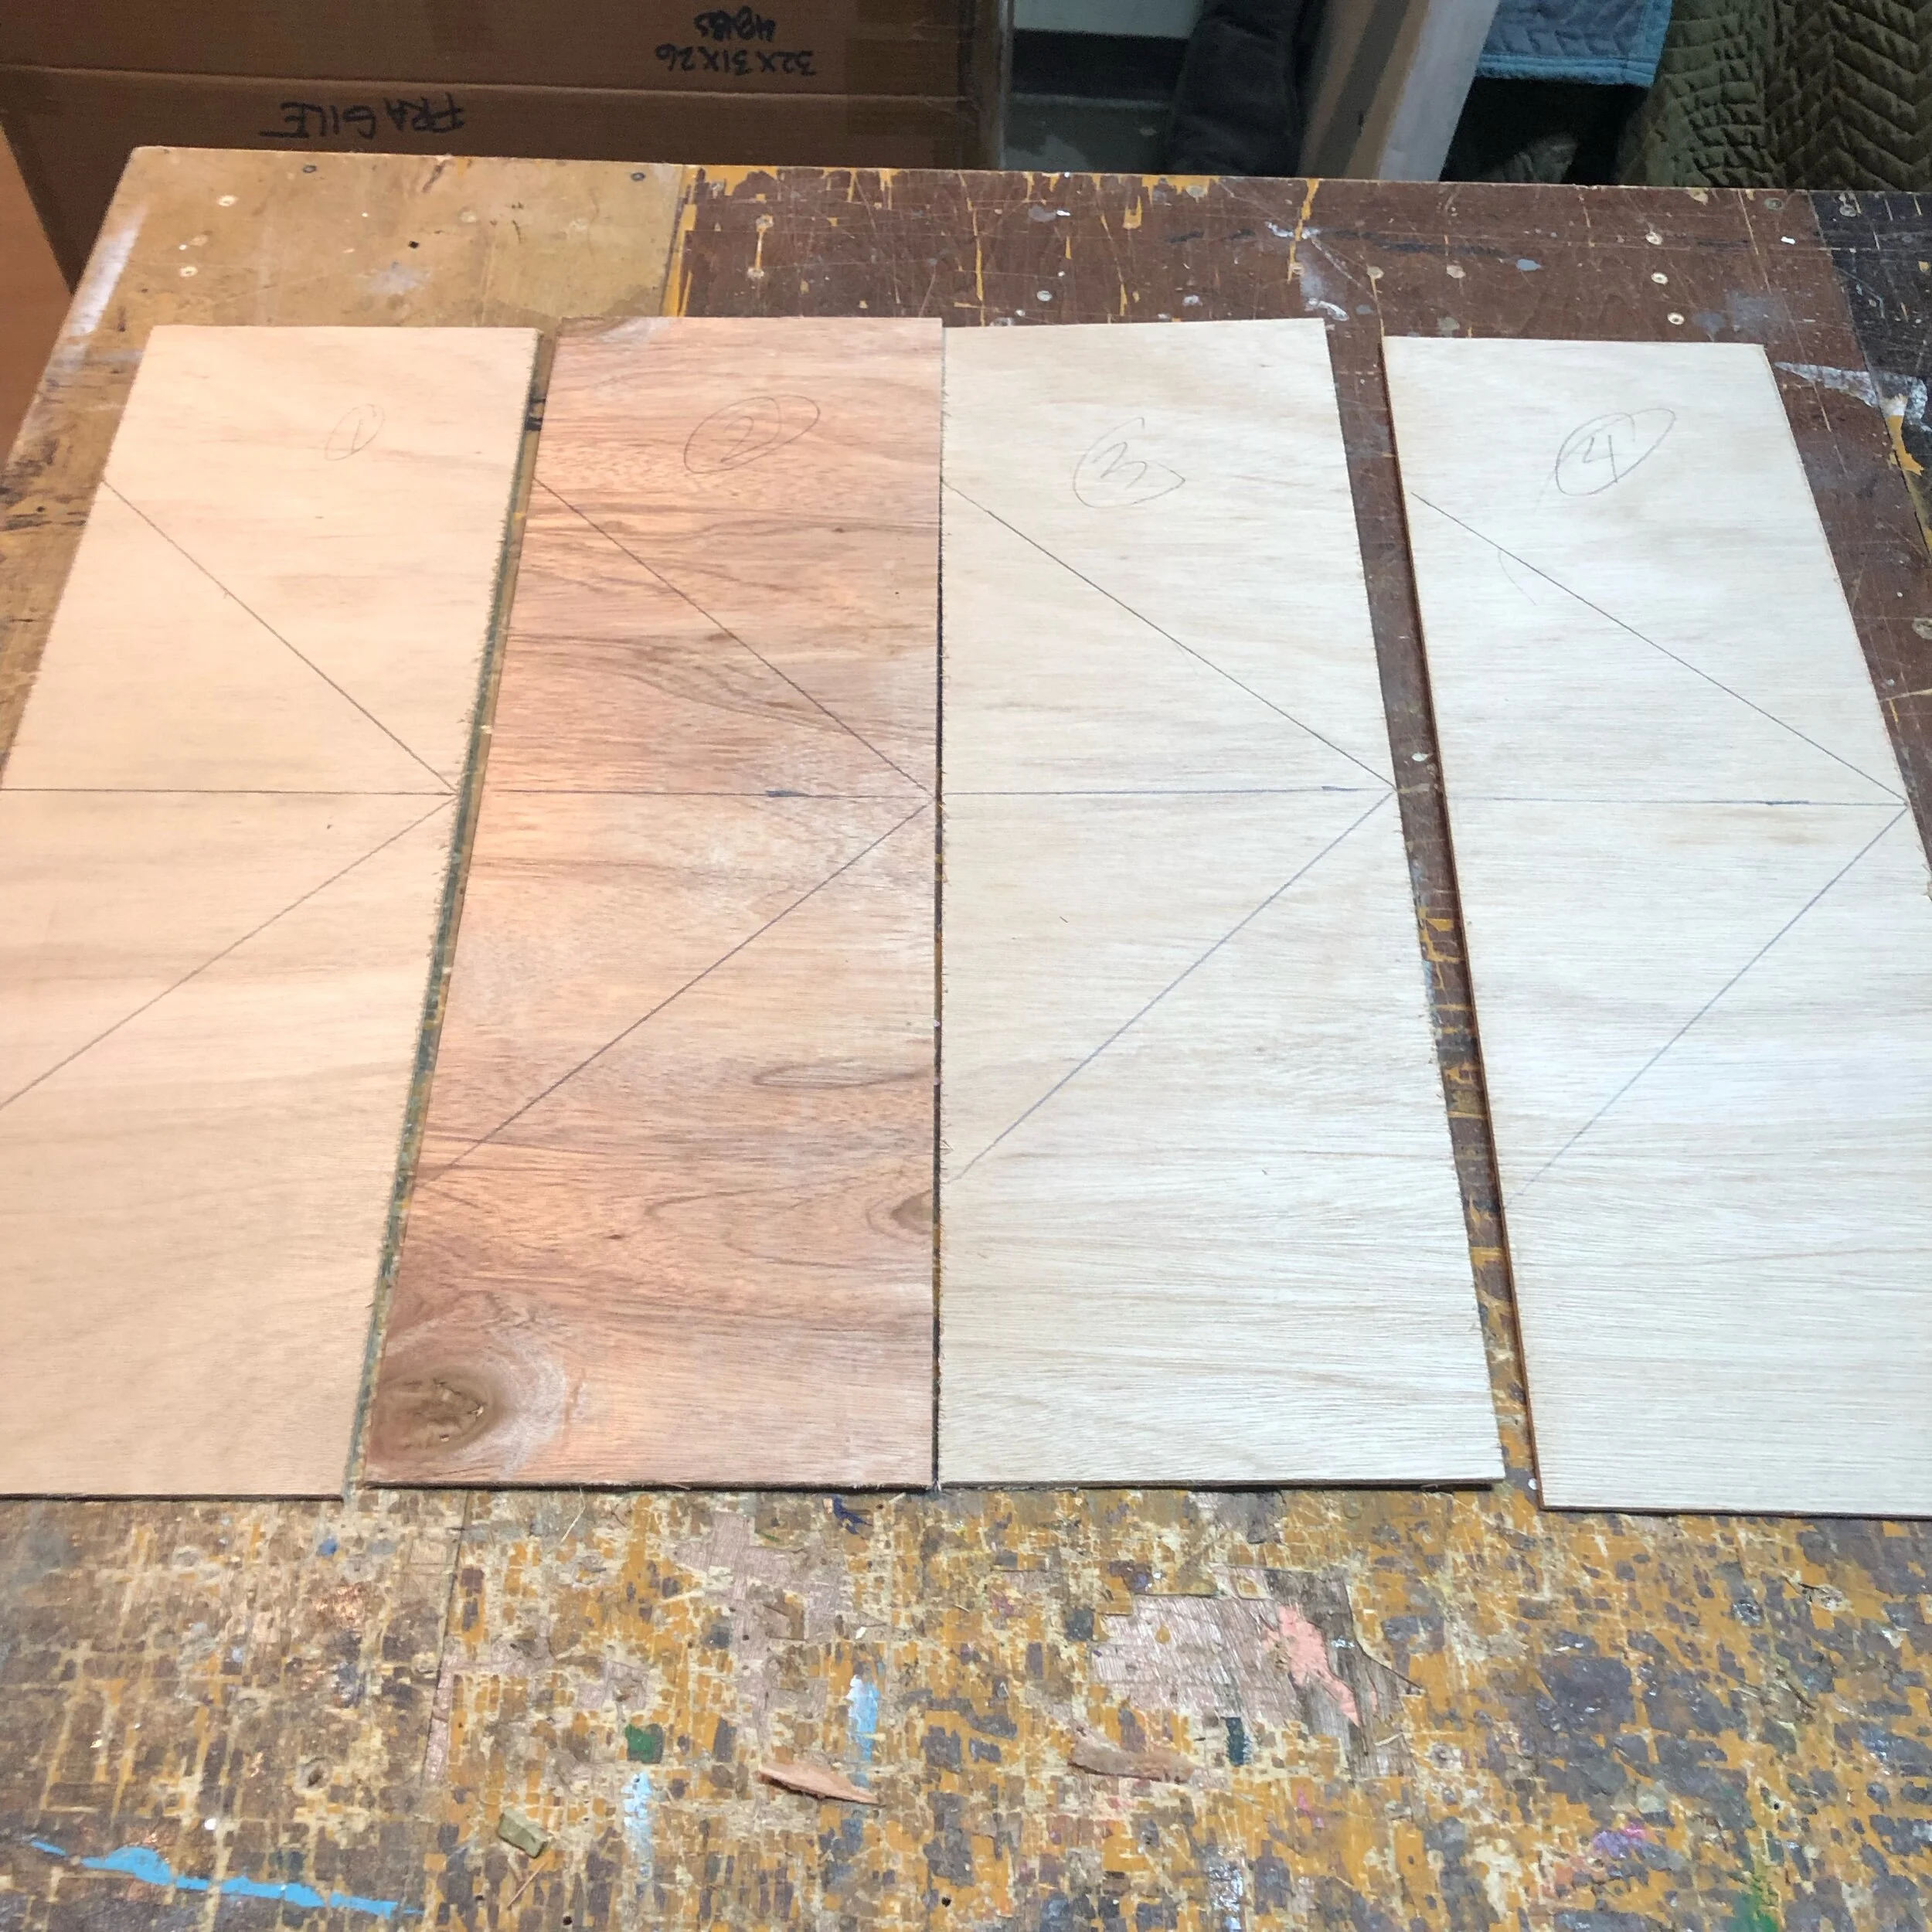
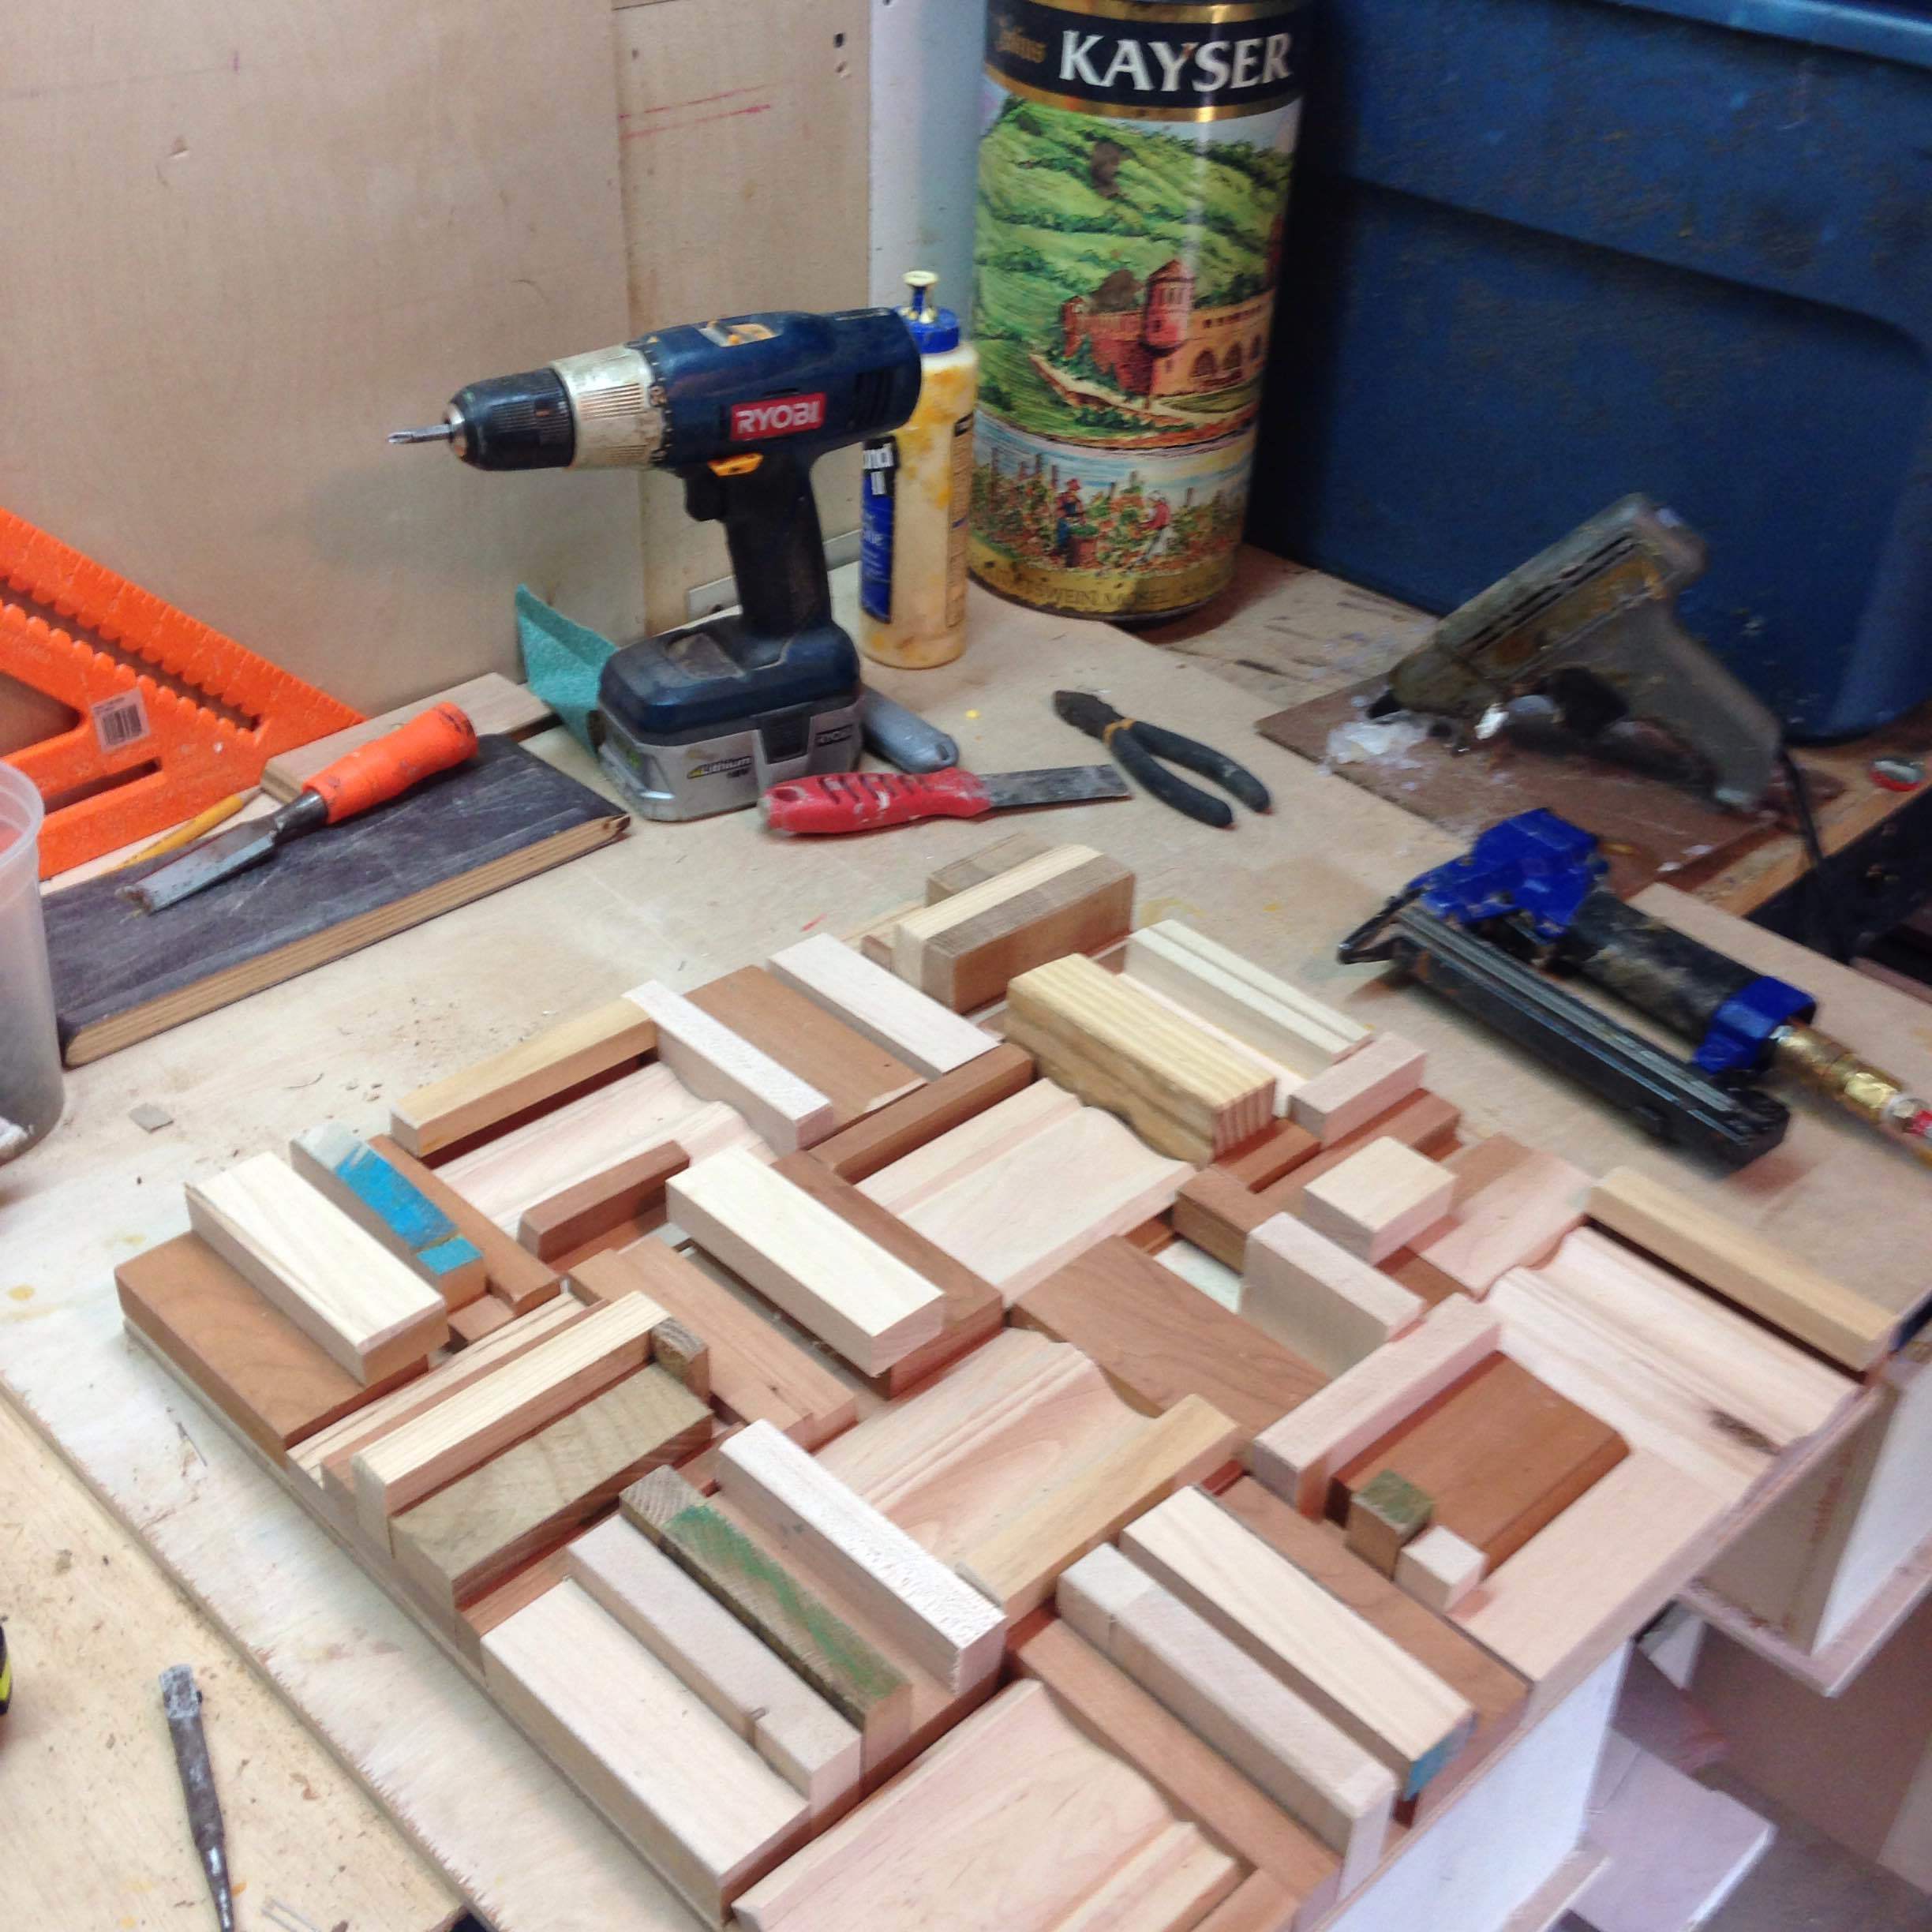
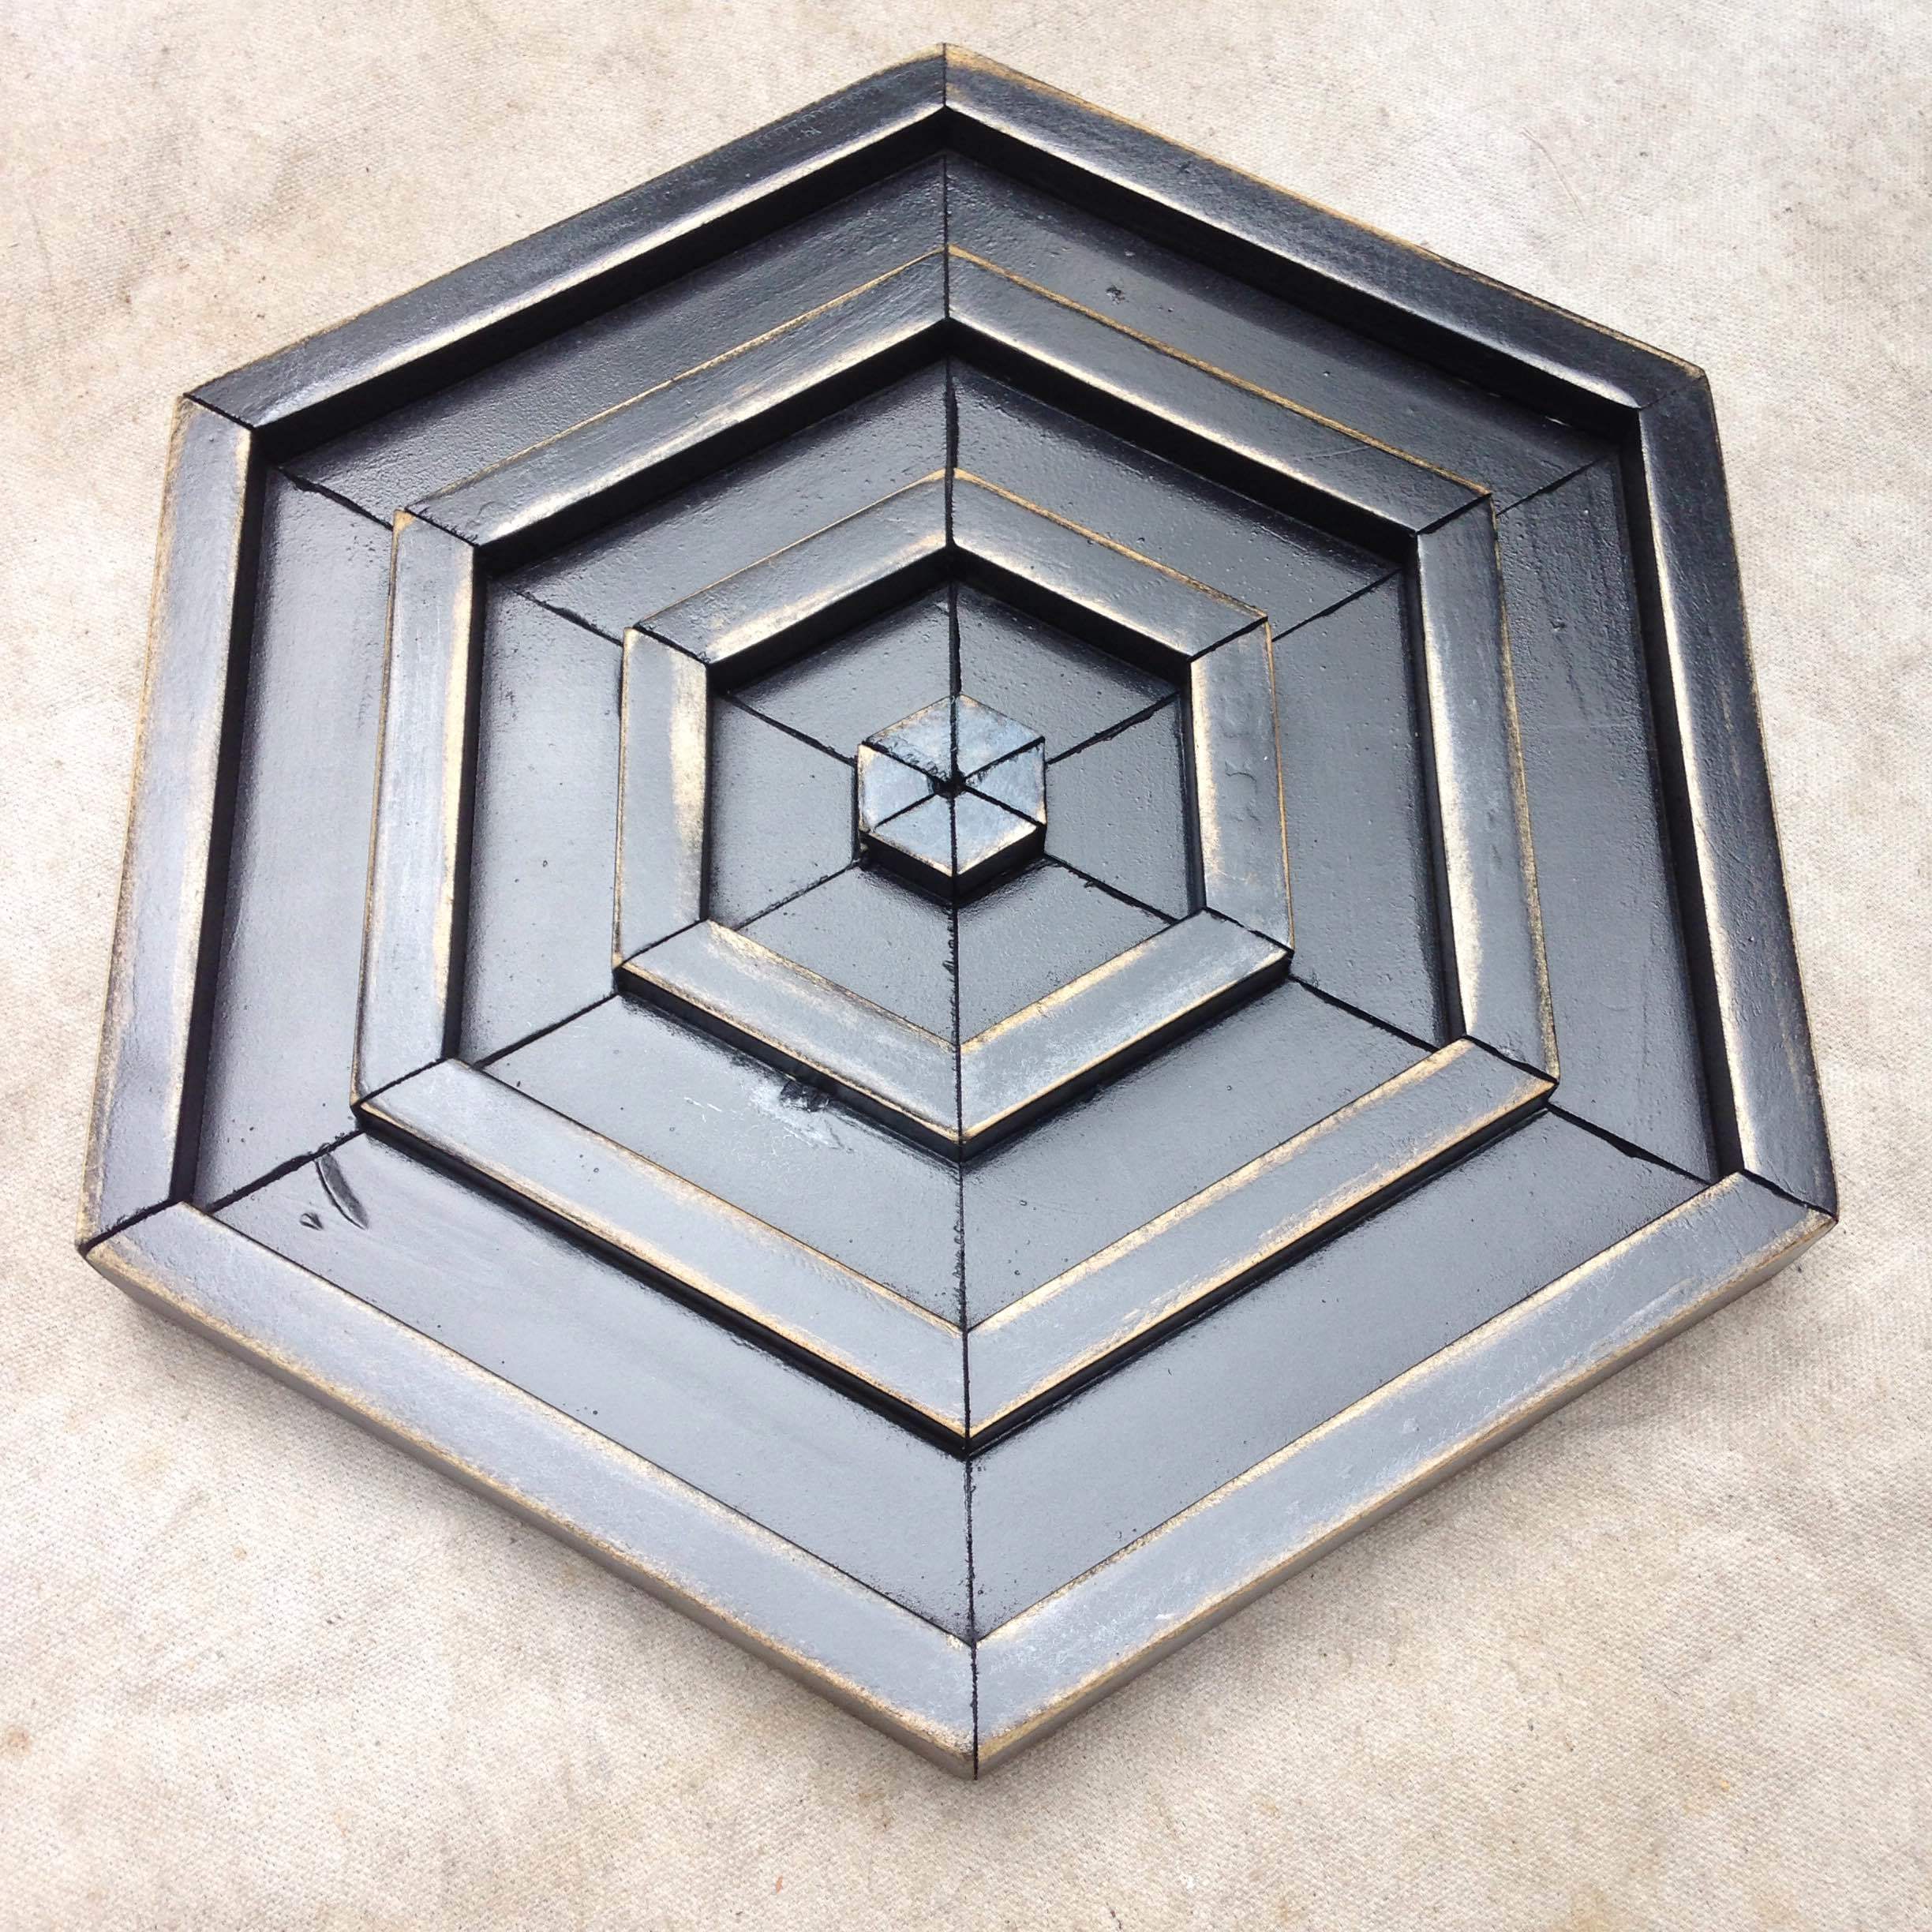
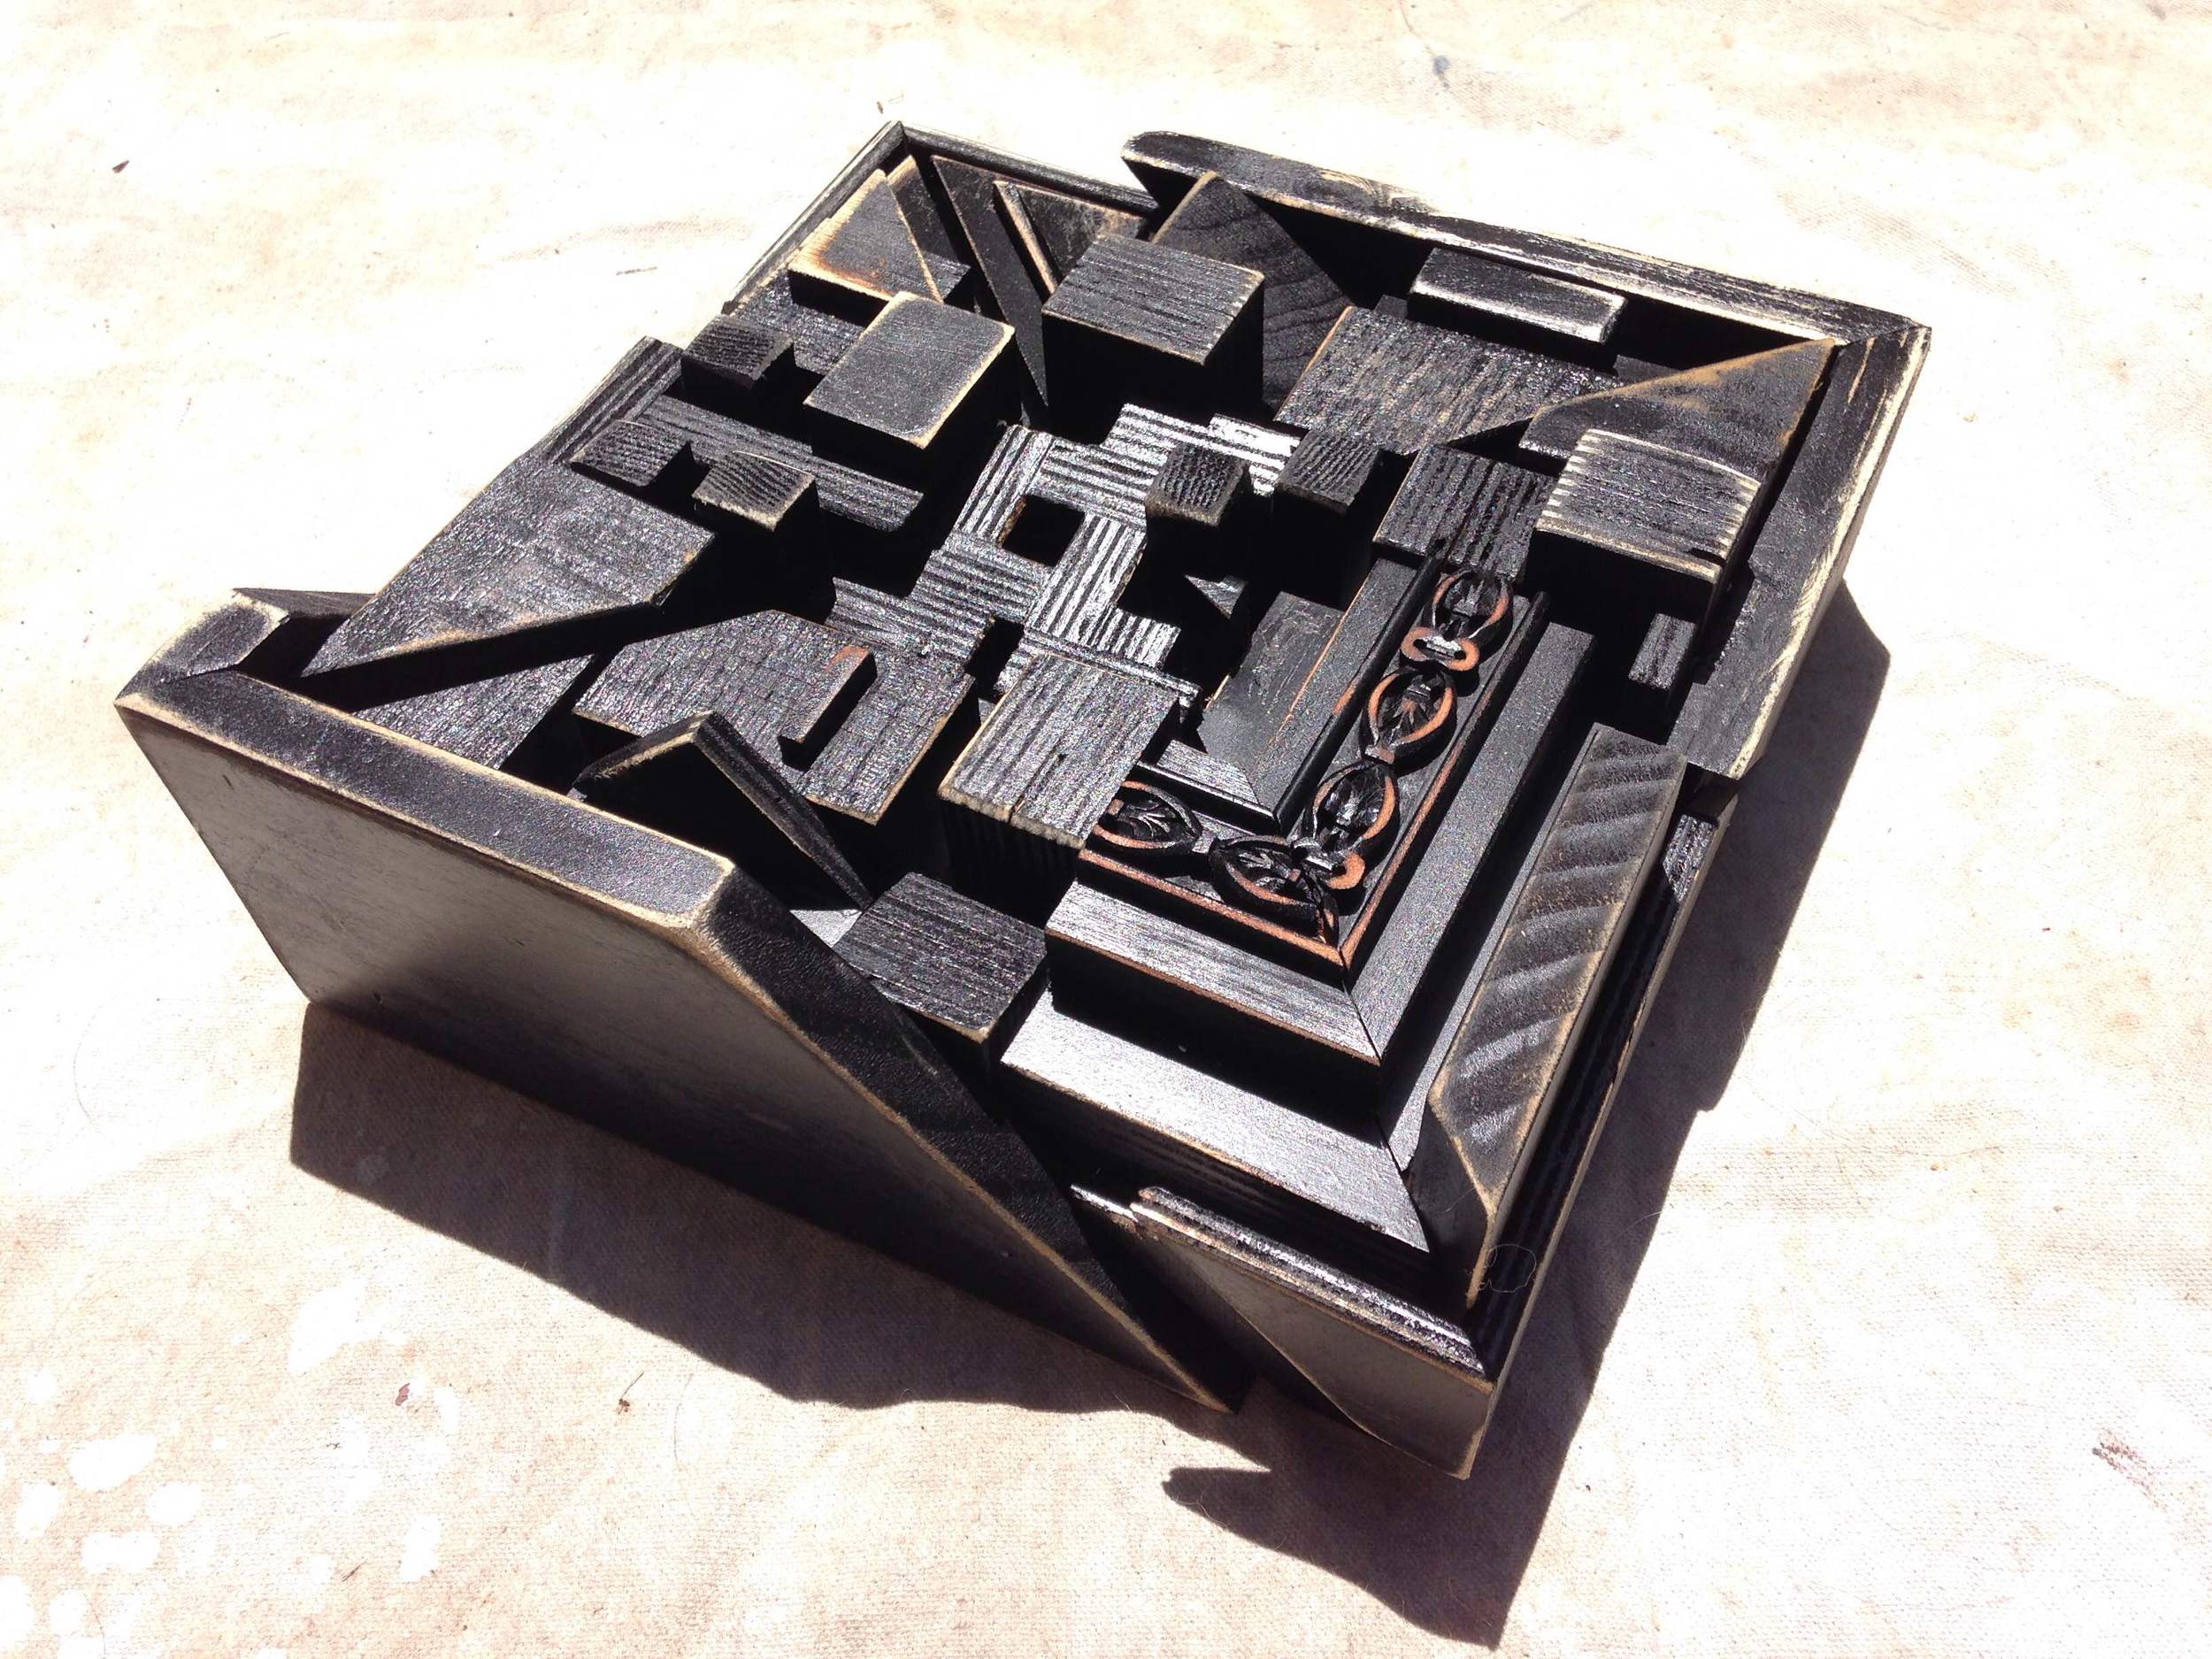
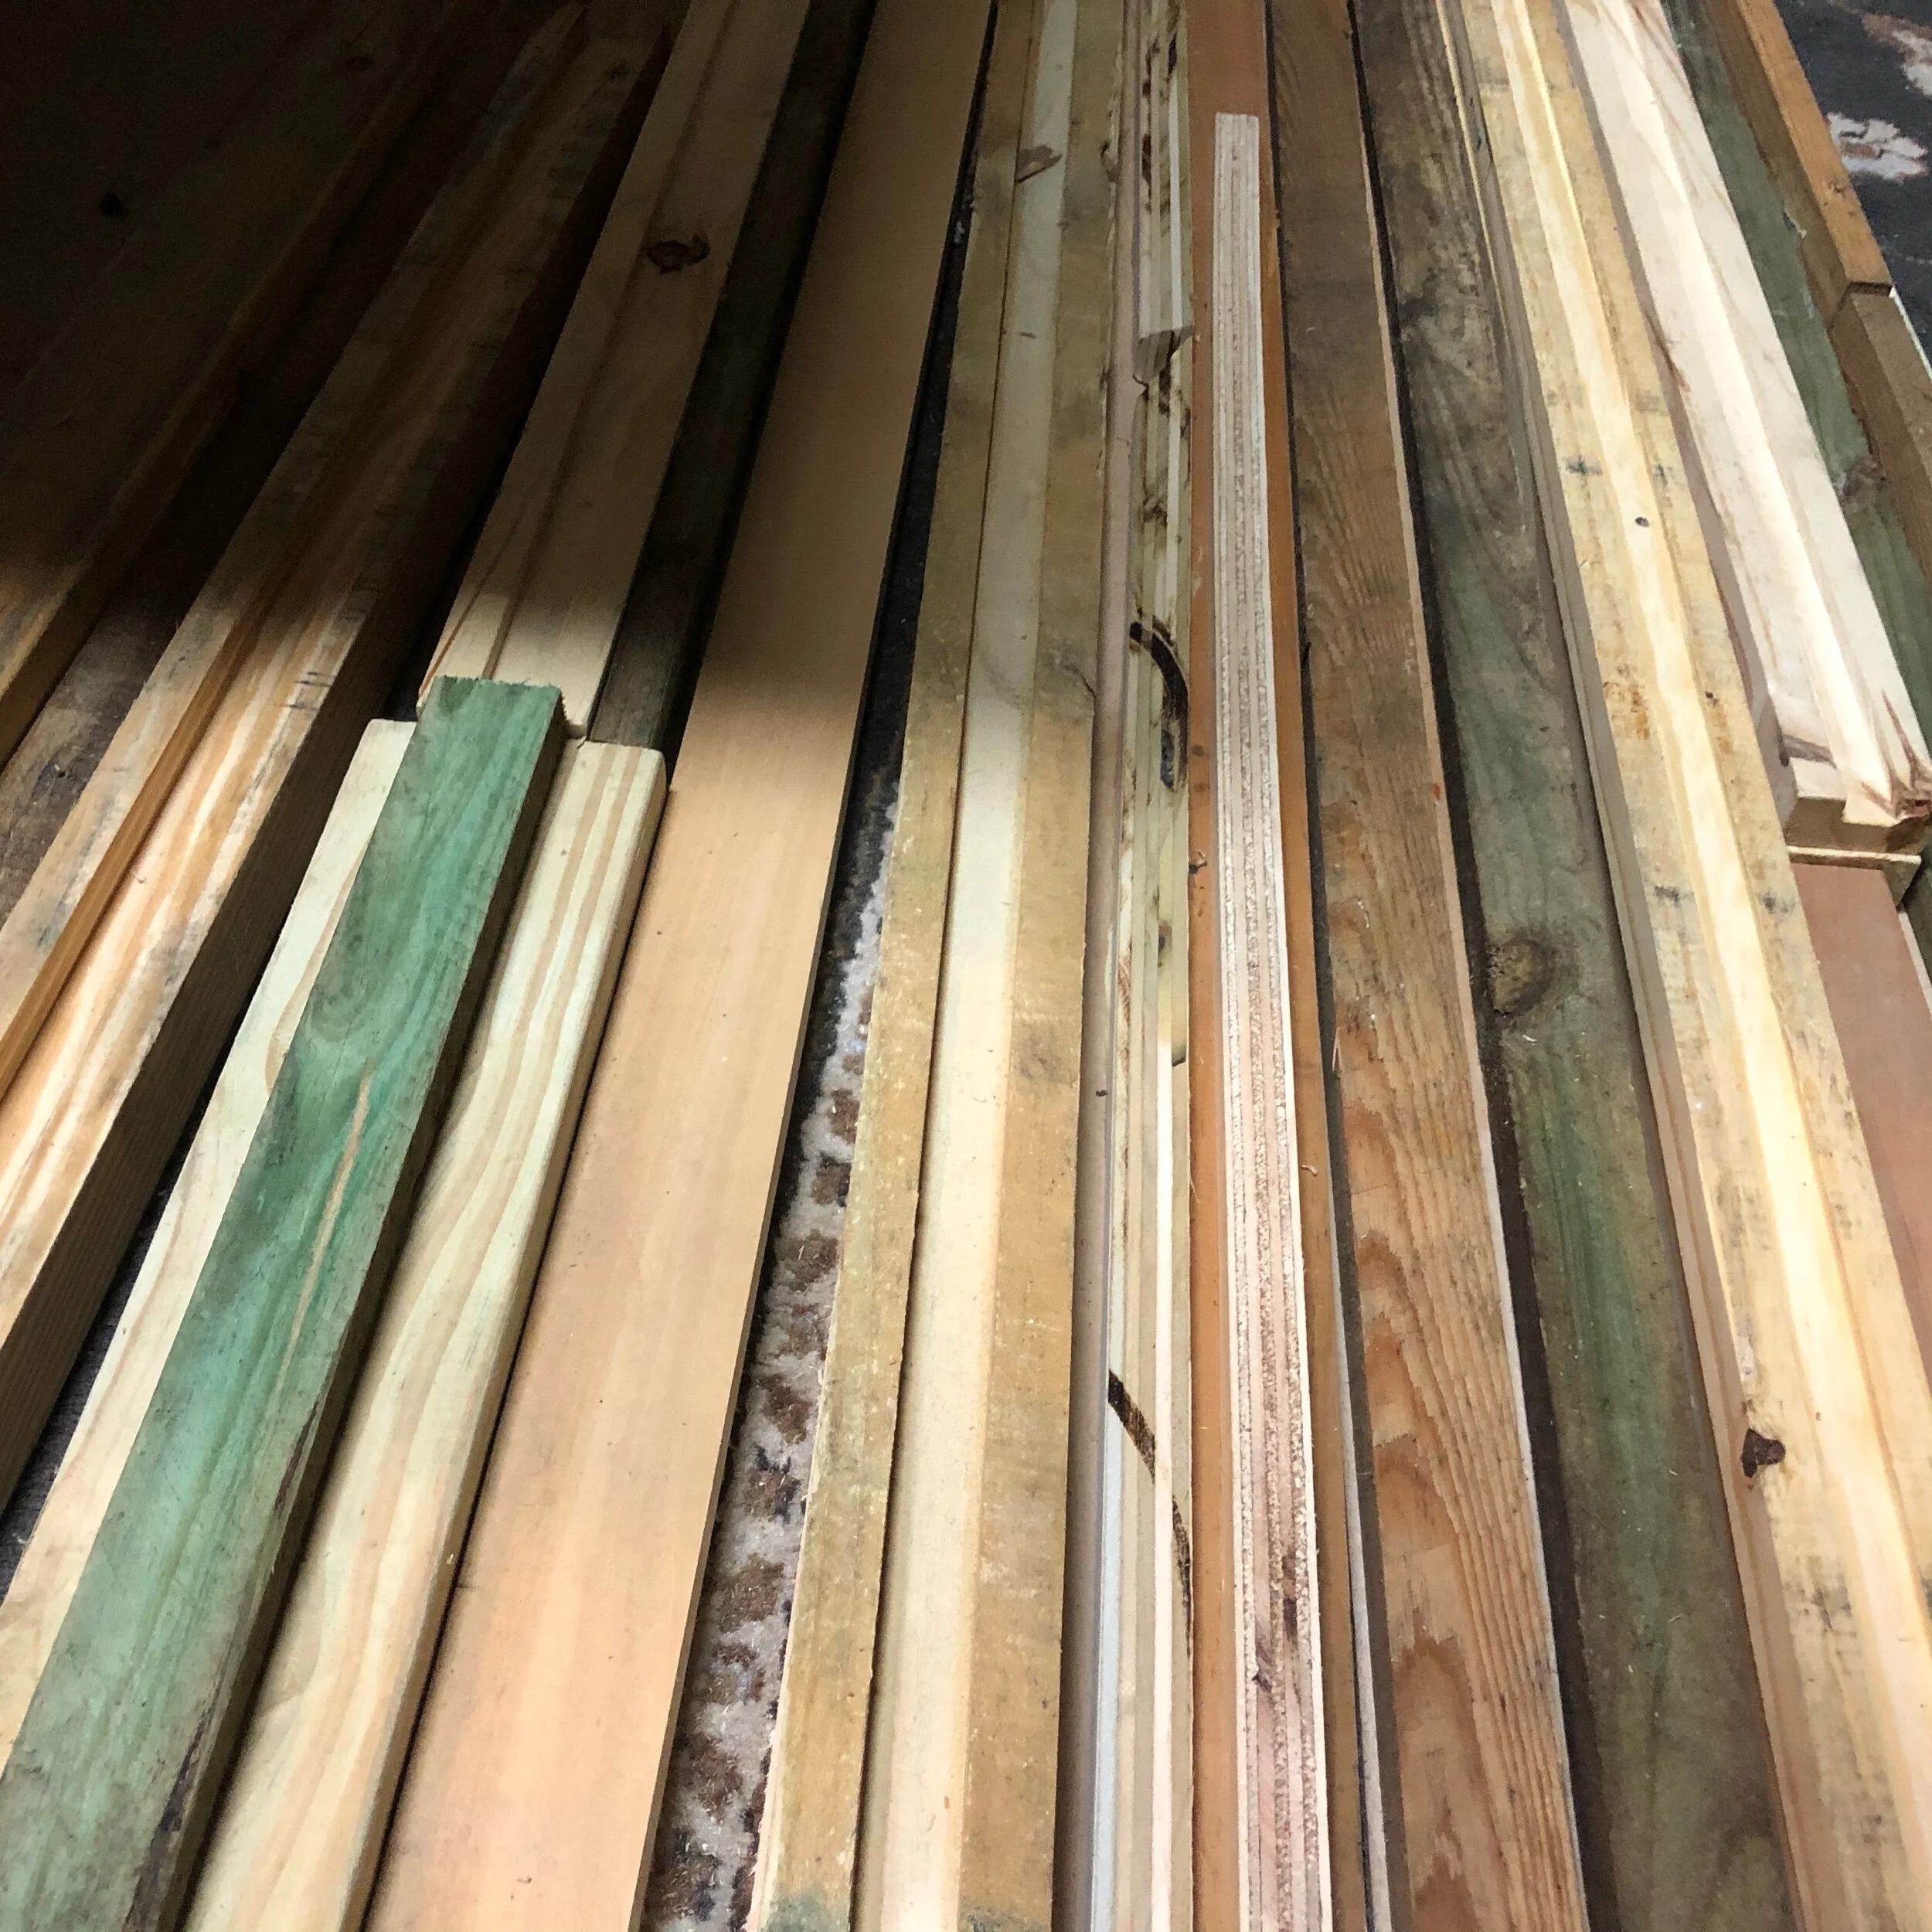
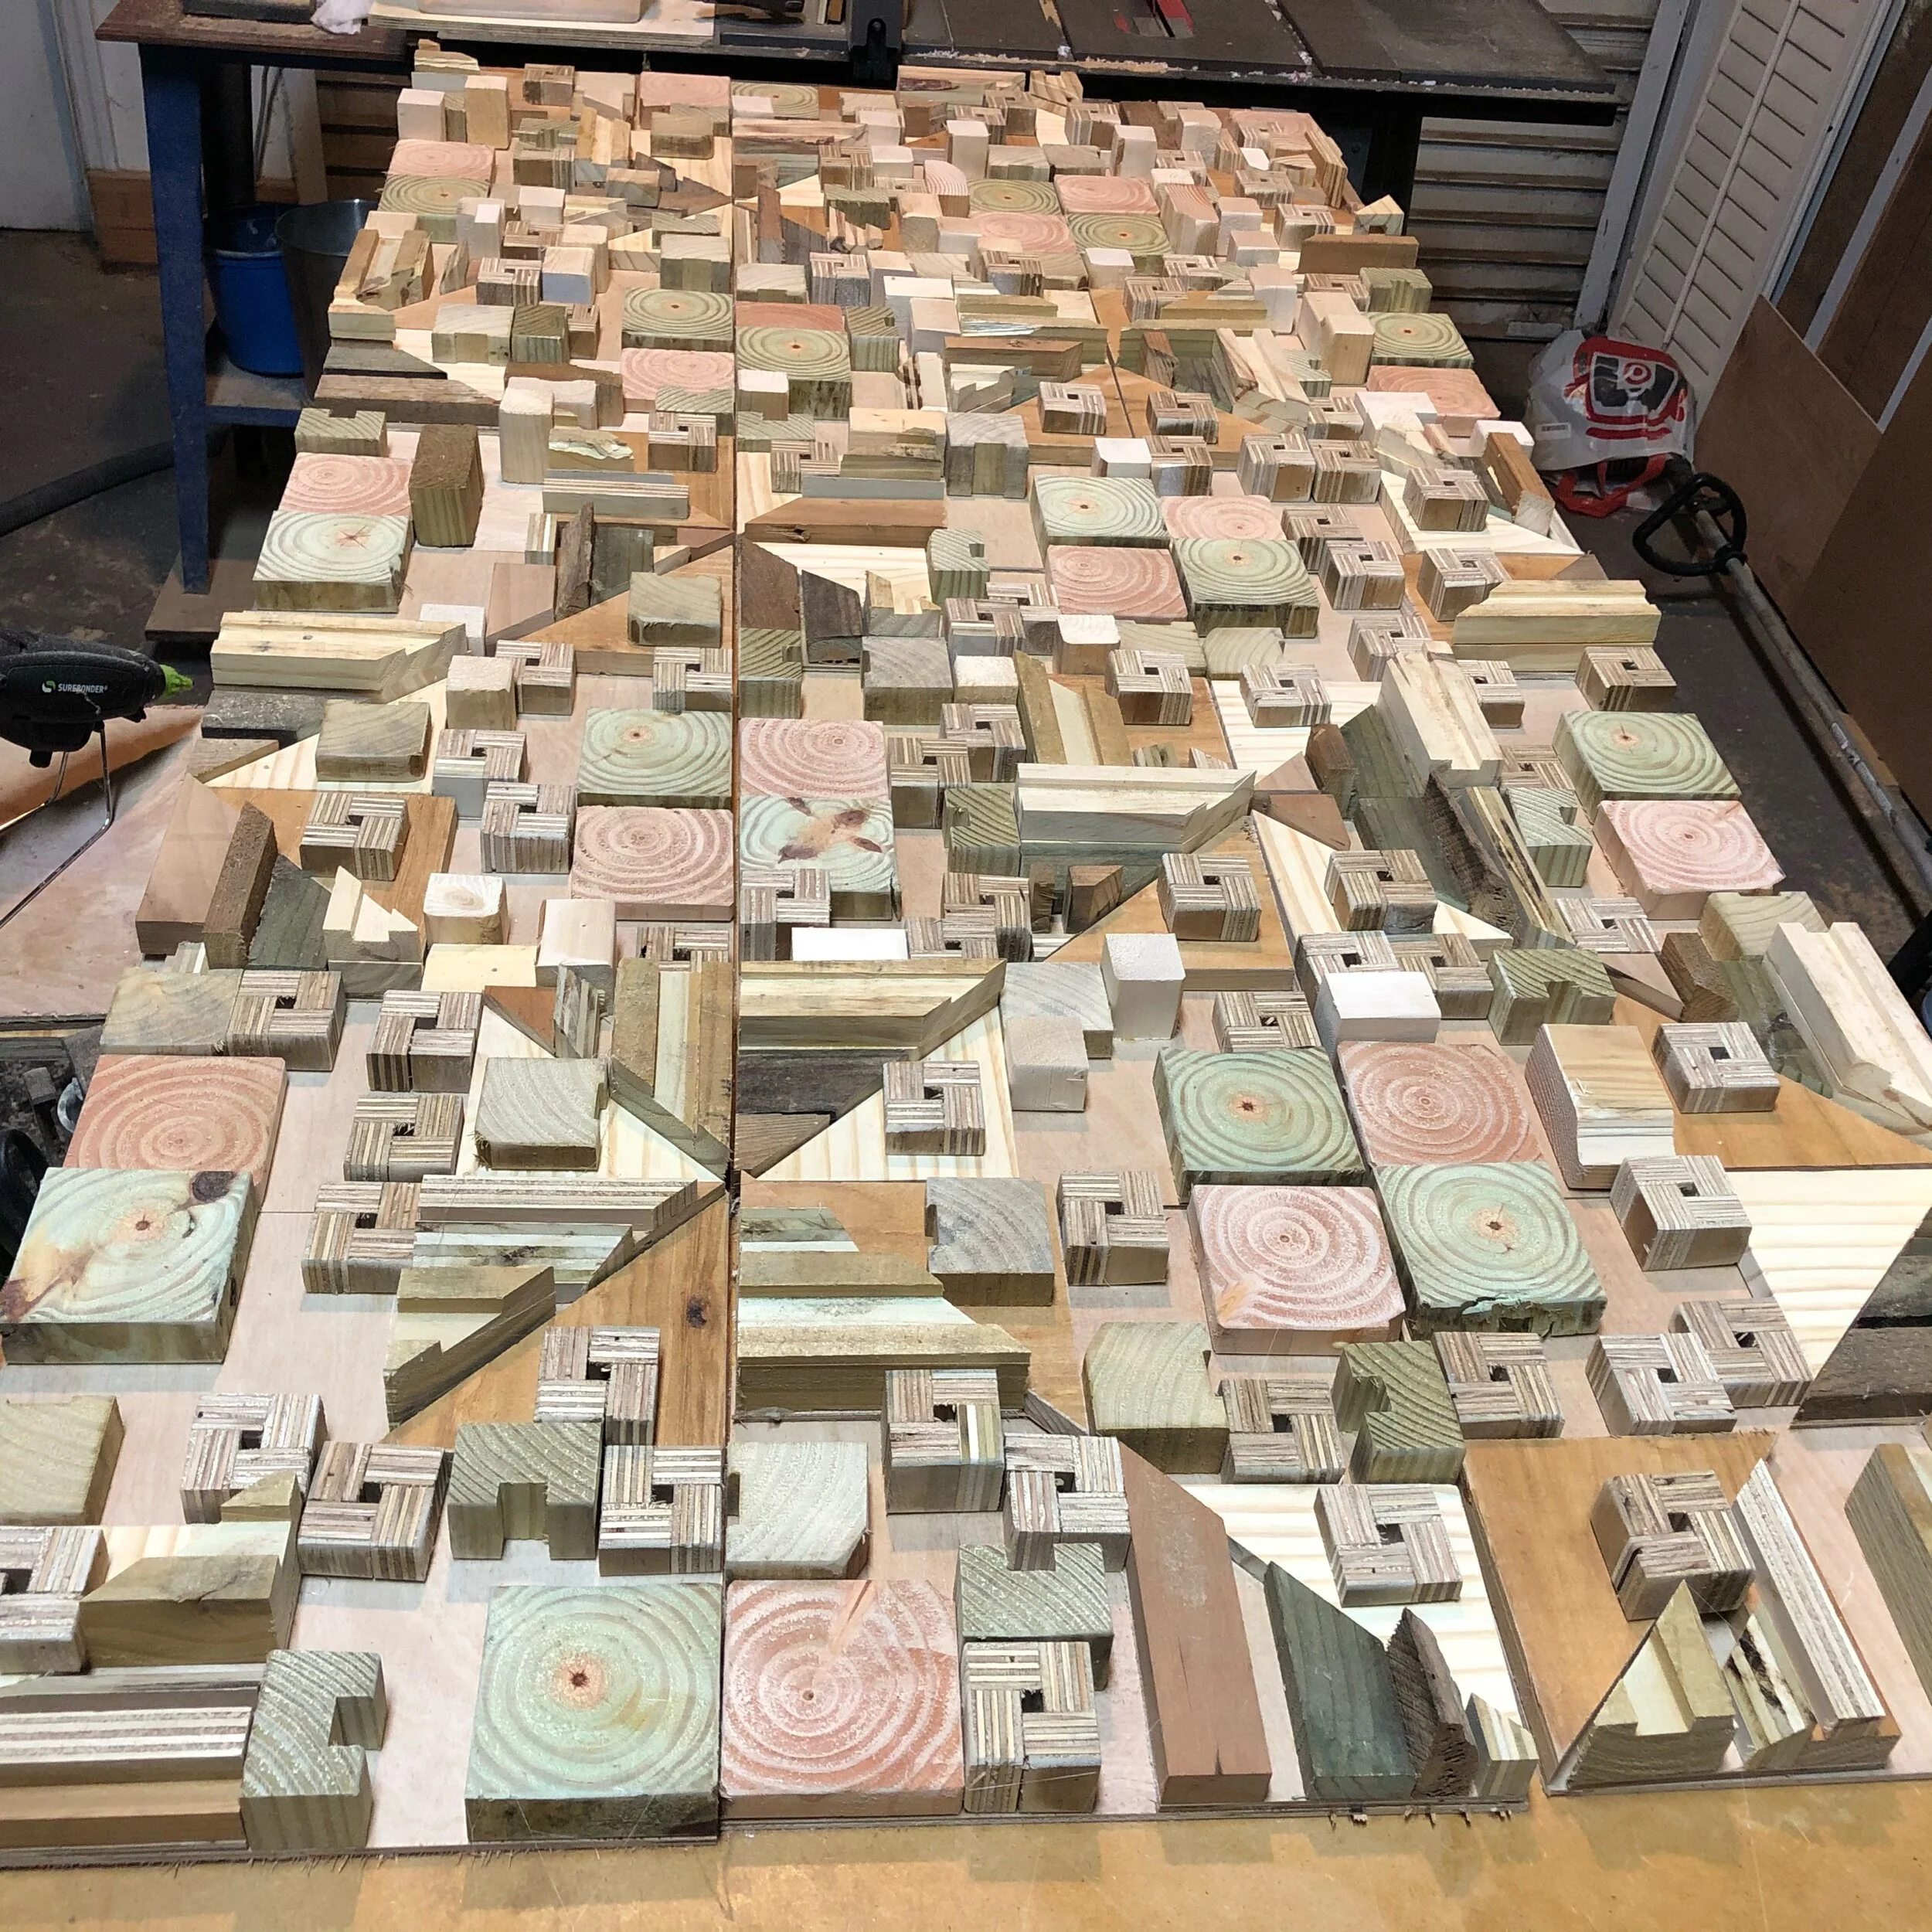
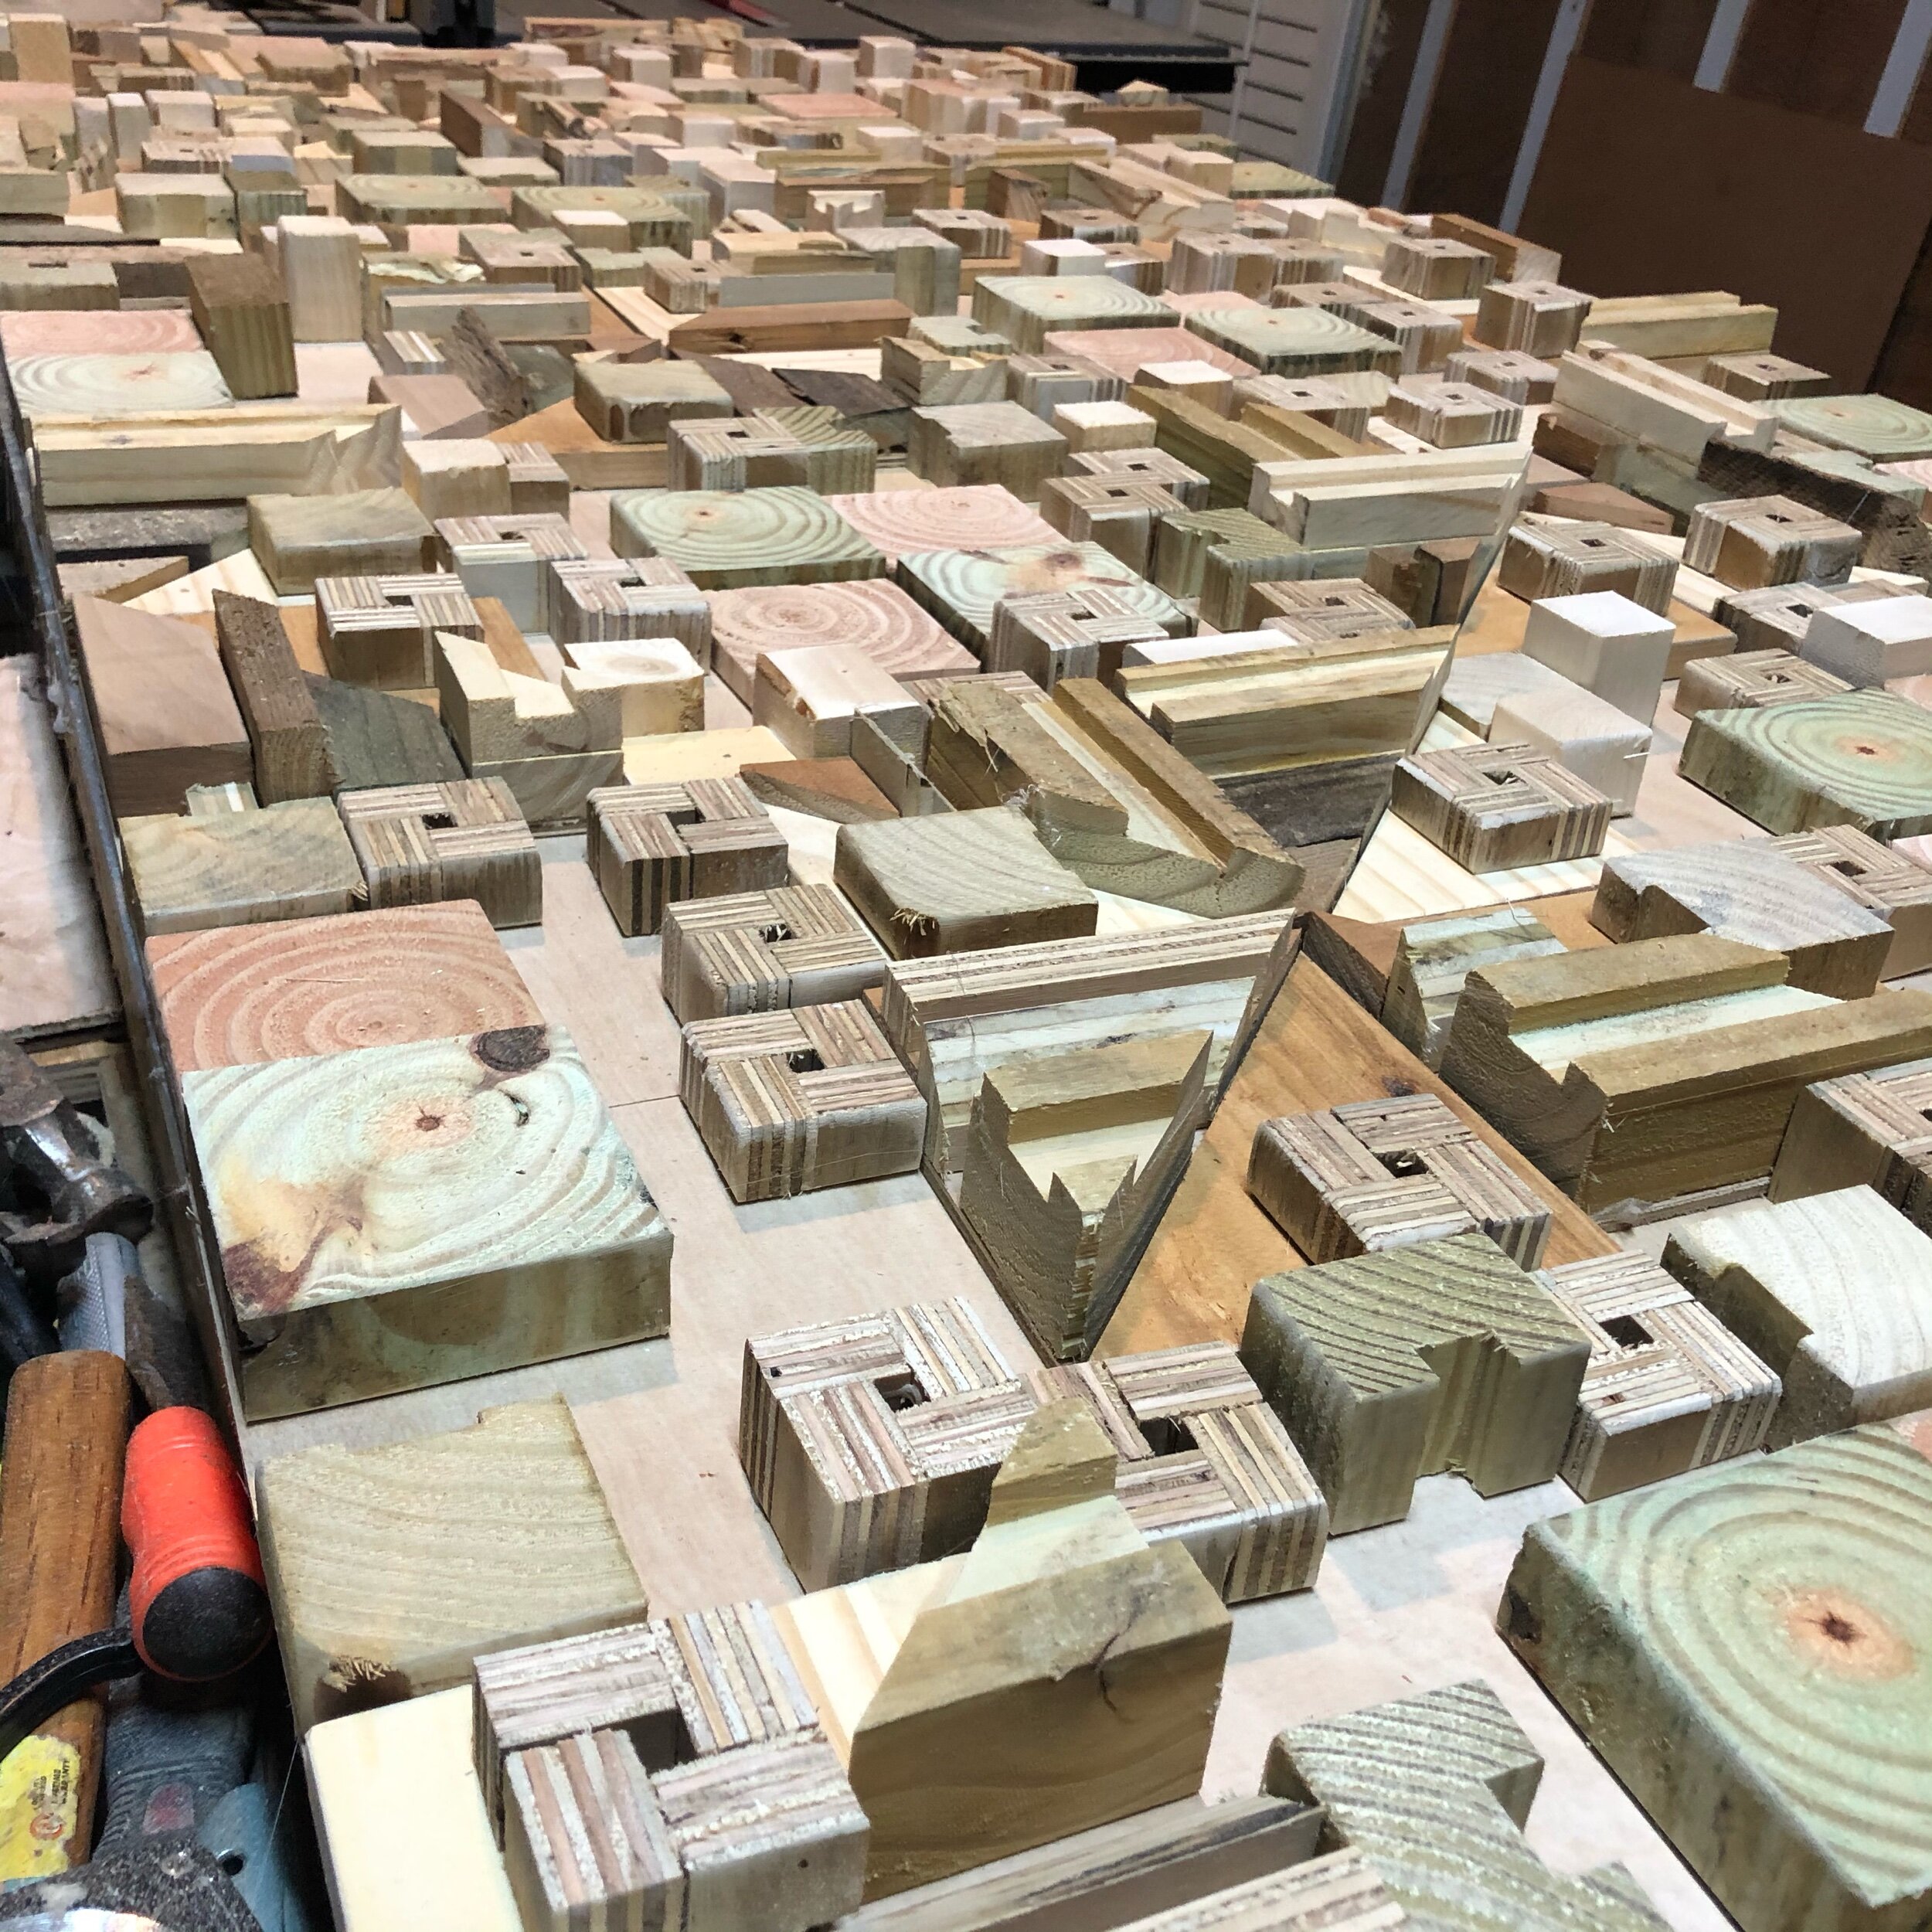
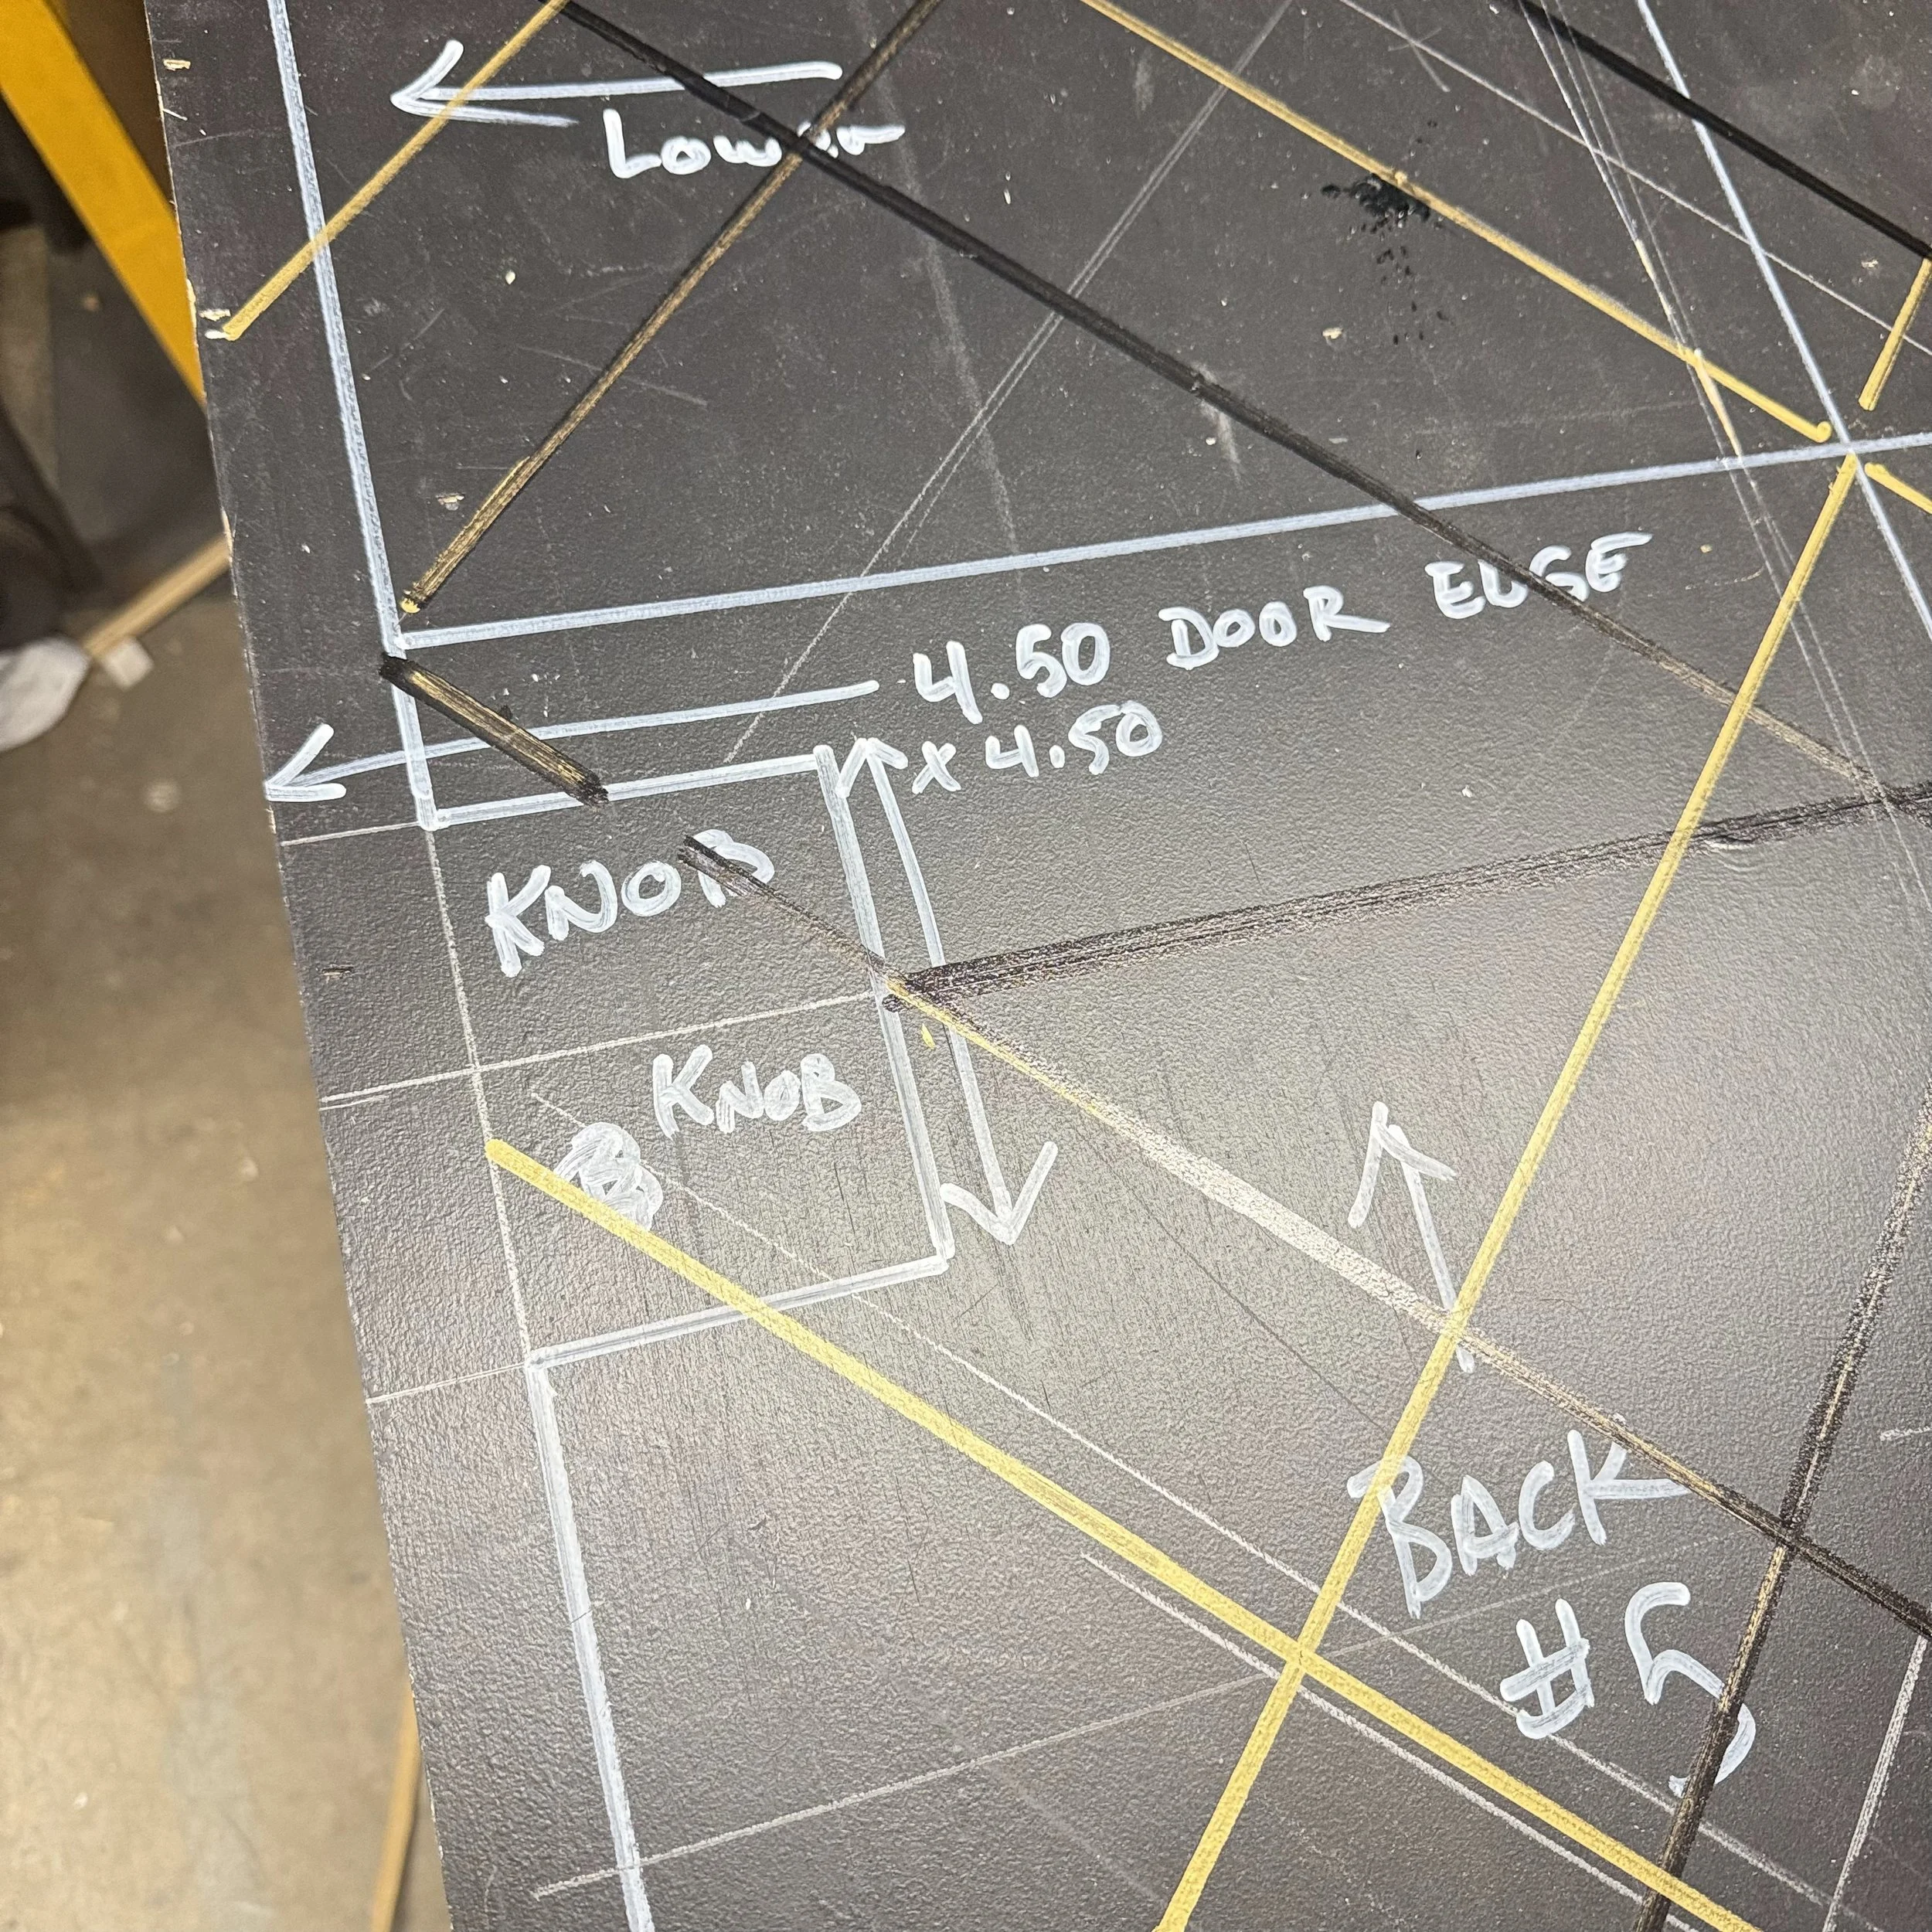
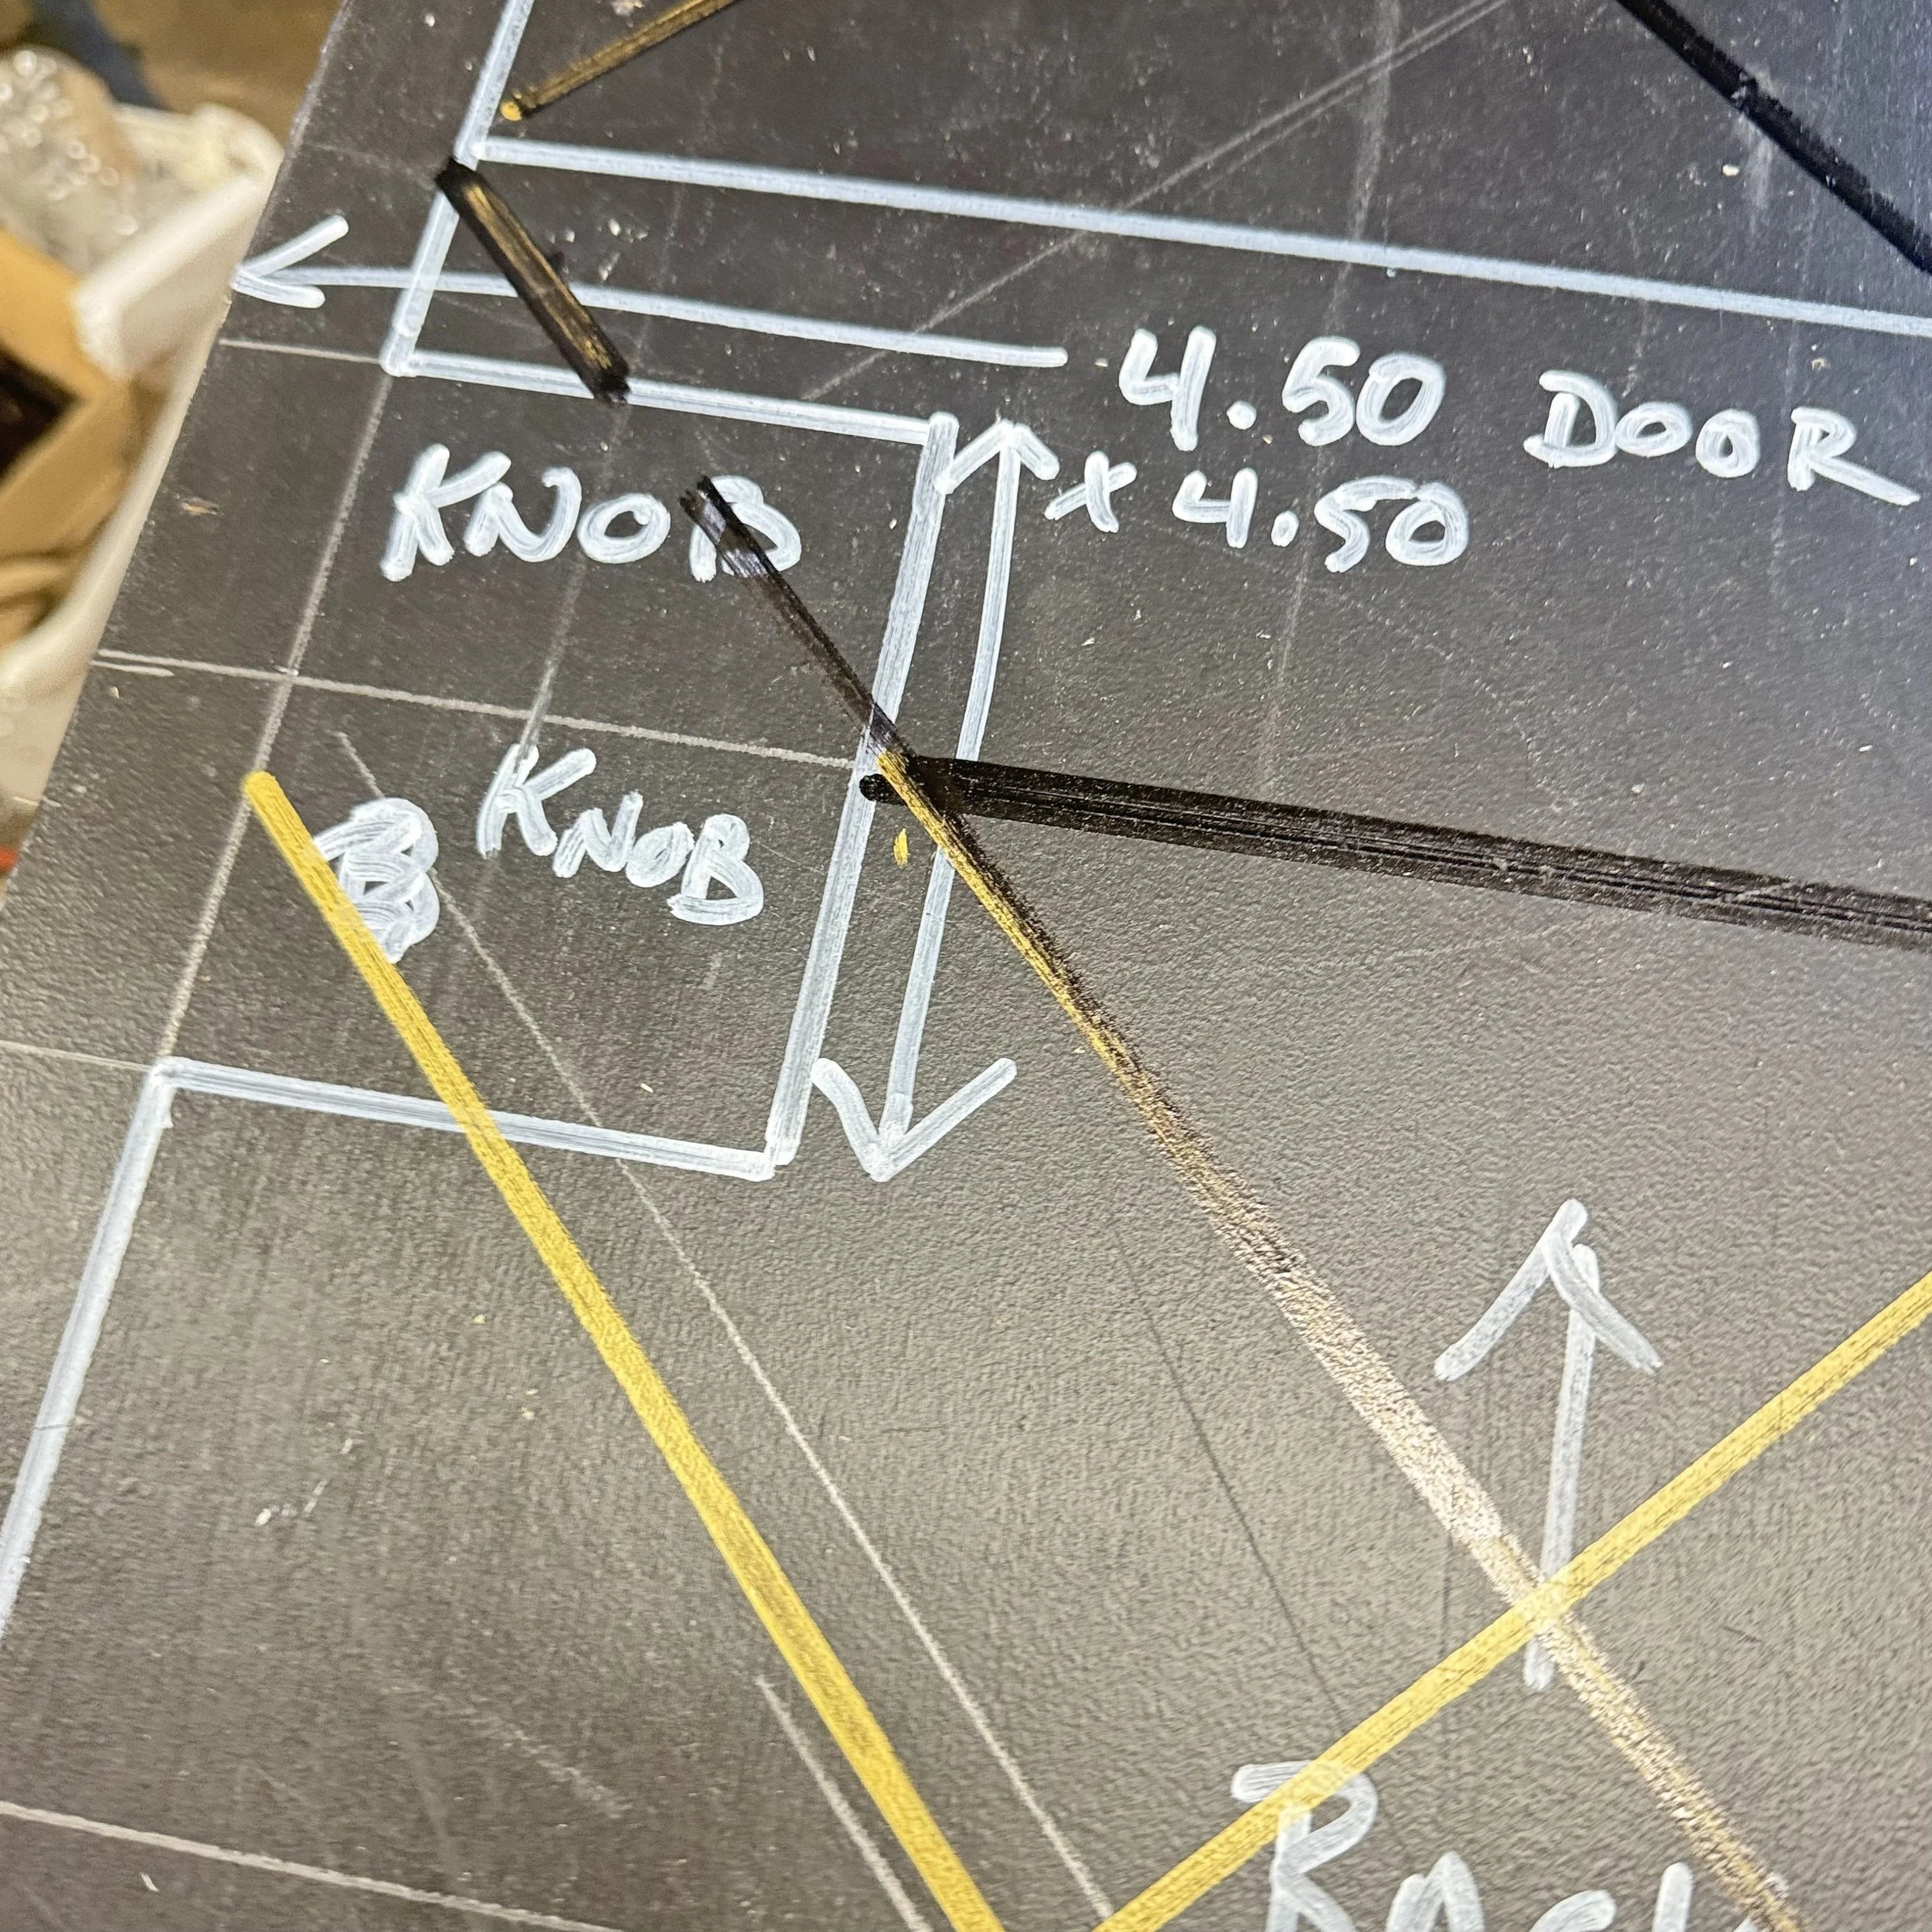
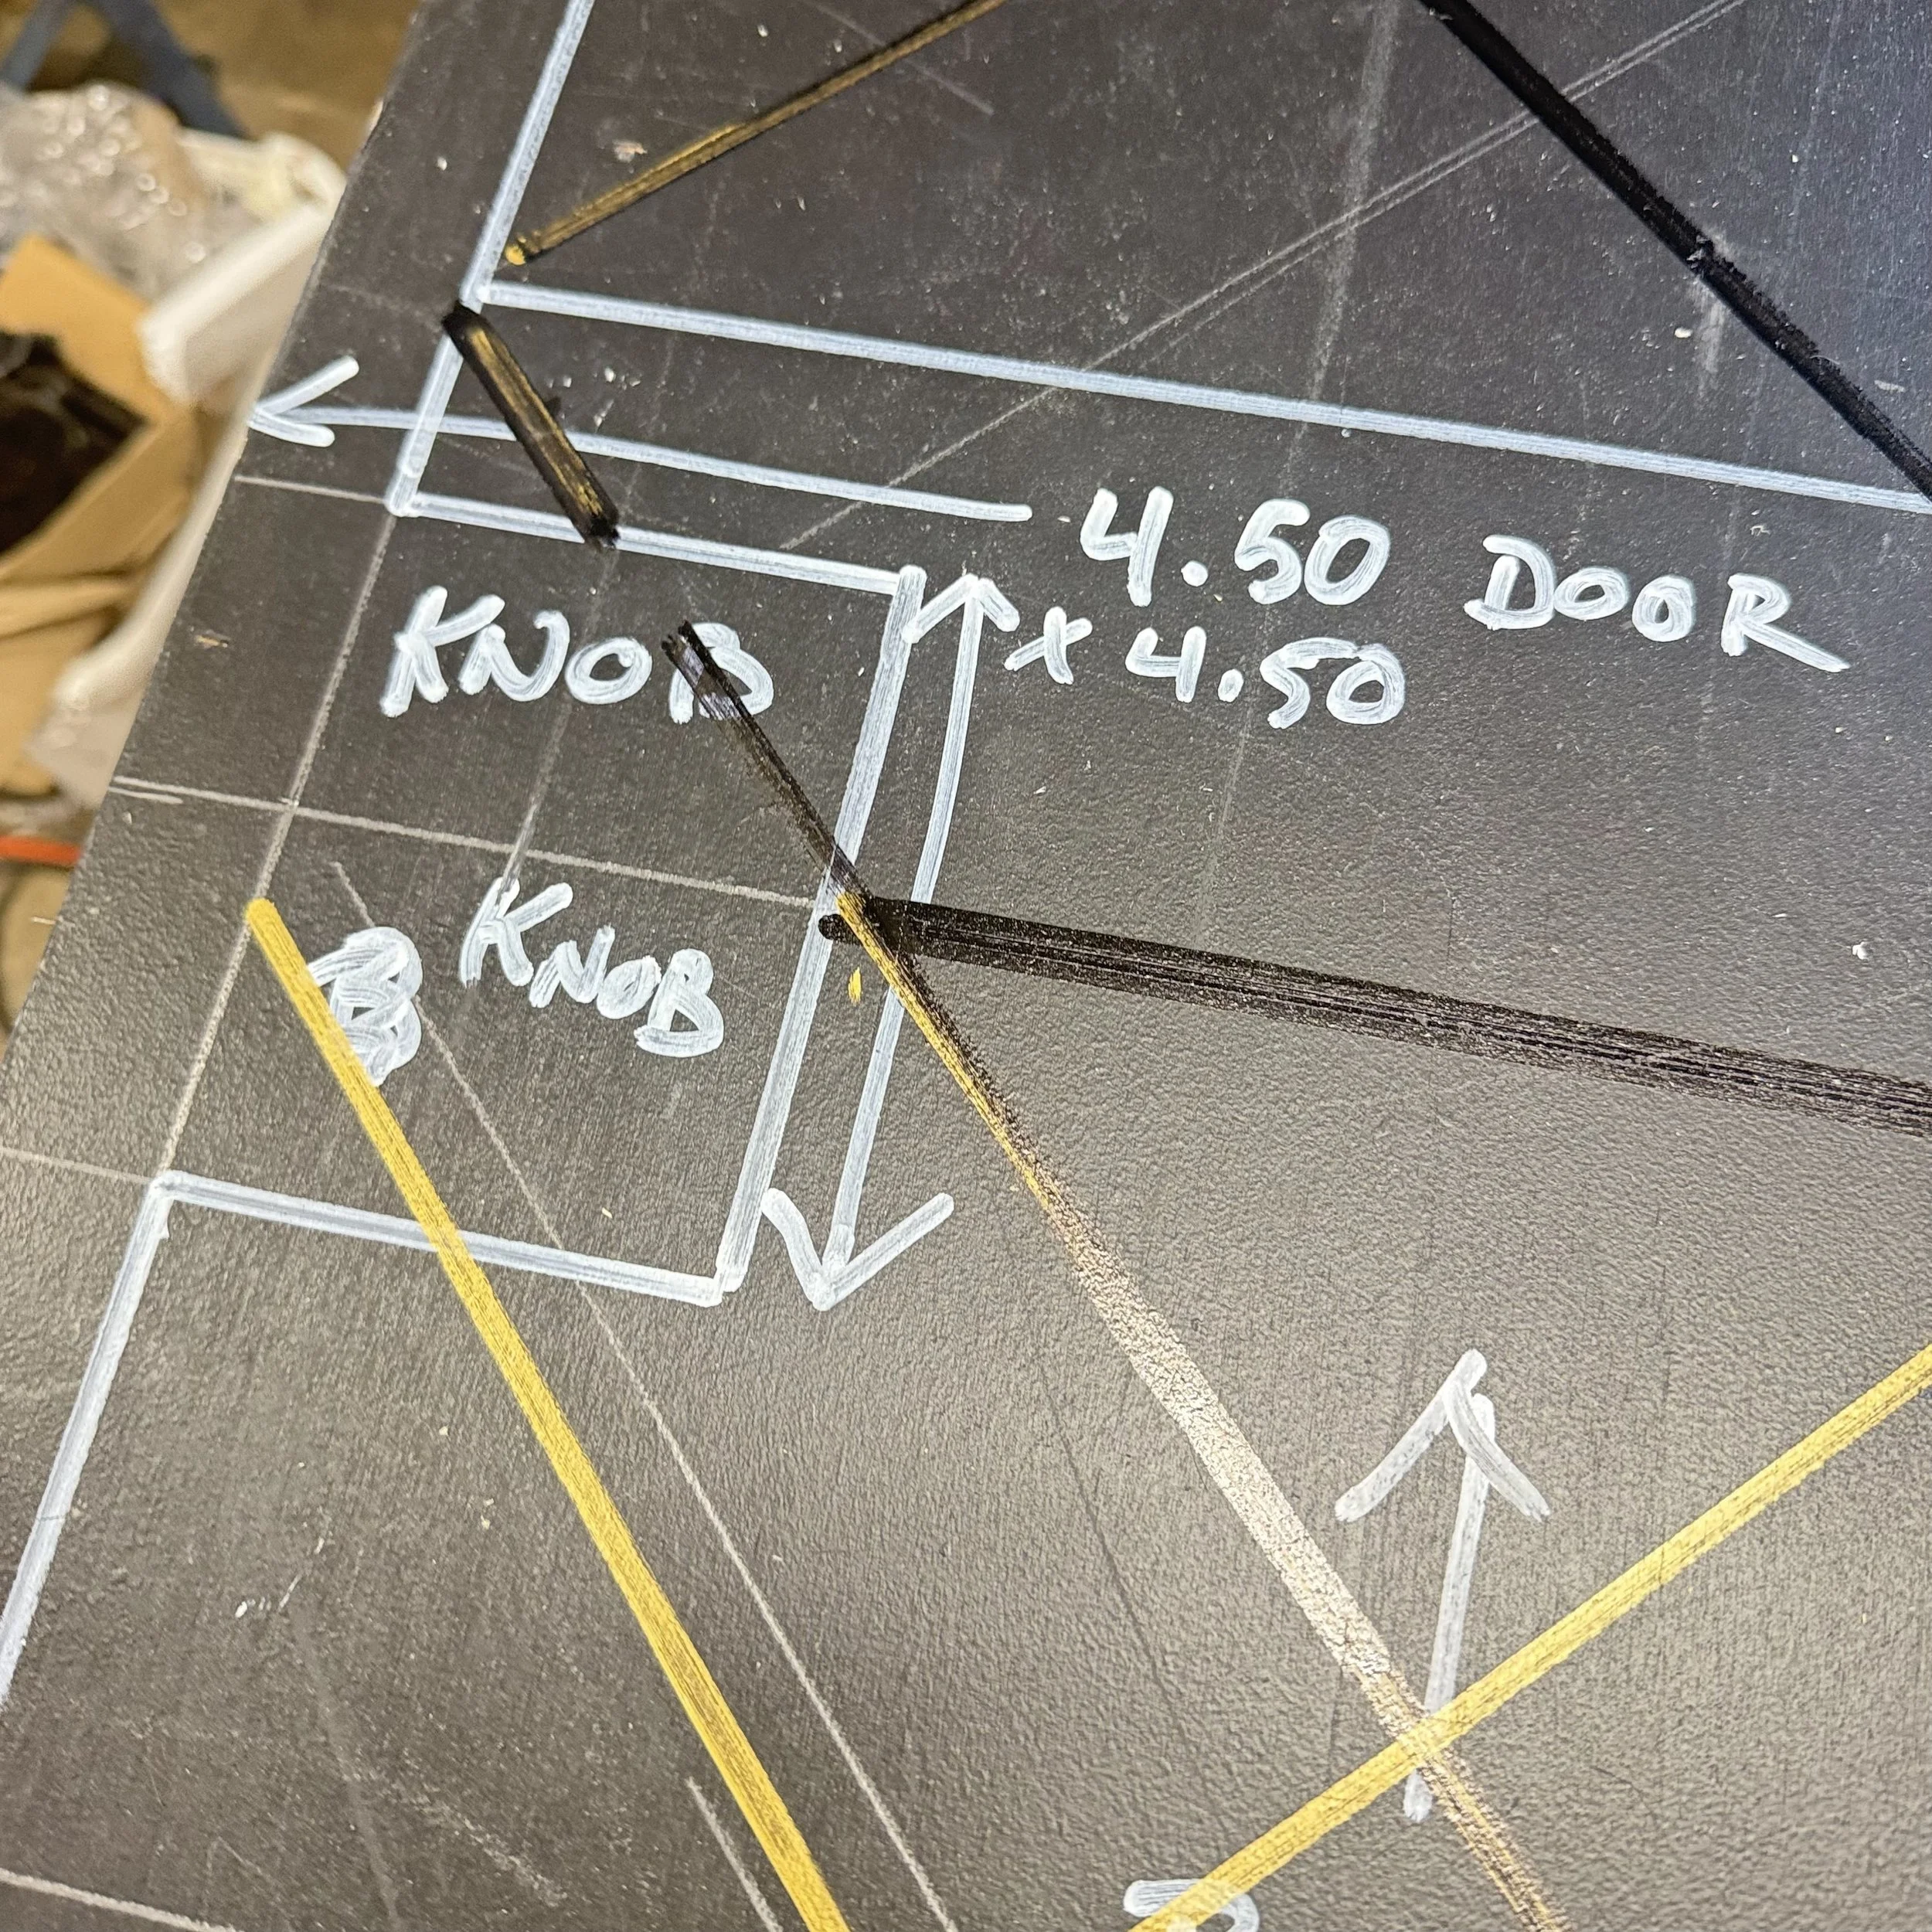
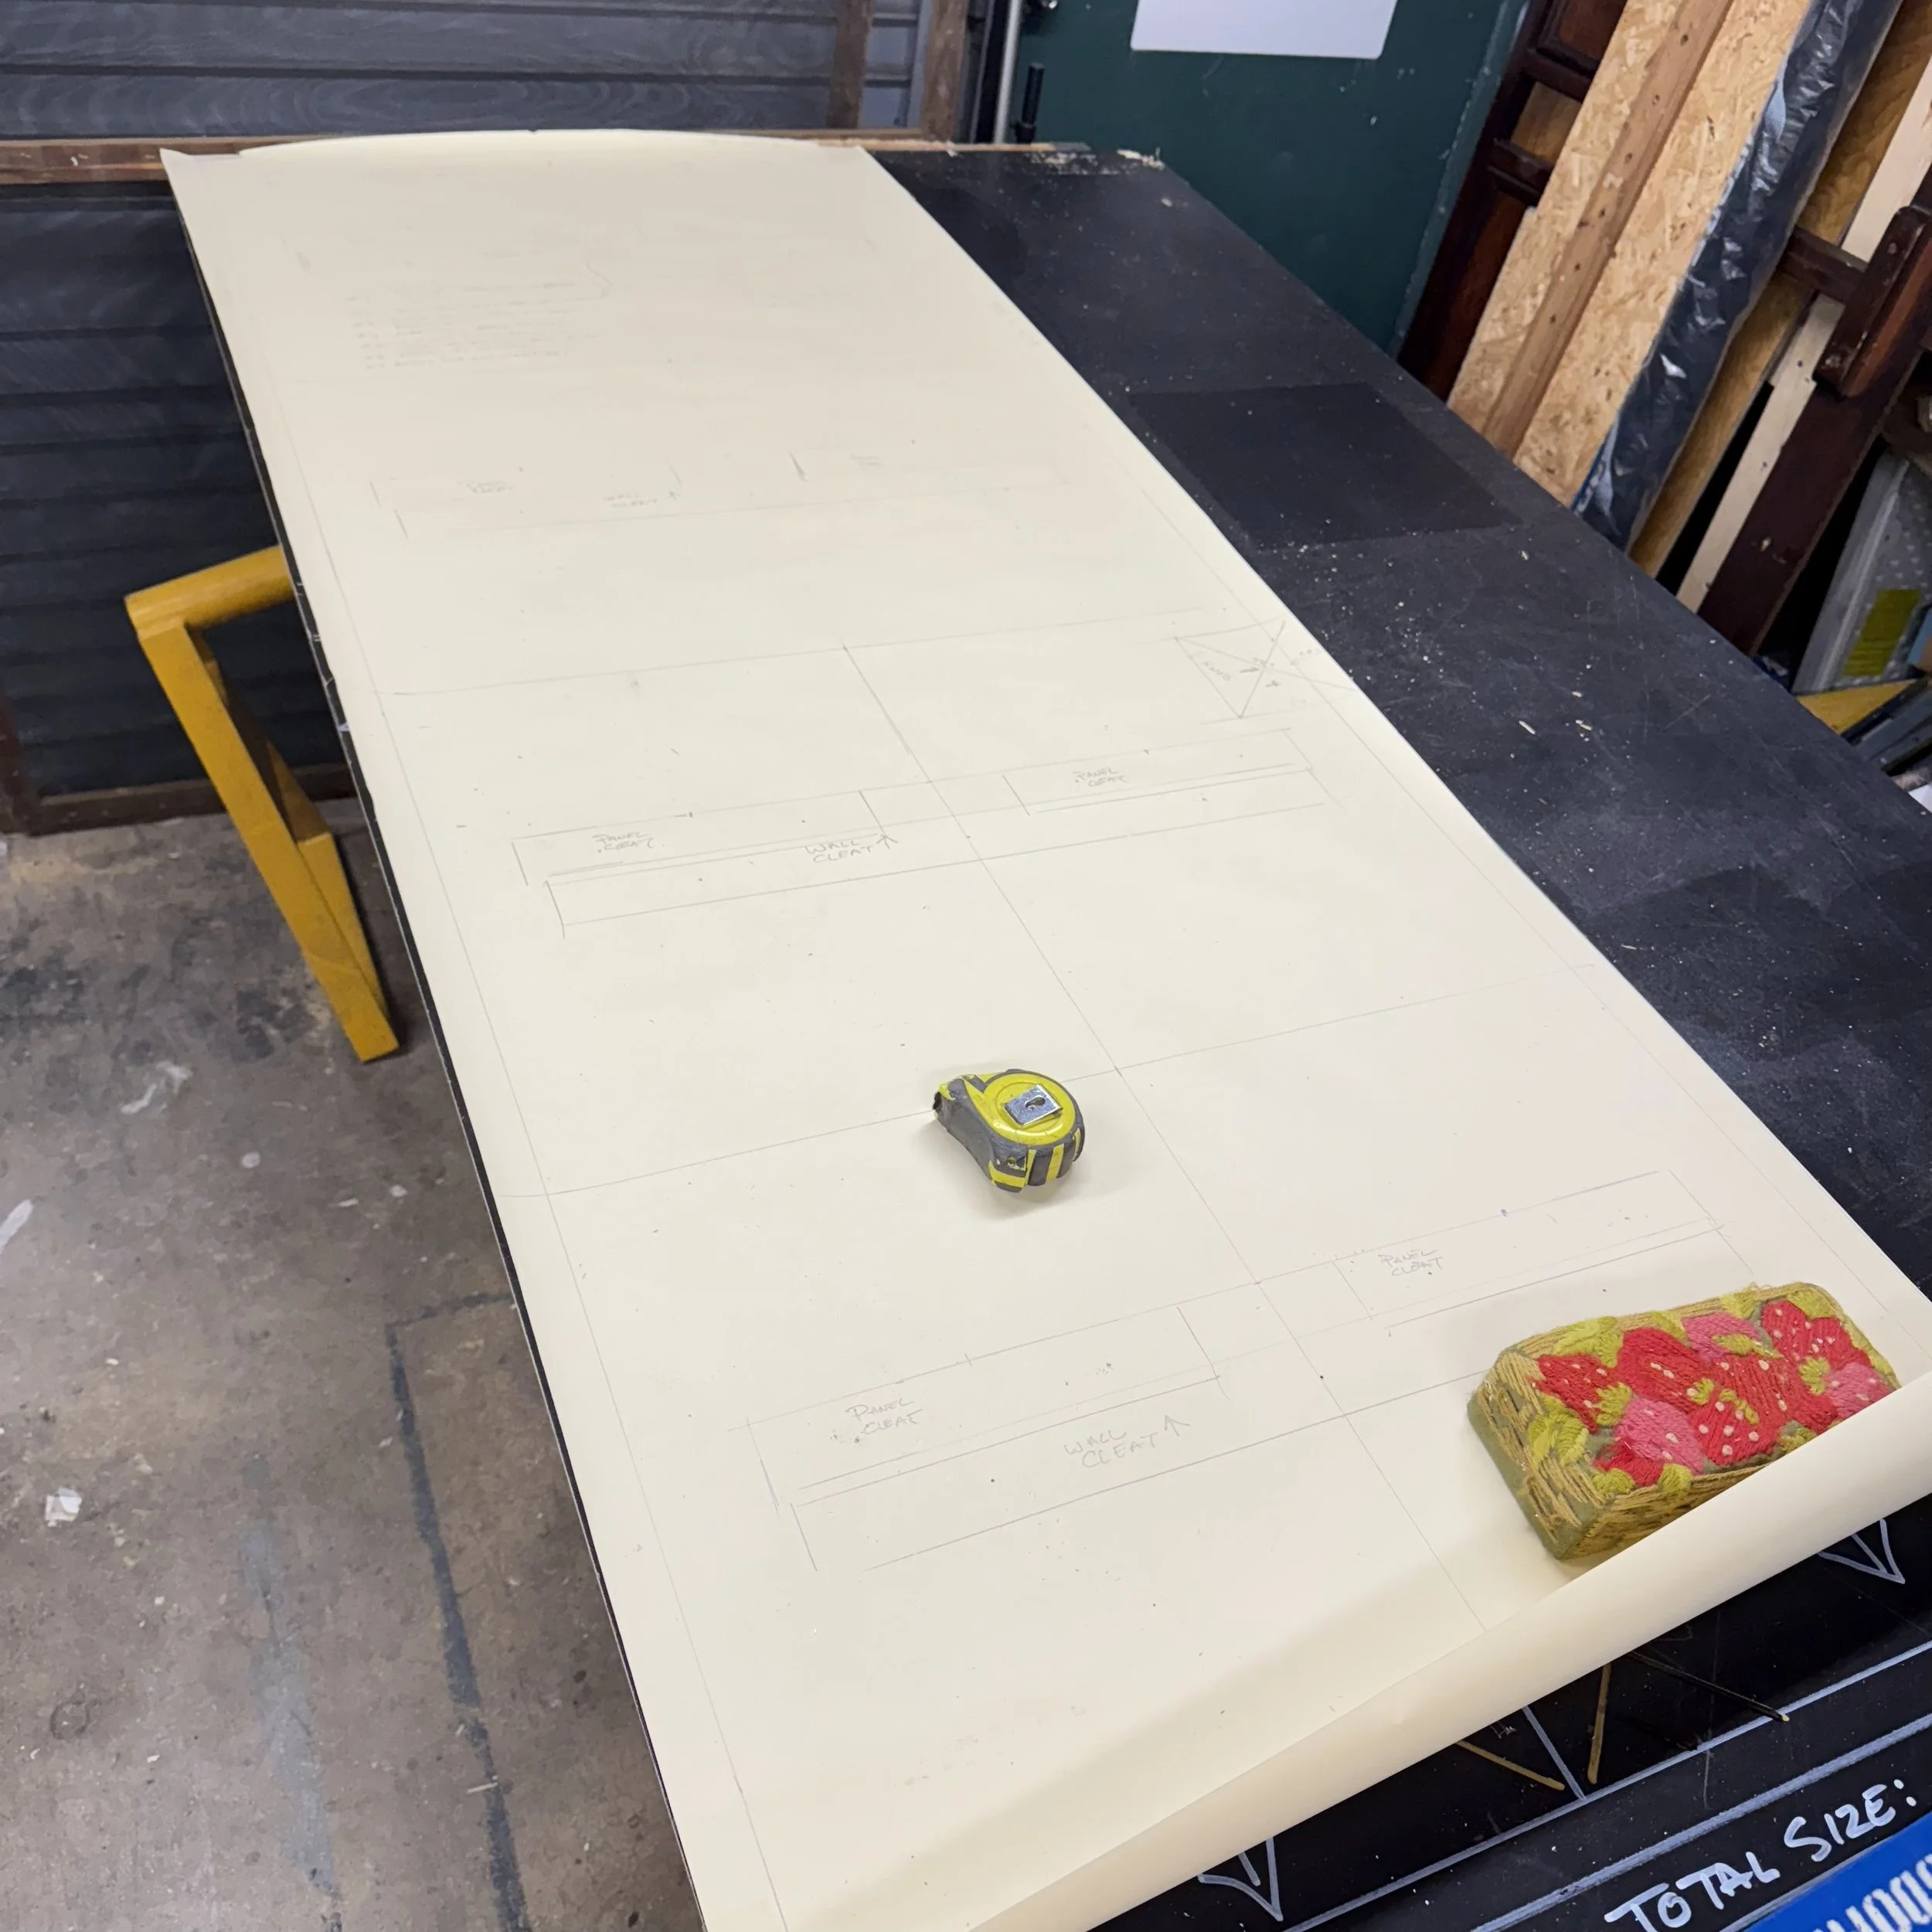
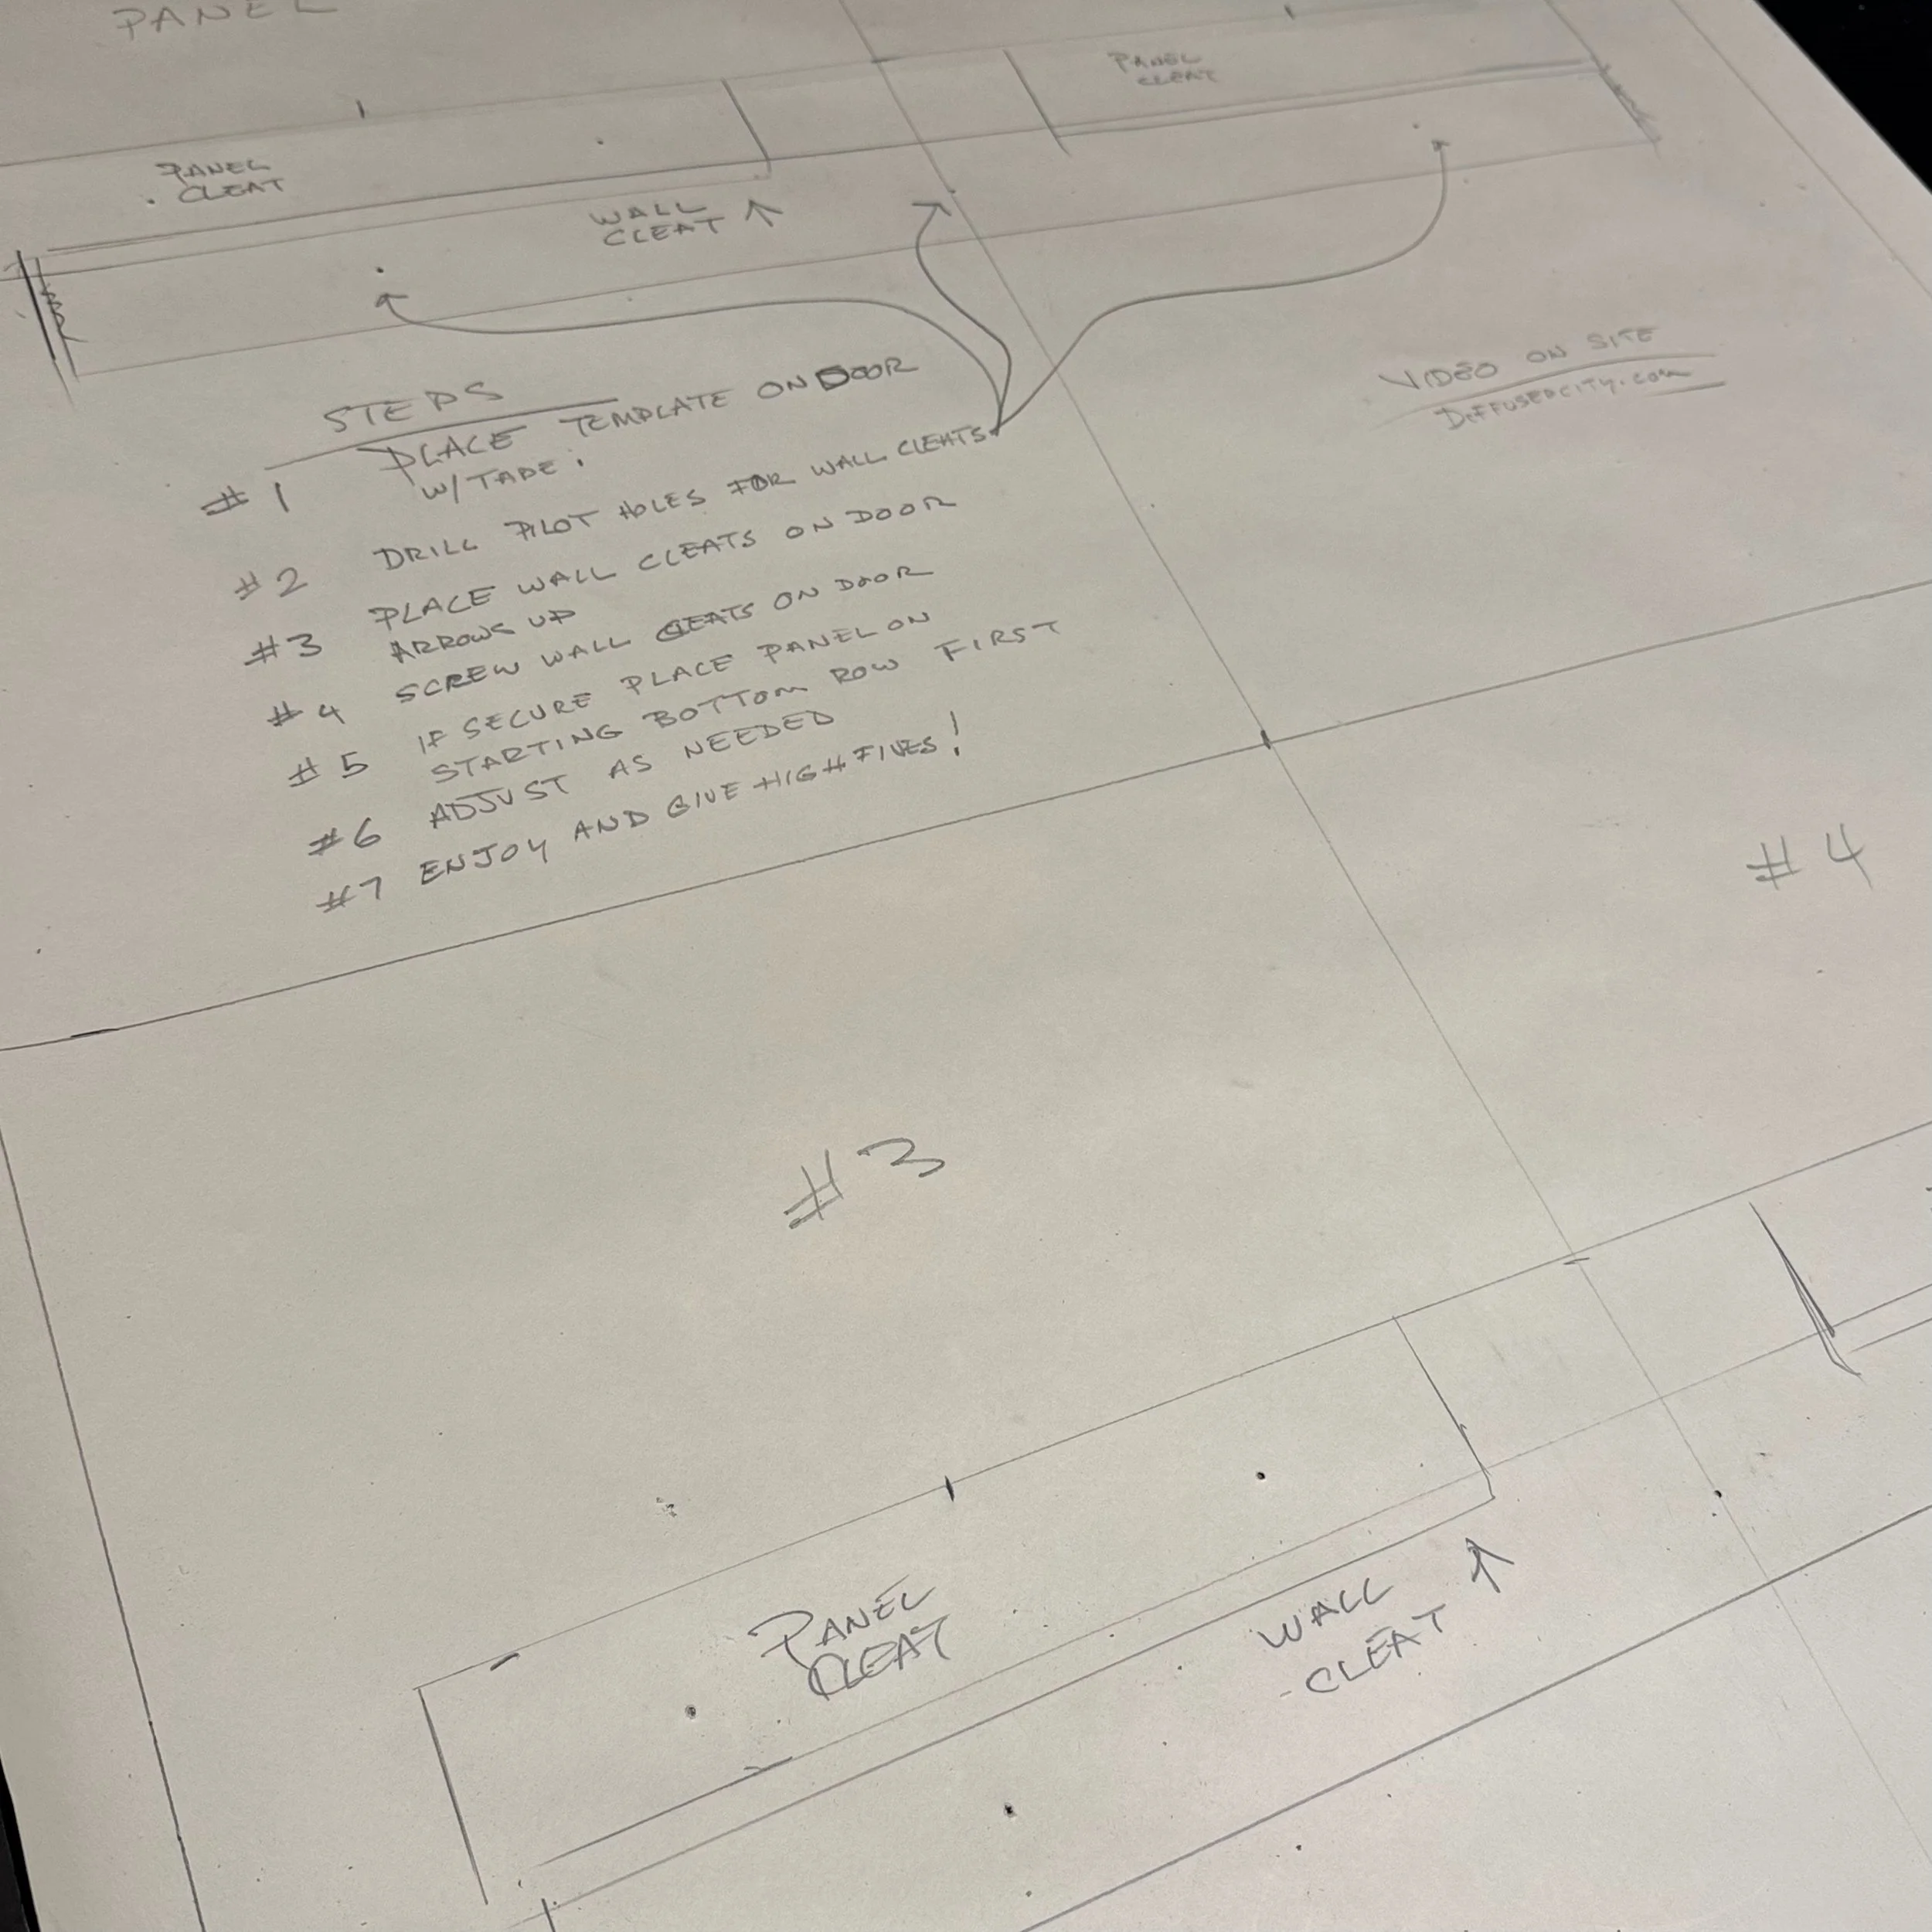
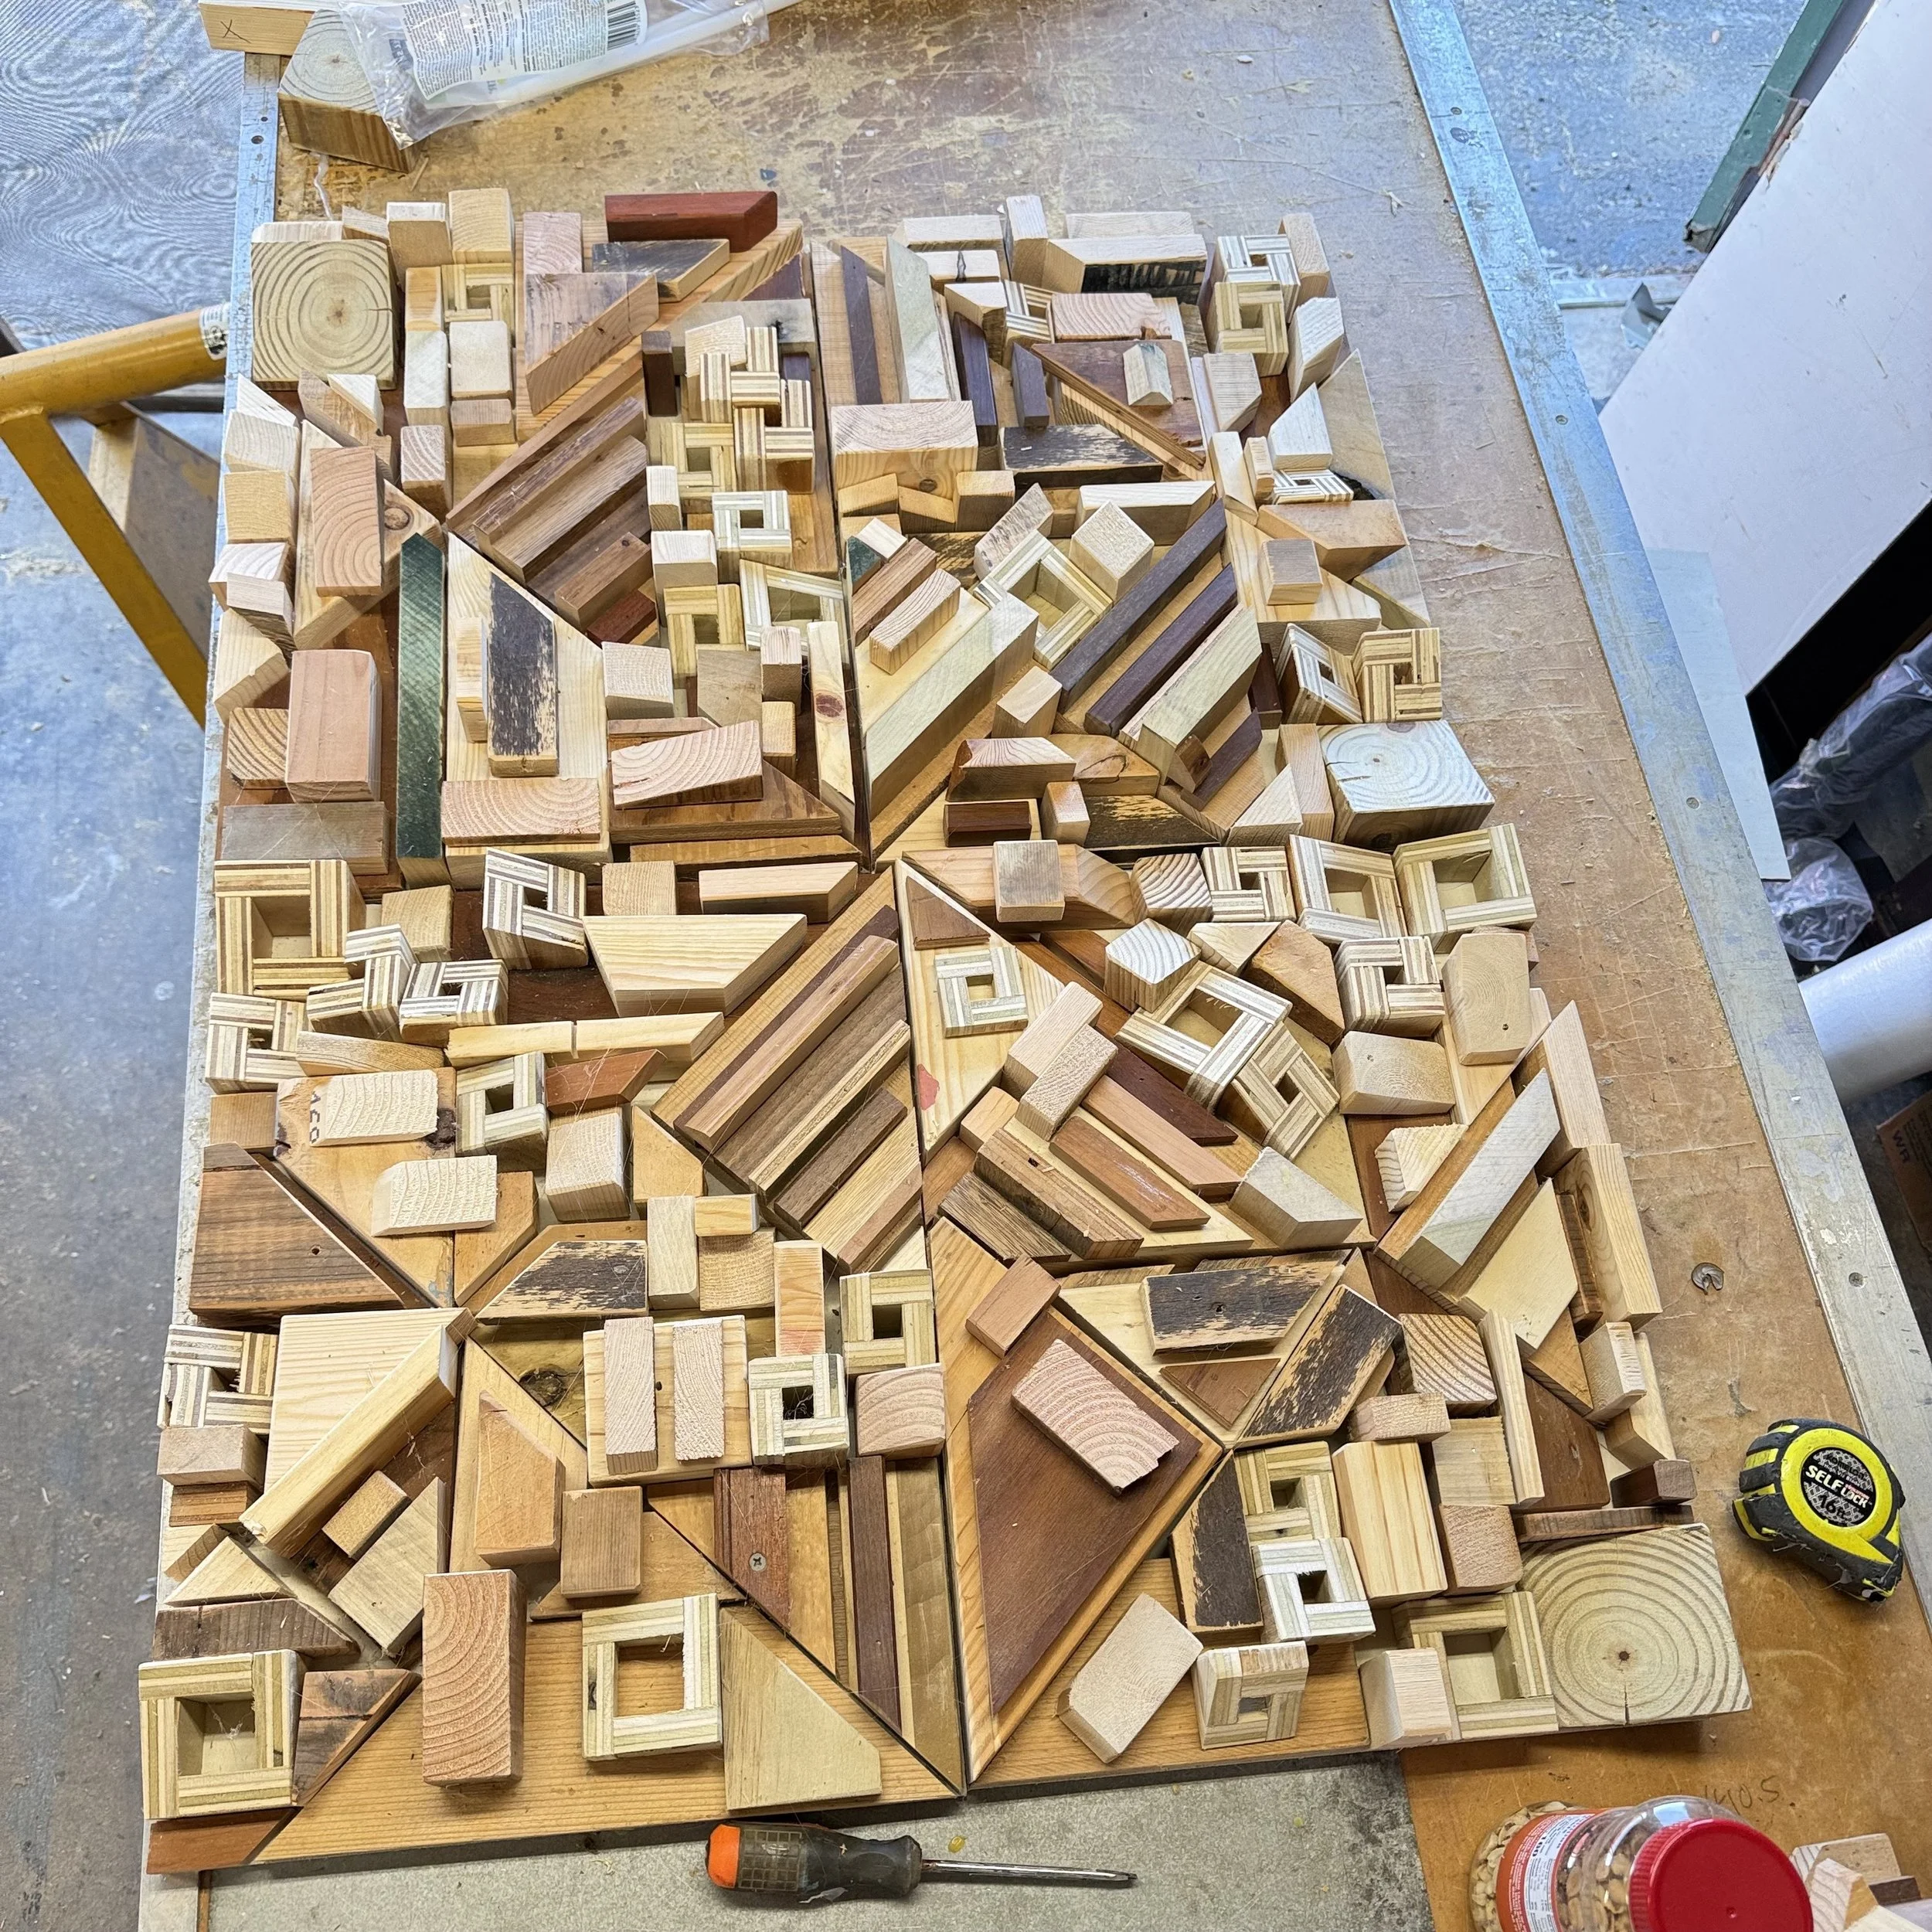
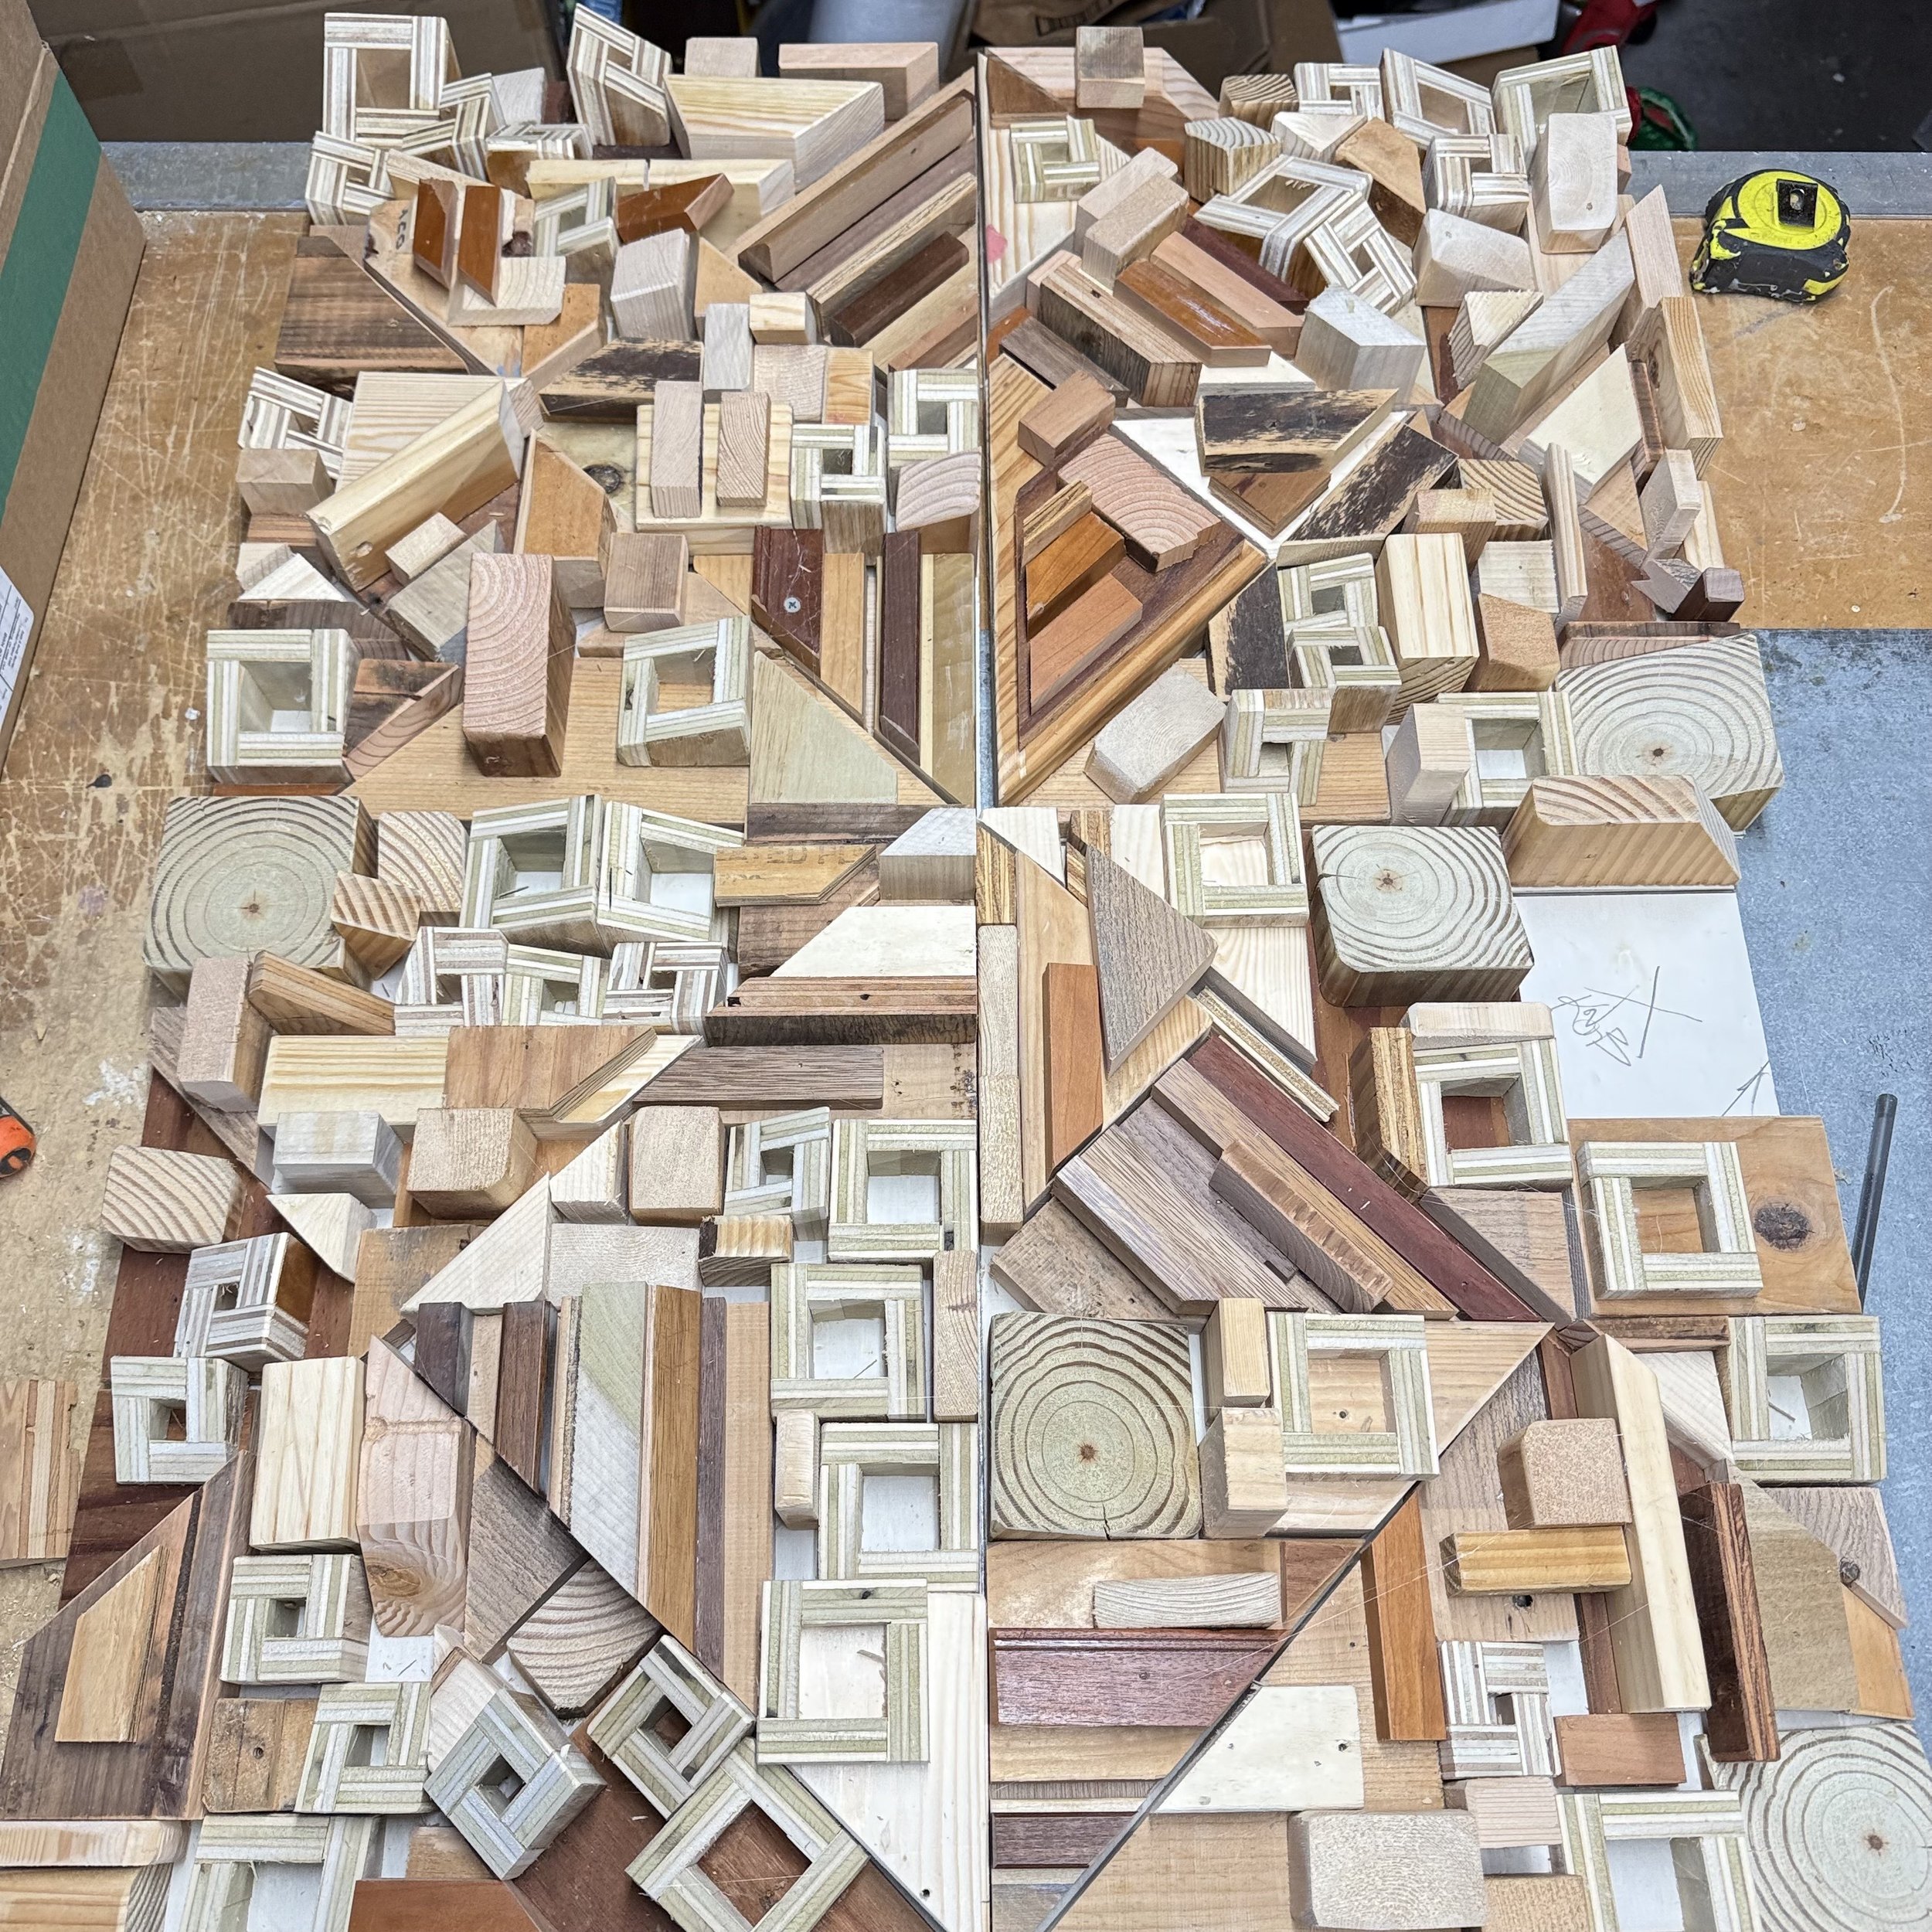
Plenty of planning goes into custom work. Like what is shown below. The black panel is a mock-up of the door. The paper roll is the hanging template. Not shown are the 1000s of little block of wood waiting for glue and a place on the panels.

12-5-25 Still moving… some things are taking shape. Turkey Day was a setback. Next week will really pop. Hang tight.
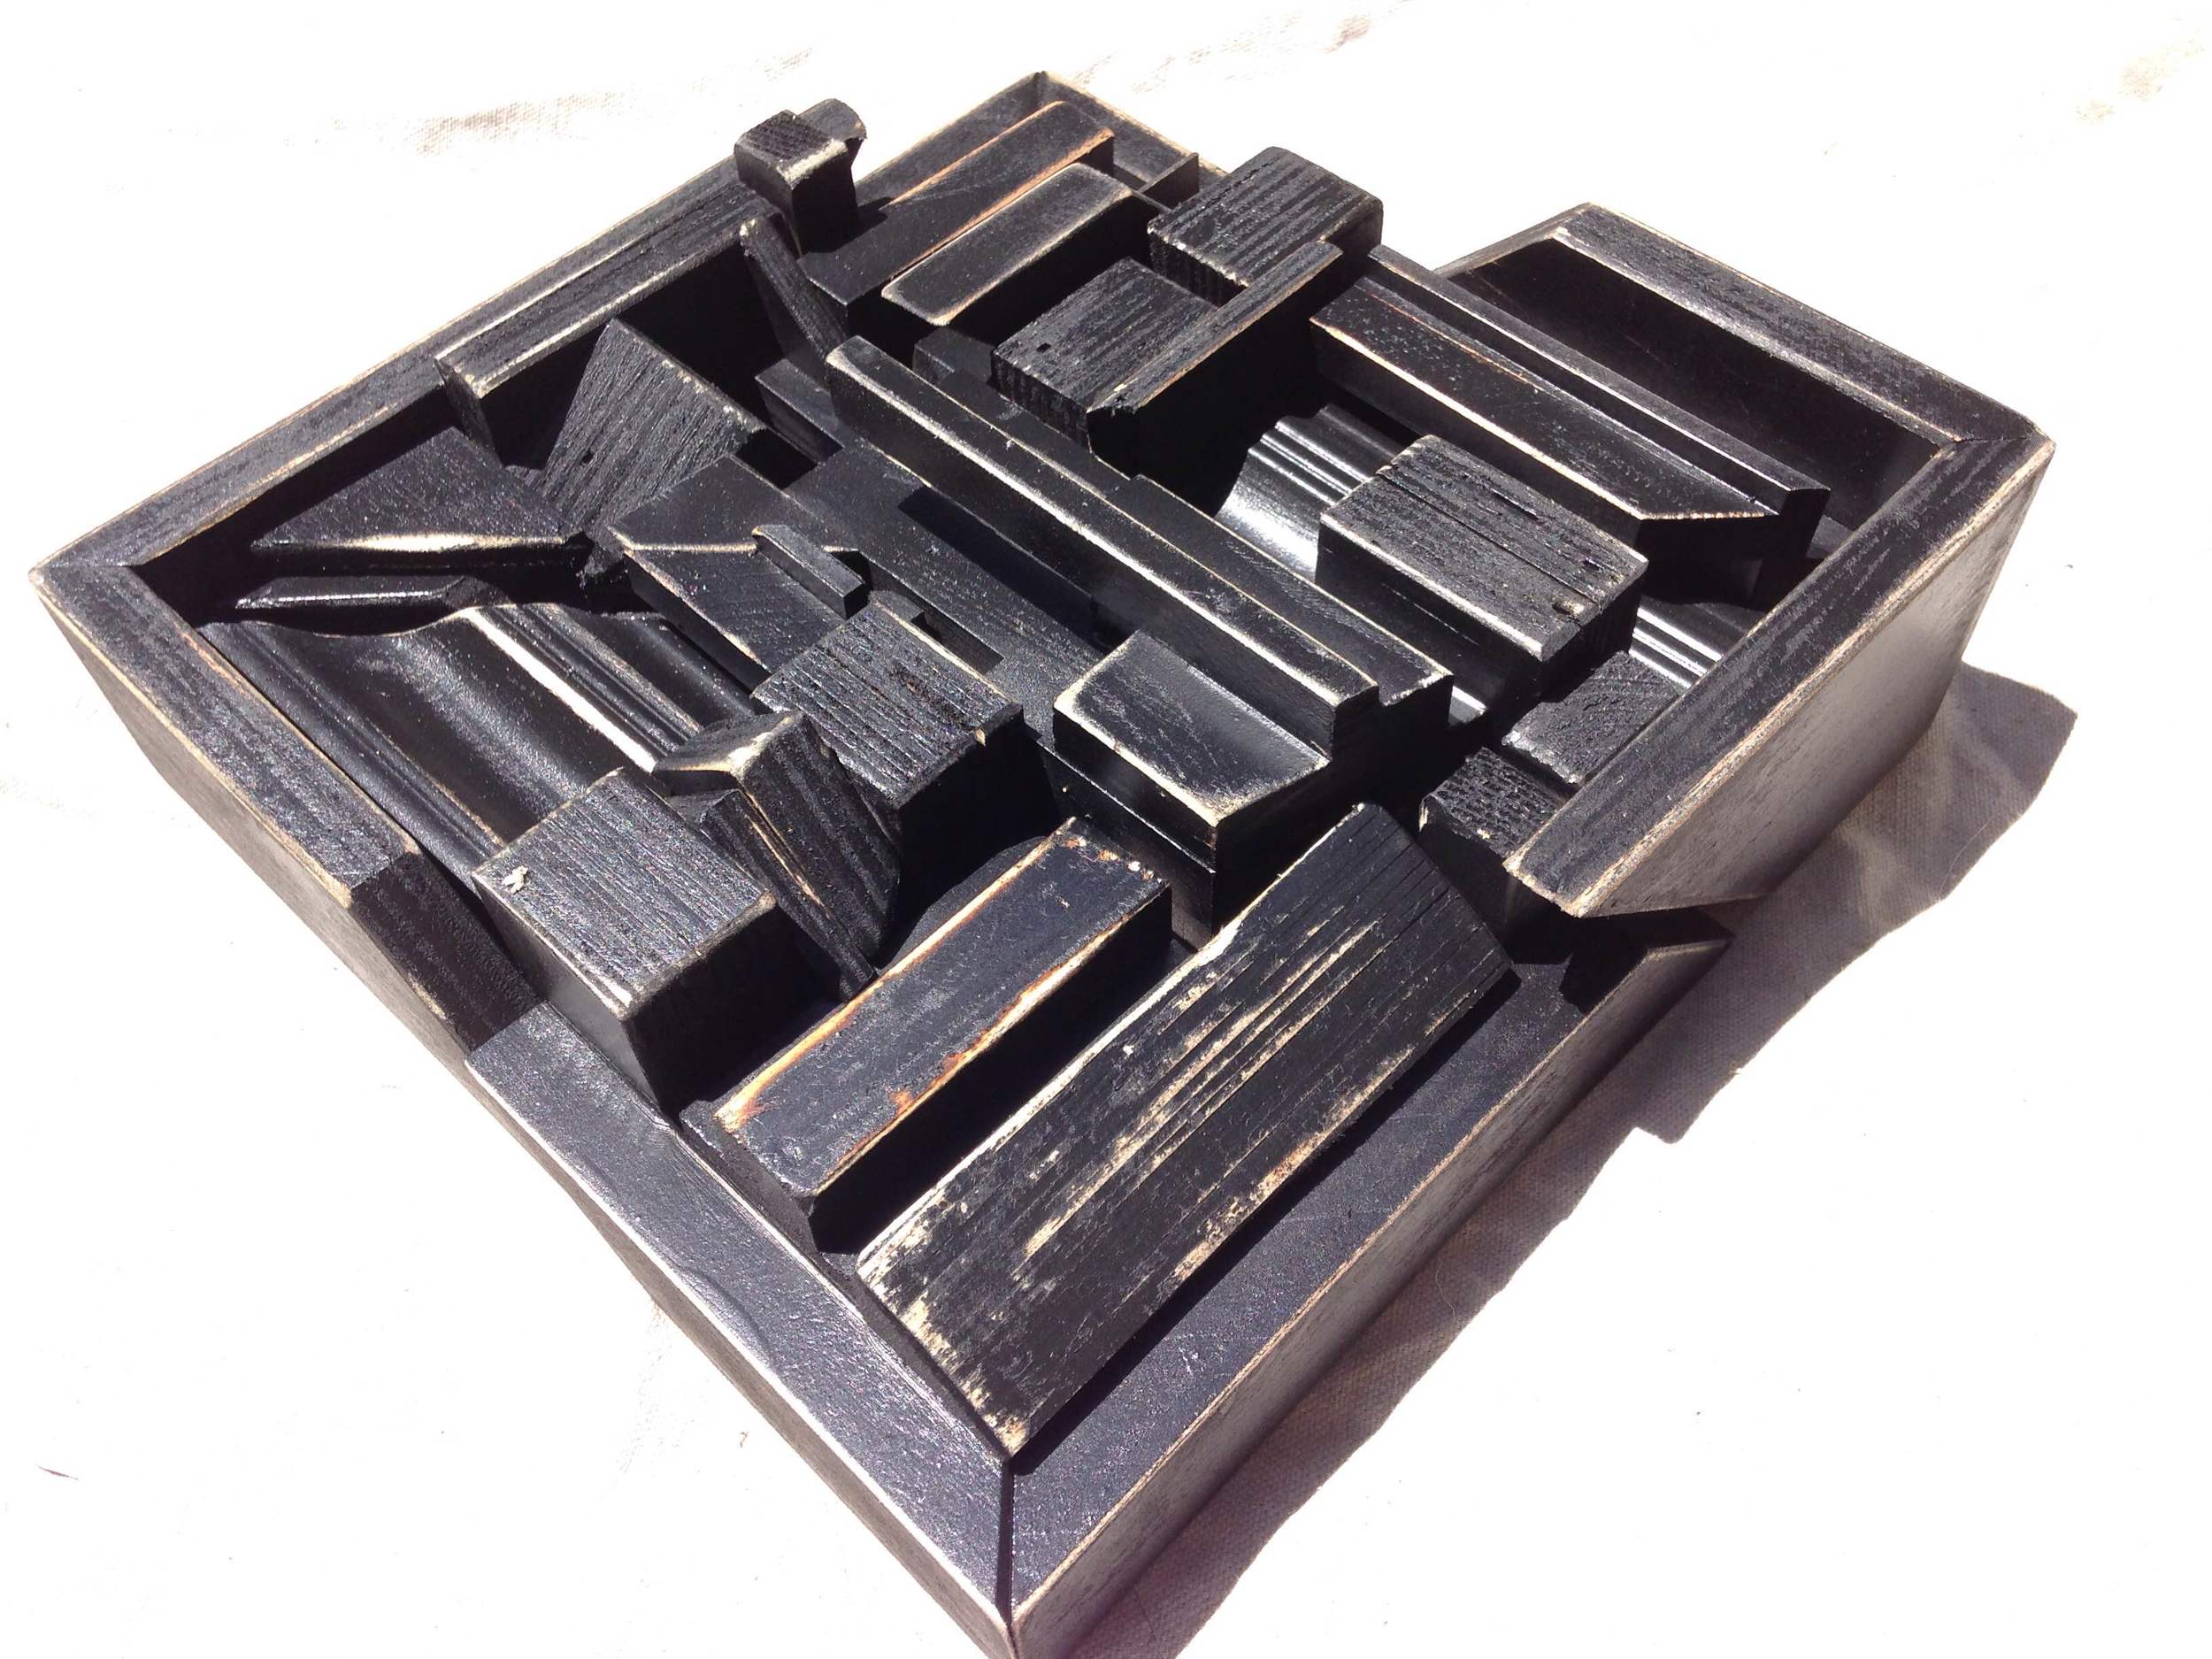
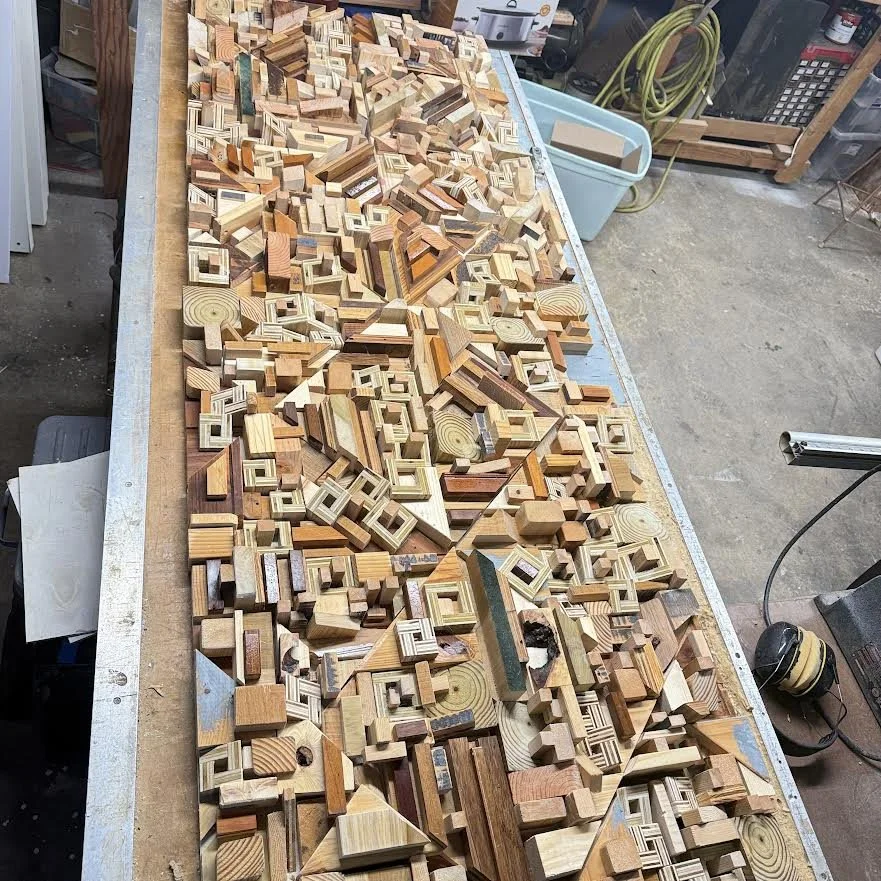
12-9-25: Moving forward….
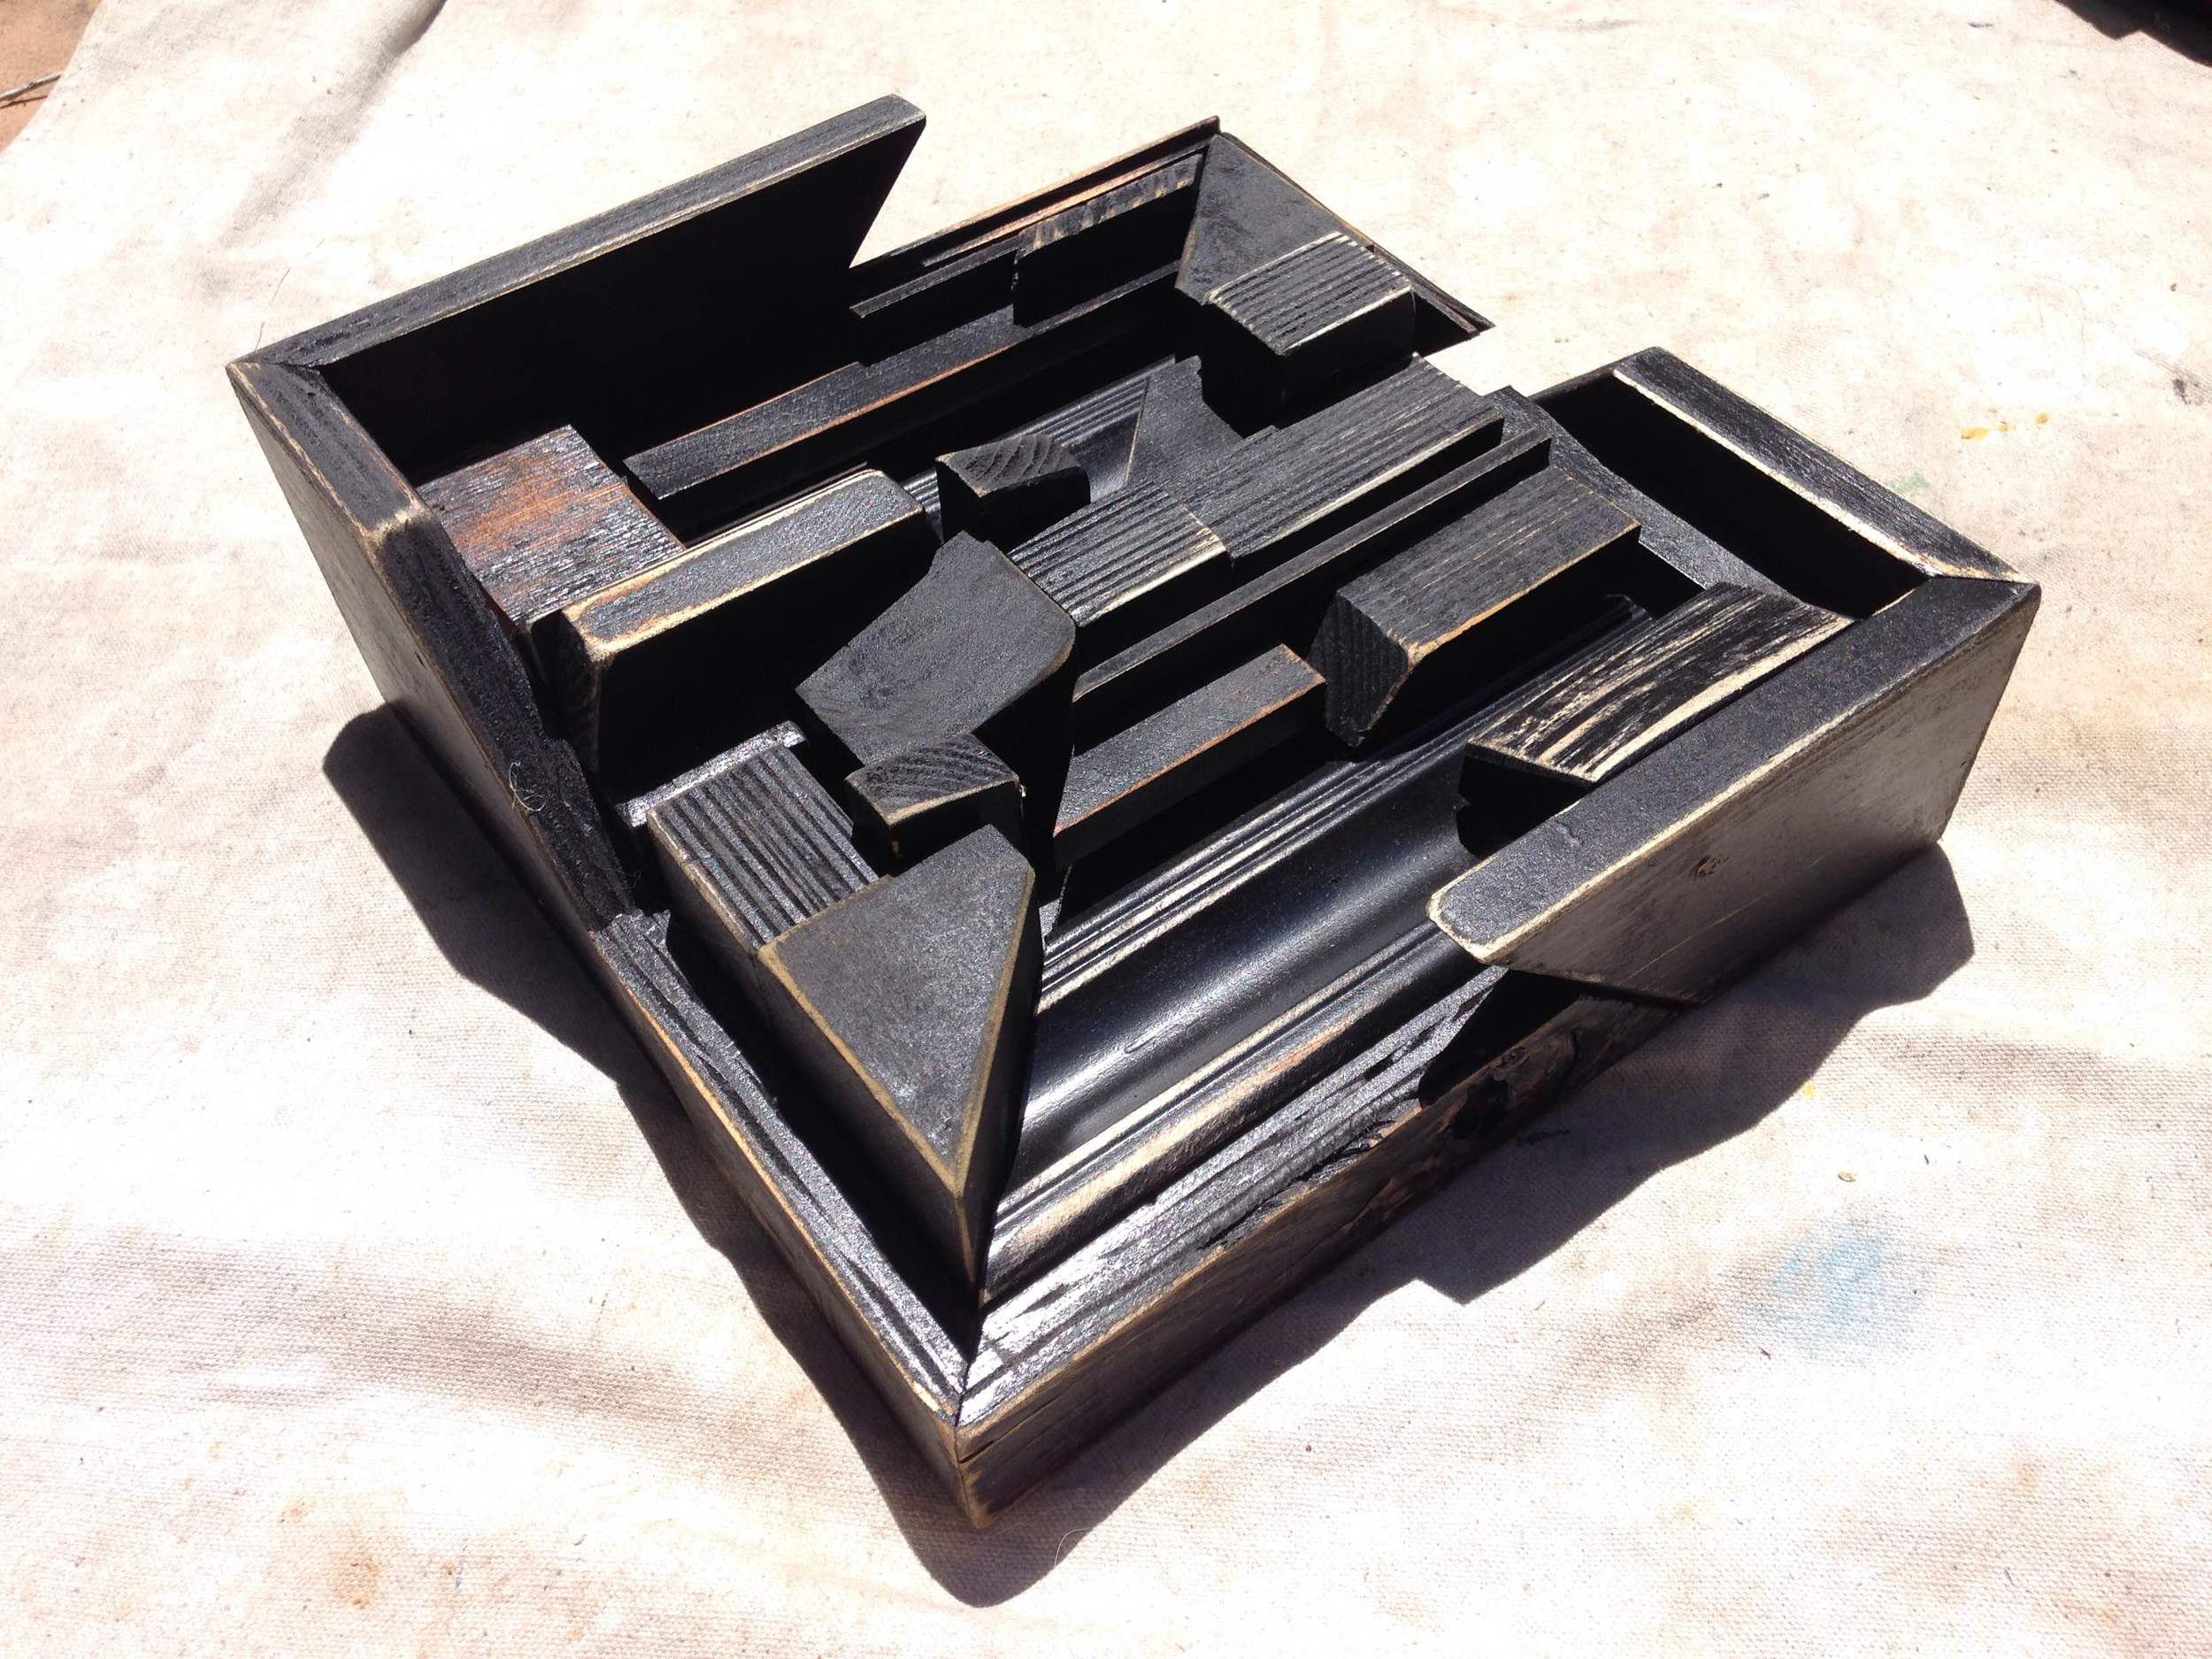
12-10-25: Moving forward even more!
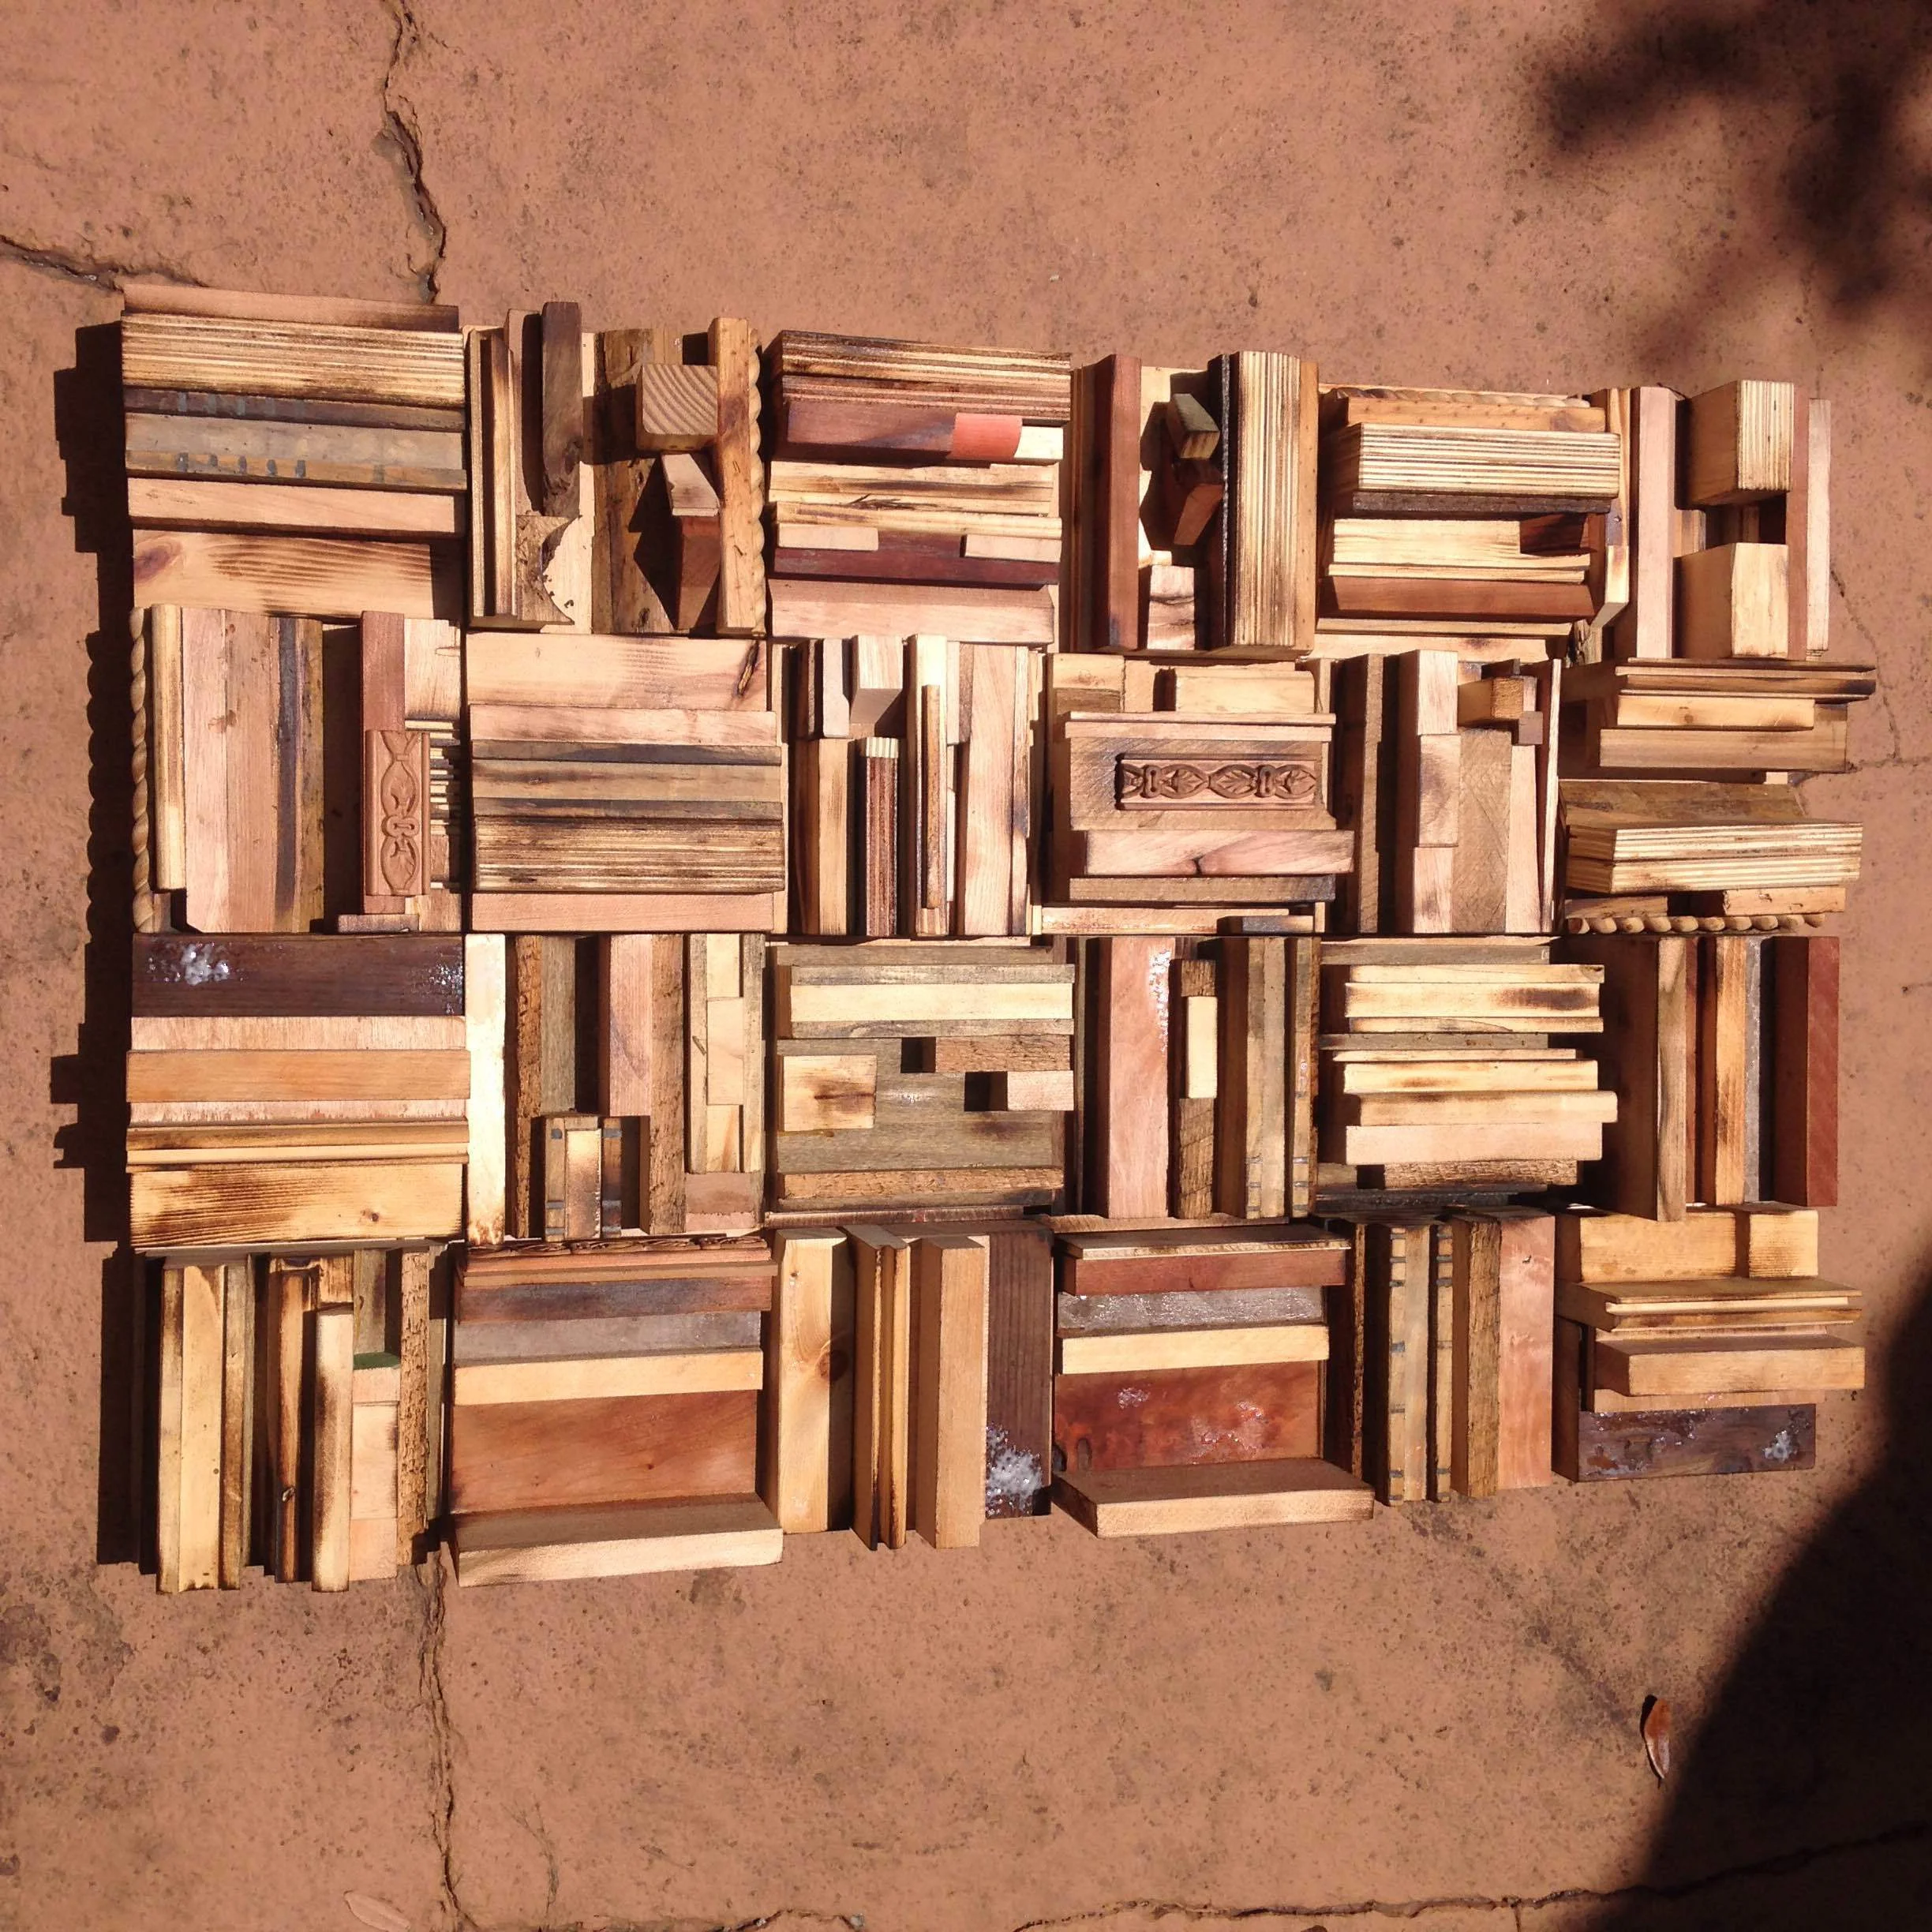
12-11-25: Getting is wrapped up. Here is an updated video for installation. Please see the HOW TO HANG page on this site for more reference.
12-12-25: And they are done! Next step, packing… they will ship Monday via UPS. Stay tuned for tracking. Thanks for waiting.
12-26-25: Thanks for the pic. The installation looks fab!